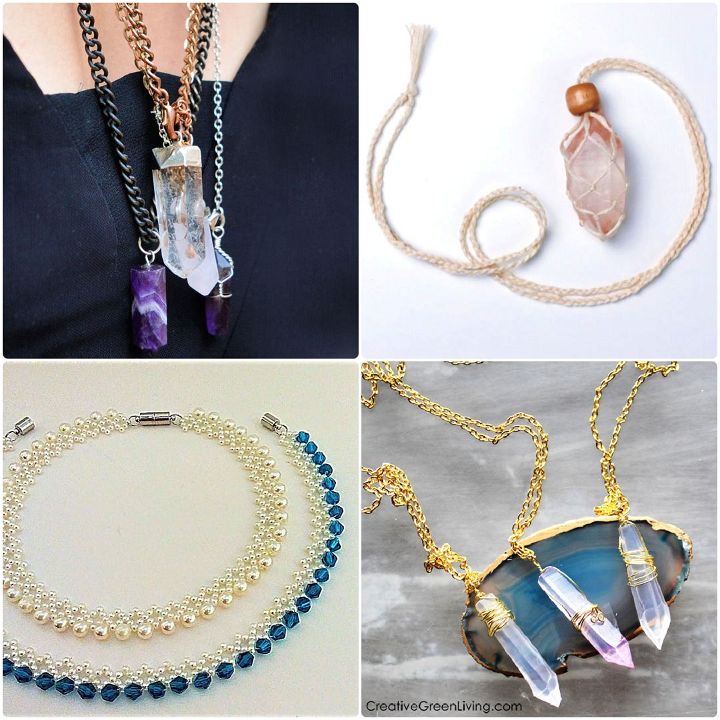
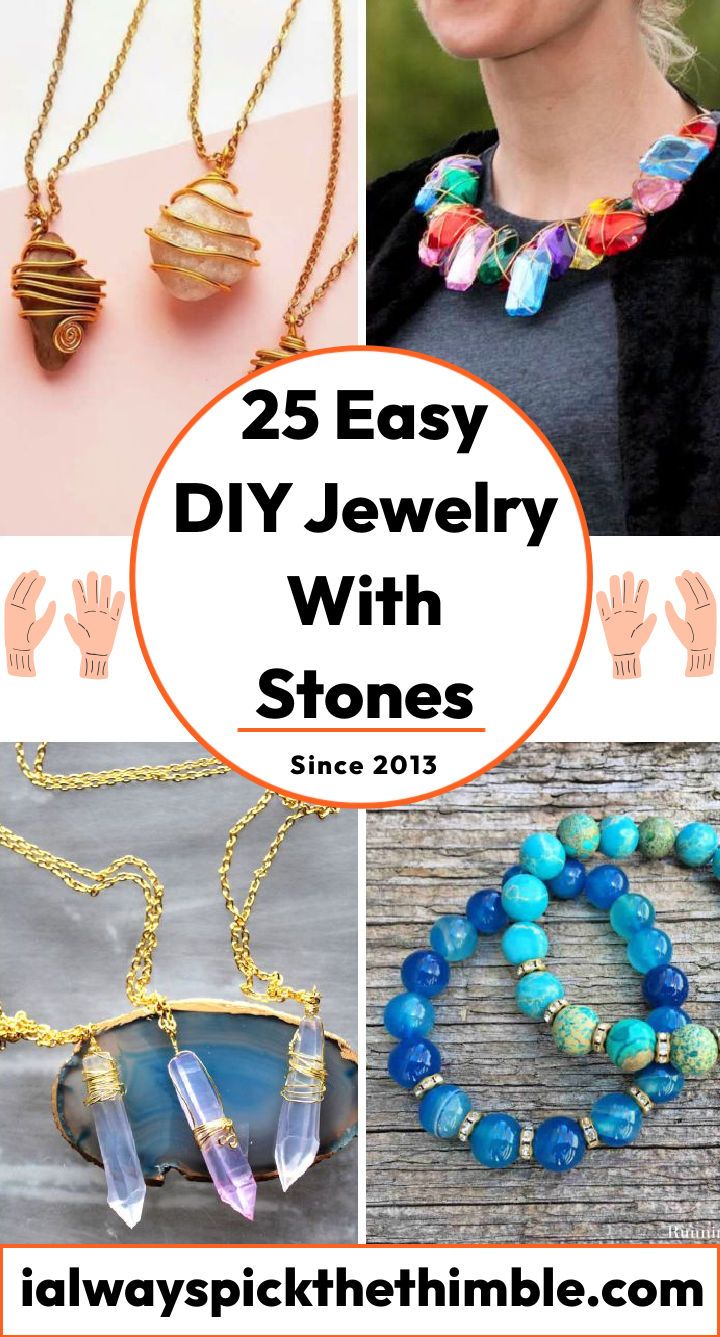
Stone jewelry making is a wonderful skill to learn. You can turn natural stones into stunning accessories that match your style. Learn how to make jewelry with stones step by step with these 25 easy and simple stone jewelry making ideas. You’ll find detailed instructions on how to drill holes in smooth pebbles, wrap wires around shiny gems, and more.
To make stone jewelry, you need the right tools and materials. One of the most important tools is the jewelry drill for stones. This allows you to make holes in your stones and pebbles for stringing or wire wrapping. You’ll also learn different skills, such as wire wrapping for stones without holes, making beaded bracelets, and designing stone necklaces.
Our stone jewelry making guide focuses on a DIY approach. You can make everything from basic sea glass necklaces to more complex projects like wire-wrapped gemstone rings or handmade raw stone earrings. You’ll learn how to make amazing pieces like a Kyber crystal necklace or a wire-wrapped bangle bracelet. We’ll also show you how to turn ordinary rocks into sparkling necklaces, making stone jewelry a fun and easy craft for everyone.
With our 25 step-by-step stone jewelry making ideas, you can enjoy a creative adventure. These instructions will help you create a variety of beautiful stone jewelry pieces, ideal for yourself or as gifts. Experience the pleasure of stone jewelry making today and start transforming stones into gorgeous, handmade jewelry.
Stone jewelry making guide
Stone jewelry making is the art of creating jewelry pieces using stones as the main element. Stones can be used to make earrings, necklaces, bracelets, rings, pendants, and more. Stone jewelry can have different styles, such as bohemian, minimalist, vintage, or modern. Also, stone jewelry can have different meanings, such as healing, protection, or symbolism.
Stone jewelry making is a fun and rewarding hobby that anyone can learn. You don’t need any special skills or experience to start making stone jewelry. All you need is some basic materials, tools, and equipment, and a lot of imagination and creativity.
Choosing the right materials
One of the most important steps in stone jewelry making is choosing the right materials for your project. There are many types of materials you can use to make stone jewelry, such as:
- Stones: Stones are the main component of stone jewelry. You can use natural or synthetic stones, depending on your preference and budget. Natural stones are stones that are found in nature, such as quartz, amethyst, turquoise, jade, agate, etc. Synthetic stones are stones that are man-made, such as glass, crystal, resin, etc. Natural stones tend to have more variations in color, shape, size, and texture than synthetic stones. Synthetic stones tend to have more uniformity and consistency than natural stones.
- Beads: Beads are small pieces of material that are used to add color, texture, and design to your stone jewelry. You can use beads made of metal, wood, ceramic, plastic, or other materials. Beads come in different shapes, sizes, colors, and patterns. You can use beads to create patterns or accents on your stone jewelry.
- Wire: Wire is a thin metal strand that is used to connect or wrap your stones and beads together. Wire can also be used to create shapes or forms on your stone jewelry. Wire comes in different gauges (thicknesses), colors (silver, gold, copper), and finishes (shiny or matte). You can use wire that is soft or hard, depending on how flexible or rigid you want your stone jewelry to be.
- Metal: Metal is a material that is used to make clasps, hooks, jump rings, chains, or other components for your stone jewelry. Metal can also be used to create charms or pendants for your stone jewelry. Metal comes in different types (sterling silver, gold-filled, brass), colors (silver, gold), and finishes (shiny or matte). You can use metal that is hypoallergenic or tarnish-resistant, depending on how sensitive or durable you want your stone jewelry to be.
When choosing the right materials for your stone jewelry making project, you should consider the following factors:
- Your style: You should choose materials that match your personal style and taste. You should also choose materials that complement each other and create a harmonious look.
- Your budget: You should choose materials that fit your budget and are affordable for you. You should also choose materials that are good quality and worth the price.
- Your skill level: You should choose materials that are easy to work with and suitable for your skill level. You should also choose materials that are safe and comfortable for you.
Tools and equipment needed
Another important step in stone jewelry making is having the right tools and equipment for your project. There are many tools and equipment you can use to make stone jewelry, such as:
- Pliers: Pliers are tools that are used to bend, cut, twist, or grip wire or metal components for your stone jewelry. Pliers come in different types (round nose pliers, flat nose pliers, chain nose pliers, wire cutters), sizes (small or large), and handles (rubber or metal). You should use pliers that are comfortable for your hands and suitable for your project.
- Beading board: A beading board is a tool that is used to lay out your beads and stones before stringing them together for your stone jewelry. A beading board has grooves or channels that help you measure the length and design of your stone jewelry. A beading board also has compartments that help you organize your beads and stones by color or size.
- Beading needle: A beading needle is a tool that is used to thread your beads and stones onto a stringing material for your stone jewelry. A beading needle has a thin metal shaft with a small eye at one end and a sharp point at the other end. A beading needle helps you pass through small or tight holes in your beads and stones.
- Stringing material: A stringing material is a material that is used to hold your beads and stones together for your stone jewelry. A stringing material can be made of metal, nylon, silk, cotton, or other materials. A stringing material comes in different types (wire, thread, cord, elastic), sizes (diameter or gauge), and colors. You should use a stringing material that is strong, flexible, and compatible with your beads and stones.
- Findings: Findings are metal components that are used to finish or embellish your stone jewelry. Findings include clasps, hooks, jump rings, crimps, ear wires, head pins, eye pins, etc. Findings come in different types (lobster clasp, toggle clasp, fish hook, lever back, etc.), sizes (small or large), and colors (silver, gold, etc.). You should use findings that match your style and materials.
When having the right tools and equipment for your stone jewelry making project, you should consider the following factors:
- Your project: You should have tools and equipment that are suitable for your project and the materials you are using. You should also have tools and equipment that are easy to use and maintain.
- Your space: You should have tools and equipment that fit your space and are easy to store and access. You should also have tools and equipment that are safe and clean for your space.
- Your budget: You should have tools and equipment that fit your budget and are affordable for you. You should also have tools and equipment that are good quality and worth the price.
Tips for beginners
One of the most helpful steps in stone jewelry making is learning some tips and tricks for beginners. There are many tips and tricks you can learn to help you improve your skills and enjoy your hobby. Some of the tips and tricks for beginners are:
- Start simple: You should start with simple projects that use basic materials, tools, and techniques. You should also start with small projects that take less time and effort. This will help you build your confidence and experience before moving on to more complex or challenging projects.
- Follow instructions: You should follow instructions from books, magazines, websites, videos, or classes that teach you how to make stone jewelry. You should also follow instructions from the labels or packages of your materials, tools, or equipment. This will help you learn the proper methods and avoid mistakes or problems.
- Experiment: You should experiment with different materials, tools, techniques, designs, or styles for your stone jewelry making projects. You should also experiment with different combinations or variations of your materials, tools, techniques, designs, or styles. This will help you discover new possibilities and express your creativity.
- Have fun: You should have fun with your stone jewelry making projects. You should also have fun with the process of making stone jewelry. This will help you relax and enjoy your hobby.
Step by step stone jewelry making guide
To make stone jewelry, follow a step-by-step guide. It offers clear instructions from start to finish, with visual aids.
Here is an example of a step-by-step guide on how to make a simple stone necklace:
- Gather your materials: For this project, you will need a natural stone pendant, a metal chain, a jump ring, a lobster clasp, round nose pliers, flat nose pliers, wire cutters, and a ruler.
- Cut your chain: Use your wire cutters to cut your chain to the desired length for your necklace. For example, if you want a 16-inch necklace, cut your chain to 16 inches plus 1 inch for the clasp.
- Attach your clasp: Use your round nose pliers to open one end of your jump ring by twisting it sideways. Do not pull it apart, as this will weaken the metal. Slide one end of your chain and one end of your clasp onto the jump ring. Use your round nose pliers to close the jump ring by twisting it back into place.
- Attach your pendant: Use your round nose pliers to open the other end of your jump ring by twisting it sideways. Slide the loop of your pendant and the other end of your chain onto the jump ring. Use your round nose pliers to close the jump ring by twisting it back into place.
- Enjoy your necklace: You have just made a simple stone necklace! You can wear it yourself or give it as a gift to someone else. You can also customize your necklace by using different types of stones, chains, clasps, or findings. You can also make matching earrings, bracelets, or rings with the same materials and techniques.
Common mistakes and how to avoid them
One of the most helpful steps in stone jewelry making is learning from common mistakes and how to avoid them. There are many common mistakes beginners make when making stone jewelry, such as:
- Choosing the wrong materials: You should choose materials that are suitable for your project and your skill level. You should also choose materials that are good quality and compatible with each other. For example, you should not use a thin wire that can break easily or a metal that can tarnish or cause allergies.
- Using the wrong tools: You should use tools that are appropriate for your project and your materials. You should also use tools that are comfortable for your hands and easy to use. For example, you should not use pliers that are too big or too small for your wire or findings.
- Making the wrong measurements: You should measure your materials and your project accurately and precisely. You should also measure your project before and after you make it to ensure it fits properly. For example, you should not make a necklace that is too long or too short for your neck or a ring that is too tight or too loose for your finger.
- Making the wrong knots: You should knot your stringing material securely and neatly. You should also knot your stringing material at the right places and in the right direction. For example, you should not make a knot that is too loose or too tight or a knot that is facing the wrong way or in the wrong position.
- Making the wrong cuts: You should cut your materials cleanly and carefully. You should also cut your materials at the right length and in the right shape. For example, you should not cut your wire too short or too long or cut your stone too small or too large.
To avoid these common mistakes, you should follow these tips:
- Read the instructions carefully and follow them step by step.
- Check the quality and compatibility of your materials before you buy them.
- Use a ruler, a tape measure, a caliper, or a ring sizer to measure your materials and your project.
- Use a beading board, a mat, or a tray to lay out your design and keep your materials organized.
- Use crimps, clasps, jump rings, or knots to secure the ends of your stringing material.
- Use wire protectors, bead tips, or wire guardians to protect your wire from wear and tear.
- Use bead caps, spacers, or charms to add interest and variety to your design.
Solutions to common problems
One of the most useful steps in stone jewelry making is finding solutions to common problems. There are many common problems beginners face when making stone jewelry, such as:
- Losing beads or stones: You may lose beads or stones when they fall off your stringing material or when they break during the process. To prevent this problem, you should use a strong and flexible stringing material that can hold your beads or stones securely. You should also use crimps, clasps, jump rings, or knots to secure the ends of your stringing material. To fix this problem, you should replace the lost beads or stones with new ones that match your design.
- Breaking wire or metal components: You may break wire or metal components when they bend too much or when they are pulled too hard. To prevent this problem, you should use a thick and sturdy wire that can withstand bending and pulling. You should also use pliers gently and carefully to avoid damaging your wire or metal components. To fix this problem, you should replace the broken wire or metal components with new ones that match your design.
- Tarnishing metal components: You may tarnish metal components when they are exposed to air, moisture, chemicals, or sweat. To prevent this problem, you should use metal components that are hypoallergenic or tarnish-resistant. You should also store your stone jewelry in a dry and cool place, away from sunlight and heat. To fix this problem, you should clean your metal components with a soft cloth and a mild soap or polish them with a jewelry cleaner.
- Scratching stones: You may scratch stones when they rub against each other or against hard surfaces. To prevent this problem, you should use smooth and polished stones. You should also separate your stones from each other and from other jewelry pieces with tissue paper or plastic bags. To fix this problem, you should buff your stones with a soft cloth and a fine abrasive or polish them with a jewelry cleaner.
Learn more about stone jewelry making and inspire you to make your own beautiful pieces. Stone jewelry making is a wonderful hobby that can bring you joy and satisfaction.
Easy Stone Jewelry Making Ideas
Stone jewelry is a beautiful and creative way to express yourself and make unique accessories. DIY Stone jewelry can be made with natural or synthetic stones, beads, wire, metal, and other materials. Explore these stone jewelry making ideas and some useful tips and guides for beginners:
1. Simple DIY Necklace With Sea Glass, Stones
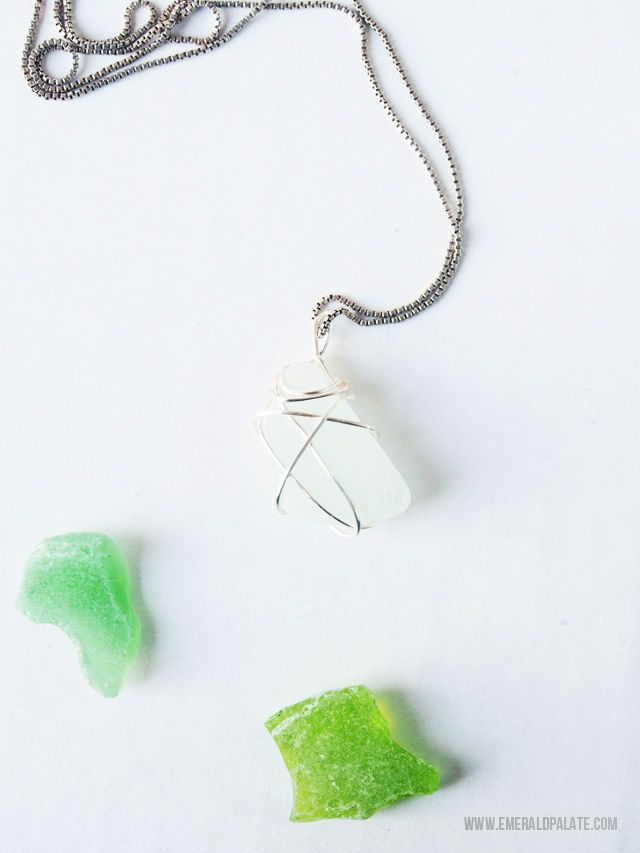
Bring your imagination to life and craft a one-of-a-kind accessory with this DIY necklace tutorial! Gather your materials: sea glass, stones, shells of your choice, malleable wire, scissors, and tweezers. Begin by making a small loop at the end of the wire; align it on top of the sea glass. Wrapping the wire around until secure will keep your stone or shell in place.
Use tweezers to secure the cut end of the wire underneath, and you’re finished! This simple DIY craft results in an original piece that’ll be cherished for years to come! emeraldpalate
2. How to Make Your Own Wire-Wrapped Stone Necklace
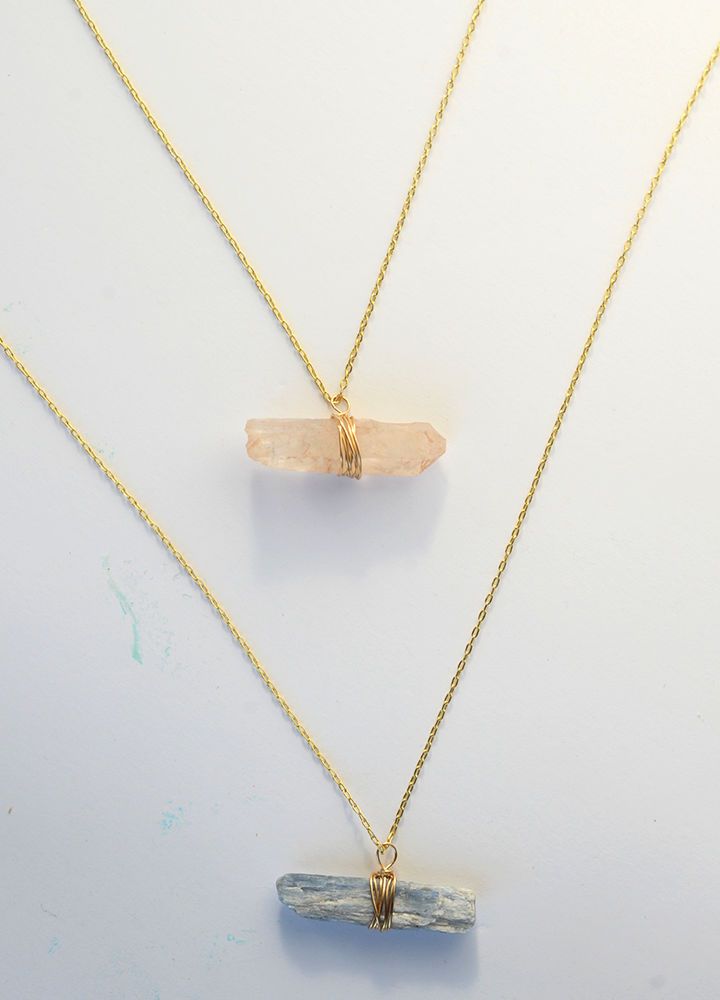
Style a beautiful and unique statement piece with this easy-to-follow tutorial! Learn how to make your own wire-wrapped stone necklace. All you need is gold wire, gold chain, clasps, round nose pliers, stones of your choice, and scissors or wire cutters.
First, start by measuring the length of the chain you will use for holding the stones together. Wrap each stone individually with gold-plated craft wire in an eye-catching pattern or design. Finally, join all pieces together using the clasp – it’s that simple! With this guide, anyone can make their very own stunning handmade gemstone necklace at home in no time. aliceandlois
3. How to Wire Wrap Pendant With Stones
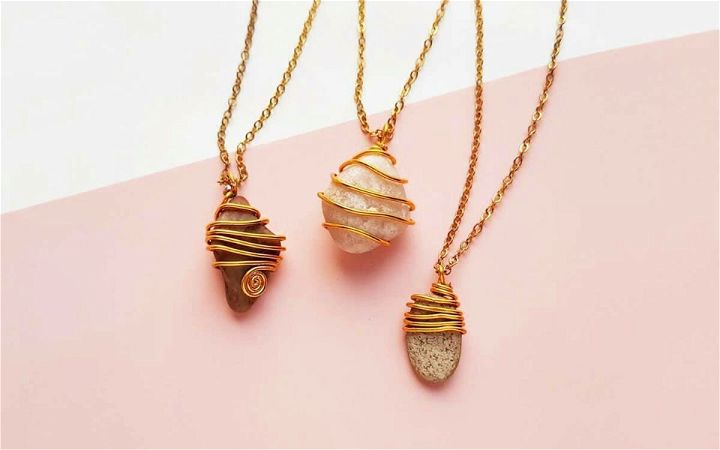
Wire wrapping pendants with stones is an easy and creative way to make unique jewelry. Start by selecting stones such as pebbles, then gather the materials needed: jewelry wire (20 gauge for ease of bending), looping pliers, flat nose pliers, and cutting pliers.
Begin by making a small loop in the open end of the wire using the looping plier; coil the open end around its band below this first loop. Bend it to 90° halfway along the stone length and wrap adjacent, even wires around it until reaching either side; where you will use your flat nose or cutting plier to close off each edge neatly for more tips on how to finish your wire-wrapped pendant with stones check out our website! thecraftaholicwitch
4. How to Do Wire and Stone Jewelry
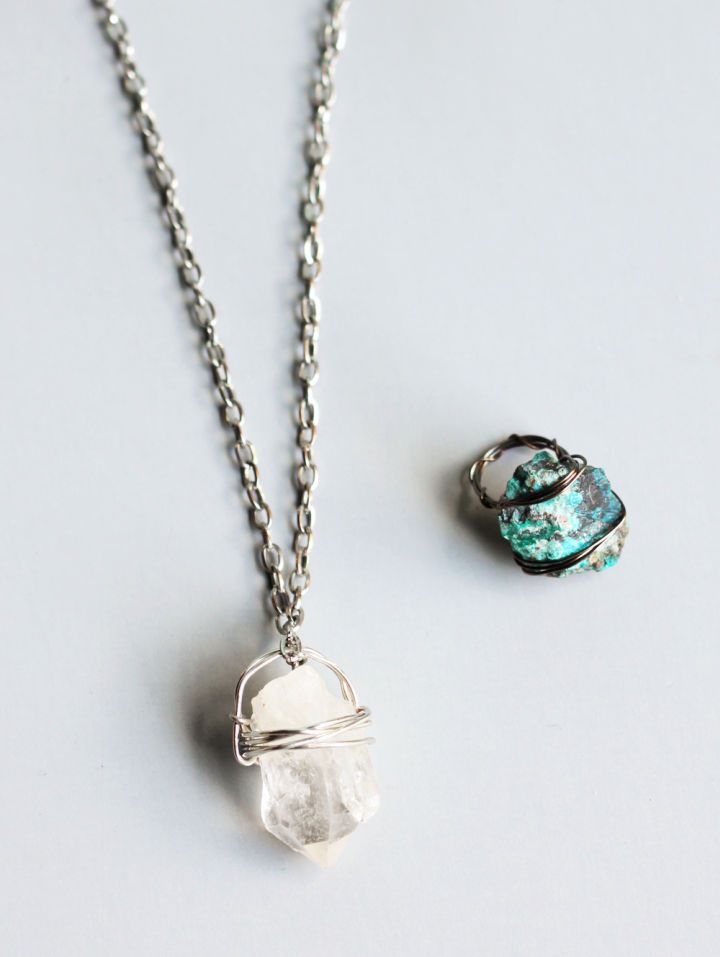
Learn how to make your own wire and stone jewelry with these simple steps! Gather cool stones from your local toy store, as well as 16-gauge wire for pendants and 20-gauge for rings.
Use needle nose pliers to wrap the wire several times around the top of your stone, then bring the wire over one side by makinga loop, through the wrapped wire, and over the other side. Cut off any excess, then use pliers to pinch it onto the rock. Finally, thread on a chain and show off your creation! Find all you need for this fun DIY project here today! smallfriendly
5. How to Wire Wrap Stones Without Holes
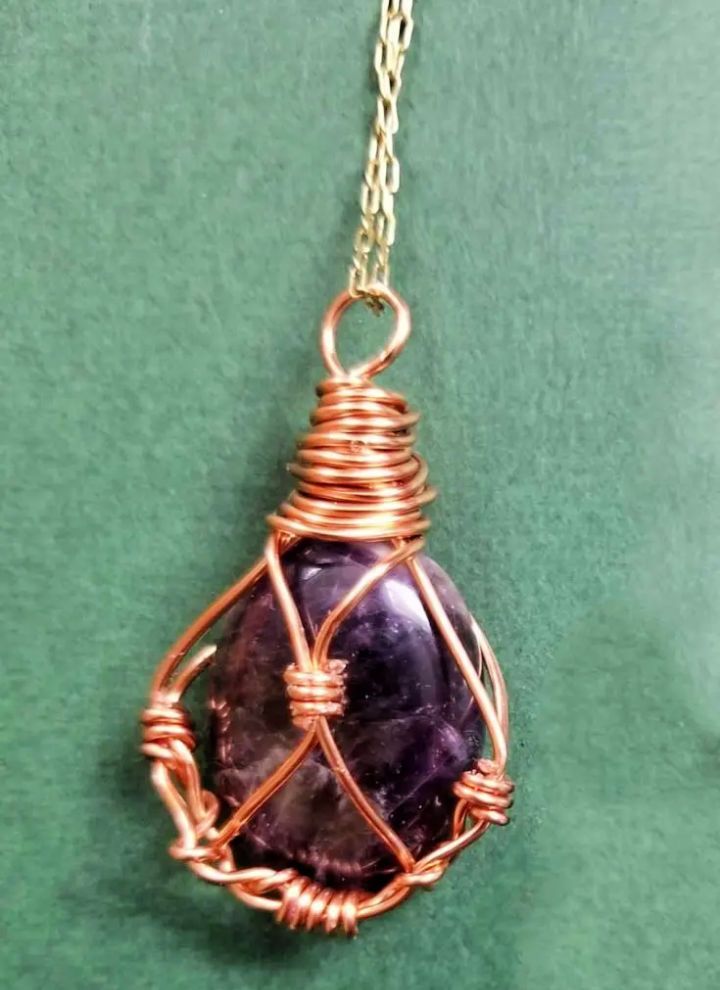
Did you know that wire-wrapping stones without holes can be challenging? But with the right tools and technique, it’s an achievable project!
All you need is 20 gauge copper wire, a finished chain, nylon jaw pliers, non-serrated chain nose pliers (with smooth inside/no ridges), wire cutters, and one oval cabochon. Begin by makingtwo loops at both ends of your wire – use the nylon jaw pliers to hold them firmly in place. Position the stone into one loop, then wrap the second around it several times until secure.
Adjust as needed for a snug fit using the flat side of your non-serrated chain nose pliers. Finally, trim off any excess with your wire cutters, and voilà – you have yourself some beautiful handmade jewelry pieces! momsandcraft
6. How to Make a Wire-Wrapped Stone Necklace

Unlock your inner designer and craft a stunning wire-wrapped stone necklace with just the essential materials! Start by purchasing 1 bag of large plastic jewel stones, 1 sheet of plastic canvas, 20 gauge wire (available at Joann’s), 1 yard of ribbon from your local fabric store, pliers, scissors, and glue.
Use the plastic canvas to make the base for each stone, then wrap it in wire. Attach your stones using glue or additional pieces of wire. Finally, string them together on the ribbon for a DIY piece that you can wear proudly! Make one-of-a-kind necklaces with this easy technique – perfect for gifting or wearing yourself! trinketsinbloom
7. Decadent Crystal Necklace With Stones
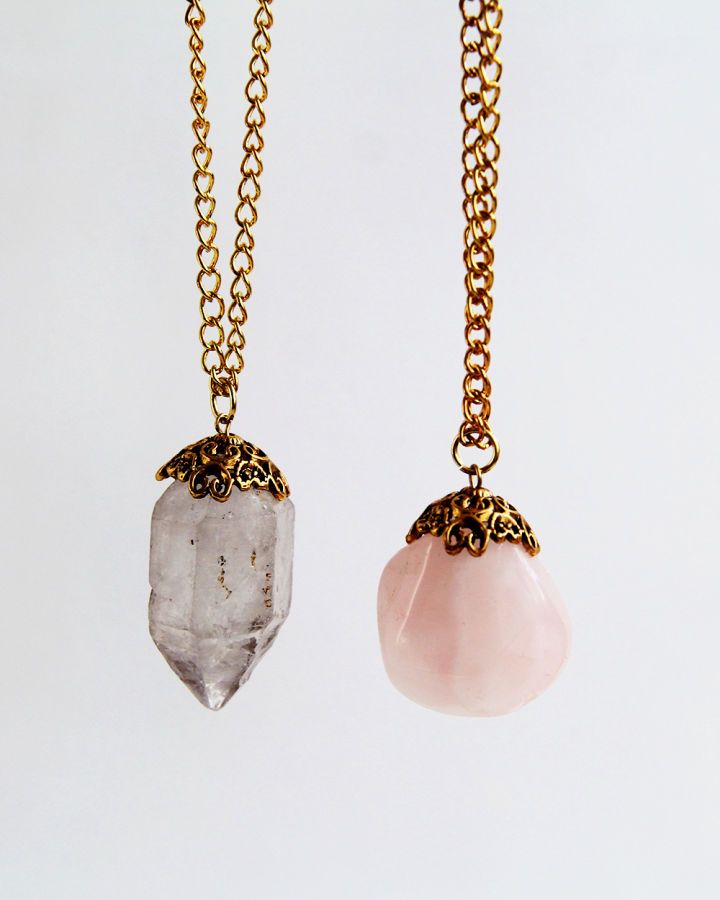
Look sophisticated and stylish with this decadent crystal necklace with stones! This elegant necklace is crafted from a sterling silver chain and features a unique gemstone bead cap.
Expertly designed, the use of round nose pliers allows you to secure the eye pin through the bottom of the bead cap for strength and stability. Finish off your look by using jump rings to attach the gemstone securely onto the chain. Perfect for special occasions or everyday wear, this crystal necklace will be sure to impress. Get yours today! fallfordiy
8. DIY Kyber Crystal Necklace With Stone
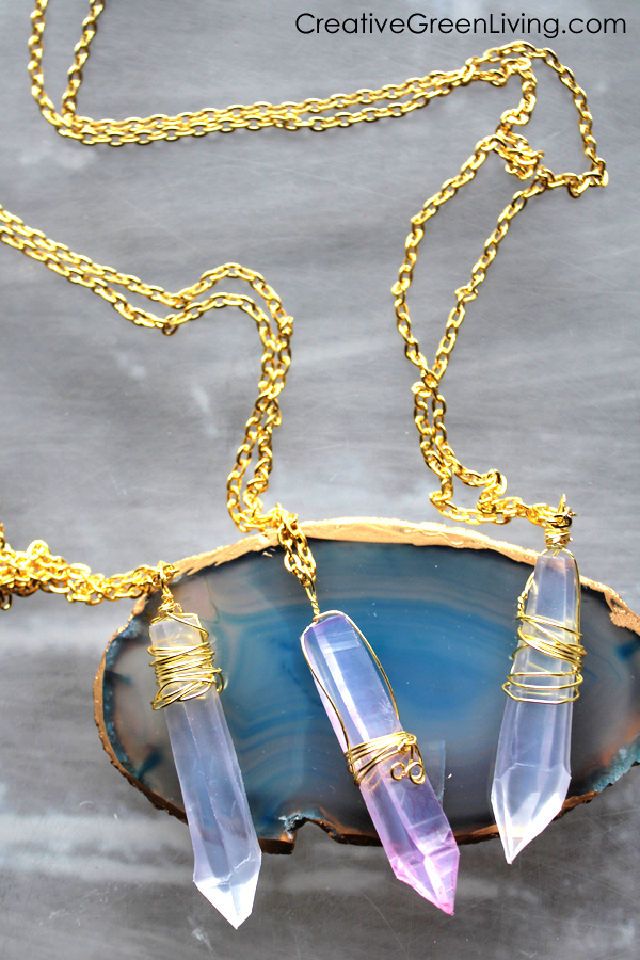
Unlock your inner Jedi by constructing a Kyber crystal necklace with stone! Start by forming the crystal with a cutting tool. Once you have formed as many crystals as you’d like, wire-wrap them to secure them together.
Finally, add a chain to complete your unique and beautiful necklace! Show off your handmade piece of jewelry with pride – it’s sure to be a conversation starter. Make it yourself for an affordable way to accessorize in style with this one-of-a-kind accessory, perfect for any occasion. creativegreenliving
9. Homemade Wire Wrapped Crystal Ladder Boho Necklace
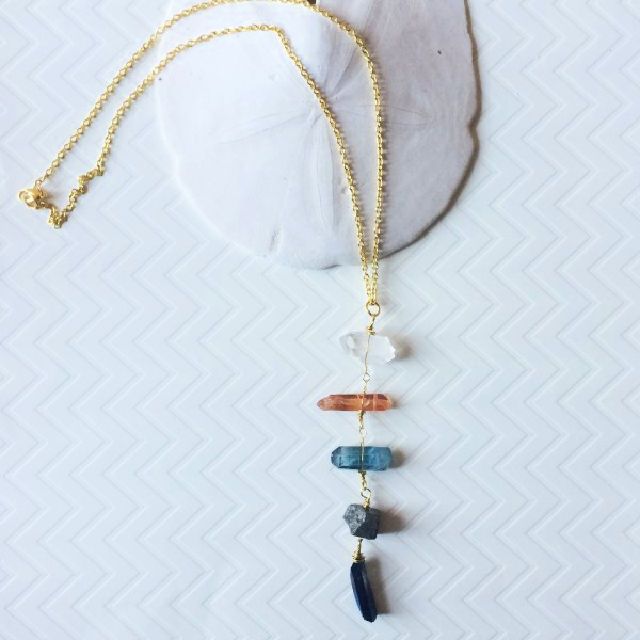
Ascend to new heights of style with this DIY on wire-wrapping a crystal ladder necklace – your own Boho-inspired jewelry awaits! All you need is some colorful crystals, raw gems, and other materials like wire cutters, round nose pliers, flat nose pliers, and jump rings.
You will need a lobster clasp and chain for the finishing touch! This easy-to-follow tutorial shows you how to transform these simple supplies into a beautiful work of art that can be proudly displayed. Try it today for an eye-catching accessory that will elevate any ensemble! atouchofboho
10. Making Crystal Healing Jewelry With Gemstones
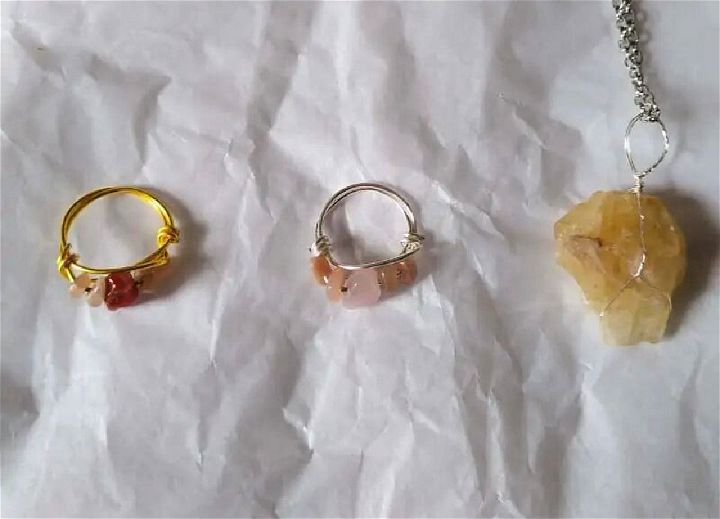
Unlock the power of gemstones and design your own crystal healing jewelry! Make necklaces, bracelets, or earrings to match any outfit. Use a citrine stone for beautiful results. Gather thin jewelry making wire (0.3mm/28 gauge or 0.5mm/24 gauge), scissors or pliers, and a necklace chain, then get creative!
Your homemade jewelry will be unique and beneficial thanks to the healing powers of the crystals you choose – perfect as gifts for family and friends, too! Get started on your gemstone journey today with quality materials from trusted suppliers. alittlesparkofjoy
11. DIY Interchangeable Macrame Crystal Necklace With a Stone
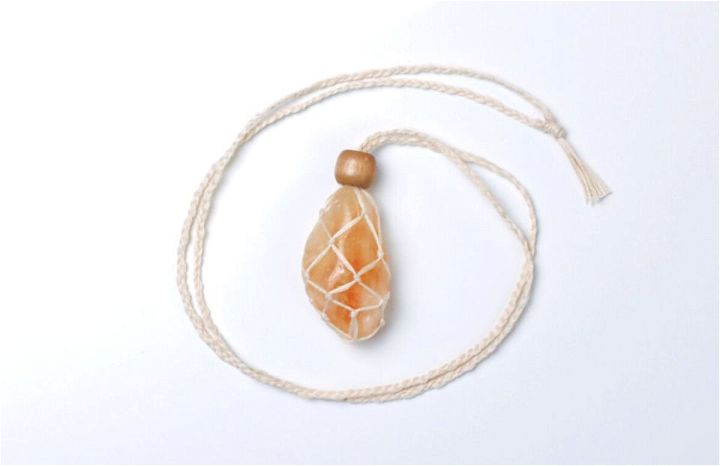
This DIY interchangeable macrame crystal necklace with a stone makes the perfect accessory for any occasion! It’s easy to make with just 6 strands of embroidery thread, a beeswax candle (optional), a wood bead with a large hole, a large eye needle, scissors, tape or clipboard/macrame board, and T-pins.
Measurements are simple, too—just use a measuring tape. Follow the instructions to make your own personalized necklace that will be treasured forever! marchingnorth
12. How Do You Make Stone Bracelets
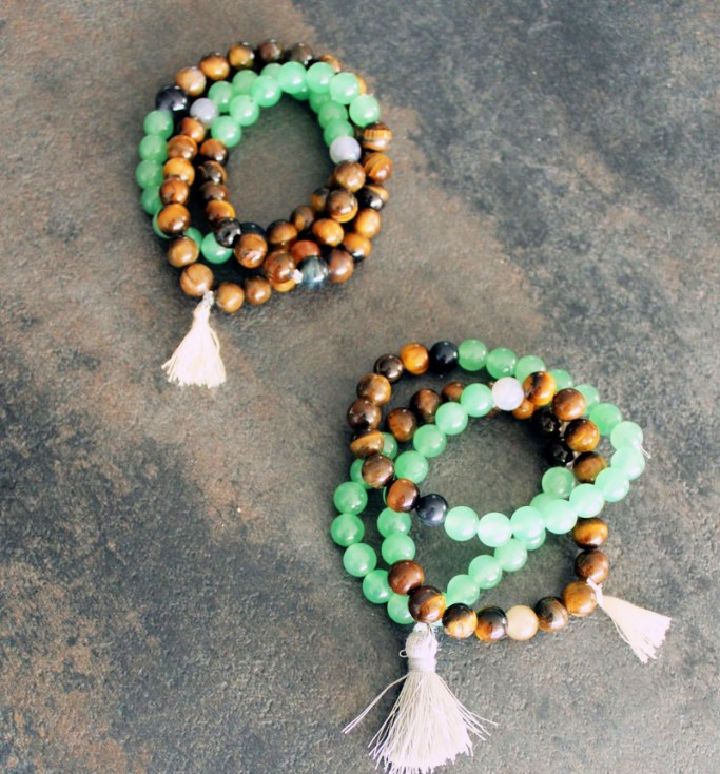
Transform ordinary stones into breathtaking bracelets with a selection of top-notch materials! You will need aventurine beads, tiger eye beads, and more to make a unique jewelry piece. Plus, you will need an elastic stretch string perfect for any bracelet creation.
Finish off your design with 1.4” craft tassels with jump rings for an amazing look that will turn heads wherever you go! Get ready to craft the best stone bracelets around at unbeatable prices today! creativefashion
13. DIY Braided Rhinestone Necklace
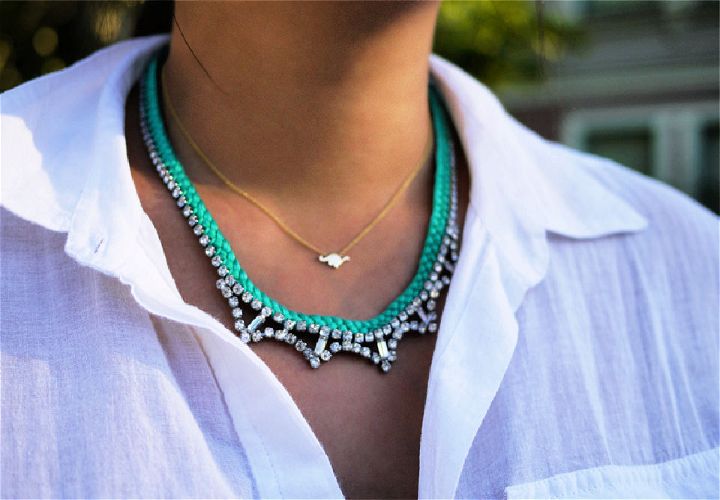
Let your inner designer shine with this unique DIY on jewelry making with stones that teaches you the making of the braided rhinestone necklace! Make a one-of-a-kind piece of jewelry using 4 skeins of embroidery floss, a darning needle, wire clippers, scissors, and more. Finish the look with a lobster clasp or add chain & crimp ends for extra sparkle.
Whether you’re crafting as a gift or making something special for yourself, this easy-to-make necklace will be sure to impress. With just a few supplies and some patience, you can put together truly exquisite results every time! honestlywtf
14. Handmade Raw Stone Earrings
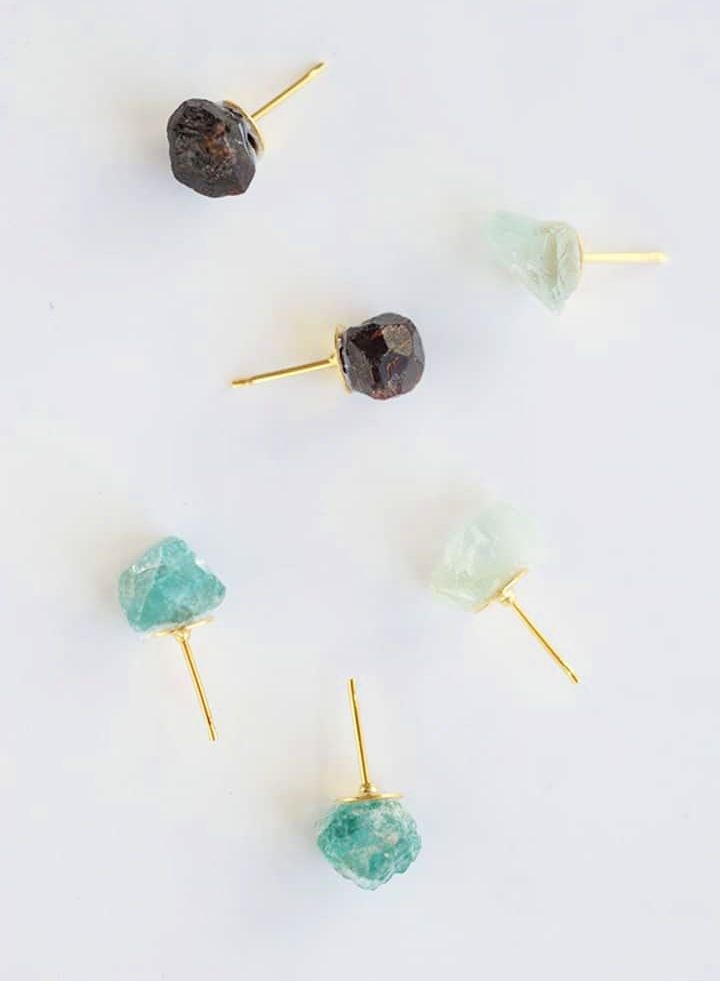
Add a touch of subtle natural beauty to your look with these stunning handmade raw stone earrings. Each set is expertly crafted with carefully selected raw stones backed onto studs and sealed together using E6000 glue for added durability and shine.
With their unique shapes, colors, and textures, these earrings make the perfect accessory for any occasion. Experience the quality firsthand: put a tab of E6000 glue on the stud, press the stone firmly into place, and then let it dry before enjoying your beautiful handmade earrings! aliceandlois
15. Easy DIY Netted Stone Friendship Bracelets
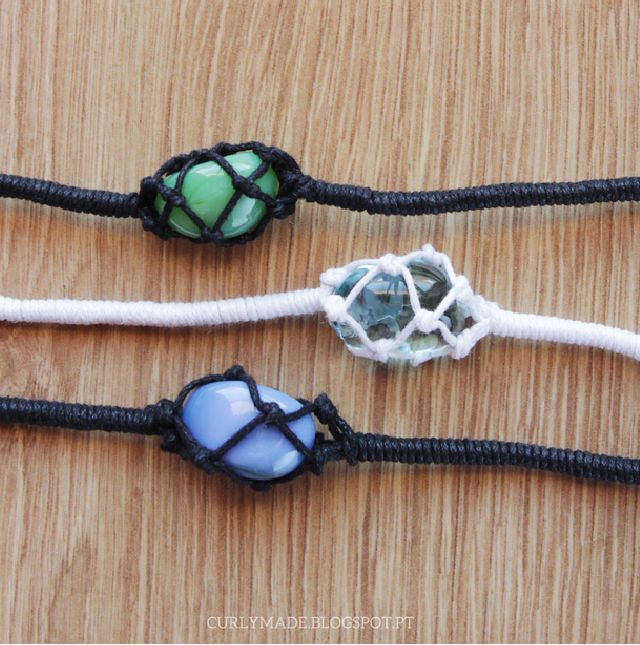
Spruce up your own beautiful and unique friendship bracelets with this easy DIY netted stone friendship bracelet tutorial! All you need is a waxed cotton cord, small stones, scissors, a clipboard or something to hold the cords, and a button.
First, fold two strands of about 1 meter-long cord together in half, then cut another strand with 2 meters of cord for wrapping around the bracelet. Knot the cords together in the middle, leaving space big enough to fit a button through.
Add your favorite stones for an eye-catching look that will be sure to spark conversations! Get creative and make one for yourself or as a special gift for someone special today. curlymade
16. How to Make Gemstone Stretch Bracelets
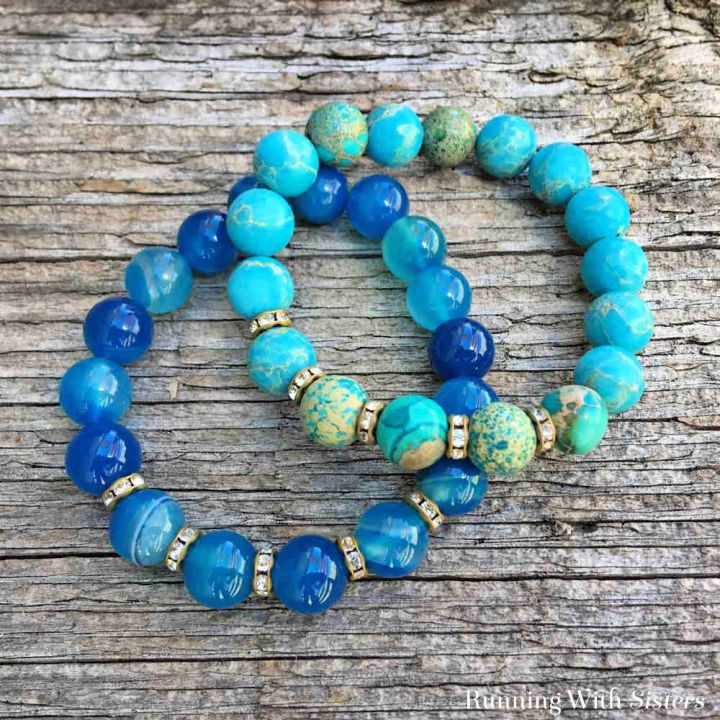
Unlock your inner artist and design a stunning gemstone bracelet with this simple guide to jewelry making! Start by cutting a 20” piece of Stretch Magic elastic cord and place a Bead Bug or masking tape at one end. Then feed 6 agate stone beads onto the cord, followed by a crystal spacer bead and an agate stone bead.
To finish, add the remaining agate stones, then pre-stretch the elastic 2 or 3 times for maximum comfort. With just these few simple steps, you’ll be able to make an amazing-looking bracelet that will make all your friends jealous! runningwithsisters
17. Make Your Own Wire-Wrapped Gemstone Ring
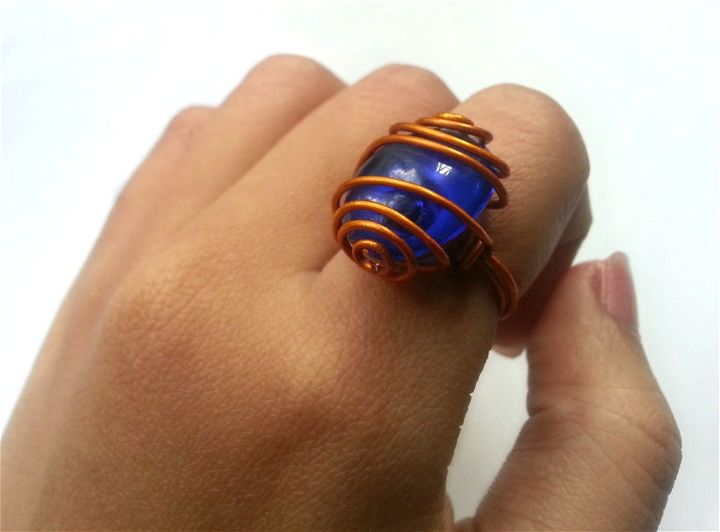
Design a one-of-a-kind gemstone ring to perfectly express your style. Learn how to make a wire-wrapped gemstone ring with our simple step-by-step guide! You can learn the basics of making the base, completing the base, and wrapping the stone in the wire.
Whether it’s for yourself or as a gift, our guide will help you craft a stunning piece of jewelry that will last forever. Start now and get creative: make your own one-of-a-kind wired gemstone ring today! instructables
18. Stone Necklace Step-by-Step Instructions
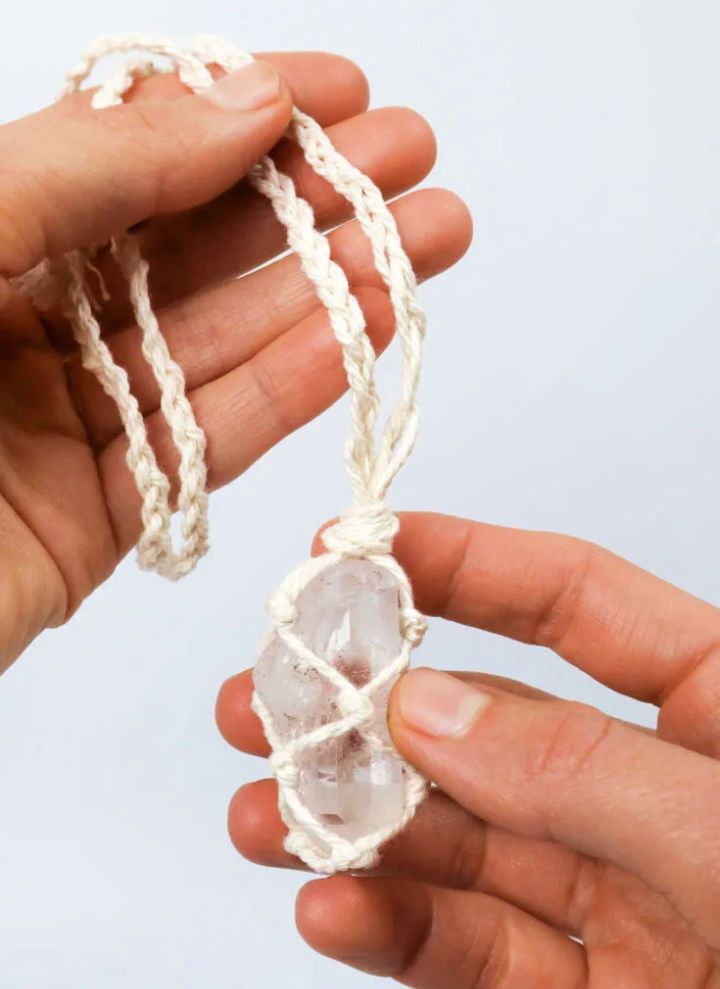
Flaunt a unique stone necklace with this step-by-step guide. Start by unraveling your cord and cutting it off at 32 inches. Bend the cord so that it is folded in half, leaving one end looped and the other end loose.
Cut out two more strips of the same measurements, then take a look at your chosen stone to decide how you want to place it. With this simple tutorial, you will be quite able to make stunning necklaces in no time! craftsyhacks
19. DIY Leather and Gemstone Bracelet
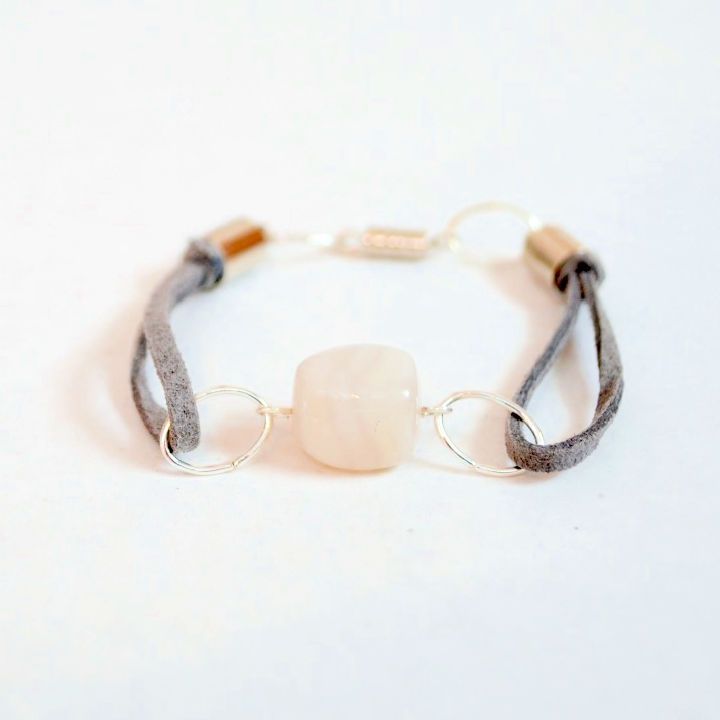
Bring out your inner designer and adorn yourself with a one-of-a-kind leather and gemstone bracelet tailor-made to complete any ensemble. These easy-to-follow instructions provide everything you need, including 4 oval jump rings, 1 eye pin, 2 end caps, 1 gemstone bead as a focal point, and a clasp for closure.
Additionally, you’ll need a leather cord, scissors, needle nose, and/or flat nose pliers & wire cutters, plus jewelry or super glue. Make a stylish piece of jewelry with this fun DIY project that will add the perfect touch to any look! amylattacreations
20. DIY Stone Wire Wrapped Bangle Bracelet
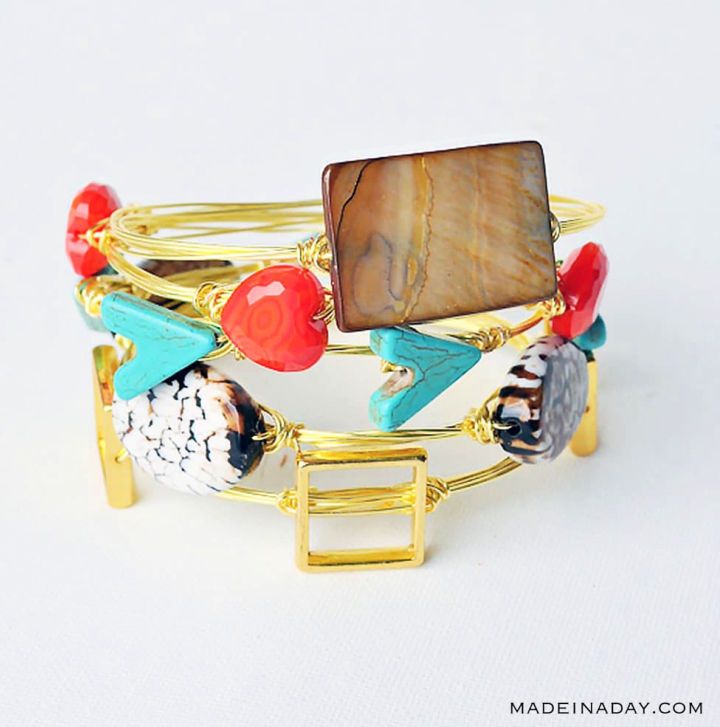
Now, make your own unique piece of jewelry with this DIY stone wire-wrapped bangle bracelet. All you need is 20 gauge beading wire, 1-5 beads or gemstones per bracelet, and a few basic tools like jewelry wire cutters, bent nose pliers, and long nose pliers.
With a bracelet mandrel sizer or by measuring the size of your wrist, make sure you have the perfect fit before finishing up! Try adding vintage charms for an extra special touch. Surprise yourself with this creative project that’s easy to complete in just a few hours. Show off your trendsetting style with this gorgeous handmade bangle bracelet! madeinaday
21. DIY Macrame Necklace With Stone
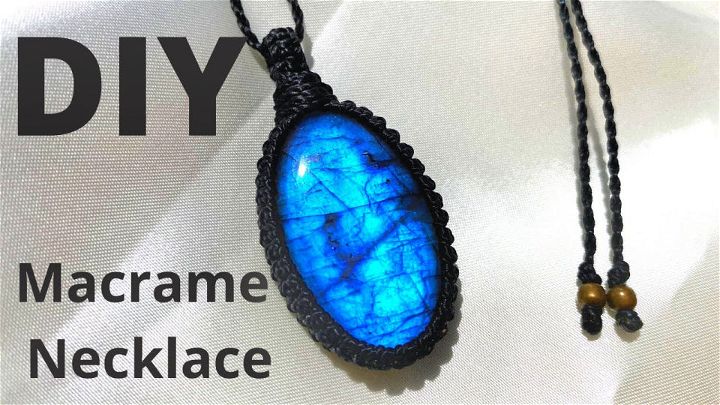
Be the envy of your friends and show off your individual style with this one-of-a-kind Macrame necklace, complete with a beautiful stone pendant. You will need 1mm waxed cord in 2 x 100cm (40in) and 1 x 200cm (80in), one small to medium size stone cabochon, 2 x 4mm metal beads, and an additional 110cm (43in) and 30 cm (12in) of the same waxed cord for the necklace.
The detailed instructions included making it very easy to follow along as you craft a beautiful macrame necklace with a stunning stone pendant that will turn heads!
22. DIY Drilled Stone Necklaces
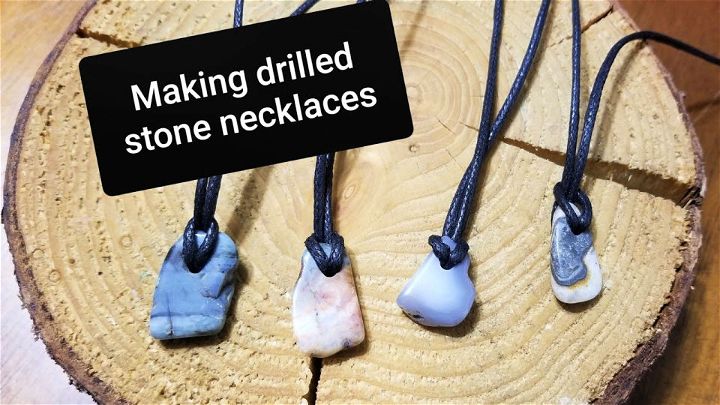
Craft your own jewelry with these unique DIY drilled stone necklaces! With just some simple tools like a lighter and snips, you can quickly turn stone pieces into beautiful necklaces. Plus, add some cotton thread for the spool to give it an extra special touch!
These handmade necklaces are fashionable and eye-catching and make great gifts that will last a lifetime. Make something truly unique with these DIY drilled stone necklaces today, and show off your creative side with one of these stylish accessories!
23. Make Wire Wrapped Rock Necklace at Home
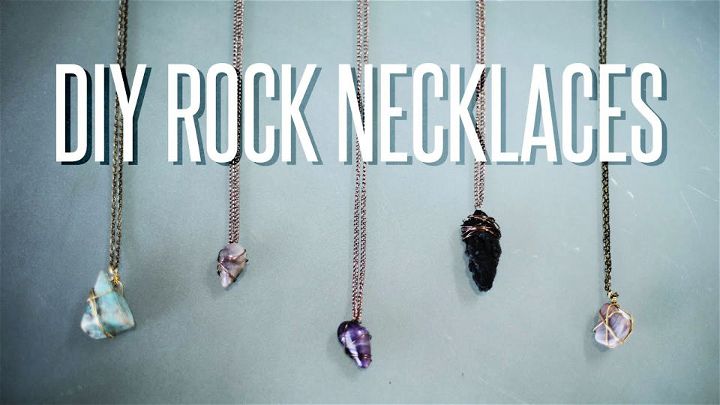
Easily make a beautiful wire-wrapped necklace in the comfort of your own home! With just some simple supplies, you can make an eye-catching piece of jewelry that is sure to have heads turning. Find yourself some colorful stones or other charm pieces and begin wrapping them with metal wires for an elegant and unique result.
To finish off the look, thread some chain through it all for a stylishly put-together necklace, everyone will admire. Try making your own wire-wrapped rock necklace today!
24. How to Turn a Rock Into a Beautiful Necklace
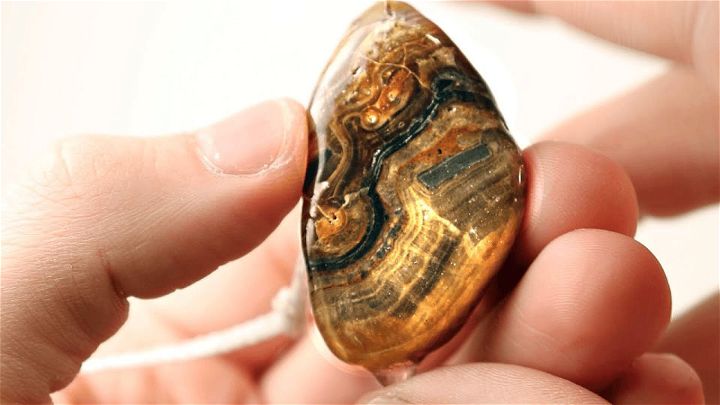
Turn a rock into a beautiful necklace with the right tools. Use a rock saw to cut and shape the stone, then use a drill press for more precise work. Polish it off by tumbling it in either a rotary or vibratory rock tumbler with ceramic media and grit to give it that perfect shine. Follow these simple steps for your own custom-made piece of jewelry!
25. How to Make Earrings From Stone
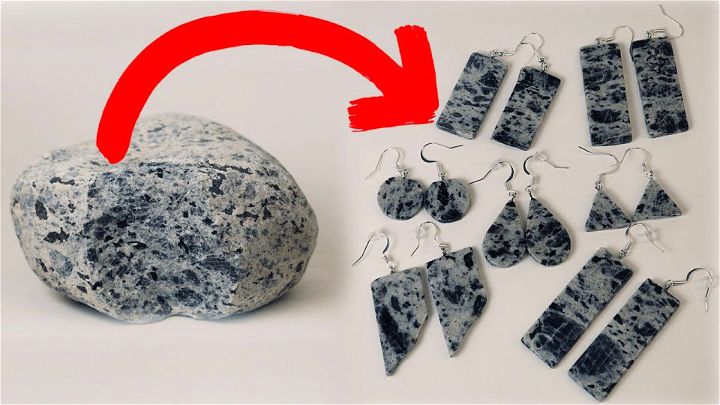
Making homemade earrings from stone is a great and fun activity! You’ll need the right equipment like a drill press, belt sander, lathe, rotary rock tumbler, vibratory rock tumbler, ceramic media, and grit.
To cut your stones, you’ll also require a rock saw with soft and hard blades as well as a saw blade sharpener and drill press vice. Start crafting your own unique one-of-a-kind earrings today for gorgeous jewelry that no one else will have!
Conclusion:
If you love rocks and minerals, you don’t have to keep them on your shelf. You can turn them into beautiful jewelry that showcases their natural beauty and uniqueness. Whether you want to drill, wrap, macrame, or snap your stones into settings, there are many ways to make stunning stone jewelry that suit your style and skill level.
You can find 25 fun and easy stone jewelry making ideas and tutorials above. With some basic tools and materials, you can transform your stones into jewelry that you can wear or give as gifts. So don’t let your rocks gather dust, turn them into jewelry that rocks!

