Making your own polymer clay earrings is a fun and satisfying way to show your creativity and individuality. Discover 25 DIY polymer clay earrings ideas with detailed, easy-to-follow instructions, ideal for beginners and experienced crafters who want to make unique clay jewelry. You can experiment with different shapes and colors of polymer clay, from simple and elegant designs to more complex and elaborate patterns.
Making polymer clay earrings involves various styles and techniques – from the textured clay earrings made with a Cricut Silhouette, the Texas-inspired designs, to the rainbow galaxy patterns. The options are limitless! Making polymer clay earrings at home is not only enjoyable but also economical, allowing you to make beautiful, handmade earrings and charms that match your personality.
Making polymer clay earrings, especially those decorated with gemstone beads, adds a classy touch to your accessory collection. Handmade polymer clay earrings make special gifts, allowing you to share your love for creativity with friends and family. For those looking for a quick and cheap project, the fast and easy DIY clay earrings idea is perfect. If you like a natural vibe, the terracotta air dry clay earrings design might be the best choice for you.
No matter what your personal style or preference, making DIY polymer clay earrings offers a chance for creativity and skill. Start your DIY polymer clay earrings adventure today and craft your own unique and fashionable jewelry pieces!
What is Polymer Clay, and Why is it Great for Making Earrings?
Polymer clay is a type of synthetic modeling material that can be shaped, sculpted and baked to harden. It comes in various colors and brands and can be mixed to make custom shades and effects. Polymer clay is great for making earrings because:
- It is lightweight and comfortable to wear
- It is durable and resistant to water, heat, and fading
- It is versatile and can mimic different materials such as metal, stone, wood, etc.
- It is easy to work with and does not require special tools or skills
- It is fun and creative and allows you to express your personality and style
Some of the popular brands of polymer clay are Sculpey, Fimo, Cernit, Premo, Kato Polyclay, etc. You can find them online or in craft stores.
How to Choose the Right Tools and Supplies for Polymer Clay Earrings?
To start making polymer clay earrings, you will need some basic tools and supplies, such as:
- Polymer clay in your desired colors and brands
- A smooth work surface such as a ceramic tile, a glass plate, or a cutting board
- A clay roller or a pasta machine to condition and flatten the clay
- Clay cutters or a sharp blade to cut out shapes
- A needle tool or a toothpick to make holes for earring findings
- An oven or a toaster oven to bake the clay
- A baking tray or a sheet of parchment paper to protect the clay from direct heat
- A pair of pliers to open and close jump rings and earring hooks
- Earring findings such as studs, posts, hoops, wires, etc.
- Glue or resin to attach the clay pieces to the earring findings
You can also use some optional accessories to enhance your polymer clay earrings, such as:
- Clay extruders or molds to make different shapes and patterns
- Texture sheets or stamps to add impressions and designs
- Acrylic paints or mica powders to add colors and effects
- Glaze or varnish to add shine and protection
- Embellishments such as beads, crystals, pearls, etc.
How to Condition, Shape, and Bake Polymer Clay Earrings?
Conditioning, shaping, and baking are the basic steps for making polymer clay earrings. Here is how you can do them:
Conditioning
Conditioning is the process of warming up and softening the clay so that it becomes pliable and easy to work with. To condition the clay, you can:
- Cut a small piece of clay from the block and knead it with your hands until it becomes smooth and elastic
- Use a clay roller or a pasta machine to roll the clay into thin sheets of even thickness
- Fold the clay sheets in half and pass them through the roller or the machine several times until they are well blended
- Repeat the process with different colors of clay if you want to make custom shades or effects
Shaping
Shaping is the process of creating different forms and designs with the conditioned clay. To shape the clay, you can:
- Use clay cutters or a sharp blade to cut out shapes from the clay sheets
- Use a needle tool or a toothpick to make holes for earring findings
- Use clay extruders or molds to make different shapes and patterns
- Use texture sheets or stamps to add impressions and designs
- Use acrylic paints or mica powders to add colors and effects
Baking
Baking is the process of hardening the shaped clay pieces in an oven. To bake the clay, you can:
- Preheat your oven or toaster oven according to the instructions on the clay package (usually between 110°C to 130°C)
- Place your clay pieces on a baking tray or a sheet of parchment paper
- Bake them for 15 to 30 minutes, depending on their size and thickness (usually 15 minutes per 6 mm of thickness)
- Let them cool completely before handling them
How to Make Polymer Clay Earrings with Molds
Molds are a great way to make intricate and detailed shapes with polymer clay without having to sculpt them by hand. You can use silicone molds, resin molds, candy molds, or even make your own molds with polymer clay. To make polymer clay earrings with molds, you can:
- Choose a mold that has a design that you like, and that is suitable for earrings
- Condition and roll out your clay as usual
- Press the clay into the mold and smooth out any excess or air bubbles
- Carefully remove the clay from the mold and make holes for earring findings if needed
- Bake the clay pieces according to the instructions on the clay package
- Decorate and finish the earrings as desired
You can also use multiple colors of clay to make different effects with molds, such as:
- Marbling: Twist and roll two or more colors of clay together and press them into the mold
- Layering: Press one color of clay into the mold and then add another color on top of it
- Inlaying: Press one color of clay into the mold and then cut out some parts of it with a blade or a cutter. Fill in the gaps with another color of clay
How to Make Polymer Clay Earrings with Tassels
Tassels are a fun and trendy way to add some movement and flair to your polymer clay earrings. You can make your own tassels with embroidery floss, yarn, leather or fabric. To make polymer clay earrings with tassels, you can:
- Make your clay pieces as usual and bake them according to the given instructions in the tutorial
- Cut a piece of embroidery floss, yarn, leather, or fabric that is about twice as long as you want your tassel to be
- Fold it in half and tie a knot at the folded end
- Cut the loose ends evenly and trim them if needed
- Attach the tassel to your clay piece with a jump ring or a wire loop
- Repeat for the other earring
You can also customize your tassels by:
- Using different colors or materials for your tassels
- Adding beads, crystals, or charms to your tassels
- Making different shapes or sizes of tassels
How to Make Polymer Clay Earrings with Gold Leaf
Gold leaf is a thin sheet of gold that can be applied to polymer clay to make a shiny and luxurious effect. You can use real gold leaf or imitation gold leaf, which is cheaper and easier to find. To make polymer clay earrings with gold leaf, you can:
- Make your clay pieces as usual and bake them according to the given instructions in the tutorial
- Apply a thin layer of glue or varnish to the areas where you want to add gold leaf
- Carefully place a piece of gold leaf over the glue or varnish and press it gently with a brush or a finger
- Peel off the excess gold leaf and smooth out any wrinkles or bubbles
- Seal the gold leaf with another layer of glue or varnish
- Finish the earrings as desired
You can also experiment with gold leaf by:
- Using different colors or types of metal leaf, such as silver, copper or rose gold
- Using different patterns or shapes of gold leaves, such as flakes, specks, or geometric forms
- Using different techniques or tools to apply gold leaf, such as stencils, stamps or brushes
How to Decorate and Finish Polymer Clay Earrings?
Decorating and finishing are the final steps for making polymer clay earrings. Here is how you can do them:
Decorating
Decorating is the process of adding embellishments and details to your baked clay pieces. To decorate your earrings, you can:
- Use glue or resin to attach beads, crystals, pearls, or other embellishments
- Use glaze or varnish to add shine and protection
- Use acrylic paints or mica powders to add more colors and effects
Finishing
Finishing is the process of attaching your decorated clay pieces to earring findings. To finish your earrings, you can:
- Use pliers to open and close jump rings and earring hooks
- Use glue or resin to attach studs, posts, hoops, or wires to your clay pieces
- Make sure your earrings are secure and balanced
How to Store and Care for Polymer Clay Earrings?
Storing and caring are the steps for maintaining your polymer clay earrings. Here is how you can do them:
Storing
Storing is the process of keeping your earrings in a safe and clean place. To store your earrings, you can:
- Use a jewelry box, a pouch, or a ziplock bag to protect them from dust, moisture, and scratches
- Avoid direct sunlight, heat, and chemicals that can damage or fade the clay
- Store them separately using jewelry holder from other jewelry to prevent tangling or breaking
Caring
Caring is the process of cleaning and repairing your earrings if needed. To care for your earrings, you can:
- Use a soft cloth or a cotton pad to gently wipe off any dirt or dust
- Use a mild soap and water to wash off any stains or residues
- Use a toothpick or a needle to remove any glue or resin excess
- Use pliers to fix any loose or broken jump rings or earring hooks
1. How to Make Polymer Clay Earrings
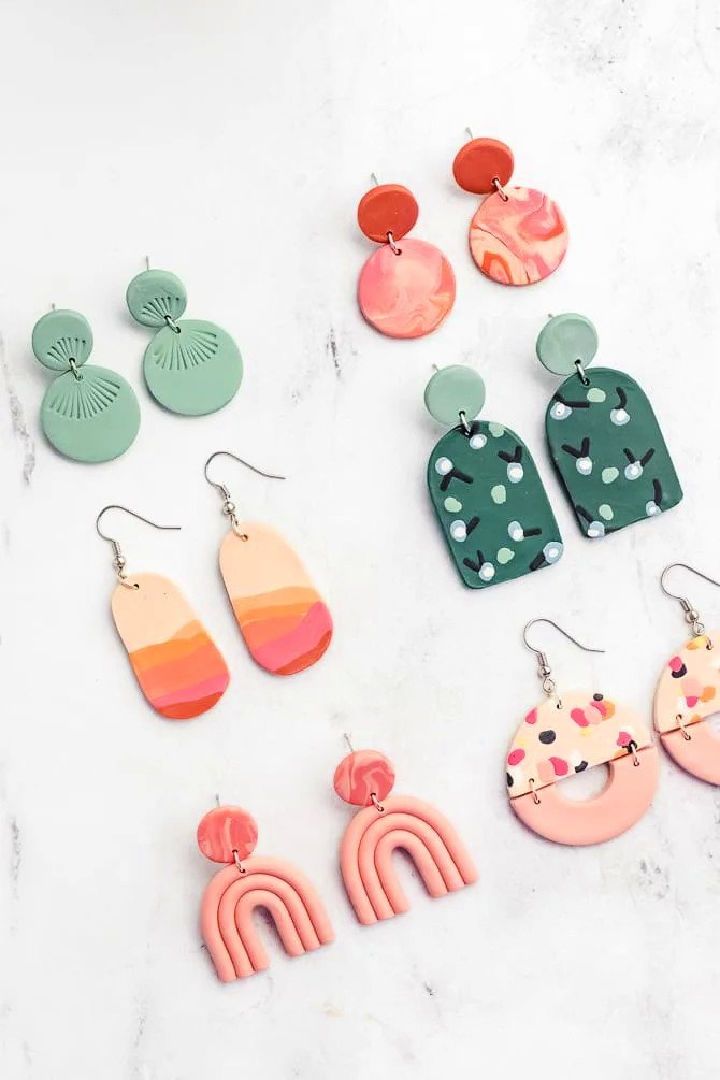
Learn how to make beautiful polymer clay earrings with this easy-to-follow guide. Gather your supplies, such as polymer clay in different colors, earring backs, jump rings, flexible, super glue, parchment paper or foil, and tools like an acrylic rolling pin and X-acto knife.
With these materials, you can make stunning earrings for yourself or a friend! Follow the step-by-step instructions to cut out shapes from the clay using cookie cutters or clay slicers before baking on a flat baking sheet. Attach the backings with jewelry pliers, then embellish your creation with jump rings and superglue. Start crafting today! sarahmaker
2. Homemade Polymer Clay Earrings
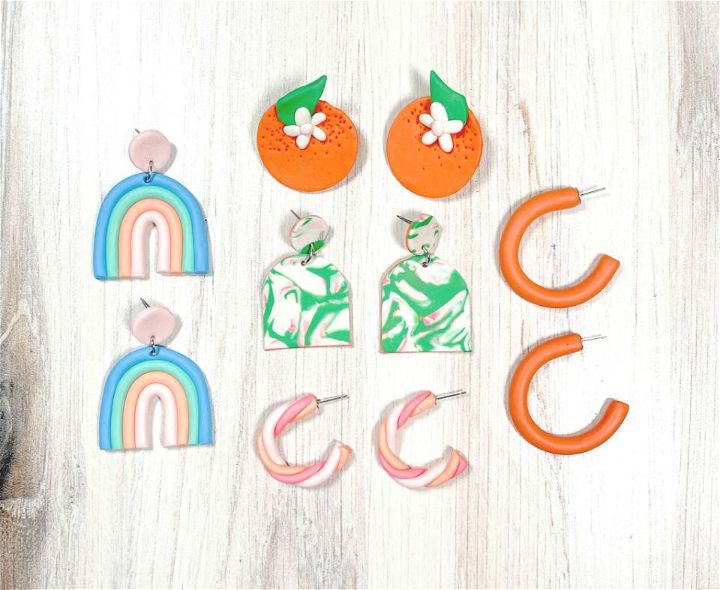
Make beautiful, unique earrings with just a few simple supplies! Make stunning pieces of jewelry from homemade polymer clay. All you need are polymer clay (in lots of colors!), jump rings, earring posts/hooks, pliers, and super glue. Optional equipment such as a clay extruder, pasta machine, and modeling tools can make crafting easier too! For basic shapes, use cookie cutters or a clay cutter; alternatively, add detail with an exacto knife, craft knife, and a toothpick or paper clip. Roll out evenly with an acrylic rolling pin – then assemble your one-of-a-kind earring creations for all to admire! pineapplepaperco
3. Easy DIY Polymer Clay Earrings
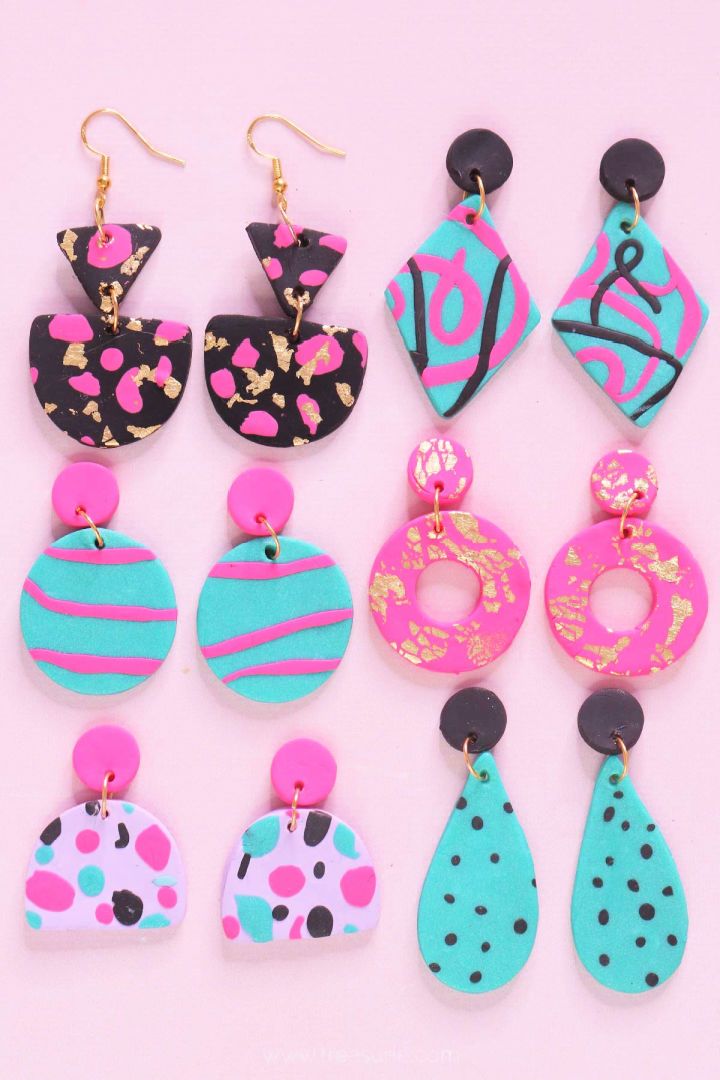
Flaunt making your own statement pieces with these easy DIY polymer clay earrings! All you need is polymer clay in various colors, jewelry findings such as earring posts, backs, hooks, and jump rings, cutting tools like clay cutters or cookie cutters, plus a hole creator like a toothpick or needle. You also need an acrylic rolling pin to roll the clay out and shape it.
A tile works best for the work surface – use baking paper on top of a baking pan as the baking surface. Finishing tools such as jewelry pliers, wet/dry sandpaper, and super glue will give you beautiful results without fail! Start making stunning earrings that express your unique style today! treasurie
4. DIY Polymer Clay Earrings With Gemstone Beads
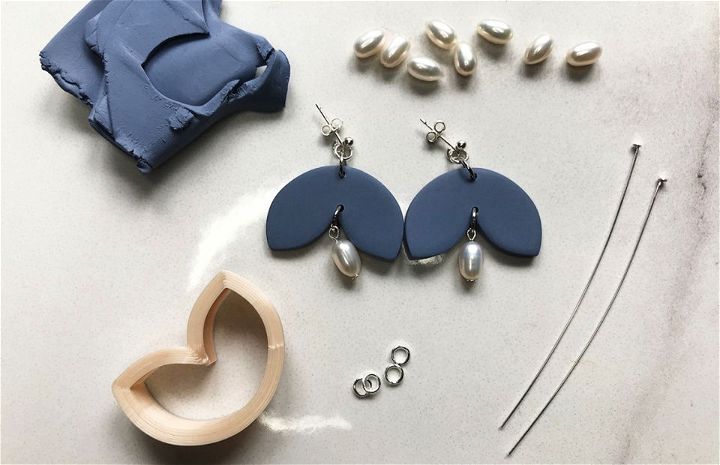
Spruce up stunning DIY polymer clay earrings with gemstone beads! With an array of colors and different textures to choose from, it’s easy to craft beautiful and unique earrings for yourself or as a special gift. Start off by cutting, kneading, and rolling, and then cut your desired shape, prepare for baking, and then bake. After that, make the pearl charms and finalize from there! Whether you’re looking for a classic pearl look or something totally out there, you’ll find what you need in this guide. kernowcraft
5. How to Make Clay Earrings at Home
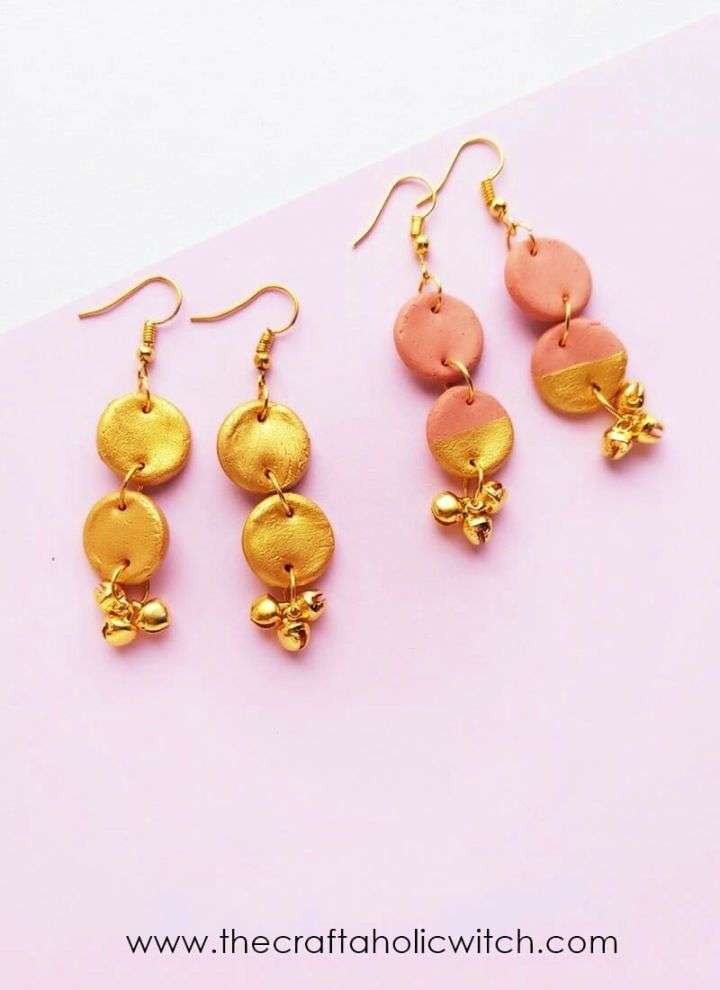
Now, whip up unique jewelry pieces at home with clay! Make your own stunning earrings using a few simple supplies such as clay, acrylic paint, earring hooks, and jump rings. You can add charms or other decorations to make them one-of-a-kind.
To get started, you’ll need some basic tools: a clay rolling board, rolling pin and cutter; craft pliers; and a round shape cutter or small cookie cutters. Roll out the clay on the board until it’s thin enough to cut shapes out of it. Paint your designs in any color you like, then attach hooks and jump rings onto the back before finishing off with decorative jewelry charms for added flair. Have fun making your own DIY masterpieces! thecraftaholicwitch
6. Ceramic Tile Polymer Clay Earrings Tutorial
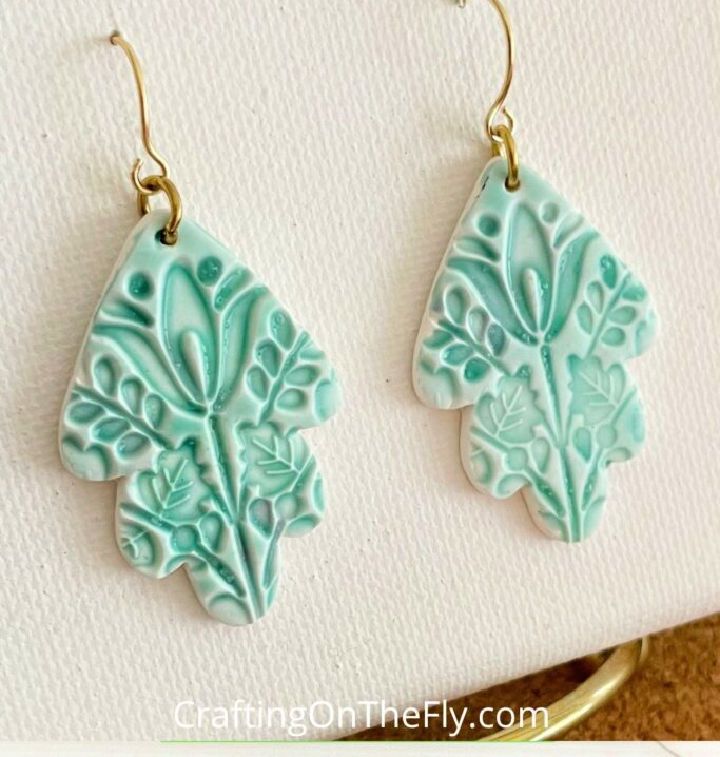
Slay an outfit with your stylish earrings that you can make with this easy-to-follow ceramic tile polymer clay earrings tutorial! Learn how to make your own beautiful ceramic tile earrings at home. With just a few simple steps, you’ll be able to make amazing accessories that look like they came from a shop.
This tutorial provides step-by-step instructions on how to prepare the clay for use, roll it out into tiles, and cut out shapes for the earring components. Plus, learn tips and tricks for finishing touches, such as polishing, painting, or glazing the finished product so that it looks perfect every time! Get started on making your custom ceramic tile polymer clay earrings today! craftingonthefly
7. DIY Polymer Clay Earrings for Beginners
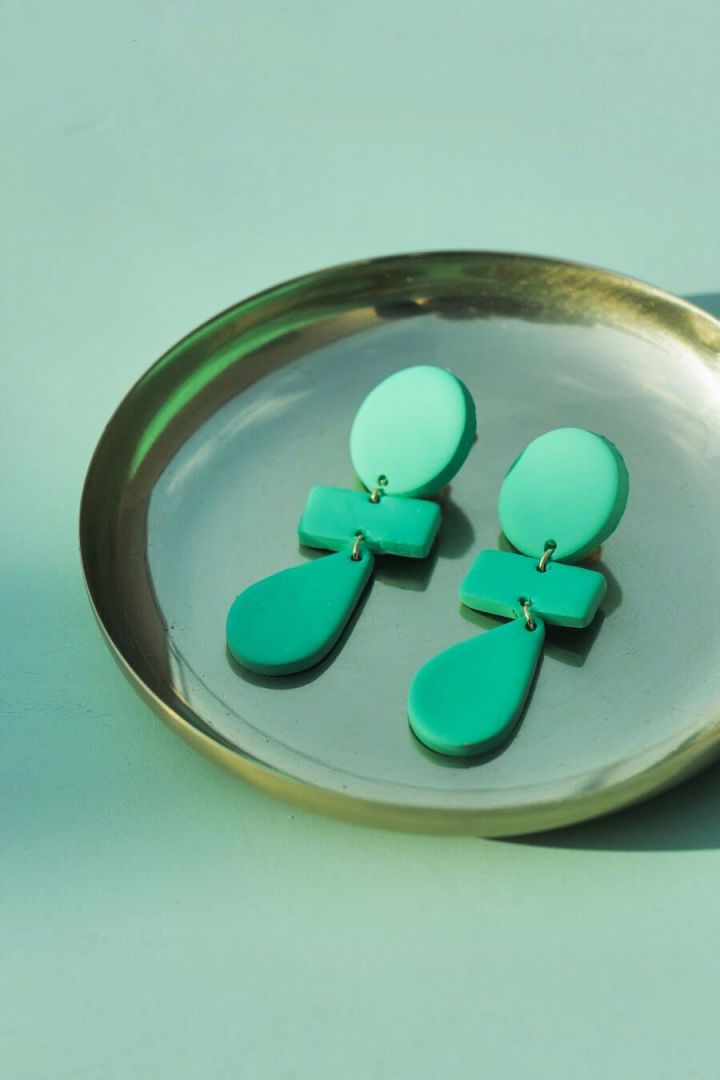
Put together unique, custom earrings with DIY polymer clay for beginners! Gather the list of supplies you need to get started: rolling pins and boards, a clay machine, cookie cutters, small shape plunger cutters, clay tools (including a larger set), jewelry pliers, gold jump rings, and glue. Finish off your design by attaching gold earring posts & backs. Learn how to craft these stylish designs today with this comprehensive guide – make stunning earrings without breaking the bank! inhander
8. DIY Texas Themed Polymer Clay Earrings
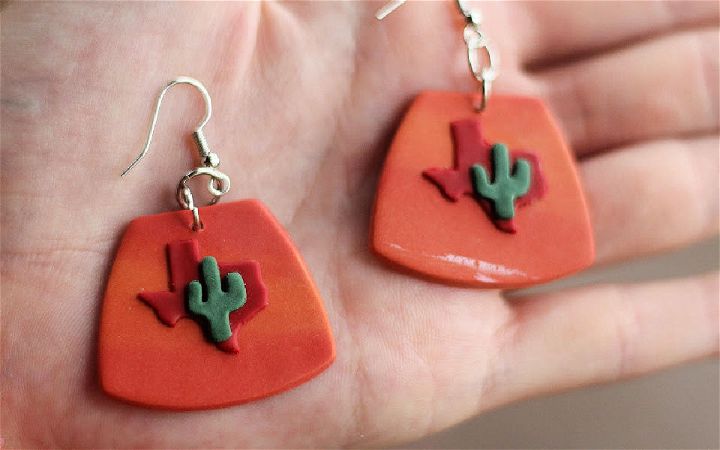
These unique DIY texas themed polymer clay earrings are the perfect way to show off your Lone Star state pride. Perfect for casual or formal events, these earrings will bring a touch of Texan style to any outfit. Crafted from high-quality polymer clay that is easy to mold into shape and comes in various colors, these earrings are sure to become one of your favorite accessories. Each pair is lightweight and comfortable enough for all-day wear, so you can showcase your Texas spirit wherever you go! Get creative and add a bit of sparkle with some glitter or additional decorations – the possibilities are endless! crafts-women
9. Easy and Inexpensive DIY Polymer Clay Earrings
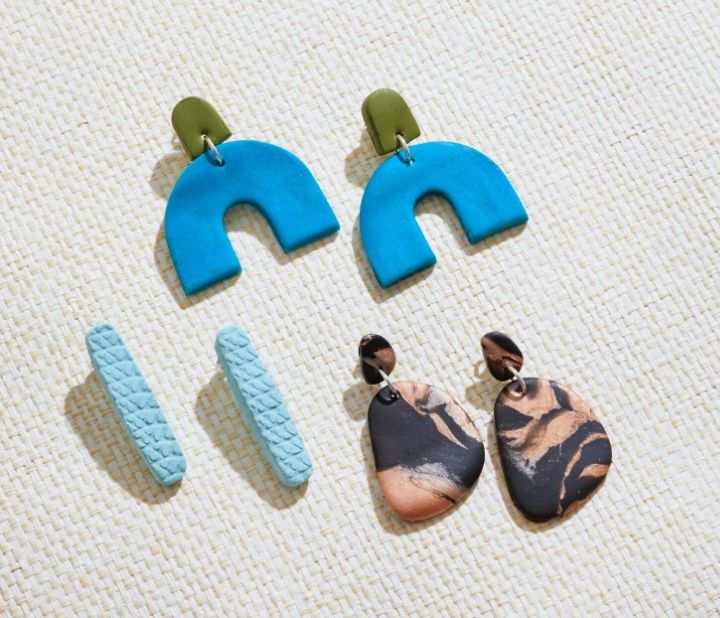
Make your own gorgeous polymer clay earrings with this easy and inexpensive DIY polymer clay earring tutorial! These instructions will show you how to prepare the clay, roll it out, and cut it into earring shapes of your choice. After baking in the oven, add jump rings and earring studs for a stunning finish. With this simple guide, make beautiful personalized accessories that won’t break the bank! Make sure to check out our helpful tips for making colorful designs that you’ll be proud to show off. Get creative today with our DIY polymer clay earrings tutorials! yahoo
10. DIY Polymer Clay Earrings and Charms
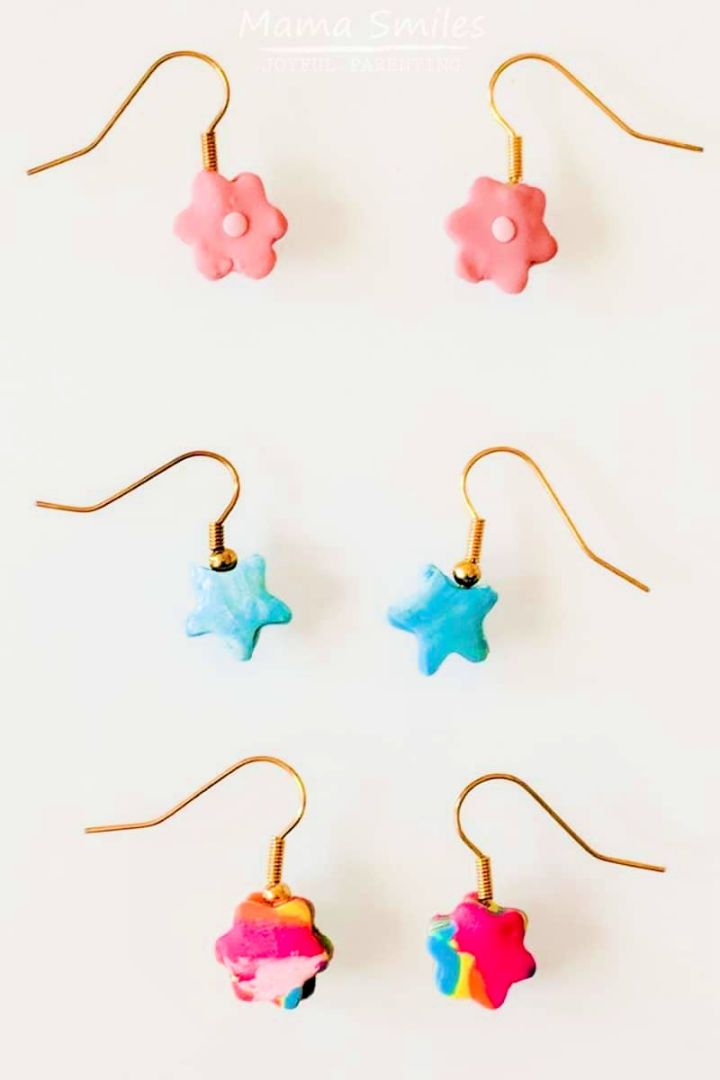
No matter how unbelievable this might sound but make one-of-a-kind DIY polymer clay earrings and charms with your own two hands! Start by rolling out the colorful clay with an acrylic roller, then use Sculpey mini metal cutters to shape pieces. Attach the shapes to earring hooks, posts, clip-on findings, or screw eyes – all of the featured earrings here are double-sided. Finally, bake in order for them to keep their shape and cool completely before handling. Make unique accessories that show off your creative side every time you wear them! mamasmiles
11. Handmade Polymer Clay Earrings
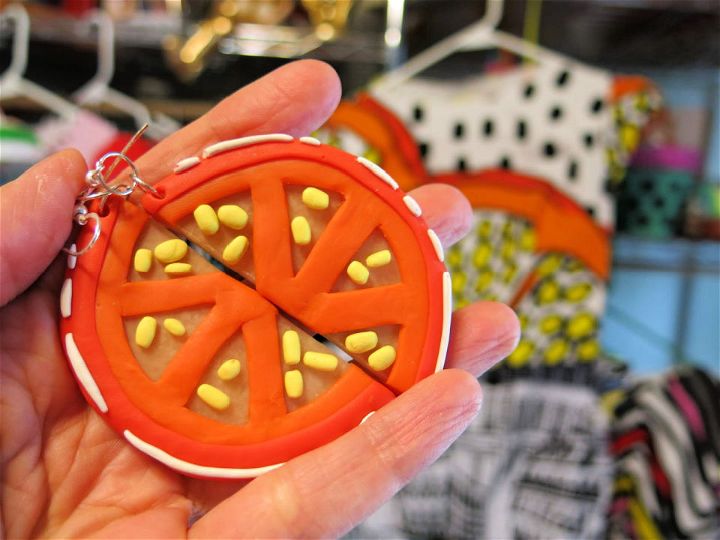
Stand out from the crowd with handmade polymer clay earrings! This self-adhesive material is easy to use – just press it together, and you’re good to go. Keep them light by avoiding overly heavy designs, and make sure that any holes are not too close to the edges of the design so they don’t break when adding jump rings. With these helpful tips in mind, you’ll be able to make beautiful earrings that everyone will admire! cassiestephens
12. Simple DIY Polymer Clay Earrings
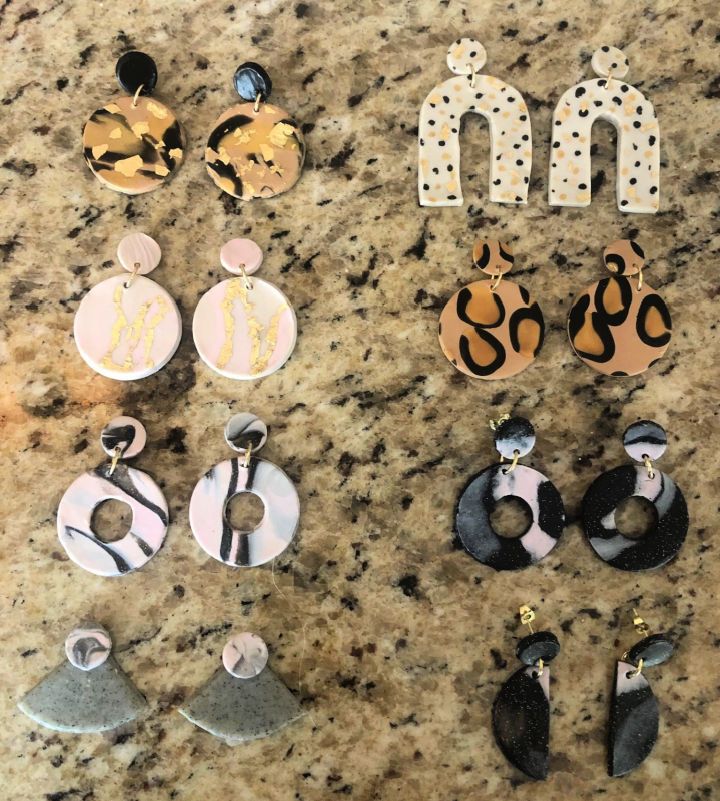
Unleash your creative self and make your own stylish polymer clay earrings easily with just a few DIY tools! Start by gathering up the supplies: polymer clay, rolling pin, clay machine/pasta maker, knife or clay cutter, and jewelry pliers. Begin by working the clay until it’s soft and pliable.
Use the rolling pin to evenly flatten it into thin sheets that can be cut into shapes of your choice. Then run them through a clay machine or pasta maker for extra uniformity in size. Finish off by cutting out any desired designs using either a knife or cutter and attaching findings with jewelry pliers to make unique handmade earrings you’ll love wearing! glowasyougo
13. DIY Embossed Clay Earrings With Cricut Silhouette
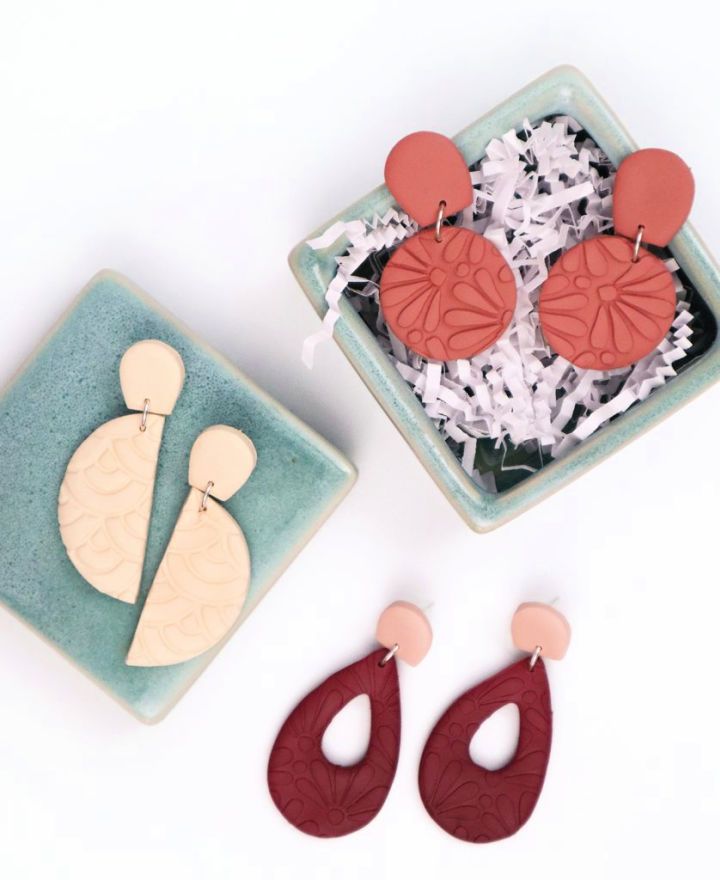
Style your own earrings with a Cricut silhouette and DIY embossed clay! Make beautiful and unique designs to make a special look for any occasion. With detailed tutorials, you can learn how to make your own earrings from start to finish, step by step.
Get creative and express yourself with custom earrings that are sure to impress everyone around you. Use the embossing feature of your Cricut Silhouette machine to give each pair of earrings a personalized touch. You will be able to make an unlimited number of fun and stylish designs while saving money in the process.
Let these DIY Embossed Clay Earrings show off your creativity and bring out your inner fashionista today! persialou
14. Polymer Clay Wavy Earrings Tutorial
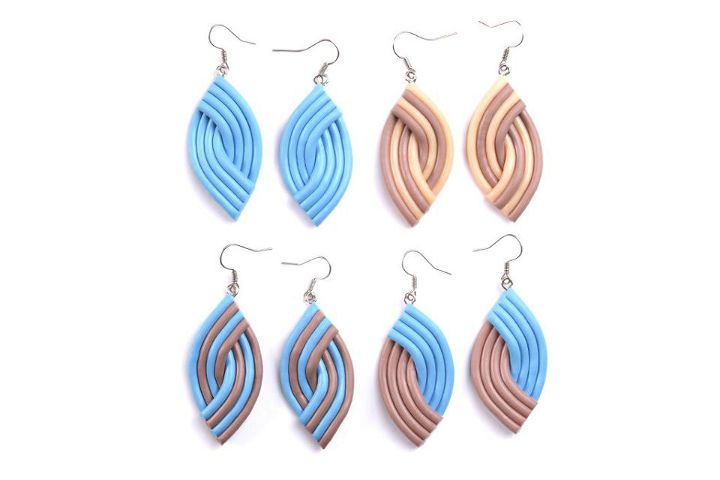
Learn how to make stunning wavy earrings with a simple Polymer Clay Wavy Earring Tutorial. You’ll need some basic materials and tools such as polymer clay, a machine, Czextuder + LC Disk 1 (an extension with 3 small holes), a scalpel or blade, and mini hand drill, together with screw eyes and earrings hoops for the finished product. With easy-to-follow steps, this tutorial will help you make beautiful jewelry made from durable polymer clay that won’t break easily. Try it now and show off your masterpiece! lucyclay
15. Make Your Own Polymer Clay Earrings
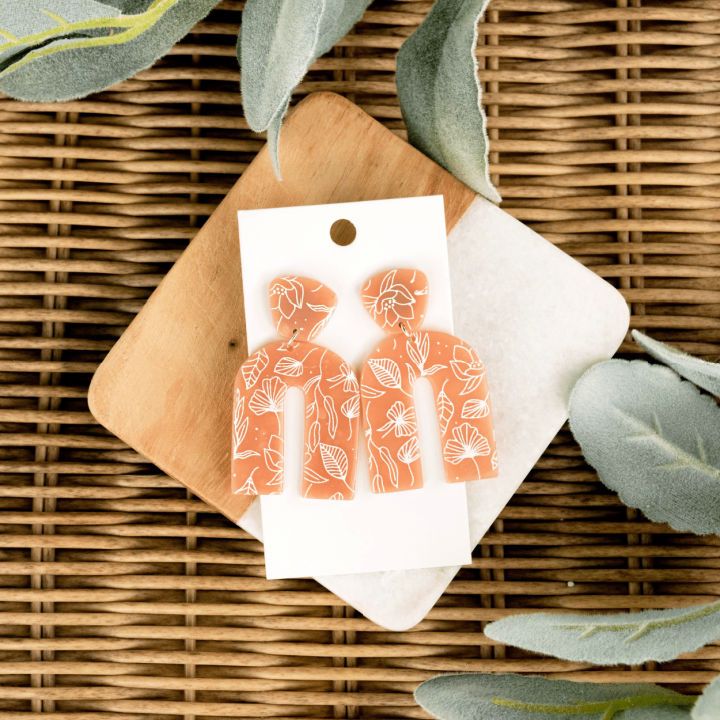
Flaunt your own unique style with polymer clay earrings! Making your own polymer clay earrings is the perfect way to express yourself through jewelry. These easy-to-follow tutorials make it simple for anyone to make fashionable, handmade earrings from start to finish.
You’ll learn how to mold, shape and paint the clay into stunning earring designs that will instantly transform any outfit. Choose from a variety of colors and textures in our expansive selection of high-quality materials, or customize your look by adding beads, glitter, and more.
With this tutorial on DIY polymer clay earrings, you can craft handmade masterpieces that exude modern elegance without breaking the bank! thesageandoak
16. Stylish Polymer Clay Earrings Idea
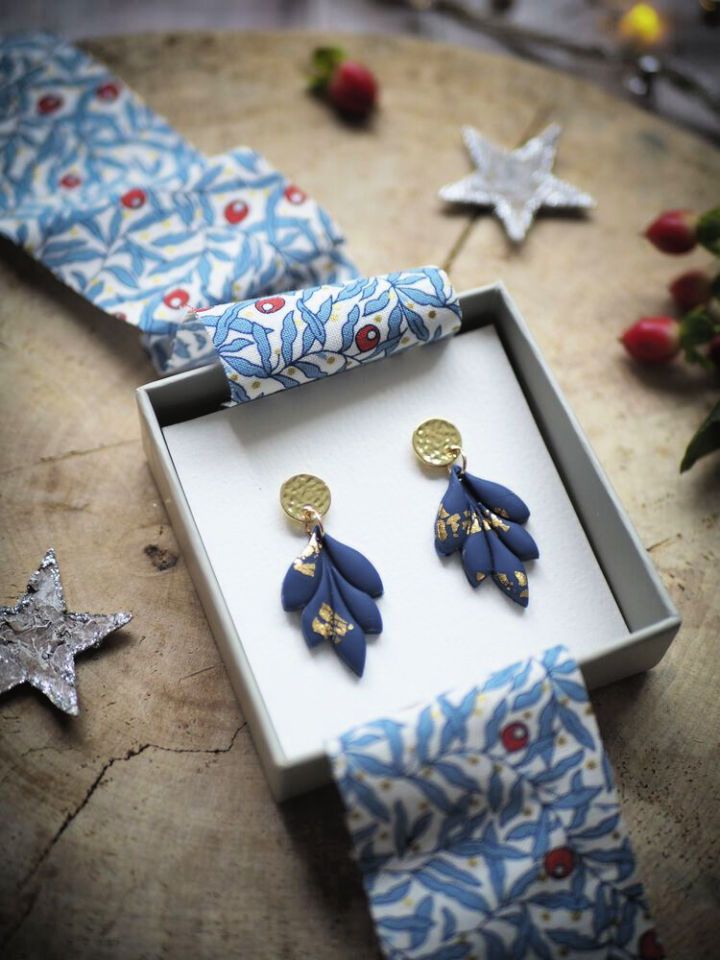
Show off your new accessory today! Make your own stylish polymer clay earrings with this easy idea! All you need is polymer clay, a piece of glass or a large ceramic tile for rolling, an artificial gold leaf, and a few other craft tools. With the help of leaf cutters and blades, make unique shapes and patterns to decorate your earrings. Finish up by adding studs or jump rings with pliers, sandpaper for smoothing out any rough edges, and tweezers for handling the pieces safely. prima
17. DIY Pink Gold Polymer Clay Earrings
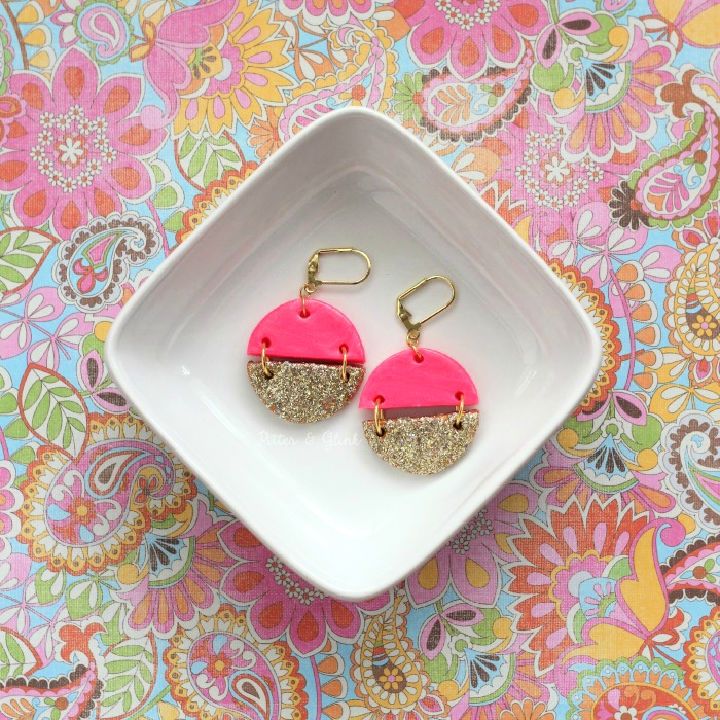
These DIY pink gold polymer clay earrings are perfect for adding a touch of glamour to any outfit! With simple supplies such as polymer clay in neon pink, pearl pink, and gold, a clay circle cutter, a craft knife, mod podge, and glitter, you can make these stunning earrings. Finish them off with some clay glaze and 8 jump rings, earring hooks, and jewelry pliers, plus a baking dish for the oven – all included in this easy tutorial. Make sure your style sparkles with these beautiful handmade earrings! pitterandglink
18. Rainbow Polymer Clay Earrings Design
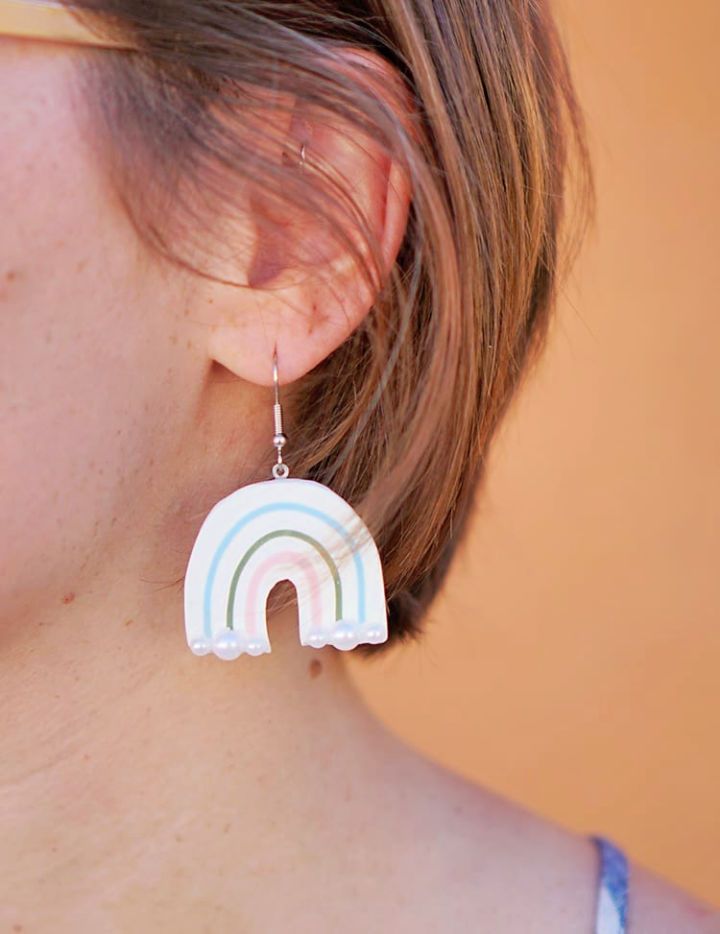
Color up your jewelry collection and make beautiful and unique earrings with rainbow polymer clay! This design project requires only a few supplies, including white and three complementary colors of polymer clay, an exacto knife, jewelry glue, flat-back pearls, flat bails, fish hook ear wires, and jewelry pliers. Optional tools such as a pasta maker to replace the clay roller or an oven thermometer for baking precision can also be used. Express your creativity through these customized creations that you will wear proudly. Knowing how much fun it is to make them will really add something special to these rainbow polymer clay earrings! shrimpsaladcircus
19. Polymer Clay Daisy Earrings
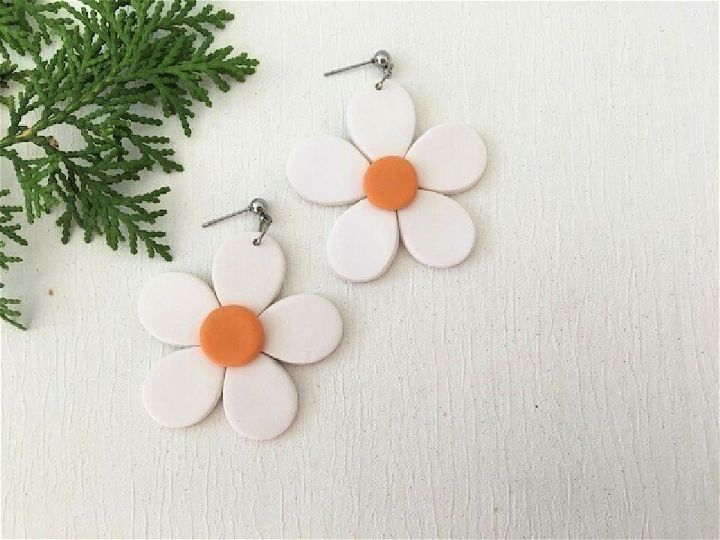
Get your hands busy making stunning handmade earrings with these polymer clay daisy earrings! You’ll need Premo and Fimo polymer clays, along with a small (20mm) teardrop shape cutter, to form the petals of the daisy. Start by conditioning your clay until it’s soft and roll out to approximately 3mm thickness. Have fun making unique earrings that you can show off to all your friends and family! Get creative and make each pair one-of-a-kind for yourself or as a special homemade gift. cutoutandkeep
20. DIY Neutrals Polymer Clay Earring
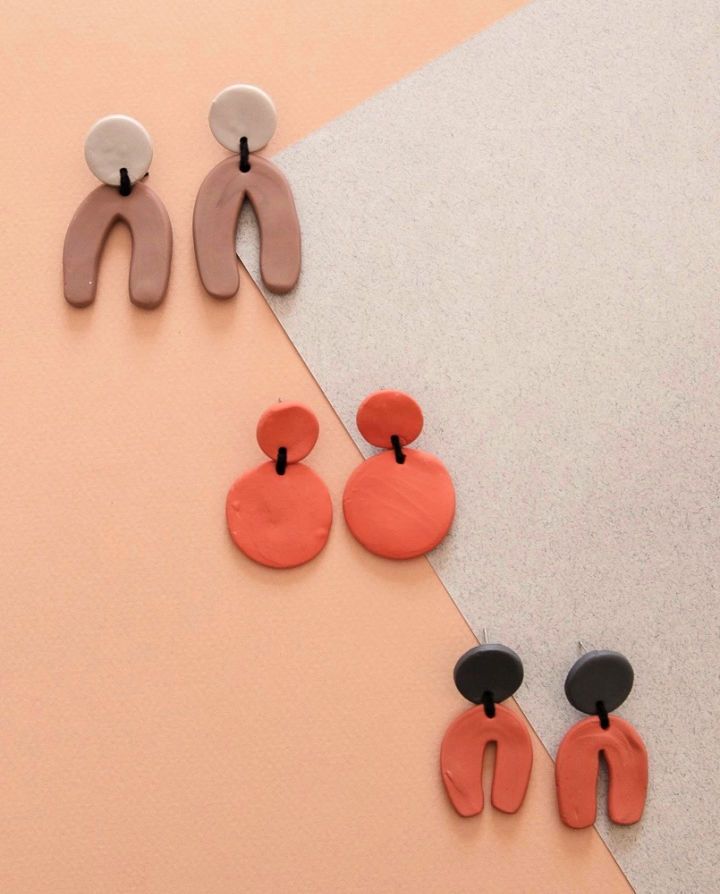
Here’s your hint to make your own DIY neutrals polymer clay earrings with ease! Gather the materials you’ll need: Sculpey polymer clay, rolling pin, clay cutters, silicone mat, earring posts and backs, and superglue. We recommend using Sculpy brand clay as it is easy to work with and produces a great end result. Use the rolling pin on the acrylic surface to flatten out the clay for cutting.
Choose from a variety of shapes in this cute cutter set for your desired look. The silicone mat ensures that your earrings don’t stick when it’s time to put them together. Super glue makes sure they stay connected after wear and tear. Get creative today with these stylish neutrals! xoxojackie
21. How to Make Crescent Polymer Clay Earrings
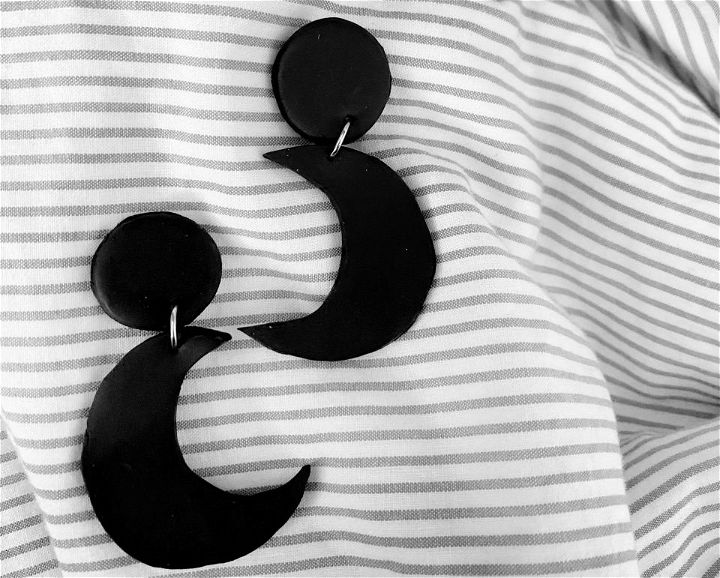
Craft beautiful crescent-shaped polymer clay earrings with this easy tutorial! Gather the supplies you will need: polymer clay, jump rings, earring posts or hooks, super glue, a knife and roller for sculpting the clay, cutters in desired shapes (such as stars or moons), toothpicks for details and holes in the clay pieces; parchment paper and tape to cover work surfaces; cardstock/thin cardboard to use as a rolling surface; cookie sheet for baking the finished pieces.
Optional sandpaper can be used for smoothing any rough edges. Follow these step-by-step instructions to make your own unique pair of crescent-shaped polymer clay earrings today! maddiedeer
22. Quick and Easy DIY Clay Earrings
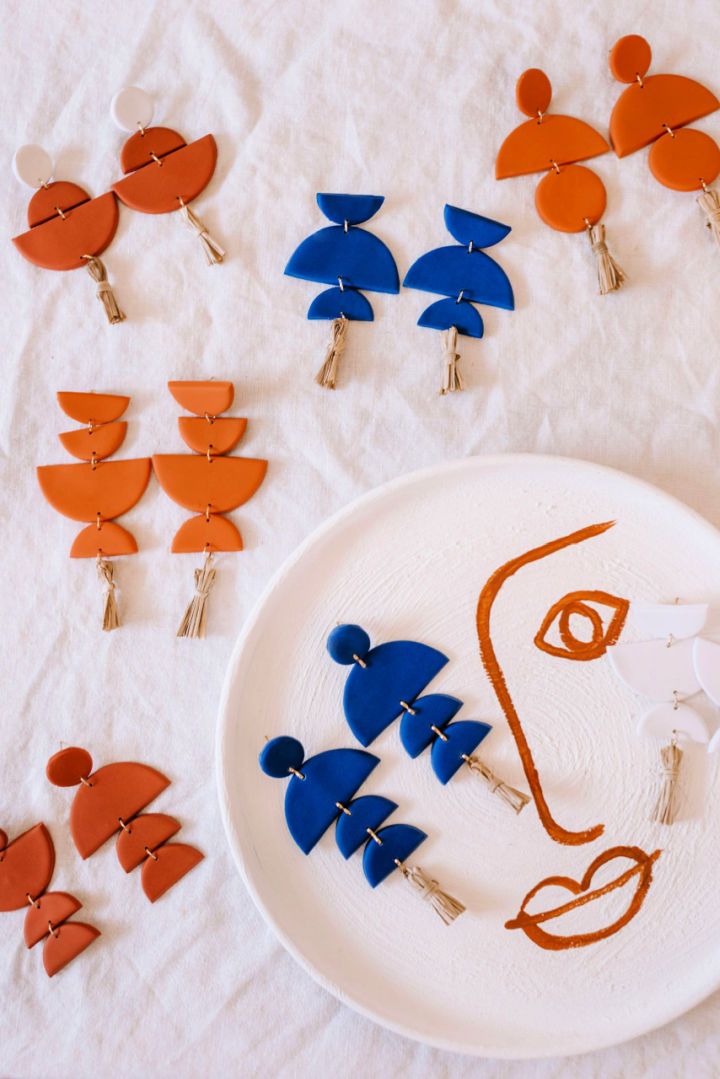
Sort yourself some unique and fashionable earrings with the quick & easy DIY clay earring tutorial! You only need Sculpey Soufflé polymer clay in Midnight Blue, Igloo, Cinnamon, and Pumpkin colors. Plus, a rolling pin or glass bottle, clay cutters or various-sized lids, and a scalpel or sharp knife to shape them.
Finally, add earring posts/backs, jump rings, and jewelry pliers for assembly, plus glue. Raffia for tassels is optional but looks great too! Bake on a tray lined with baking paper to finish them off. Get creative while making these stylish accessories – the possibilities are endless! collectivegen
23. DIY Terracotta Air Dry Clay Earrings
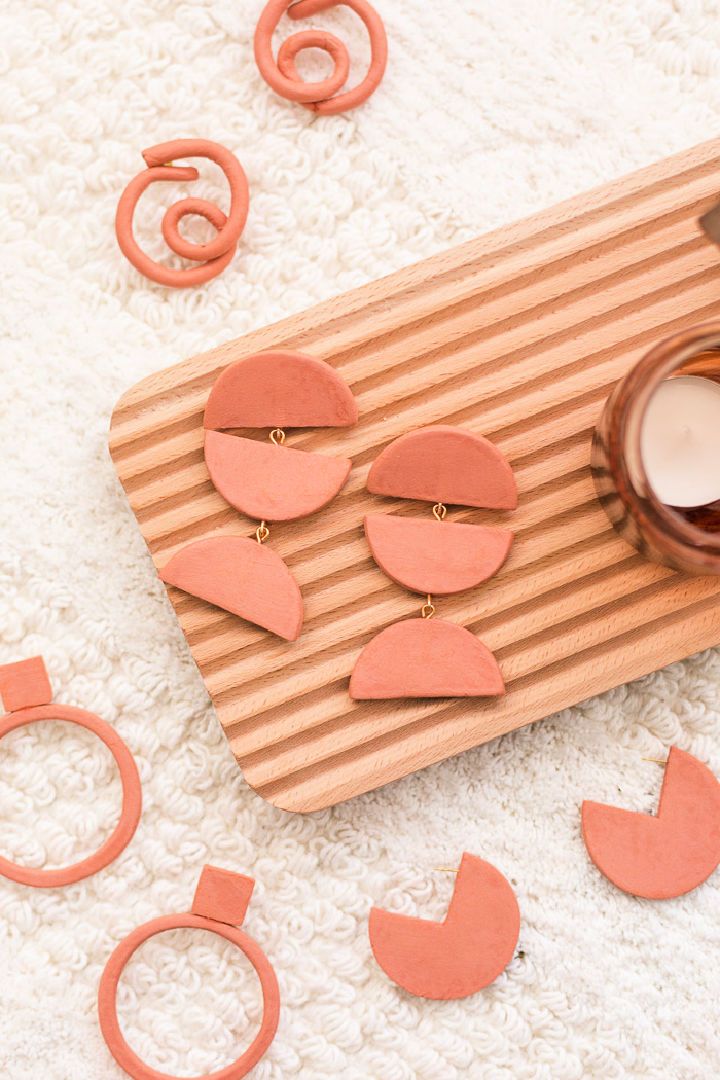
Bake your own one-of-a-kind terracotta earrings with ease using air-dry clay! All you need is some terracotta air dry clay, a roller, cookie cutters, and a craft knife. Sand the edges of your shapes for an extra smooth finish before attaching them to their earring backings with eye pins. Use four-in-one jewelry pliers for easy crafting, and finally, attach the components together securely using E6000 adhesive. Make unique works of art that will be admired by all – DIY terracotta air dry clay earrings are great gifts, or simply just treat yourself! fallfordiy
24. Simple DIY Polymer Clay Earrings
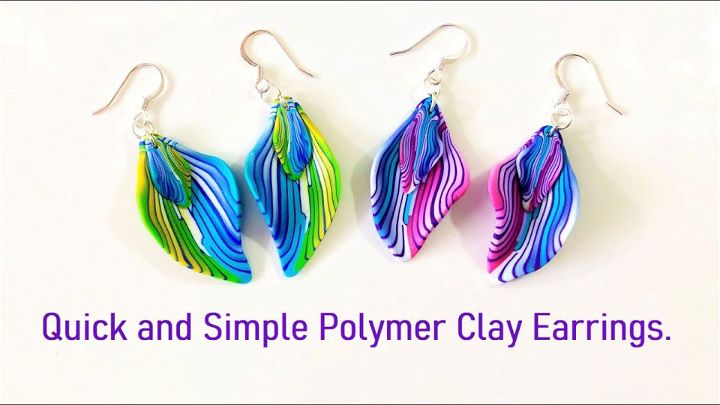
Great side business idea? Make stylish and unique earrings at home with these simple DIY polymer clay earrings! All you need to get started is a flat, nonporous ceramic tile, a polymer clay blade for slicing the clay, and a clay roller. If you don’t have a pasta machine to condition and make thin sheets of polymer clay, just use 2 stacks of playing cards! Finish off your earrings with jump rings, fishhook earrings findings, and small pliers. Make amazing jewelry in no time – try it out now! youtube
25. DIY Rainbow Galaxy Earrings

Learn how to make stunning rainbow galaxy earrings with this DIY tutorial! Using easy-to-find materials like polymer clay and alcohol inks, you can make beautiful jewelry that stands out from the crowd. Follow along as the guide shows you step-by-step how to make these unique earrings – perfect for any occasion. Plus, it’s so simple that anyone can do it – no previous experience is required! Unleash your creativity and show off your skills with this DIY polymer clay earring idea!
Troubleshooting and FAQ
Here are some common questions and problems that you may encounter when making polymer clay earrings and how to solve them.
What is the best glue for polymer clay?
There is no definitive answer to this question, as different glues may work better for different types of clay, earring findings and embellishments. However, some general guidelines are:
- Use a strong and flexible glue that can bond different materials and withstand wear and tear
- Use a clear and fast-drying glue that does not leave visible marks or stains
- Use a glue that is compatible with the type of clay and earring findings you are using
- Use a glue that is safe and non-toxic
Some examples of glues that are commonly used for polymer clay earrings are:
- E6000: This is a popular industrial-strength glue that can bond almost anything. It is clear, flexible, and waterproof. However, it has a strong odor and may contain harmful chemicals, so use it in a well-ventilated area and wear gloves.
- Super glue: This is a quick-drying glue that can bond metal, plastic and ceramic. It is clear and easy to apply. However, it can be brittle and may not hold up well to bending or twisting. It can also cause skin irritation or damage if it comes in contact with your fingers.
- UV resin: This is a type of resin that cures under UV light. It can be used as a glue or a coating for polymer clay earrings. It is clear, glossy, and durable. However, it can be expensive and requires a UV lamp or sunlight to cure.
My earrings look burned.
If your earrings look brown, black, or bubbly after baking, they may be overbaked or exposed to too high temperatures. To prevent this from happening, you can:
- Follow the given instructions on the clay package for the correct baking time and temperature
- Use an oven thermometer to check the actual temperature of your oven
- Cover your clay pieces with aluminum foil or parchment paper to protect them from direct heat
- Place your clay pieces on a ceramic tile or a baking sheet to distribute the heat evenly
- Check your clay pieces frequently while baking and remove them as soon as they are done
If your earrings are already burned, you can try to salvage them by:
- Sanding off the burned areas with fine-grit sandpaper
- Painting over the burned areas with acrylic paint or mica powder
- Cutting off the burned areas and reshaping the earrings
- Discarding the burned areas and using the remaining clay for other projects
There are fingerprints and fuzz on my clay.
If your clay has visible fingerprints, dust, or lint on it, it may affect the appearance and quality of your earrings. To prevent this from happening, you can:
- Wash your hands before working with clay, and avoid touching your face or hair
- Wipe your work surface and tools with alcohol or baby wipes to remove any dirt or oil
- Use gloves or cornstarch to reduce the stickiness of the clay
- Use texture sheets or stamps to cover up any imperfections
- Smooth out any fingerprints with rubbing alcohol or water before baking
If your clay already has fingerprints or fuzz on it, you can try to remove them by:
- Sanding them off with fine-grit sandpaper after baking
- Scraping them off with a blade or a needle tool before baking
- Covering them up with paint, glaze, or embellishments after baking
My earrings are brittle and keep breaking.
If your earrings are cracking, snapping, or falling apart, they may be underbaked or made from poor-quality clay. To prevent this from happening, you can:
- Follow the given instructions on the clay package for the correct baking time and temperature
- Use an oven thermometer to check the actual temperature of your oven
- Use a high-quality brand of polymer clay that is suitable for jewelry making
- Use a flexible and strong type of earring finding that can support the weight of the clay
- Avoid making your earrings too thin or too large
If your earrings are already broken, you can try to fix them by:
- Gluing them back together with a strong glue
- Baking them again for a longer time or at a higher temperature
- Reinforcing them with wire or jump rings
- Repurposing them into smaller earrings or other jewelry pieces
Related DIY Jewelry Making Ideas
DIY jewelry is a great way to express yourself and save money. Check out these amazing DIY jewelry making ideas and get started today.
- DIY Earrings: Unleash your creativity with fabulous DIY earrings you can make at home, perfect for adding a personal touch to any outfit.
- DIY Bracelets: Explore our collection of DIY bracelet ideas, perfect for creating personalized jewelry at home.
- Necklace Ideas: Dive into creative DIY necklace ideas that guide you on how to make necklaces with a personal touch.
- Tassel Earrings: Discover how to elevate your style with lovable DIY tassel earrings, offering easy ideas to craft your own unique pieces.
- Make Beaded Bracelets: Learn how to make beaded bracelets with our free bead bracelet patterns, perfect for beginners and experts alike.
- Friendship Bracelet Patterns: Discover a variety of impressive friendship bracelet patterns that everyone can enjoy crafting and sharing.
- Wire Wrapped Rings: Master the art of ring making with our adorable DIY wire wrapped rings tutorial, ideal for all skill levels.
- Paracord Bracelets: Find awesome paracord bracelet patterns to create unique and durable bracelets that express your individual style.
- Chevron Friendship Bracelet Pattern: Follow our free pattern on how to make a wonderful chevron friendship bracelet, a fun and stylish accessory for all.
Conclusion:
Making DIY polymer clay earrings are more than just a hobby – it’s a way to express yourself, have fun, and make something beautiful. Whether you’re a beginner or a pro, you can find inspiration and guidance in these 25 easy DIY polymer clay earring ideas that cover a range of styles, techniques, and themes. You can unleash your imagination and experiment with different shapes, colors, and textures of polymer clay, making earrings that suit your taste and personality. You can also make meaningful gifts for your loved ones, showing them how much you care and appreciate them. Making DIY polymer clay earrings is a rewarding and fulfilling activity that will bring you joy and satisfaction. Don’t wait any longer – grab some polymer clay and start making your own stunning earrings today!

