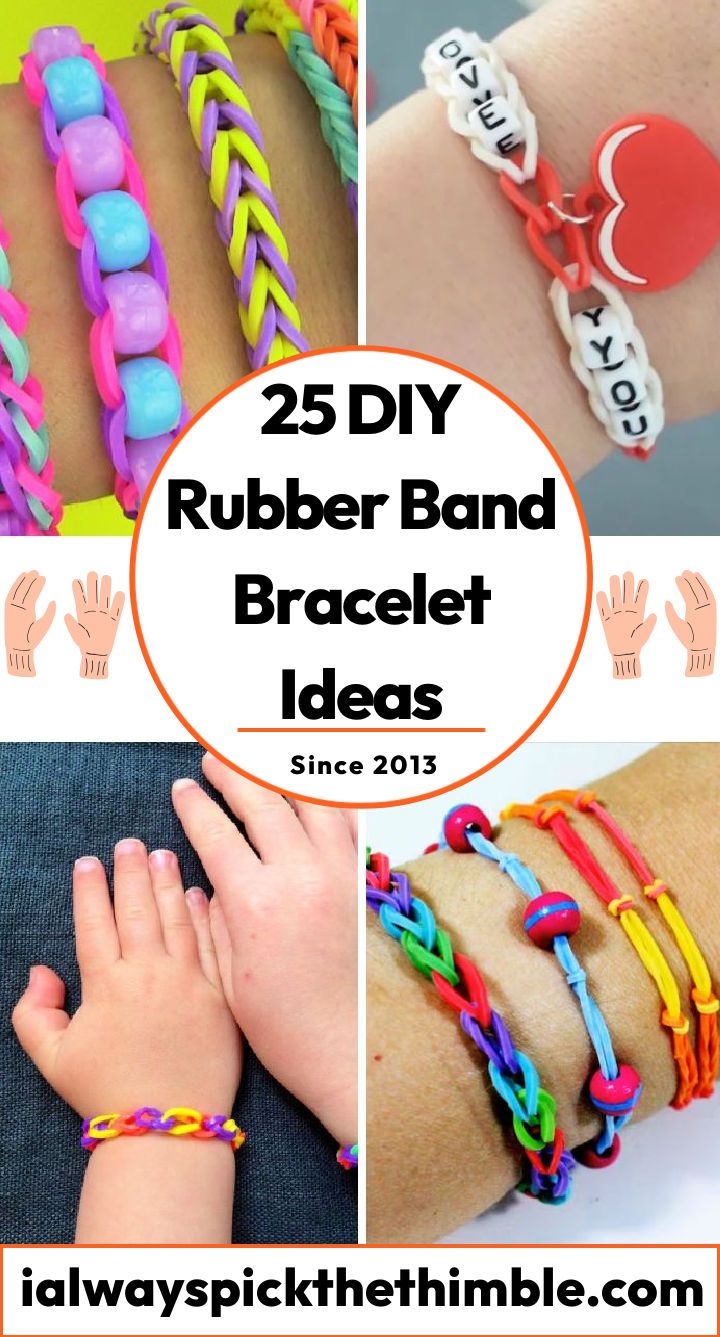
Making your own rubber band bracelets is a fun, easy, and creative activity that’s ideal for both kids and adults. Here’s your guide to 25 free rubber band bracelet patterns, with clear step-by-step instructions that make the process simple for beginners and experts alike. From the classic Hexafish Rainbow Loom Bracelet Design to the trendy DIY Fishtail Rubber Band Bracelet, there’s a variety of patterns available to match everyone’s taste.
Rubber band bracelets are more than just ornaments; they are a way to show your individuality and imagination. Using different patterns like the Candy Color Rubber Band Flower Bracelet or the Cool Rainbow Loom Starburst Bracelet, you can easily make unique bracelets. The patterns also offer comprehensive instructions, so even newcomers can smoothly make their rubber band bracelet wonders.
What makes these rubber band bracelet patterns even more convenient is their adaptability. Some patterns, like the DIY Rubber Band Bracelet with Fingers or the Rainbow Loom Bracelet with Your Fingers, don’t need a loom. You can make these bracelets using common items such as pencils or a clothespin.
Each rubber band bracelet pattern in this collection gives a full guide, from materials required to detailed visual demonstrations, ensuring a hassle-free bracelet-making experience. So grab your rubber bands and start making. Have fun with the process of making your own rubber band bracelets today!
What are rubber band bracelets?
Rubber band bracelets are bracelets made from small, elastic bands that can be woven together in various ways. They are also known as loom bands, rainbow loom, loom bracelets, band bracelets, rainbow loom bracelets and rubber band bracelets. Rubber band bracelets became popular in the early 2010s, especially among children and teenagers, who enjoyed making and exchanging them with their friends. Some of the reasons why rubber band bracelets are popular are:
- They are easy and fun to make. You can make different patterns and designs with just a few bands and a loom or your fingers.
- They are colorful and customizable. You can choose from a wide range of colors and styles to match your outfit, mood, or personality.
- They are inexpensive and eco-friendly. You can buy rubber bands in bulk for a low price or reuse old ones from your household items. You can also recycle them when you get bored of them, or they break.
- They are educational and creative. Making rubber band bracelets can help you develop your fine motor skills, hand-eye coordination, spatial awareness, and math skills. You can also express your creativity and imagination by inventing new patterns and techniques.
What tools do you need to make rubber band bracelets?
The main materials you need to make rubber band bracelets are:
- Rubber bands: These are the small, elastic bands that you will weave together to form the bracelet. You can find them in different colors, sizes, shapes, and textures. You can buy them online or at craft stores, toy stores, or dollar stores. A pack of 600 bands usually costs around $5.
- Loom: This is a plastic board with rows of pins that you will use to hold and organize the bands as you weave them. There are different types of looms, such as the Rainbow Loom, the Cra-Z-Loom, or the Wonder Loom. You can buy them online or at craft stores or toy stores. A loom kit usually costs around $15-$20 and comes with a hook, a set of bands, and instructions.
- Hook: This is a small tool that you will use to grab and pull the bands over the pins on the loom. It usually comes with the loom kit, but you can also buy it separately or use a crochet hook instead.
- Clips: These are small plastic pieces that you will use to connect the ends of the bracelet together. They usually come with the loom kit or the band pack, but you can also buy them separately or use other items such as buttons, beads, or charms instead.
To use these, you need to follow these steps:
- Place your loom on a flat surface with the red arrow pointing away from you. This will help you keep track of the direction of your weaving.
- Choose a pattern and a color scheme for your bracelet. You can follow a tutorial or make your own design.
- Wrap the bands around the pins on the loom according to your pattern. Make sure to press them down and avoid twisting them.
- Use your hook to pull the bands over the pins according to your pattern. Be careful not to drop or break them.
- When you reach the end of your bracelet, use a clip or a band to secure it. Then remove it from the loom and admire your work.
What are some popular patterns for rubber band bracelets?
There are many patterns for rubber band bracelets that you can try out. Some of the most popular ones are:
- Fishtail: This is a simple and elegant pattern that looks like a fishtail braid. To make it, you need two pins on the loom or two fingers on your hand. You wrap one band around both pins or fingers, then add another band on top of it. Then you pull the bottom band over the top one on both sides and repeat until you reach the desired length.
- Single: This is a basic and easy pattern that looks like a single chain. To make it, you need one pin on the loom or one finger on your hand. You wrap one band around the pin or finger, then add another band on top of it. Then you pull the bottom band over the top one and repeat until you reach the desired length.
- Triple Single: This is a more complex and colorful pattern that looks like three single chains connected together. To make it, you need three rows of pins on the loom or three fingers on your hand. You wrap one band around each row or finger, then add another band on top of each one. Then you pull the bottom band over the top one on each row or finger and repeat until you reach the desired length. Then you connect the three chains together with clips or bands.
- Starburst: This is a beautiful and intricate pattern that looks like a starburst flower. To make it, you need six pins on the loom arranged in a hexagon shape. You wrap one band around each pin in a clockwise direction, then add another band on top of each one in a counterclockwise direction. Then you pull the bottom band over the top one on each pin and repeat until you reach the desired length.
There are many other patterns that you can explore, such as the dragon scale, the inverted hex fish, the ladder, the zigzag, and the waterfall. You can also make your own patterns by combining different colors, shapes, and techniques. You can find more examples and tutorials online or in books and magazines.
Basic techniques for making rubber band bracelets
Some of the basic techniques for making rubber band bracelets are:
- Looping: This is the technique of pulling one band over another on the pins or fingers. You need to master this technique to make any pattern. To loop a band, you need to use your hook to grab it from below and pull it over the pin or finger and release it on the other side.
- Twisting: This is the technique of twisting one band into a figure-eight shape before placing it on the pins or fingers. This creates more tension and texture in your bracelet. To twist a band, you need to hold it between your thumb and index finger and twist it once in either direction.
- Connecting: This is the technique of joining two or more bands together with clips or bands. This allows you to make longer or wider bracelets or add embellishments. To connect two bands, you need to insert one end of each band into opposite sides of a clip or loop one band through another.
Some of the advanced techniques for making rubber band bracelets are:
- Inverting: This is the technique of flipping one band over another on the pins or fingers. This creates more depth and complexity in your bracelet. To invert a band, you need to use your hook to grab it from above and pull it under the pin or finger and release it on the other side.
- Extending: This is the technique of adding more bands to an existing bracelet by looping them through the clips or bands. This allows you to adjust the size or shape of your bracelet or make new patterns. To extend a bracelet, you need to attach new bands to one end of your bracelet and loop them through the clips or bands on the other end.
- Layering: This is the technique of placing one bracelet on top of another and connecting them with clips or bands. This allows you to make thicker or more colorful bracelets or combine different patterns. To layer two bracelets, you need to align them side by side and insert one end of each bracelet into opposite sides of a clip or loop one bracelet through another.
Tips and Tricks for making rubber band bracelets
Some of the tips and tricks for making rubber band bracelets are:
- Plan ahead: Before you start making your bracelet, decide on a pattern and a color scheme. Gather all the materials and tools you need and organize them in a convenient way. This will save you time and prevent mistakes.
- Practice: The more you practice making rubber band bracelets, the better you will get at it. Try different patterns and techniques and learn from your errors. You can also watch videos or read books for more guidance and inspiration.
- Be creative: Don’t be afraid to experiment with different colors, shapes, and textures of bands. You can also add other items, such as beads, charms, buttons, or stickers, to your bracelets. You can also mix and match different patterns and techniques to make your own unique designs.
- Be careful: When making rubber band bracelets, be careful not to pull or twist the bands too hard, or they might snap or break. Also, be careful not to poke yourself with the hook or the pins on the loom. If you have any allergies or sensitivities to latex or plastic, you might want to wear gloves or avoid contact with the bands.
- Have fun: The most important thing is to have fun and enjoy making rubber band bracelets. You can make them for yourself or as gifts for your friends and family. You can also share your creations online or join a community of other rubber band bracelet makers.
Common Mistakes when making rubber band bracelets
Some of the common mistakes beginners make when making rubber band bracelets are:
- Skipping a band: This is when you forget to loop a band over another on the pins or fingers. This can cause gaps or holes in your bracelet or make it fall apart. To avoid this, you need to pay attention to your pattern and count your bands carefully.
- Dropping a band: This is when you accidentally drop a band from your hook or your fingers. This can cause your bracelet to unravel or lose its shape. To avoid this, you need to hold your hook and your fingers firmly and securely.
- Using the wrong size or type of bands: This is when you use bands that are too big or too small for your loom or your fingers. This can cause your bracelet to be too loose or too tight or make it look uneven or distorted. To avoid this, you need to use bands that are compatible with your loom or your fingers and match your pattern and style.
- Using the wrong direction of weaving: This is when you weave your bands in the opposite direction of the red arrow on the loom. This can cause your bracelet to twist or curl up or make it look different from your intended design. To avoid this, you need to follow the red arrow on the loom and weave your bands from left to right.
Common problems beginners face when making rubber band bracelets
Some of the common problems beginners face when making rubber band bracelets are:
- Your bracelet is too short or too long: This is when you don’t measure your wrist size correctly, or you don’t add enough or too many bands to your bracelet. To solve this, you need to measure your wrist size before you start making your bracelet and adjust the number of bands accordingly. You can also extend or shorten your bracelet by adding or removing clips or bands at the ends.
- Your bracelet is too loose or too tight: This is when you don’t stretch your bands enough or too much on the pins or fingers. To solve this, you need to stretch your bands evenly and moderately on the pins or fingers and avoid pulling them too hard or too soft.
- Your bracelet breaks or snaps: This is when your bands are old, worn out, defective, or exposed to heat, sunlight, water, or chemicals. To solve this, you need to use new, good quality, and clean bands and store them in a cool, dry, and dark place. You can also repair your broken bracelet by replacing the broken bands with new ones and reconnecting them with clips or bands.
Advanced techniques: Techniques for complex bracelets.
If you want to challenge yourself and make more complex bracelets, you can try some of these advanced techniques:
- Double weaving: This is when you weave two sets of bands on the same row of pins on the loom. This creates a thicker and stronger bracelet with more layers and colors. To do this, you need to place two bands on each pin instead of one and loop them separately according to your pattern.
- Double looping: This is when you loop one band twice over another on the pins or fingers. This creates a tighter and denser bracelet with more texture and detail. To do this, you need to twist one band into a figure eight shape before placing it on the pins or fingers and loop it twice over another band according to your pattern.
- Double hooking: This is when you use two hooks instead of one to grab and pull the bands over the pins on the loom. This allows you to make more complicated patterns and designs with more flexibility and control. To do this, you need to use one hook for each hand and coordinate them according to your pattern.
Rainbow Loom Patterns
When you use your rainbow loom, get unlimited number of rainbow loom patterns that you can make on the plastic pegboard. Select a loom pattern and get to work. You do not need a special loom for other patterns.
Rainbow loom patterns are the different ways you can arrange and weave the bands on the loom to make various designs and shapes. Some rubber band bracelet patterns are simple and easy, while others are complex and challenging. And some patterns are basic and classic, while others are creative and original.
Find some of the factors that affect the difficulty and appearance of rainbow loom patterns are:
- The number of rows or columns of pins on the loom: The more rows or columns you use, the more bands you need, and the more complicated the pattern becomes.
- The direction of weaving: You can weave your bands from left to right, right to left, up to down, down to up, or diagonally on the loom. The direction of weaving affects how your bracelet twists or curls up, or lays flat.
- The type of looping: You can loop your bands over each other in different ways on the pins or fingers. The type of looping affects how your bracelet looks and feels.
- The color scheme: You can use different colors of bands to make different effects and contrasts on your bracelet. The color scheme affects how your bracelet stands out and matches your style.
Some of the categories of rainbow loom patterns are:
- Single patterns: These are patterns that use only one row or column of pins on the loom. They are usually easy and quick to make. Some examples are single chain, fishtail, inverted fishtail, triple fishtail, etc.
- Double patterns: These are patterns that use two rows or columns of pins on the loom. They are usually more complex and time-consuming to make. Some examples are double braid, double cross fishtail, double rhombus, etc.
- Triple patterns: These are patterns that use three rows or columns of pins on the loom. They are usually very complex and require a lot of bands and patience to make. Some examples are triple single chain, triple link chain, triple fishtail braid, etc.
- Quadruple patterns: These are rainbow loom patterns that use four rows or columns of pins on the loom. They are usually extremely complex and require advanced skills and techniques to make. Some examples are quadruple fishtail braid, quadruple rhombus starburst, quadruple hexafish braid, etc.
- Multi-patterns: These are rainbow loom patterns that use more than four rows or columns of pins on the loom. They are usually the most difficult and impressive to make. Some examples are multi rainbow loom, multi starburst, multi ladder, etc.
Free Rubber Band Bracelet Patterns
Learn how to make rubber band bracelets with 25 unique bracelet patterns. Make trendy and stylish accessories using rubber bands in various designs. Perfect for all ages and skill levels. Let your creativity shine with these fun and easy-to-follow rubber band bracelet patterns.
1. Hexafish Rainbow Loom Bracelet Design
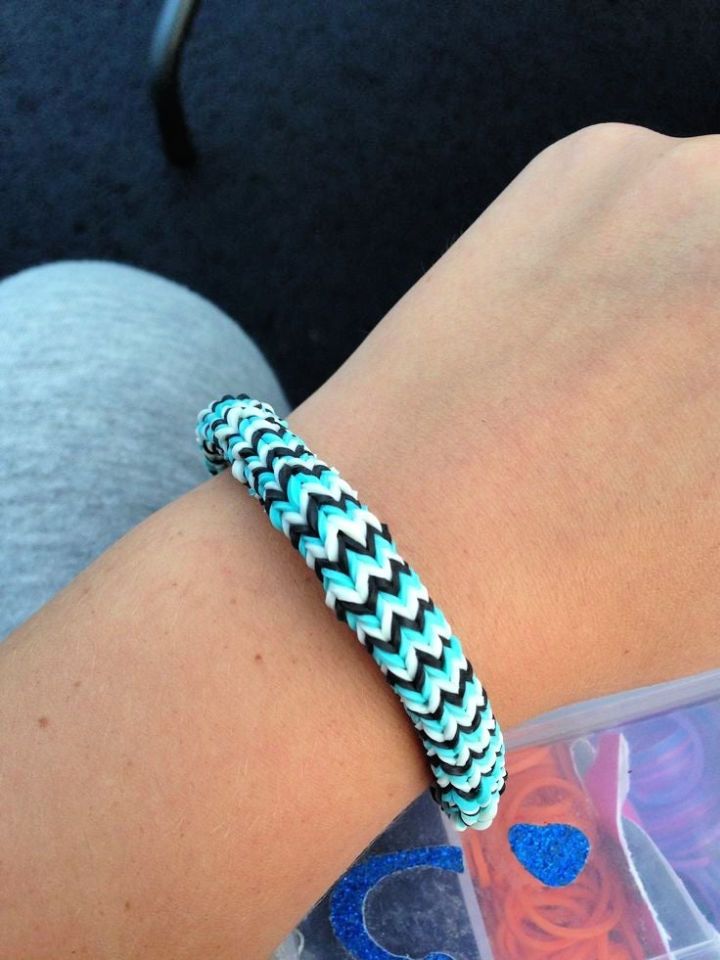
Craft a hexafish rainbow loom bracelet with this comprehensive tutorial! All you need is an array of supplies, such as a loom, hook, and ample rubber bands. Although it takes 6 pins to make the bracelet, any loom will suffice – including the cray-z-loom. Spend time on this project for the best results; it necessitates patience and accuracy for perfect execution. Follow these steps closely, and you can make a showstopping accessory quickly! instructables
2. Easy DIY Loom Bracelet for Beginners
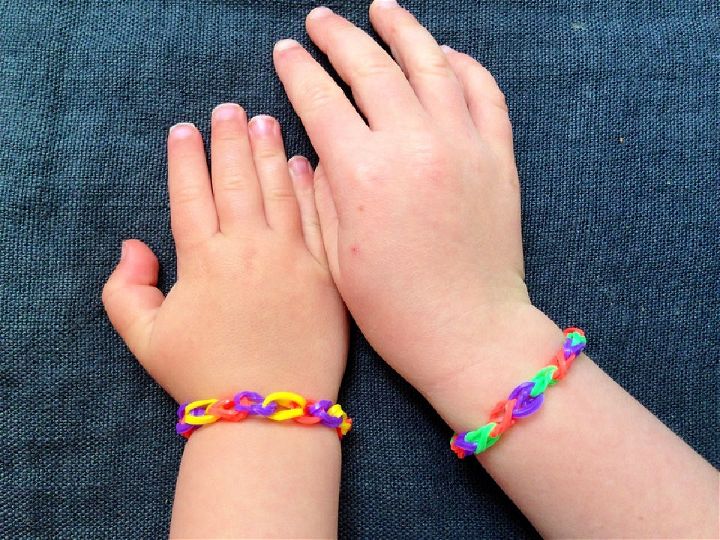
Marvelous! Learn the tricks of the trade with this easy-to-follow loom bracelet tutorial. Perfect for kids ages 5 to 10 and up, all you need is a loom, rubber bands, and s-shaped closures to make an eye-catching elastic band bracelet in just 20 minutes. With only basic craft supplies, you can craft something truly special that will impress your friends and family. Try out this straightforward guide today! mykidcraft
3. Candy Color Rubber Band Flower Bracelet
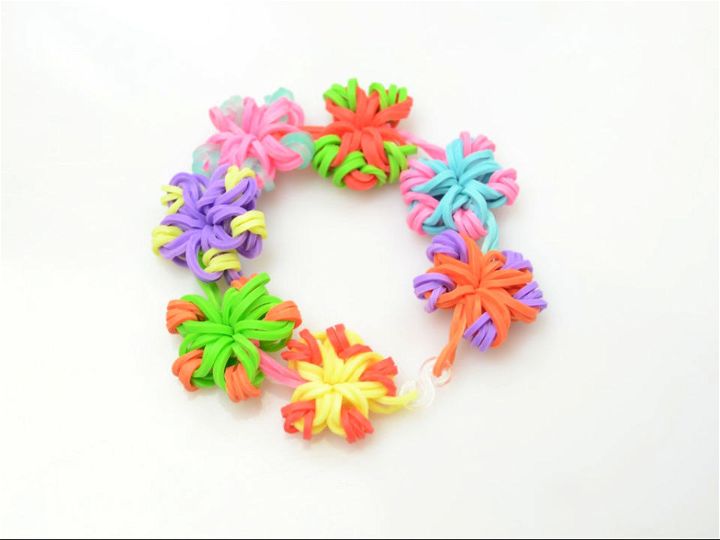
Craft your own colorful flower loom band bracelet with this simple tutorial! All you need is rubber bands in multiple colors, a rubber band hook, and an s clip. Learn how to make a stunning piece of jewelry perfect for wearing or gifting. Gather the necessary supplies and start creating; follow the step-by-step instructions to assemble the first few rubber bands. Who knows? You may be inspired to make more beautiful accessories with ease! instructables
4. DIY Fishtail Rubber Band Bracelet
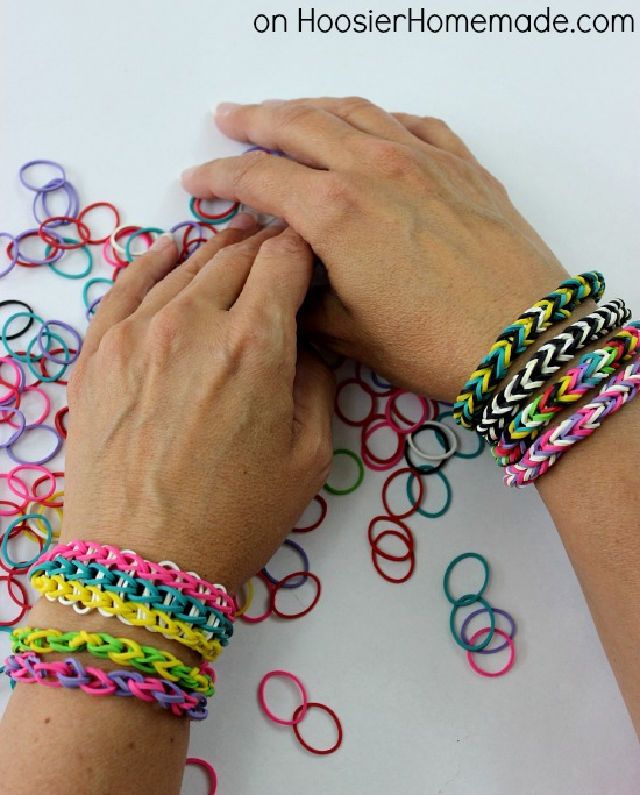
Envision your own unique rubber band bracelet design with this easy-to-follow guide! The fishtail pattern is the simplest craft and can be done with basic supplies found in a wonderloom kit for $12.88. Impress your family, friends, or yourself by learning how to make these colorful bracelets – working on your fine motor skills while having fun! Follow the step-by-step instructions, and you’ll soon be sporting a stylish new accessory made yourself! hoosierhomemade
5. Cool Rainbow Loom Starburst Bracelet
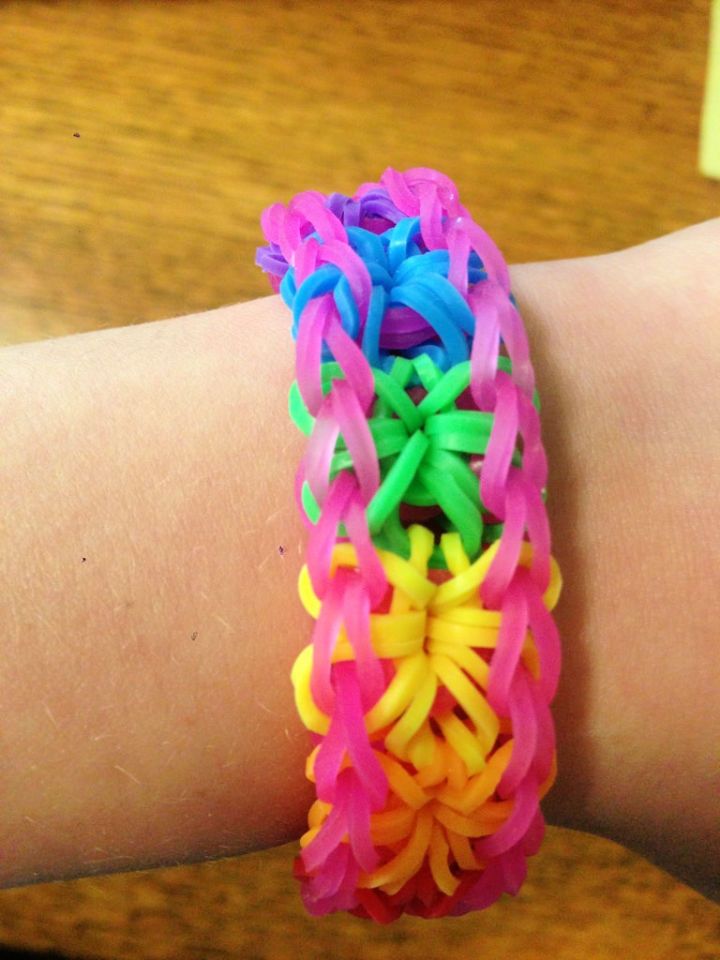
Amazing craftsmanship awaits with this comprehensive guide to makinga beautiful rainbow loom starburst bracelet. Gather the necessary components, including rubber bands of your choice, a loom, a hook, and your creativity! Featuring yellow as its starburst, a navy blue border, and alternating clear rubber bands, you can produce an original bracelet by following these simple instructions. Unleash your imagination and have a blast while making this beguiling accessory. instructables
6. How to Make Bracelets With Rubber Bands
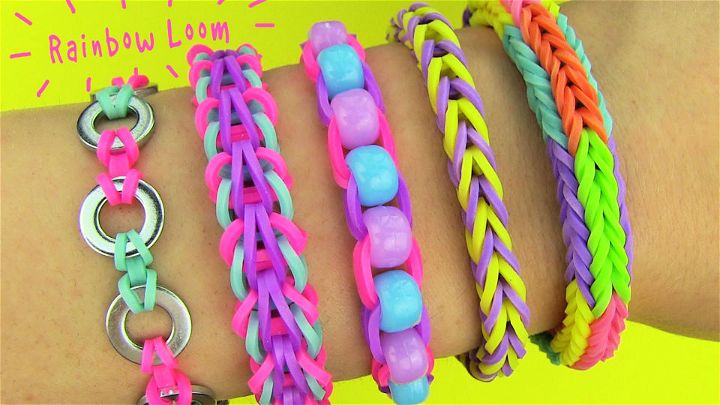
Make a crafty and stylish rubber band bracelet with this easy tutorial! All you need are colorful bands, your digits, and some perseverance. This DIY guide will teach you how to make the fishtail pattern, but customization is always an option. Whether for yourself or as a personalized gift for loved ones – this fabulous DIY project will surely bring smiles without breaking the bank! Get ready to have fun crafting with your kids at home and learn how to make beautiful rubber band bracelets together. learnhow
7. Make a Rainbow Loom Starburst Bracelet
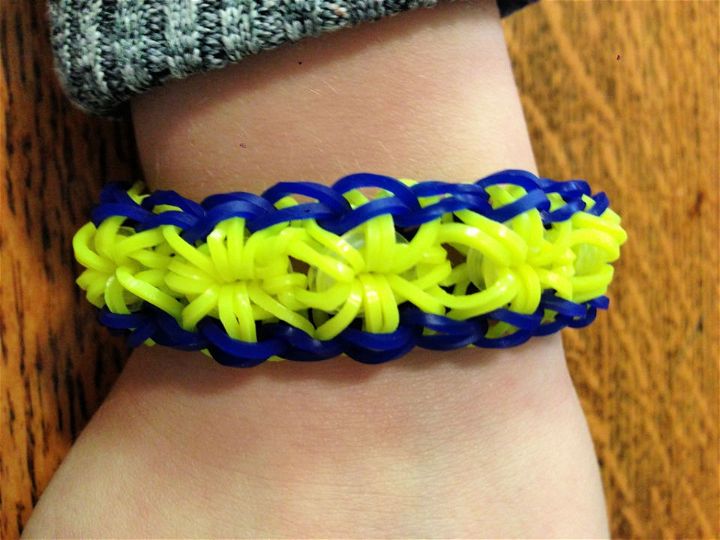
Dazzle friends and family with your own handmade rainbow loom starburst bracelet! You can make this vibrant accessory with just a few supplies like yellow, navy blue, and clear rubber bands, a loom, and a hook. Follow the easy step-by-step instructions to craft the colorful border, alternating bands, and striking starburst pattern. Unleash your creativity as you make a unique bracelet that is stylish and fun to wear or give as an unforgettable gift. Make memories now; gather the necessary materials for this simple DIY project today! instructables
8. Making a Rubber Band Bracelet With Loom Bands
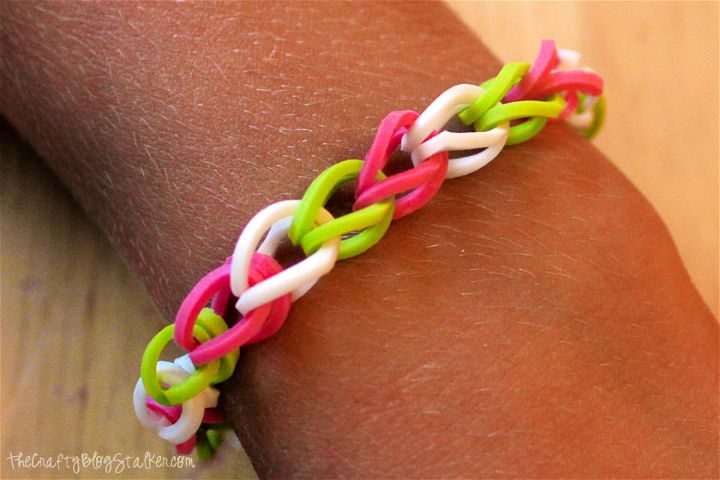
Unlock your crafty potential with this easy DIY guide to makingbeautiful rubber band bracelets! With a package of colorful loom bands and your fingers, you can make personalized gifts for friends and family – no loom required. The step-by-step instructions will help get you started in the right direction while C-clips finish off the look. Perfect for crafting with kids or making special mementos, start learning to make these fun accessories today! thecraftyblogs
9. DIY Fishtail Rubber Band Bracelet
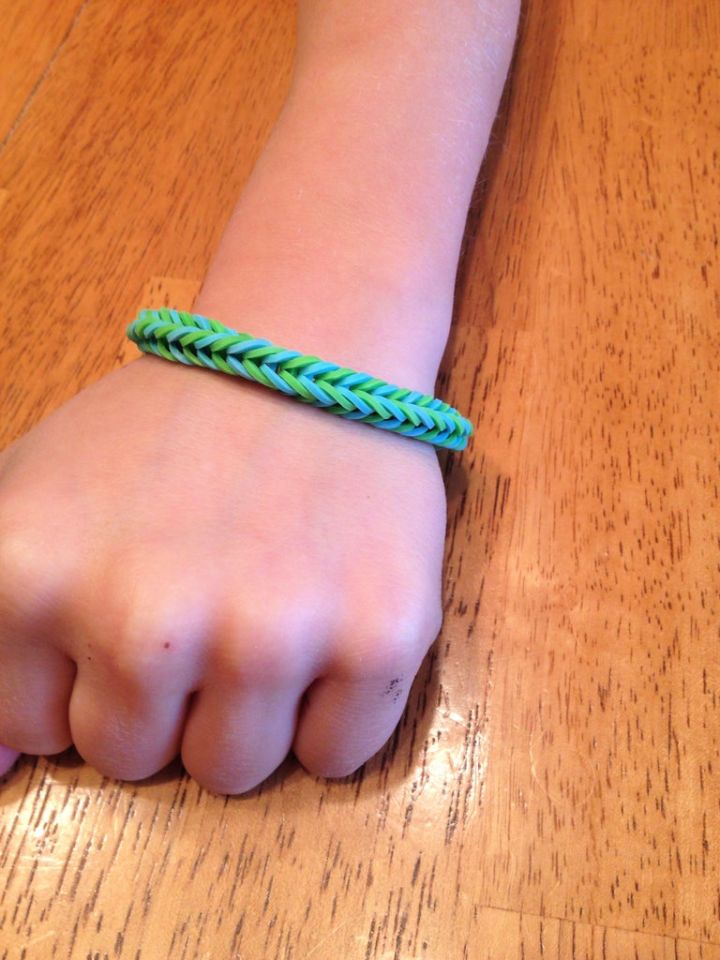
Glamorize your wardrobe with this easy-to-follow guide on how to make a fishtail rubber band bracelet! You only need a rainbow loom kit, rubber bands, a rainbow loom hook, and a c or s clip. You can make an exquisitely designed piece that will turn heads with just these few materials. Follow the steps carefully and get ready to master the intricate fishtail pattern – resulting in a beautiful bracelet perfect for any occasion. Get creative with colors and styles – unleash your inner fashionista today! instructables
10. Double Cross Single Rubber Band Bracelet
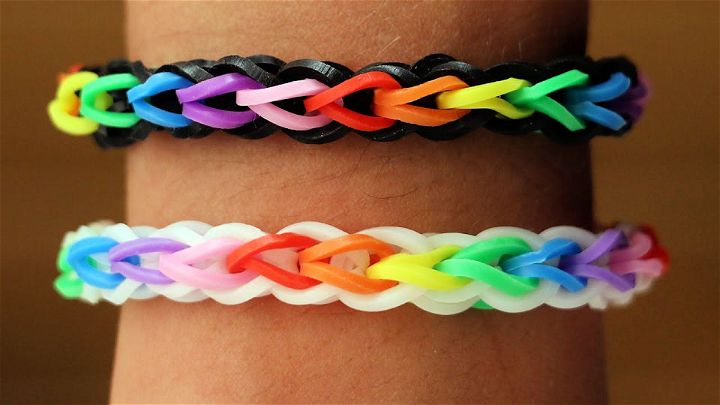
Whip up a stylish and vibrant double cross single bracelet with ease using this comprehensive DIY tutorial! You only need 21 rainbow-colored rubber bands (3 of each hue: red, orange, yellow, green, blue, purple, and pink) plus 23 black bands. Follow along with the step-by-step video guide for an easy yet eye-catching jewelry piece suitable for both kids and adults alike. Unleash your creative side today by making this beautiful rainbow loom bracelet!
11. DIY Criss Cross Quadfish Rubber Band Bracelet
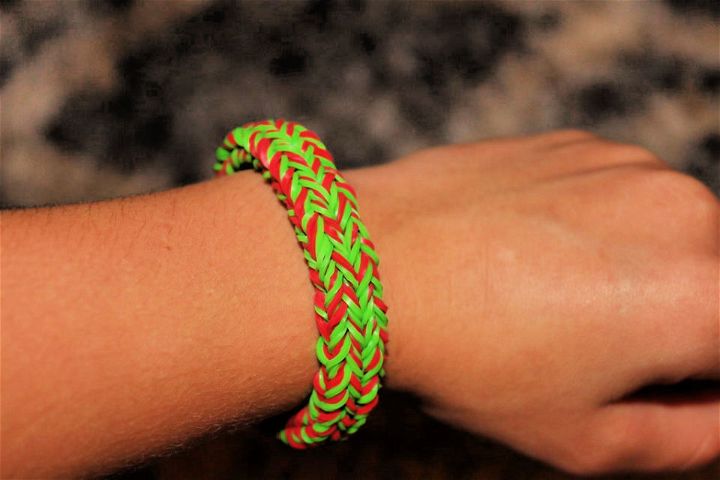
Make your unique criss cross quadfish rubber band bracelet with this simple and easy tutorial! Learn the steps from veronica and make a beautiful half-inch thick bracelet using green & red rubber bands, a hook, a c or s clip, and rainbow loom or 2 forks. Make something special today with just a few materials, and follow the instructions to make an amazing piece of jewelry. Pick up your supplies now, and gather around friends & family to start crafting your perfect personalized accessory that all will admire! instructables
12. Easy Rainbow Loom Bracelets Design
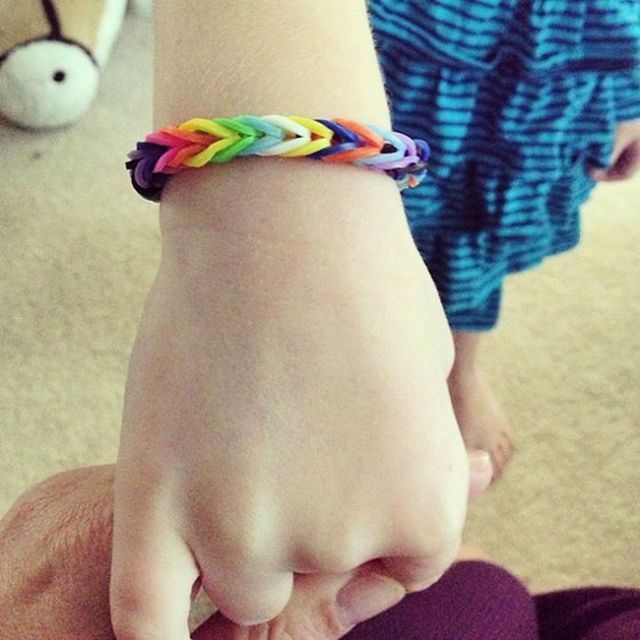
Voguish rubber band bracelets can be crafted without a rainbow loom! All you require are some elastic bands, a hook, and your digits. This effortless “fishtail” technique is ideal for kids and produces an even better-looking bracelet. With these bangles being a fashionable trend, they only cost $1.99 for the entire pack at craft stores. Start finger-knitting immediately with this simple guide and flaunt your new accessory to all your friends. pixiepurls
13. DIY Beaded Rubber Band Friendship Bracelet
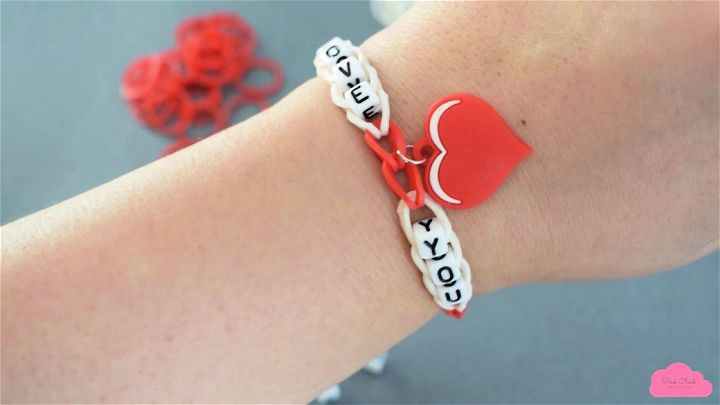
Surprise your loved one with a handmade beaded bracelet just in time for Valentine’s day! This easy-to-follow tutorial only requires minimal materials – lettered beads, vibrant rubber bands, and your own two hands. Add charm and sentimentality to the craft by adding a heart-shaped pendant. Share the love this holiday season by making an “I love you” bracelet for yourself or someone special. Gather up your supplies now and begin crafting!
14. Make a Rubber Band Ring Bracelet
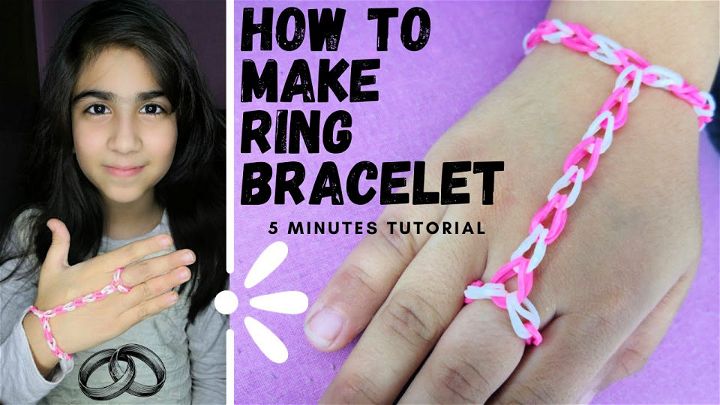
Enchanting your wrists with a customized custom loom band ring bracelet is now easier! This straightforward video tutorial teaches you how to make a fashionable accessory perfect for any outfit. This DIY project requires just a loom band kit and some basic crafting supplies – no experience necessary! Follow step-by-step instructions to make your unique bracelet design in no time. This fun and simple tutorial prepares you to show off your stylish creation and turn heads.
15. How to Make Rubber Band Bracelet
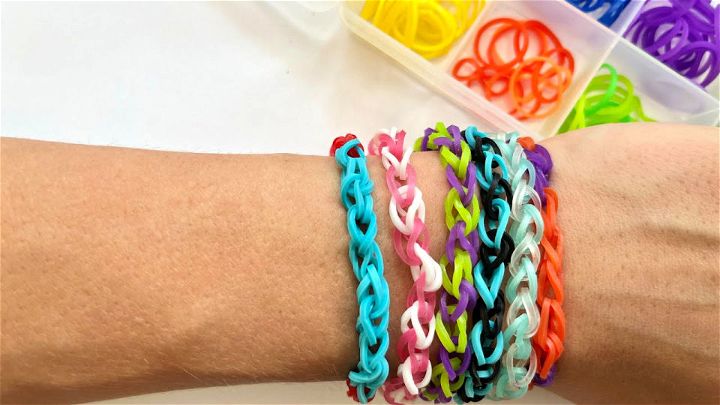
Learn to make rubber band bracelets easily with just two fingers and colorful rubber bands! Perfect for kids aged 5-6, this activity is a great way to entertain friends or pass the time during road trips. All you need is a c clip to close the bracelet – get started with an all-inclusive rubber band bracelet-making kit today and make bespoke bracelets, anklets, or necklaces in no time. Unlock your creativity and design unique accessories now!
16. Rainbow Loom Bracelet With Your Fingers
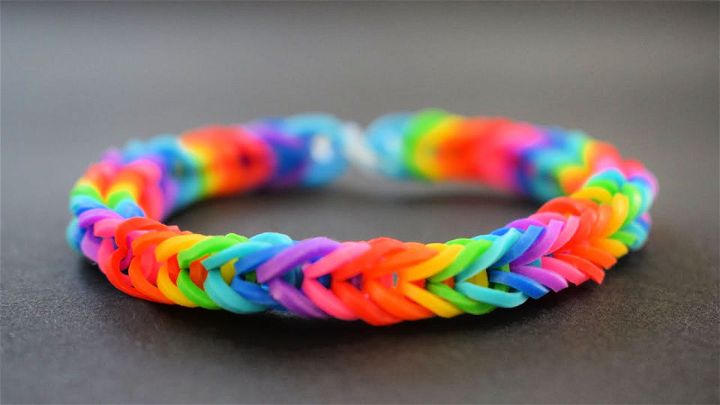
Get ready to boost your summer style; learn how to craft a lovely fishtail rainbow loom bracelet with this easy tutorial! All you need is loom rubber bands available separately or as an 11000 pieces premium-quality set including charms, beads, and s clips. If you want to avoid making the s-clip yourself, find a package with everything included. Get creative and make your chic bracelets in any color combination that tickles your fancy –these can be worn as classic bracelets or stylish hairbands!
17. How to Make a Colorful Bracelet With Rubber Bands
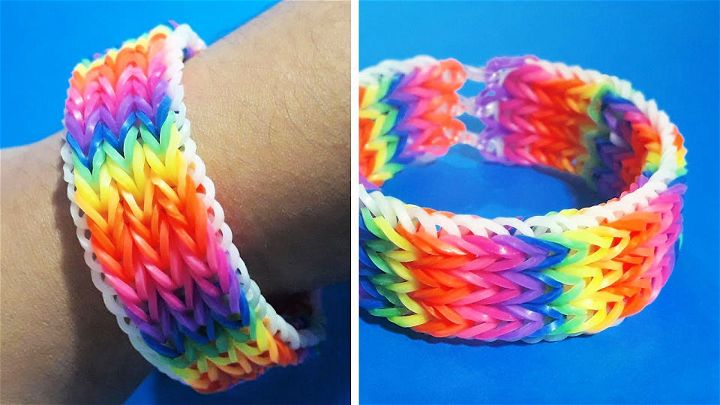
Discover the art of making gorgeous, multicolored loom rubber band bracelets with this straightforward tutorial! Whether you’re a novice or a seasoned crafter, this easy guide will provide step-by-step instructions to make your unique bracelet. You only need colorful rubber bands and your creative hands – no prior experience is necessary. Express yourself with any color combination, and craft a unique accessory today. Follow along with this helpful tutorial and start designing your very own custom loom bracelet now!
18. DIY Rubber Band Bracelet With Fingers
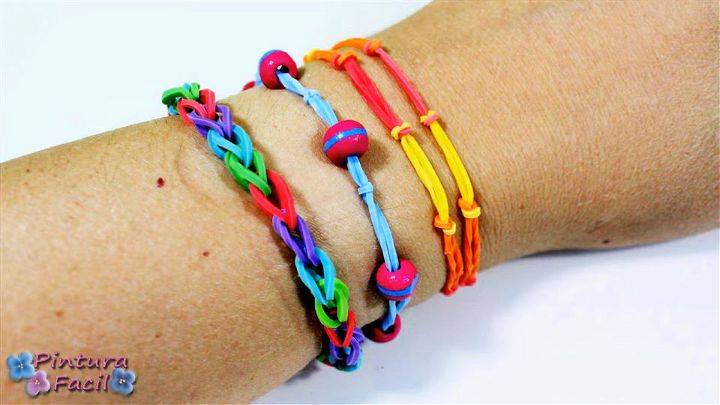
Awe-inspiring rubber band bracelets can now be made right at home with the help of this incredible DIY tutorial! No loom is required; this “rainbow loom Mathie” technique is perfect for crafting enthusiasts of all ages and skill levels. Gather some colorful rubber bands and your fingers – that’s it! Make a variety of vibrant designs by mixing colors and weaving patterns. Unlock endless possibilities to make personalized pieces with just your hands. Learn how to knit stunning rubber band bracelets without leaving the house – watch now!
19. Rubber Band Bracelets With a Clothing Pin in 3 Minutes
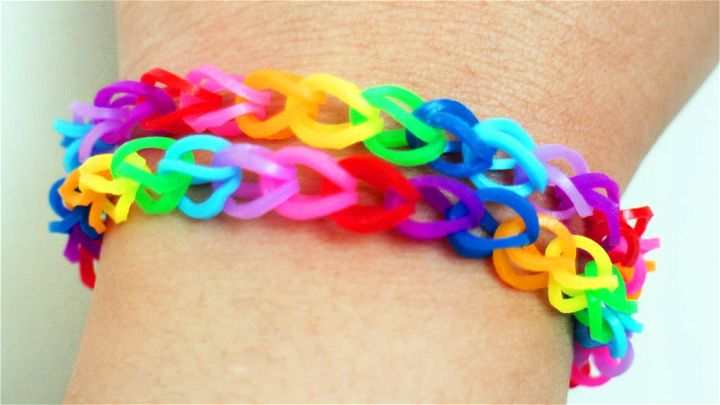
Willing to show your creative side? With this video tutorial, you can learn to make rubber band bracelets in just 3 minutes using a clothespin! Perfect for beginners and all ages, you’ll need the materials of rubber bands, a clothespin, and your hands! This quick and easy craft is great for any occasion; get creative and make bracelets in different colors and patterns. Follow along to start crafting your rubber band bracelets today – only with supplies you likely already have at home!
20. Rubber Band Bracelets Without Using Loom Pattern
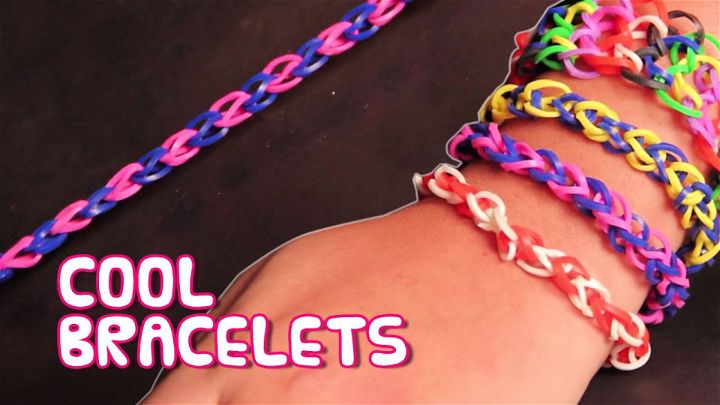
Make custom rubber band bracelets in just 5 minutes without needing a loom! This tutorial will show beginners how to craft beautiful accessories using only their hands and colorful bands. With simple steps, you can make mix-and-match designs that are uniquely yours. This fun activity is perfect for those who love DIY projects and want to try something new. Get creative today – start making rubber band bracelets without a loom! youtube
21. Halloween Fishtail Rubber Band Friendship Loom Bracelet With Pencils
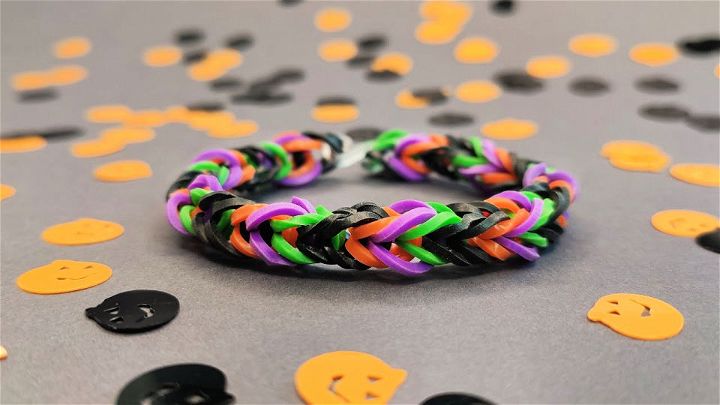
Get creative with this DIY tutorial and make your halloween fishtail rubber band friendship loom bracelet with pencils! Perfect for those intimidated by bracelet-making without a loom, this tutorial is easy and fun. Inject vibrant orange, purple, green, and black colors for the perfect holiday look. With this step-by-step guide, you’ll be ready to craft beautiful bracelets quickly. So watch the video to learn how to make personalized bracelets that’ll wow friends and family alike!
22. Easy DIY Rubber Band Bracelet Without Loom
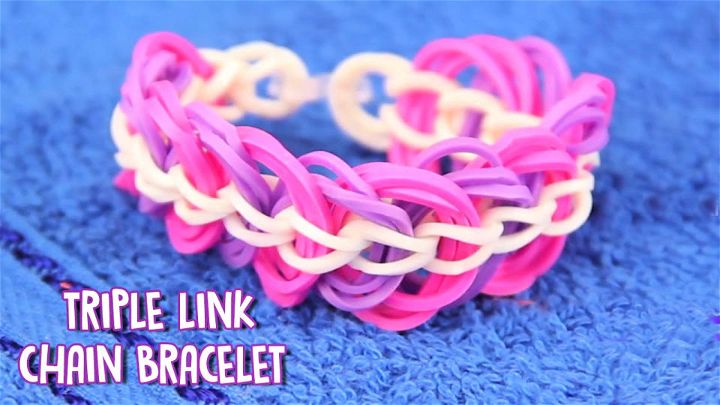
Behold! Learn how to craft an amazing and colorful rubber band bracelet with this super easy DIY triple-link chain bracelet tutorial. Without the need for a loom, you can make your favorite rubber band bracelet in less than 5 minutes utilizing only links, hooks, and the bands themselves.
Just follow the simple steps, which involve looping bands over your fingers, adding more, and pulling them tightly to make that perfect bracelet – ideal for beginners and kids looking for a fun activity. Don’t wait any longer – start making your beautiful triple-link bracelet today! youtube
23. Rainbow Coloured Double Cross Rubber Band Bracelet
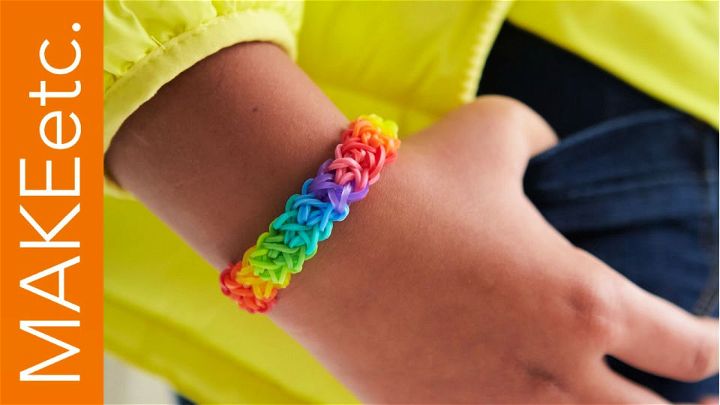
Make a captivating, colorful rubber band bracelet with this easy-to-follow tutorial. Following this video guide will give you the skills to make a stunning double cross rainbow-colored bracelet in no time! You only need a loom, clip, and favorite rainbow-colored rubber bands. Show off your new jewelry crafting skills and impress friends with your beautiful, handmade creation.
24. DIY Spiral Rubber Band Bracelet
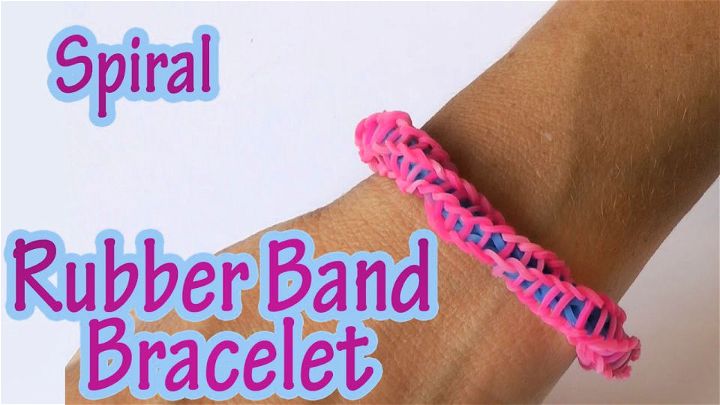
This impressively creative DIY craft tutorial teaches you how to make a spiral rubber band bracelet without a loom! This fun project can be accomplished in minutes using your hands and colorful rubber bands. Follow the step-by-step instructions in the video and start making your unique bracelets immediately. Unleash your creativity and show off these easy-to-assemble, stylish rubber band bracelets!
25. Rainbow Loom Multicolor Triple Single Bracelet
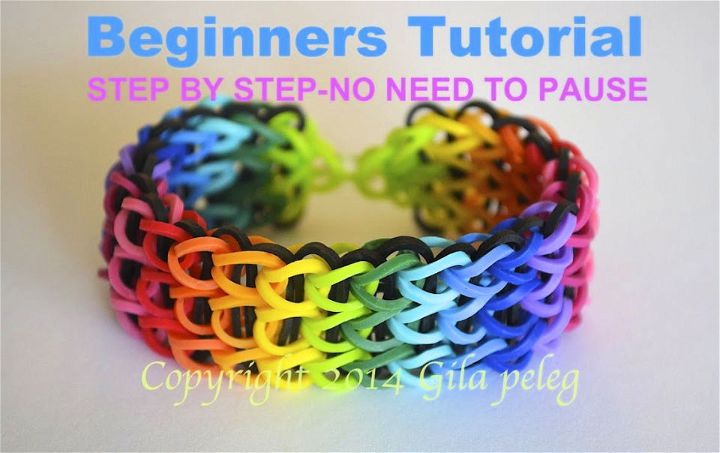
Put together a rainbow loom-multicolor triple single bracelet with this effortless step-by-step guide that will be great for beginners! This dazzling design requires two looms and an array of enticing rubber bands, including neon green, yellow, neon orange, orange, red, pink, fuchsia, purple, navy blue, ocean blue turquoise dark green, and glow-in-the-dark. What if you need two looms? No worries – use an extension or collaborate with a friend who has one.
Conclusion:
Rubber band bracelets are fun, easy, and inexpensive to make. You can make a variety of designs and patterns using different colors, shapes, and sizes of rubber bands. Whether you use a loom, a crochet hook, a pair of pencils, or just your fingers, you can enjoy making and wearing these colorful accessories. You can also add beads, charms, chains, or other embellishments to make your bracelets more unique and stylish. Rubber band bracelets are great for expressing your personality, showing your friendship, or giving as gifts to your loved ones. If you want to learn how to make rubber band bracelets, you can check out these 25 free rubber band bracelet patterns. Have fun and be creative with rubber band bracelets!

