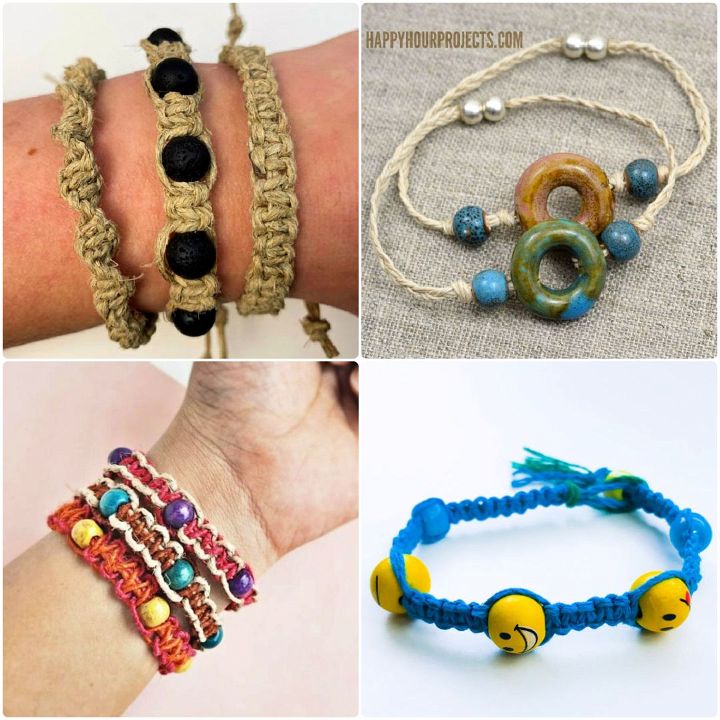
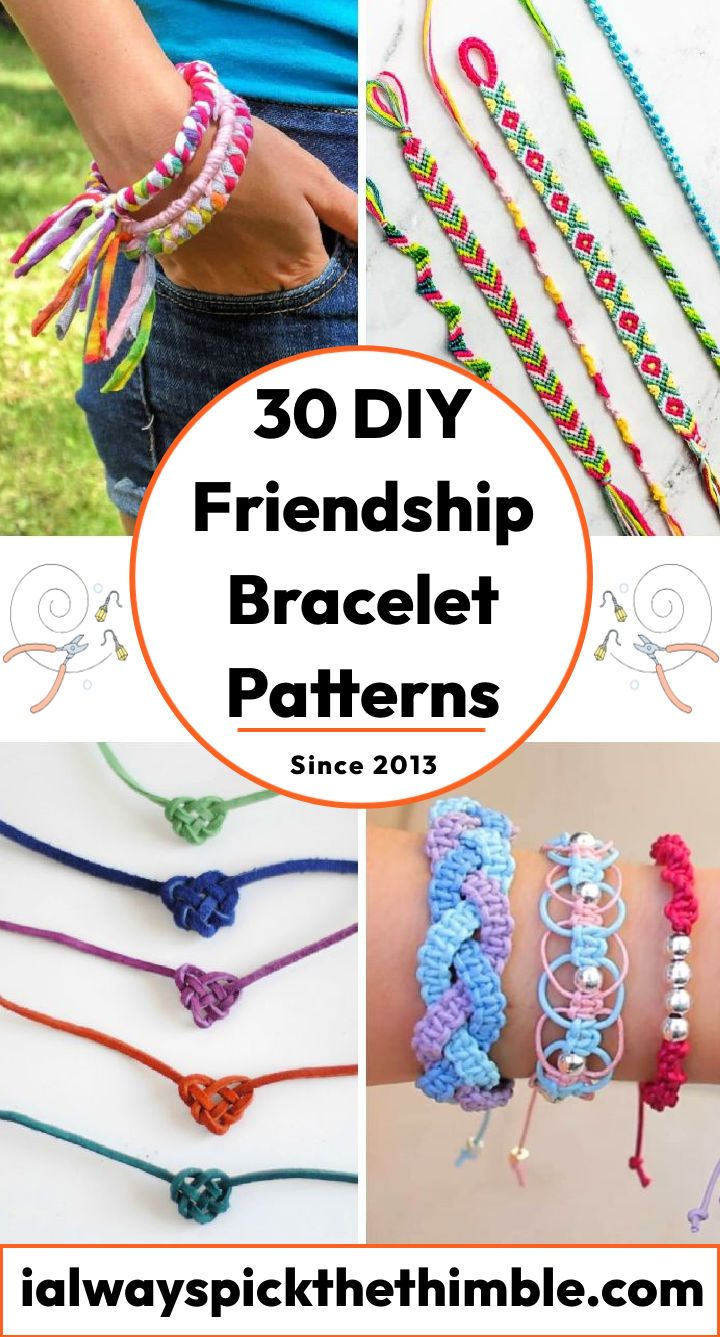
Learn how to make friendship bracelets step by step with these 30 cool and easy friendship bracelet patterns for everyone! These free friendship bracelet patterns show you how to make unique, handmade bracelets from materials you can find at home. With step-by-step instructions and visual guides, you can make beautiful friendship bracelets in no time, even if you are new to this hobby.
The bracelet ideas offer a wide range of designs, from basic string bracelet patterns to the more artistic braided friendship bracelets. The collection includes the classic zig-zag and chevron friendship bracelet styles, as well as more innovative ideas like bracelets made from fabric leftovers or recycled t-shirts. For a personal touch, there are also patterns for friendship bracelets with names, letters, and numbers.
By following these easy friendship bracelet patterns, you can make lovely and meaningful gifts for your friends, family, or yourself! These handmade bracelets are not only a symbol of love and friendship, but also a proof of your creative talents. Each bracelet, unique in its design and color, brings a feeling of nostalgia and charm.
So, get your materials ready, choose a pattern, and learn how to make friendship bracelets today! With these 30 easy friendship bracelet patterns, you can surely find the perfect pattern that suits your style and skill level. Start this fun DIY journey and make amazing pieces of friendship bracelets with sentimental value.
What are friendship bracelets and why are they popular?
Friendship bracelets are handmade bracelets that are usually given as a symbol of friendship, love, or loyalty. They are made by tying knots with colorful threads, beads, or other materials, and can have various patterns and designs. Friendship bracelets are popular because they are fun, easy, and inexpensive to make, and you can customize them to suit your personal style and preferences. They also show that you care about someone and appreciate their friendship.
How to choose the right materials and tools for your friendship bracelet project
To make a friendship bracelet, you will need some basic materials and tools, such as:
- Embroidery thread. This is the most common material for making friendship bracelets, as it comes in a wide range of colors and is durable and smooth. You can also use yarn, leather cord, fabric scraps, or any other type of thread you like.
- Beads. These are optional, but they can add some sparkle and texture to your bracelet. You can use any kind of beads you like, such as glass, plastic, metal, or wood. Just make sure they have holes that are big enough for your thread to pass through.
- Clasps. These are also optional, but they can make it easier to put on and take off your bracelet. You can use any kind of clasp you like, such as lobster claw, toggle, or magnetic. Alternatively, you can make a loop and knot closure with your thread.
- Scissors. You will need a pair of sharp scissors to cut your thread and trim the excess ends.
- Tape measure. You will need this to measure the length of your thread and your wrist.
- Tape or safety pin. You will need this to secure your bracelet to a surface while you work on it.
How to master the basic knots and techniques for making friendship bracelets
There are four main types of knots that you will need to know to make friendship bracelets: forward, backward, forward-backward, and backward-forward. These knots are used to create different patterns and effects by changing the order and direction of the threads. Here is how to make each knot:
- Forward knot. Take the first thread (the one on the left) and cross it over the second thread (the one on the right), forming a 4 shape. Bring the first thread behind the second thread and pull it through the loop. Pull the first thread up until you feel resistance. Repeat this step with the same threads to complete the knot.
- Backward knot. Take the first thread (the one on the left) and cross it under the second thread (the one on the right), forming a P shape. Bring the first thread over the second thread and pull it through the loop. Pull the first thread down until you feel resistance. Repeat this step with the same threads to complete the knot.
- Forward-backward knot. Make a forward knot with the first and second threads, then make a backward knot with the same threads.
- Backward-forward knot. Make a backward knot with the first and second threads, then make a forward knot with the same threads.
You can combine these knots in different ways to create different patterns, such as stripes, chevrons, zig-zags, diamonds, or letters.
How to follow a friendship bracelet pattern and adjust it to your preferences
A friendship bracelet pattern is a diagram that shows how to arrange the threads and what knots to make with them. It usually has numbers or letters that represent each thread color, and symbols that represent each knot type. For example:
This pattern shows how to make a simple striped bracelet with four colors: red ®, yellow (Y), green (G), and blue (B). The arrows indicate forward knots (>) or backward knots (<). To follow this pattern, you would start by making two forward knots with R over Y, then two forward knots with R over G, then two forward knots with R over B. Then you would repeat this process with Y over G, Y over B, and Y over R. Then you would repeat this process with G over B, G over R, and G over Y. And so on until you reach the desired length.
You can adjust a friendship bracelet pattern to your preferences by changing the colors, width, length, or adding embellishments. For example, you can:
- Change the colors. You can use any colors you like for your bracelet, as long as you have enough thread of each color. You can also use more or less colors than the pattern suggests, or use different shades of the same color to create a gradient effect.
- Change the width. You can make your bracelet wider or narrower by adding or removing threads. The more threads you use, the wider the bracelet will be. Just make sure to adjust the pattern accordingly, and keep the threads in the same order.
- Change the length. You can make your bracelet longer or shorter by making more or less rows of knots. The length of your bracelet will depend on the size of your wrist and how loose or tight you want it to be. You can measure your wrist with a tape measure and add some extra length for the closure.
- Add embellishments. You can add some extra flair to your bracelet by adding beads, charms, tassels, or other accessories. You can either string them on your thread before you start knotting, or attach them after you finish your bracelet. Just make sure they match the style and size of your bracelet.
How to avoid common mistakes and fix problems when making friendship bracelets
Making friendship bracelets can be a fun and relaxing activity, but sometimes things can go wrong. Here are some common mistakes and problems that you might encounter, and how to fix them:
- Tangled threads. This can happen if you don’t keep your threads organized and separated while you work on them. To prevent this, you can use a clipboard, a cardboard loom, or a safety pin to secure your threads to a surface and keep them in order. You can also use bobbins, clips, or hair ties to wrap up the unused threads and keep them from getting tangled.
- Uneven knots. This can happen if you pull your threads too tight or too loose when you make your knots. To prevent this, you should pull your threads just until you feel resistance, and keep the tension consistent throughout your bracelet. You can also use your fingers to smooth out any bumps or gaps in your knots.
- Loose ends. This can happen if you don’t secure your threads properly when you start or finish your bracelet. To prevent this, you should tie a knot at the beginning and end of your bracelet, and leave some extra length for the closure. You can also use glue, clear nail polish, or fray check to seal the ends of your threads and prevent them from unraveling.
- Broken clasps. This can happen if you use clasps that are too weak or too heavy for your bracelet. To prevent this, you should choose clasps that are suitable for the type and size of your thread, and attach them securely with knots or crimps. You can also use loop and knot closures instead of clasps, as they are more durable and adjustable.
How to finish and secure your friendship bracelet
Once you have reached the desired length for your bracelet, you will need to finish and secure it so that you can wear it or give it away. There are different ways to do this, depending on what type of closure you want to use:
- Clasp closure. If you want to use a clasp for your bracelet, you will need to attach it to both ends of your bracelet with knots or crimps. First, divide your threads into two groups at each end of your bracelet, and tie a knot with each group close to the last row of knots. Then, trim the excess threads leaving about an inch (2.5 cm) of length. Next, attach a jump ring to each knot with a crimp bead or another knot. Finally, attach a clasp to one jump ring and another jump ring to the other end of your bracelet.
- Loop and knot closure. If you want to use a loop and knot closure for your bracelet, you will need to make a loop at one end of your bracelet and a knot at the other end that fits into the loop. First, divide your threads into two groups at one end of your bracelet, and tie a knot with one group close to the last row of knots. Then, braid the other group of threads until you have a loop that is big enough for the knot to pass through. Next, tie another knot at the end of the braid to secure it, and trim the excess threads. Finally, tie all the threads together at the other end of your bracelet with a big knot that fits into the loop.
How to care for and store your friendship bracelets
Friendship bracelets are meant to last for a long time, but they can get dirty or damaged over time if you don’t take good care of them. Here are some tips on how to care for and store your friendship bracelets:
- Wash them gently. If your bracelets get dirty or stained, you can wash them by hand with mild soap and warm water. Do not use bleach, harsh detergents, or hot water, as they can damage the threads or fade the colors. Rinse them well and squeeze out the excess water. Do not wring or twist them, as they can lose their shape or break.
- Dry them flat. To dry your bracelets, lay them flat on a towel or a drying rack. Do not hang them or put them in the dryer, as they can stretch or shrink. You can also use a hair dryer on a low setting to speed up the drying process, but be careful not to overheat them.
- Iron them carefully. If your bracelets get wrinkled or creased, you can iron them on a low setting with a thin cloth between the iron and the bracelet. Do not iron them directly, as they can melt or scorch. You can also use a steamer to smooth out the wrinkles, but be careful not to burn yourself or the bracelet.
- Store them neatly. To store your bracelets, you can either keep them on your wrist, or take them off and put them in a jewelry box, a ziplock bag, or a small pouch. Do not pile them up or toss them around, as they can get tangled or damaged. You can also use a bracelet holder, a display stand, or a wall hanger to organize and showcase your bracelets.
1. How to Make Friendship Bracelets
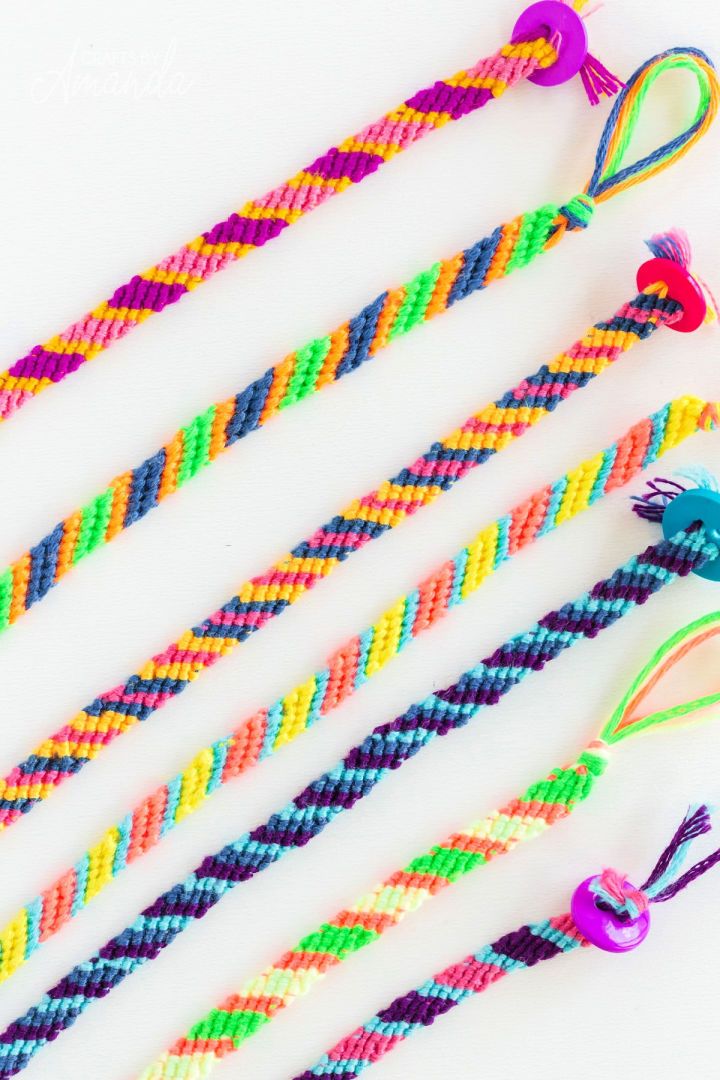
Show your friends how much you care by making them a DIY friendship bracelet! This fun activity is easy to do, even for beginners. Make it in their favorite colors and watch as they proudly beam at the candy stripe diagonal pattern crafted just for them.
All you need are embroidery floss, scissors, tape, a button and an extra floss (approx 12″). Make something special that will last long after the memory of gifting it has faded away – start crafting today! craftsbyamanda
2. Basic Friendship Bracelet Pattern
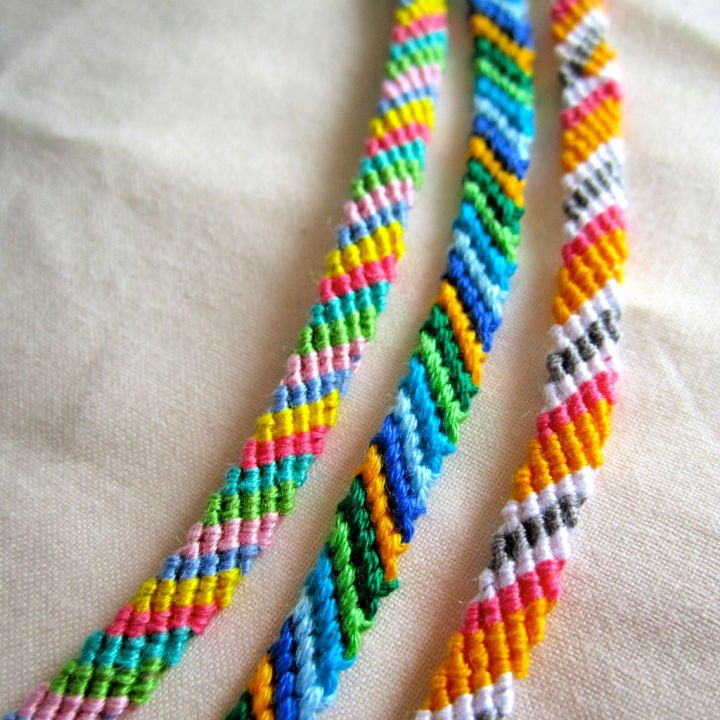
Make your beautiful friendship bracelets in less than an hour! With just some embroidery floss and basic skills, you can make a great craft you can take anywhere.
It’s perfect for those who have repeatedly failed to learn how to knit or crochet – make stunning accessories out of the comfort of your home with minimal effort! Whether a gift for friends or a fun way to pass the time, making friendship bracelets will surely put smiles on everyone’s faces. instructables
3. Make Your Own Friendship Bracelets
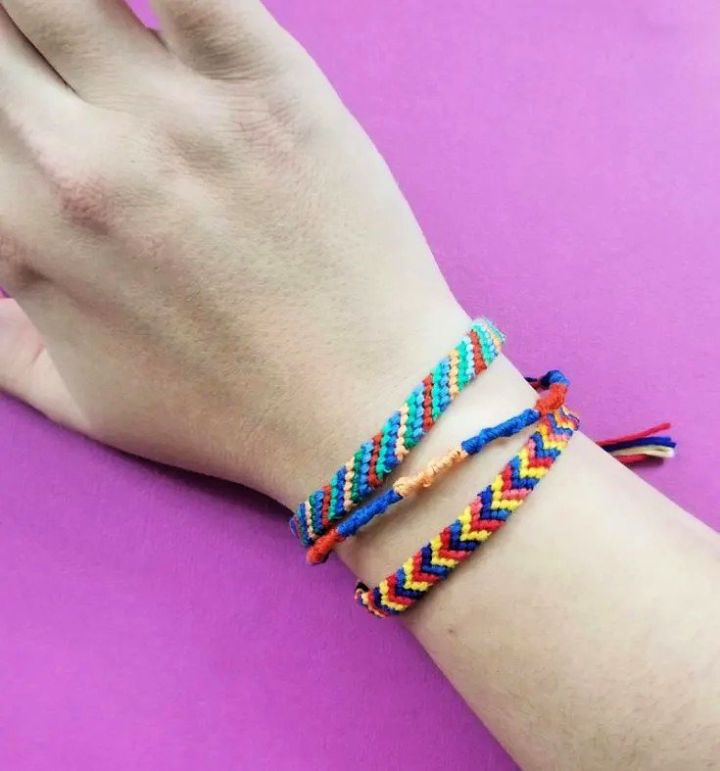
Make your unique style with friendship bracelets! The 3-dimensional designs are a sophisticated masterclass and will make any outfit stand out. Plus, making them is a truly relaxing experience that anyone can enjoy – you only need basic skills and techniques to get started.
With an endless array of colors, shapes, and sizes available, show off your creativity today with a beautiful handmade friendship bracelet. momsandcraft
4. Fun DIY Friendship Bracelets
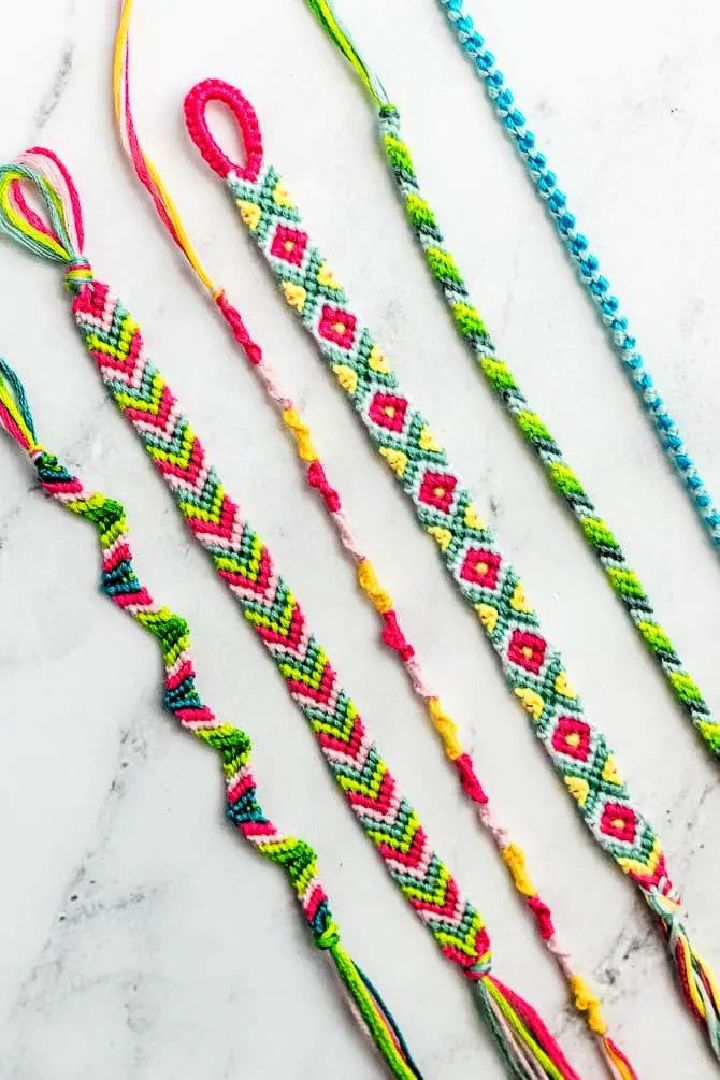
Bring back the nostalgia of summer camp with fun DIY friendship bracelets! Whether you loved making them as a kid or are just learning to make them, it’s an easy craft for all ages.
With just some embroidery floss or string and letter beads or charms, plus a clipboard, safety pin, or masking tape to help keep things secure, your friendship bracelets will be ready soon. Easy to learn and fun to make – not to mention easy to take with you anywhere – these classic summer camp crafts will bring colorful memories and lasting friendships wherever they go. sarahmaker
5. DIY Fabric Scrap Friendship Bracelet
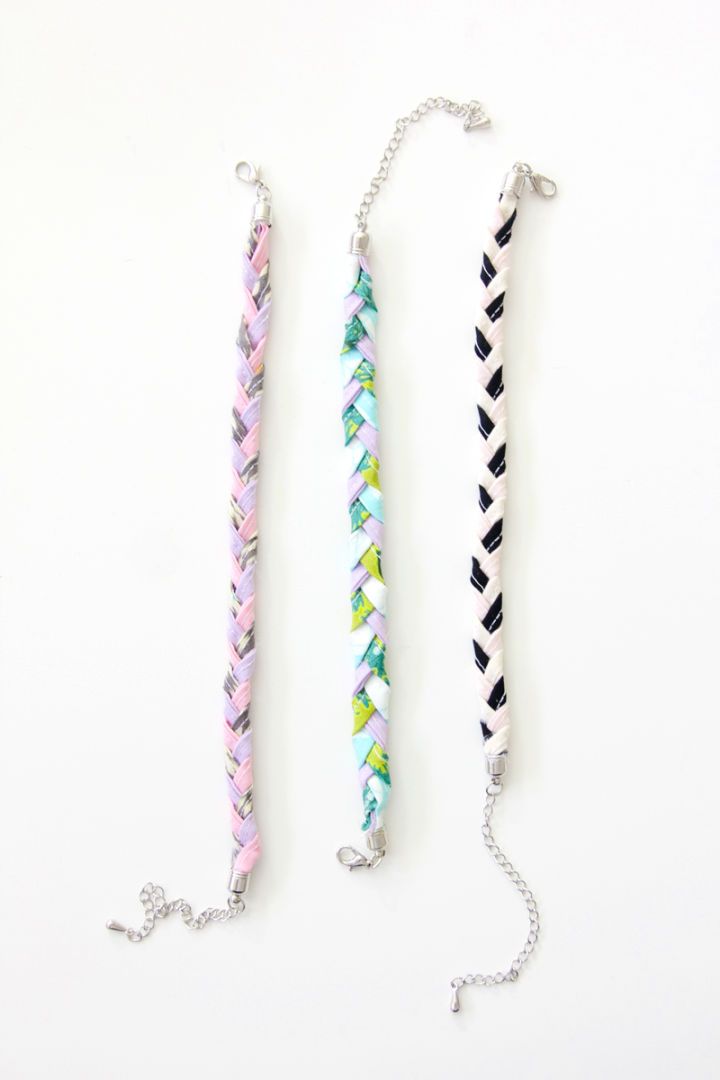
Make your holiday gifts special with a DIY fabric scrap friendship bracelet. These handmade bracelets are the perfect gift for friends, as they’re simple enough to involve your kids and an easy yet chic way to show your love. Craft these unique presents in no time – it’s an easy project that won’t break the bank either!
Get creative this season and give something meaningful; you’ll be sure to make lasting memories while making a one-of-a-kind present. Make sure to get some extra fabric scraps because this craft makes great stocking stuffers too! skiptomylou
6. Easy Braided Friendship Bracelets With Letter Beads
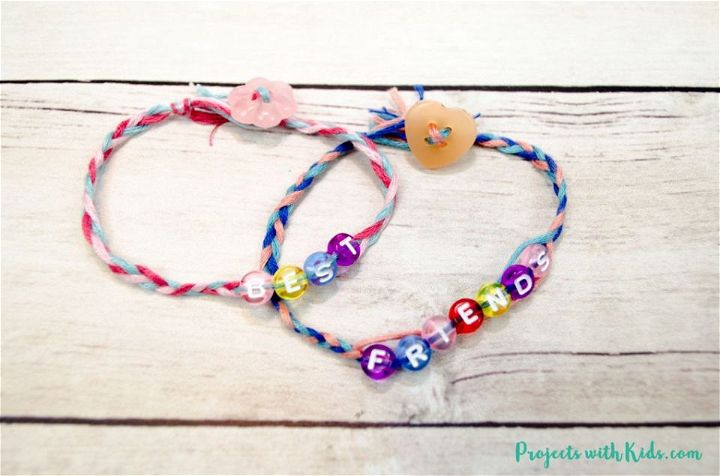
Something unique for your best friend this summer with this easy braided friendship bracelet with letter beads! These entertaining and simple bracelets are ideal for a playdate craft or part of a summer camp activity for the kids.
Required materials include embroidery thread, letter beads, buttons, scissors, and tape to secure the thread – it can’t be simpler! So get all of your supplies ready and start crafting these bracelets! projectswithkids
7. DIY Round Braid Leather Friendship Bracelets
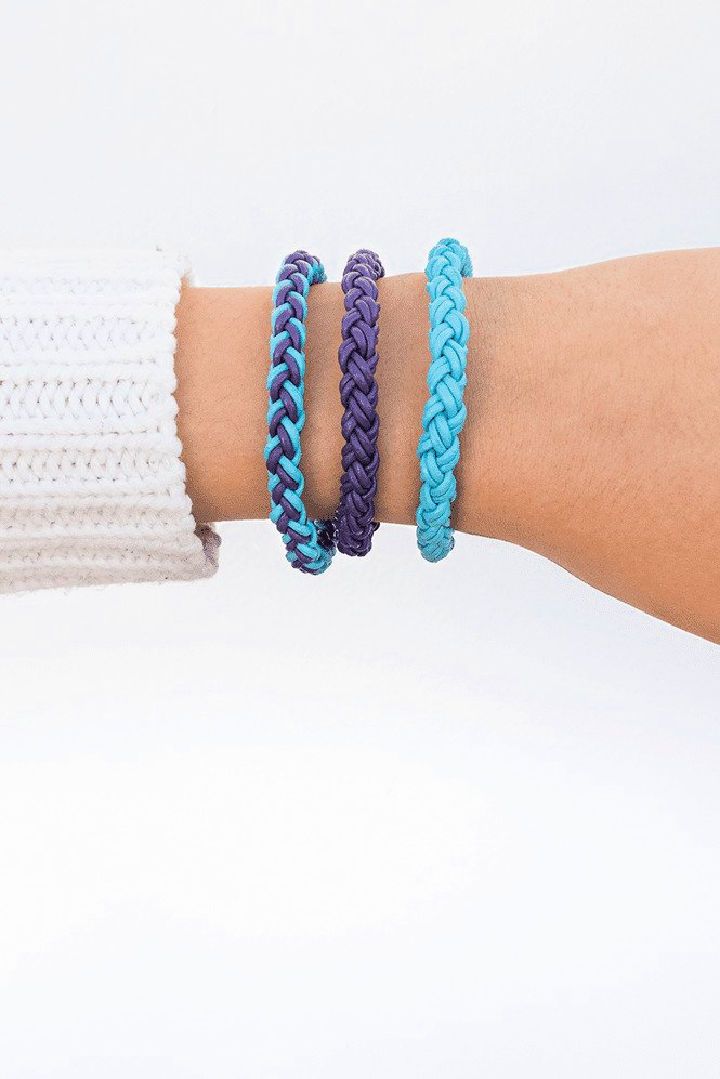
Craft the perfect gift with these DIY round braid leather friendship bracelets. With step-by-step instructions, making something quite right that your best friends will love and appreciate is easy.
This four-strand round braid style adds an extra touch of detail, making your unique bracelets look even more special. Perfect as an individual present or a group activity at parties, this is a great way to show you care! curlymade
8. How to Make Friendship Bracelets at Home
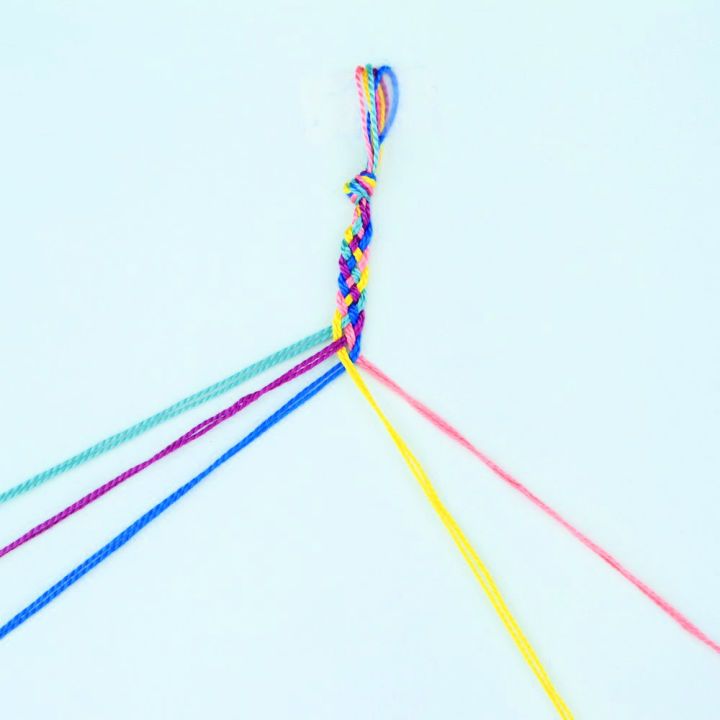
Show your BFF you care by making a cool and unique friendship bracelet! It’s the perfect summer accessory or a thoughtful gift to let someone know they’re special.
With easy steps that can be followed, making something beautiful that will look great on anyone’s wrist only takes a few minutes. Start expressing yourself with friendship bracelets today – your friends will love them! craftjam
9. Heart Knot Friendship Bracelet for Valentines
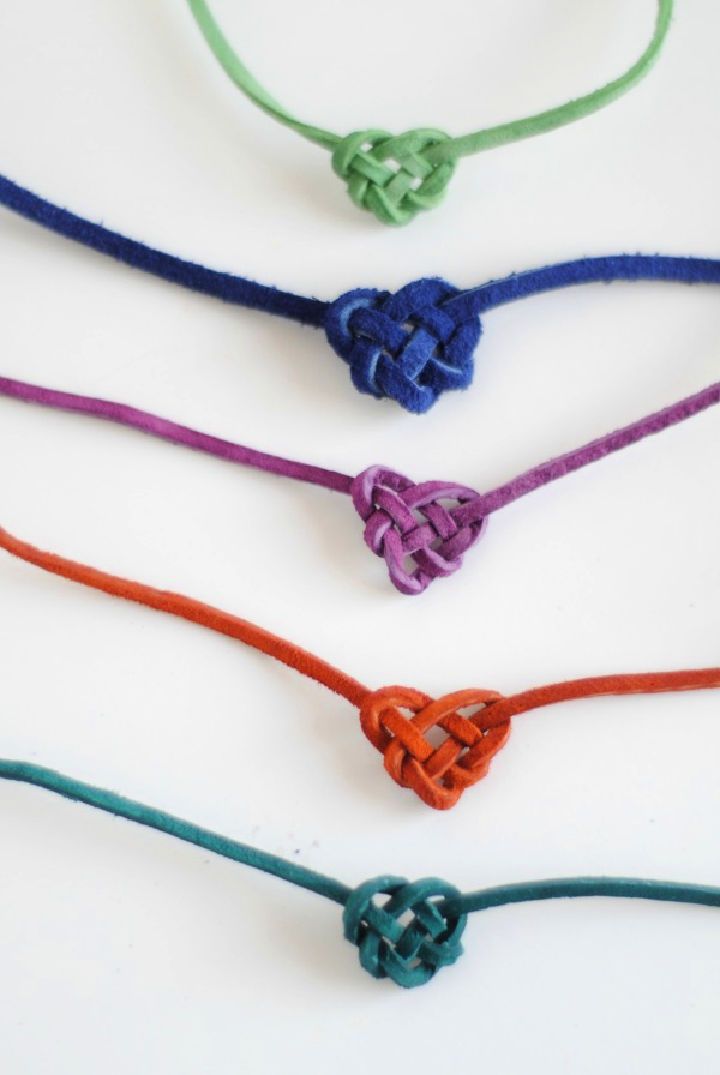
Give your special someone the perfect last-minute Valentine’s Day gift with this heart knot friendship bracelet. This handmade bracelet is made with delicate, durable cotton thread in a beautiful intertwining knot design that symbolizes friendship and love. Crafted by expert artisans, it features an adjustable clasp for a comfortable fit and easy wearability.
The vibrant colors of the threads made this bracelet truly eye-catching – sure to be an instant favorite! Show your recipient how much you care this Valentine’s Day with the heart knot friendship bracelet – they won’t be disappointed! hartandsew
10. Making a Crepe Paper Bracelet
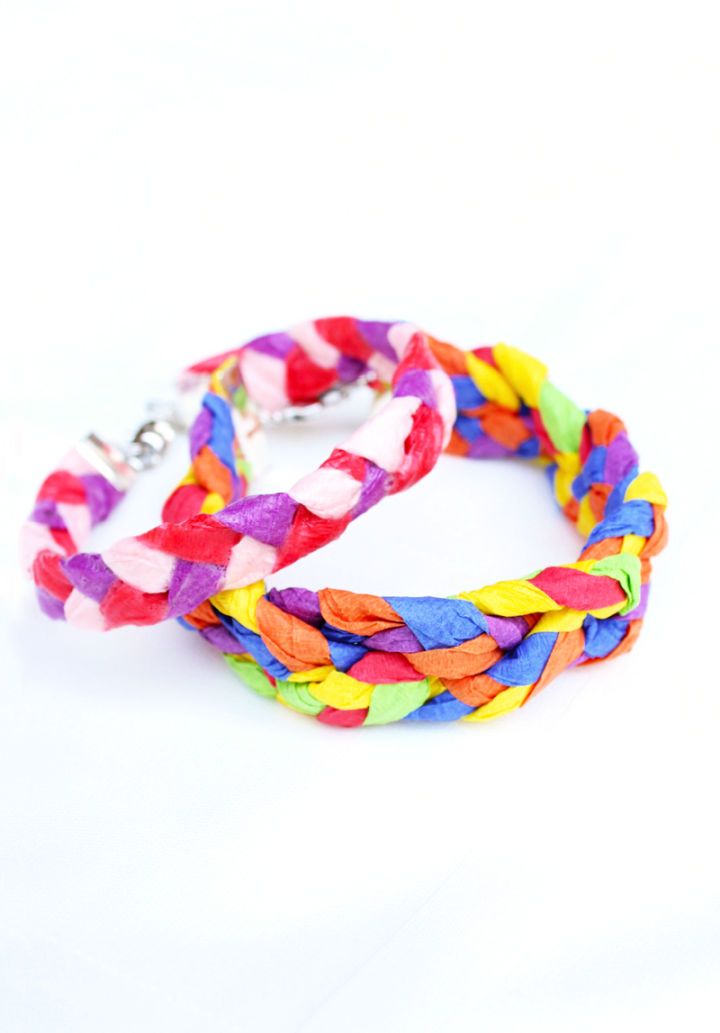
Something super special with this DIY crepe paper bracelet! It’s easy and inexpensive, so it’s a great craft for older kids. You only need crepe paper streamers, staples, tape, scissors and Mod Podge. This fun and unique jewelry project will add sparkle to any occasion.
With just a few steps, you can make a piece of art that’s one-of-a-kind! Cut the crepe paper into strips and then use the stapler to secure each strip before adding color or decoration with your choice of Mod Podge. Then attach clasps on either side and wear your stylish new bracelet proudly! babbledabbledo
11. DIY Beaded Tassel Friendship Bracelets
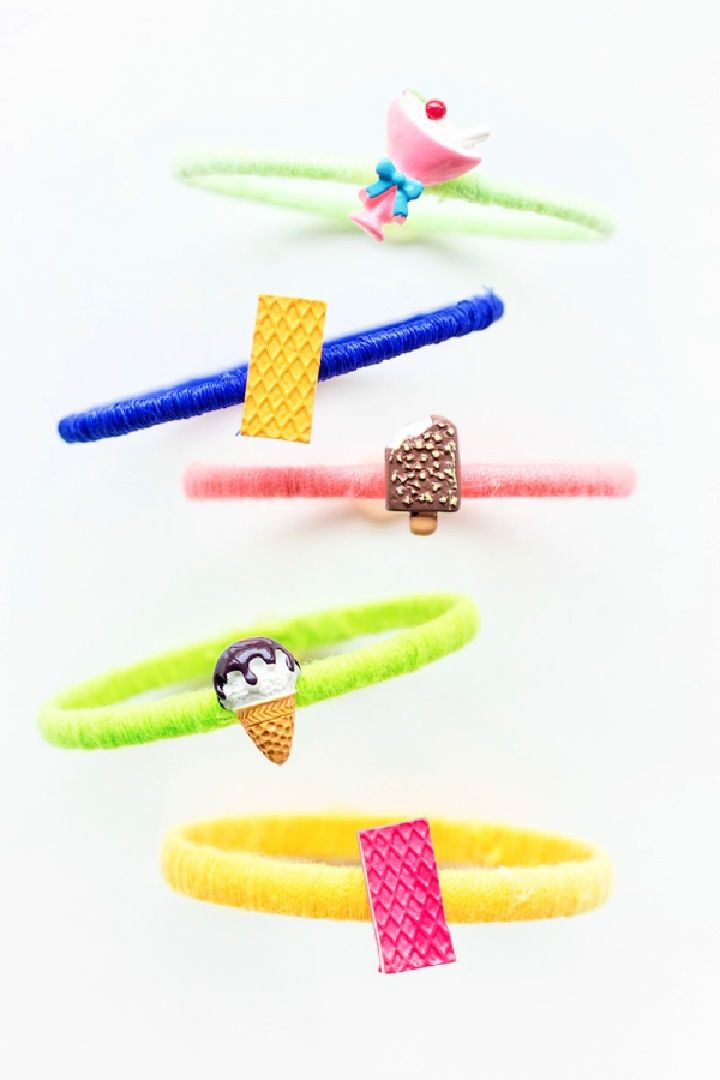
A beautiful and meaningful gift for your friends with DIY beaded tassel friendship bracelets. Perfect for any special occasion, such as birthdays, graduations or holidays, these fun handmade bracelets will bring a smile to the recipient’s face.
With simple supplies like beads, string and tassels, you can easily make something unique to show your friends how much they mean. This creative activity is fun too, so why not give beaded tassel friendship bracelets as a thoughtful present?! studiodiy
12. Washi Tape Wooden Friendship Bracelets
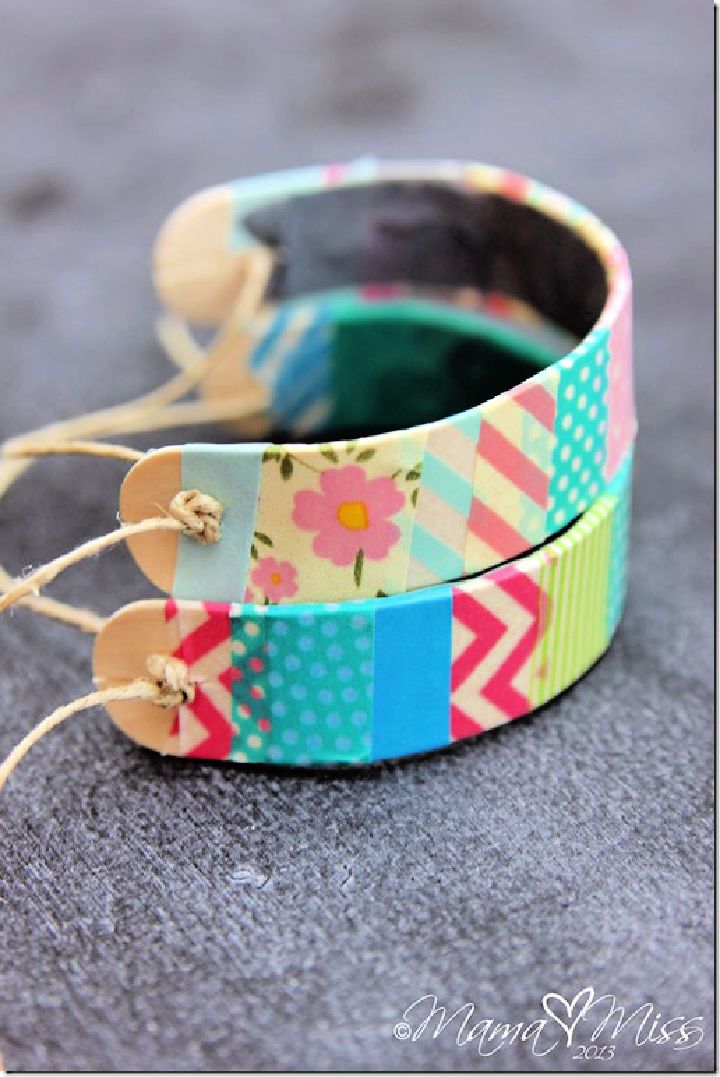
You and your little one can make a beautiful and vibrant accessory with washi tape wooden friendship bracelets in just a few days!
All you need is some water, a mug, popsicles or craft sticks, an awl or piercing tool, hemp beading cord #20, scissors and different colors of washi tape for the craft. Then you can have some quality time together as you make these DIY unique pieces to wear matching sets of accessories with pride! Have fun. mamamiss
13. How to Make a Heart Friendship Bracelet
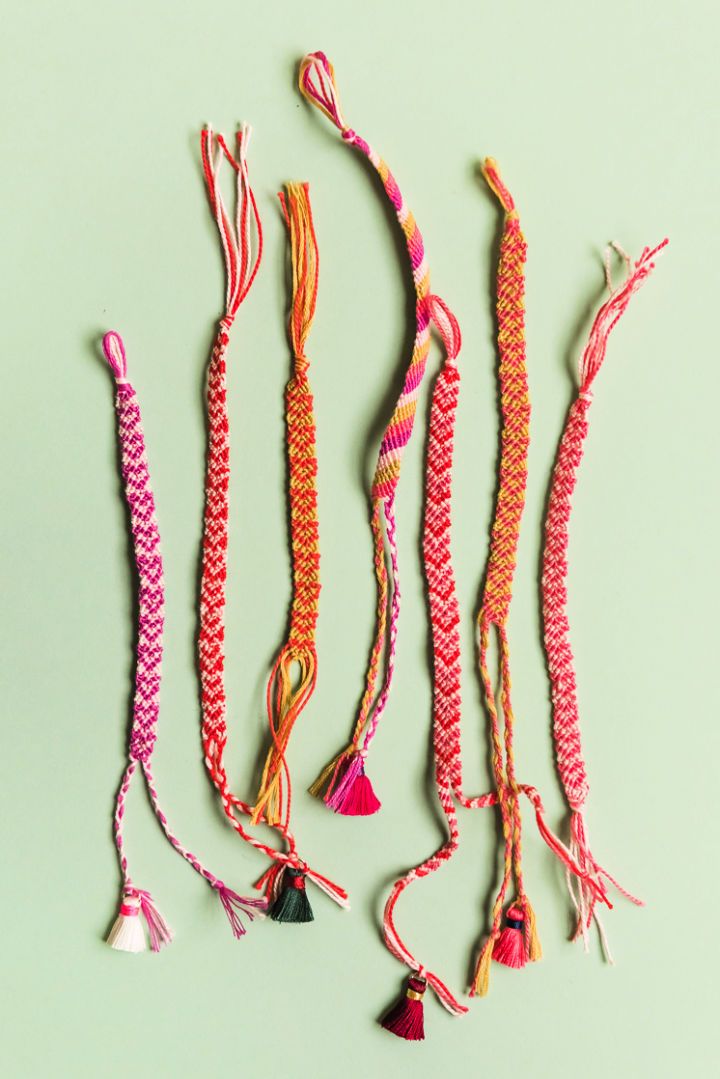
Show off your artistic side with an adorable heart friendship bracelet! This free printable card to-go with it is both easy to use and pretty cute DIY.
Though the craft may be tricky, you can conquer it in no time for a beautiful handmade piece of jewelry that will make all your friends swoon. Make this one-of-a-kind accessory today and show off your creativity! housebuilt
14. Fastest Friendship Bracelet Ever
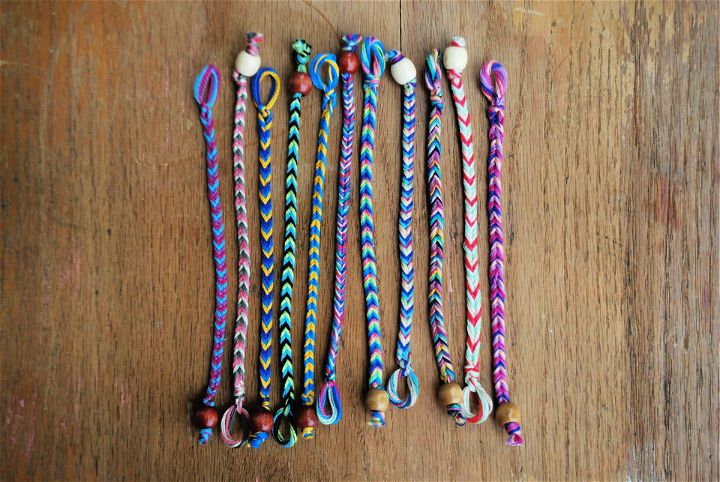
The fastest way to make friendship bracelets! This three-strand braid tutorial is quick and easy so that you can make one in every color combination. With the step-by-step guide, even a beginner can easily learn the technique and make an amazing bracelet that your friends will love.
With this simple yet stylish design, let us show you how easy it is to craft beautiful handmade DIY jewelry. So get ready to lace up your threads and make friendship bracelets faster than ever! heywanderer
15. DIY Bracelets from Recycled T Shirts
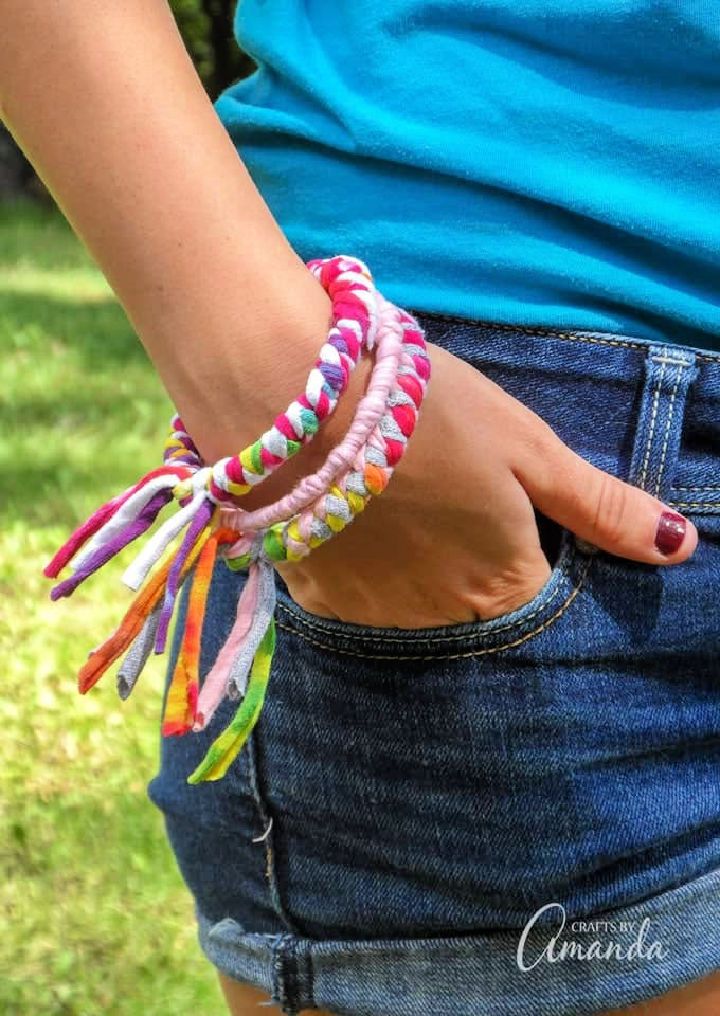
A unique, eco-friendly statement with DIY bracelets made from recycled T-shirts! Perfect as a homemade gift for teenagers or preteens, these colorful bracelets are easy to make and require only some bangle bracelets and old T-shirts.
Not only repurposing materials that would otherwise be discarded, but you’ll also get creative satisfaction knowing you’ve crafted something truly special for your loved ones. Get crafty today and make beautiful jewelry with this fun and inexpensive project! craftsbyamanda
16. How to Make Beaded Friendship Bracelets
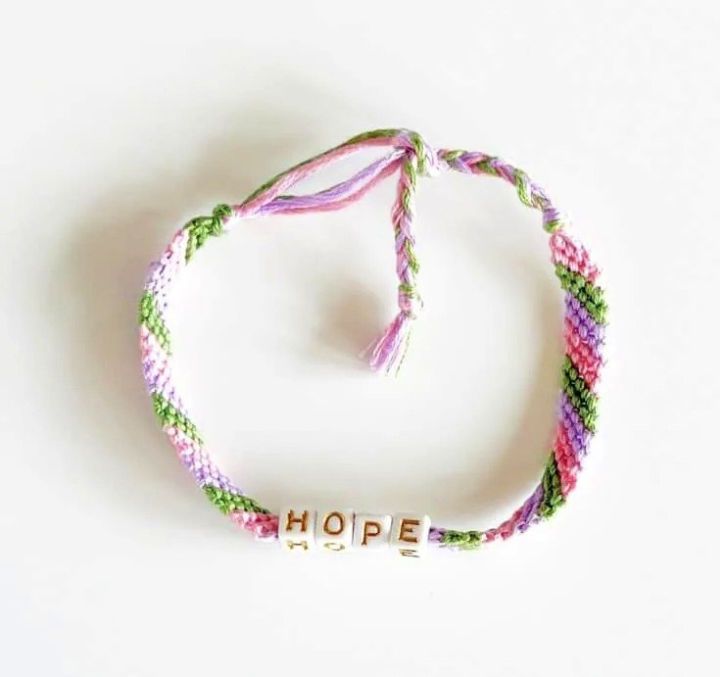
Brighten your summer with a fun and easy DIY activity – make personalized letter-beaded friendship bracelets! This modern twist on popular friendship bracelets is perfect for kids at camp or home. All you need are embroidery floss, measuring tape or ruler, some letter beads, Perler beads, threading needles, and tape to get started.
With endless floss colors and beads available, make unique handmade gifts that will bring joy to friends and family alike. Make something special this season – bead away the summer days with colorful letters! hellowonderful
17. Fancy Friendship Bracelets Pattern
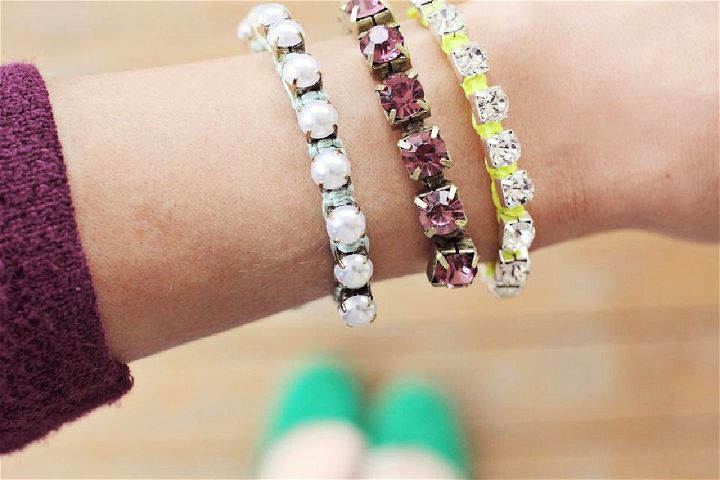
Feel the warmth of friendship with this fancy friendship bracelet pattern! Whether you want to keep it for yourself or gift it to your closest pals, these bracelets will make a statement. Crafted from embroidery floss, thin cord and jewelry chain and adorned with gorgeous jewels, jump rings and clasps, this project is full of creativity.
Plus, there’s no need for expensive equipment – use a clipboard & washi tape, and it’ll look adorable! Get crafting today and share the love! abeautifulmess
18. Printable Friendship Bracelets With Square Loom
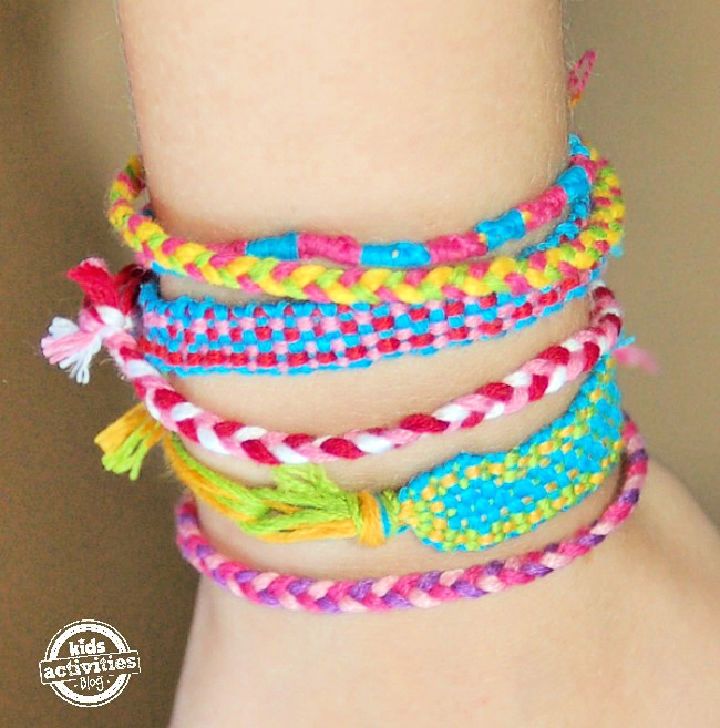
Making friendship bracelets just got a lot easier with the printable square loom! The free template is fun and easy to use, perfect for crafting endless friendship bracelet patterns.
Simple instructions make it incredibly straightforward, so you can quickly start making awesome, unique designs. So why not get creative and show off your personalized style with our amazing square loom today? kidsactivities
19. DIY Ladder Stitch Friendship Bracelet
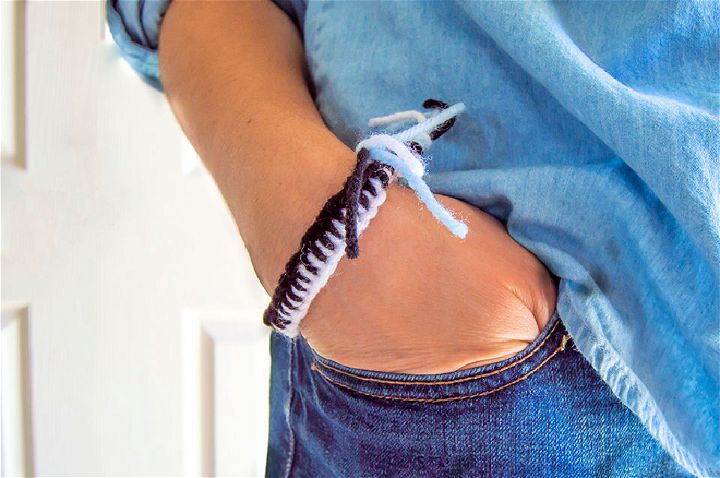
Revive the trend of friendship bracelets with this DIY ladder stitch friendship bracelet! This handmade bracelet is perfect for anyone wanting to learn how to stitch and make beautiful friendship bracelets.
You don’t have to be an expert – follow the step-by-step instructions, and you’ll be able to make a unique, fun piece of jewelry for yourself or a friend. With this ladder stitch technique on offer, making friendship bracelets has never been easier! Embrace your creative side today by ordering a ladder-stitch friendship bracelet! homanathome
20. DIY Friendship Bracelets With Names Letters and Numbers
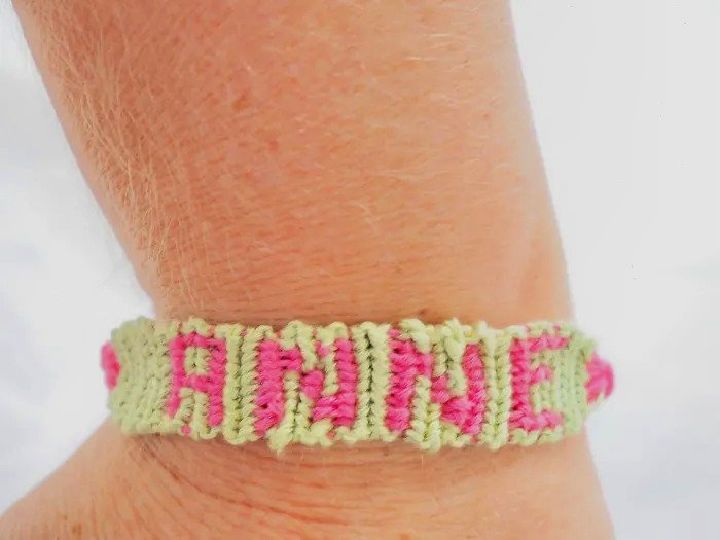
Craft something special for your best friend with the amazing DIY friendship bracelets! These personalized bracelets let you add your friend’s name, lucky number, or birthdate. Make a unique design of names and letters in colors that reflect your friendship.
Get creative with embroidery floss to make one-of-a-kind creations – perfect for a surprise gift or as a reminder of how much they mean. Today, be inspired by this custom jewelry designs and show how thoughtful you are! feltmagnet
21. Crazy Complicated Friendship Bracelet Pattern
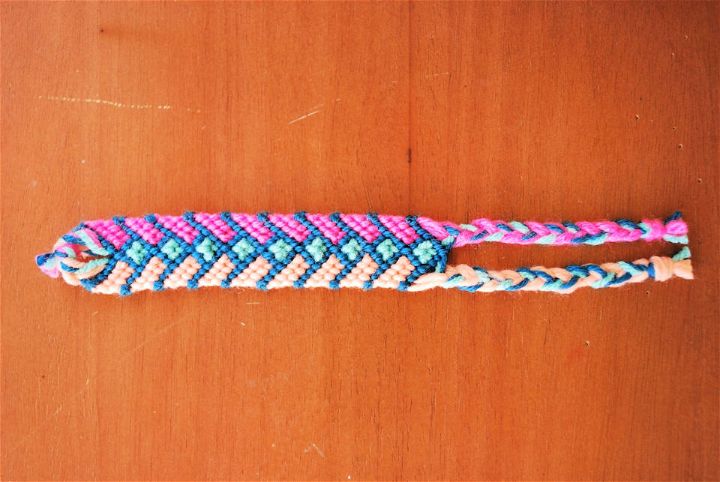
Are you searching for a unique and eye-catching bracelet? Look no further than this crazy complicated friendship bracelet pattern! This DIY bracelet will catch the attention of friends and family alike.
With its chevron friendship design, it’ll take about 15 minutes to make. Plenty of simpler bracelet designs are also available if you want something easier. Get creative with your bracelets today – give the crazy complicated friendship bracelet pattern a try! heywanderer
22. DIY Friendship Bracelets for Adults
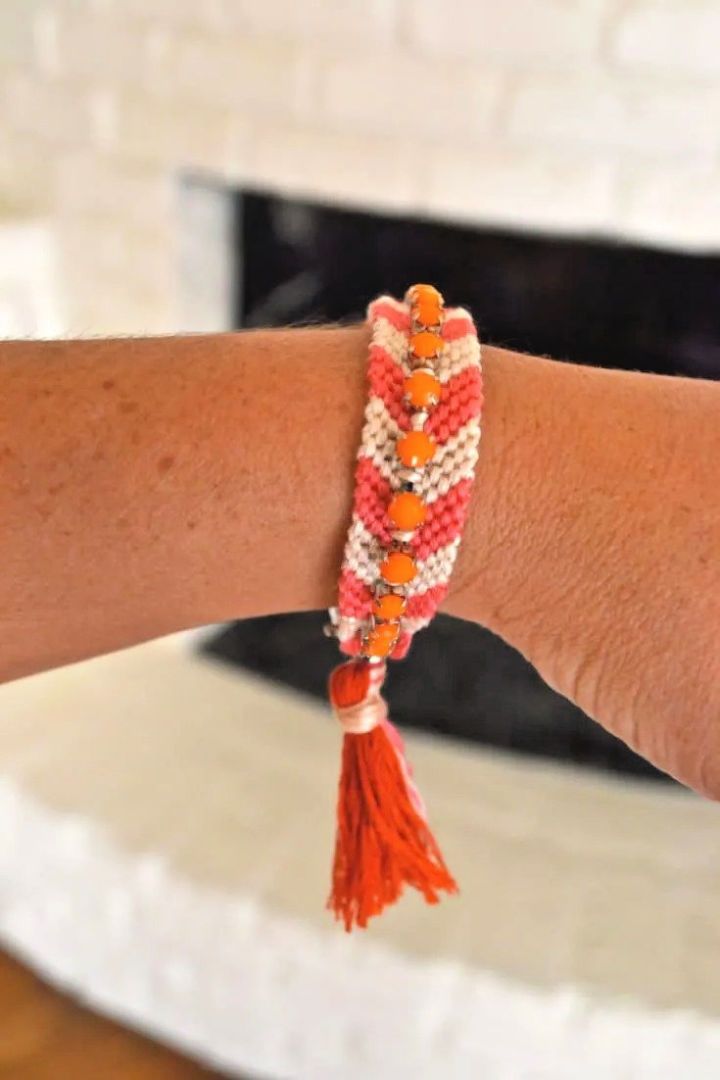
Love crafting something special? DIY friendship bracelets are the perfect way to express your love and appreciation for friends and family. Make gorgeous, stylish accessories with simple patterns, metallic threads and bright colors.
These beautiful friendship bracelets are ideal for adults of all ages and will add a dazzling touch to any look. Stand out from the crowd by making unique pieces that show your creativity – it’s easy and fun! Express yourself today with friendship bracelets! goodinthesimple
23. Making String Friendship Bracelets
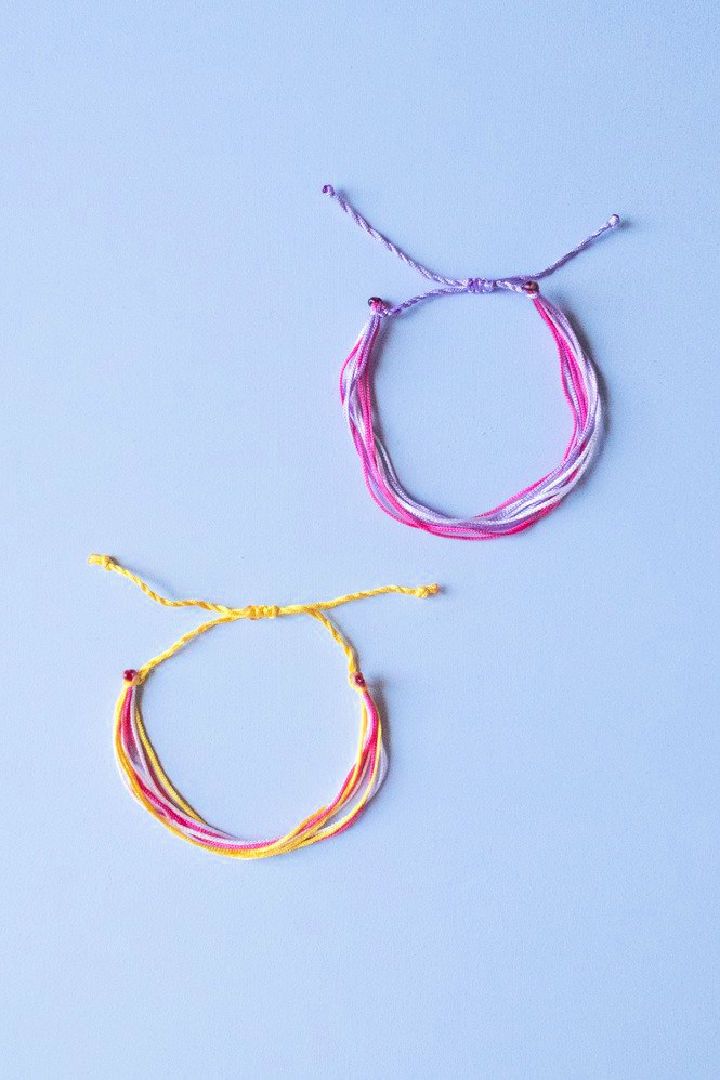
Beautifully laidback summer-style bracelets are the perfect way to accessorize your look! DIY string friendship bracelets are a classic hit that never goes out of style. All you need is a waxed polyester or nylon satin cord, which is 1mm thick.
The possibilities for creativity and fashion with these strings are endless – make it as simple or intricate as you’d like! With this easy-to-follow guide, you can make beautiful friendship bracelets that will last all season long. Get creative and show off your unique style with string friendship bracelets today! curlymade
24. Zig Zag Friendship Bracelet Pattern
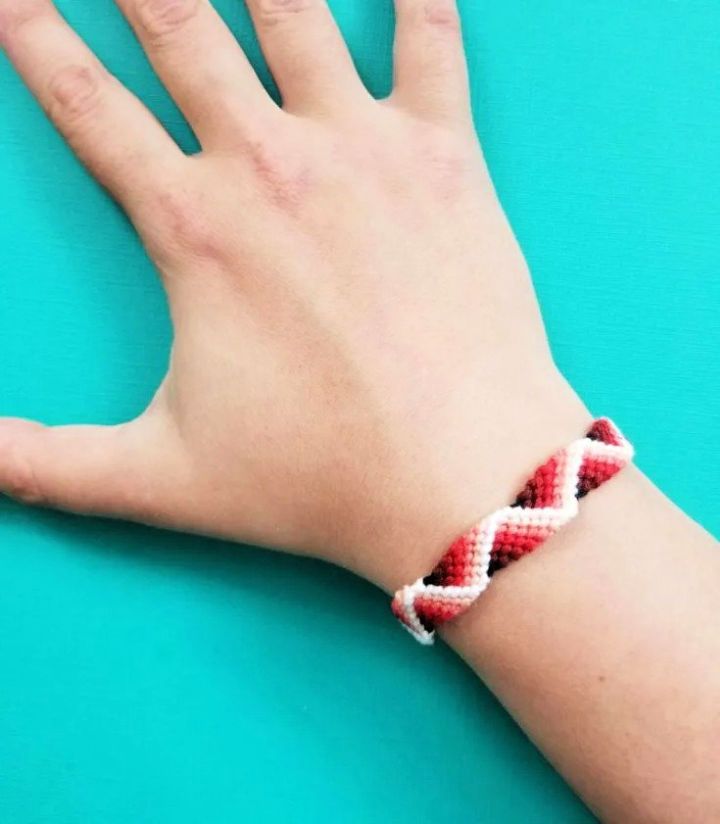
If you want the perfect way to show off your creativity, try making a zig zag friendship bracelet! This classic bracelet pattern makes a cool 3D effect on each unique design.
You can easily make a beautiful bracelet with an eye-catching ribbon effect using special weaving techniques and colorful threads. Whether you’ve worn it alone or stacked it with other bracelets, this fun and trendsetting zig zag friendship bracelet will turn heads! So what are you waiting for? Get started making your stylish 3D bracelets today! momsandcraft
25. Easy DIY T Shirt Yarn Bracelets
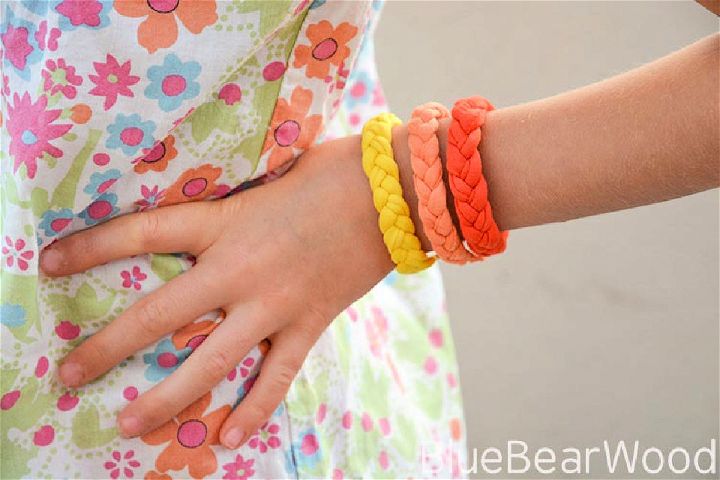
Discover the perfect, unique, fun summer accessory with easy DIY T-shirt yarn bracelets! This chic and fashionable craft is great for adults and kids alike. Whether heading to the beach, hanging out with friends or going to a festival this summer, your T-shirt yarn bracelets will ensure you stand out from the crowd in style.
With endless color combinations, these bracelets are super easy to make, so why not give them a go? Get creative, get thrifty and make some stunning jewelry pieces – perfect for any occasion! bluebearwood
26. How to Make Friendship Bracelets at Home
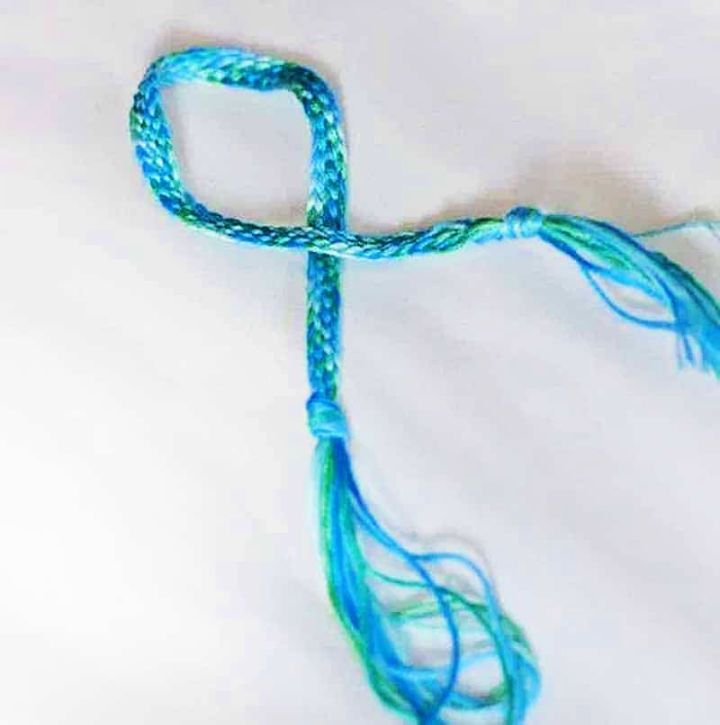
Add a touch of color and fun to your summer with DIY friendship bracelets! Making friendship bracelets is an easy and fun craft for all ages. You can make colorful strings, patterns, beautiful braids and knots with embroidery floss in various colors, scissors, pins, and nimble fingers.
Furthermore, you’ll be able to make memorable gifts – everyone will cherish the thoughtfulness that went into each special moment spent making those friendship bracelets. Get creative now while spending quality time crafting with friends or family! skiptomylou
27. Easy DIY Friendship Bracelets
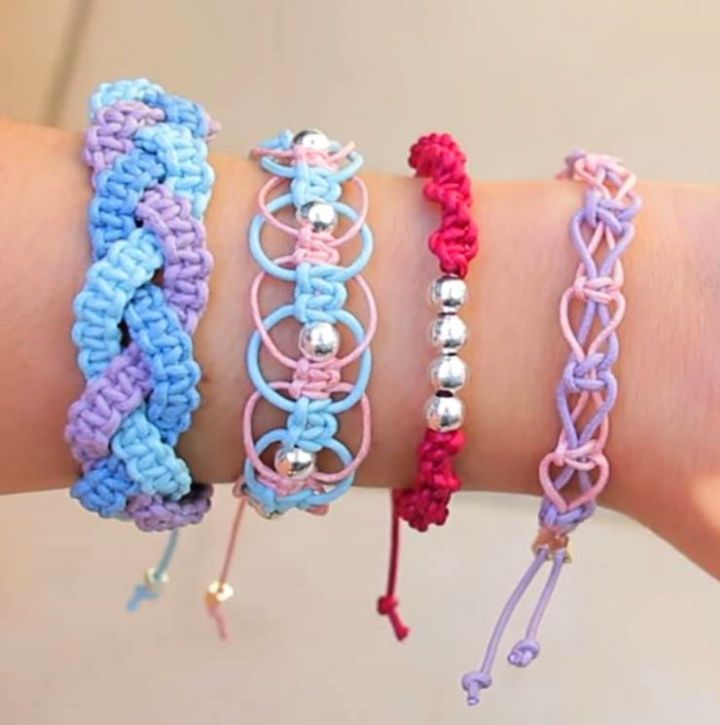
Make beautiful, one-of-a-kind friendship bracelets for you and your friends with easy DIY tutorial! Have everything you need to make amazing designs, from thread to string and more.
With step-by-step instructions, even beginners can craft super cute bracelets in no time – follow the tutorial and let your creativity shine through. Perfect for gifting or keeping for yourself, start crafting with the friendship bracelet tutorials today! kimspireddiy
28. Handmade Chinese Ladder Friendship Bracelet
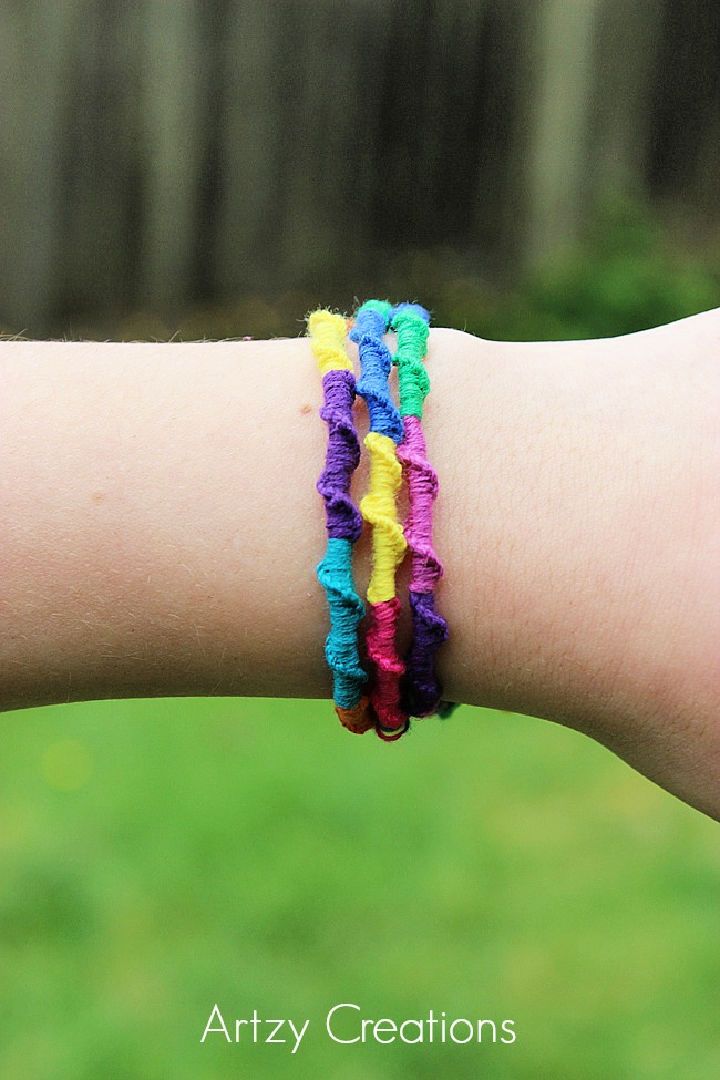
Make summertime more fun with Chinese ladder friendship bracelets! An incredibly inexpensive way to keep your fingers busy and boredom away for hours, this timeless craft is perfect for kids and adults. Get together with a friend and enjoy spending time making something special – making these DIY friendship bracelets provide endless hours of enjoyment.
You’ll need DMC floss, scissors, and tape to get started. The satisfaction of making something yourself that those around you can treasure makes it all worthwhile. Make a few now and share them with your friends today! designdazzle
29. DIY Macrame Friendship Bracelet
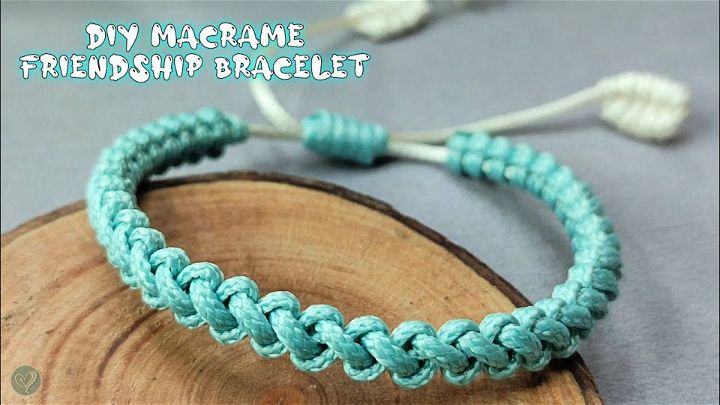
Make something special and unique with this easy-to-follow Macrame friendship bracelet tutorial! Perfect for those just starting their crafting journey, this tutorial is simple, yet the result will be a beautiful friendship bracelet. This tutorial contains step-by-step instructions that make making your custom macrame bracelet easy.
Get creative with different colors or add additional knotting techniques to customize yours even more! With some patience and creativity, you’ll have a fabulous keepsake or meaningful gift in no time.
30. DIY Chevron Friendship Bracelet
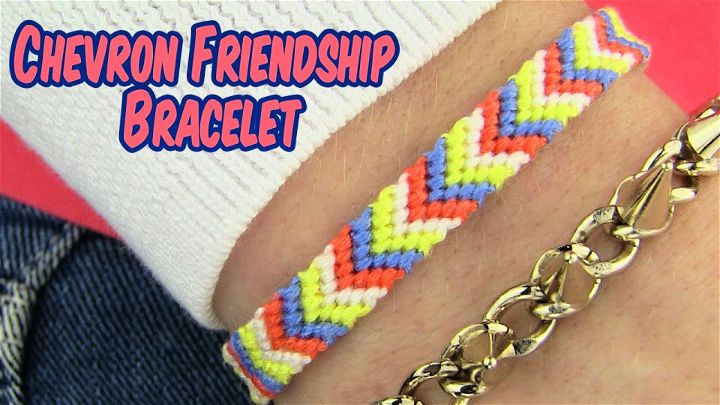
Are you looking for a stylish DIY project this spring or summer? Look no further! This easy-to-follow tutorial on how to make a chevron friendship bracelet is perfect for fashionistas of all skill levels.
From the simple step-by-step instructions, you can make an adorable accessory that adds a perfect touch of style to any outfit. Not only does it look very cute, but making your chevron friendship bracelet is easy, too – so you can craft one quickly.
Troubleshooting and FAQ about Friendship Bracelet Patterns
Discover tips and frequently asked questions about friendship bracelet patterns. Get all the information you need in one place!
How do I start a friendship bracelet?
To start a friendship bracelet, you will need to cut your threads to the desired length, tie a knot at one end, and secure it to a surface with tape or a safety pin. Then, you can follow the pattern of your choice to make the knots with the threads.
How do I end a friendship bracelet?
To end a friendship bracelet, you will need to tie a knot at the end of your last row of knots, and trim the excess threads. Then, you can either attach a clasp to both ends of your bracelet, or make a loop and knot closure with your threads.
How do I make a chevron friendship bracelet?
To make a chevron friendship bracelet, you will need to arrange your threads in a symmetrical order, such as red, yellow, green, blue, blue, green, yellow, red. Then, you will need to make forward knots with the leftmost thread over all the other threads until it reaches the middle, and backward knots with the rightmost thread over all the other threads until it reaches the middle. Then, you will need to tie the two middle threads together with a forward knot. Repeat this process with the new leftmost and rightmost threads until you reach the desired length.
How do I make a candy stripe friendship bracelet?
To make a candy stripe friendship bracelet, you will need to arrange your threads in any order you like. Then, you will need to make forward knots with the leftmost thread over all the other threads until it reaches the right end. Repeat this process with the new leftmost thread until you reach the desired length.
How do I make a spiral staircase friendship bracelet?
To make a spiral staircase friendship bracelet, you will need to arrange your threads in any order you like. Then, you will need to make forward-backward knots with the leftmost thread over all the other threads until it reaches the right end. Repeat this process with the new leftmost thread until you reach the desired length.
How do I add beads to my friendship bracelet?
To add beads to your friendship bracelet, you will need to string them on your thread before you start knotting, or after you finish your bracelet. You can either add beads to all or some of your threads, depending on the effect you want. You can also use different sizes and shapes of beads to create more variety.
How do I fix a tangled thread in my friendship bracelet?
To fix a tangled thread in your friendship bracelet, you will need to gently untangle it with your fingers or a needle. You can also use bobbins, clips, or hair ties to wrap up the unused threads and keep them from getting tangled while you work on your bracelet.
How do I wash my friendship bracelet?
To wash your friendship bracelet, you will need to hand wash it with mild soap and warm water. Do not use bleach, harsh detergents, or hot water, as they can damage the threads or fade the colors. Rinse it well and squeeze out the excess water. Do not wring or twist it, as it can lose its shape or break.
How do I dry my friendship bracelet?
To dry your friendship bracelet, you will need to lay it flat on a towel or a drying rack. Do not hang it or put it in the dryer, as it can stretch or shrink. You can also use a hair dryer on a low setting to speed up the drying process, but be careful not to overheat it.
How do I store my friendship bracelet?
To store your friendship bracelet, you can either keep it on your wrist, or take it off and put it in a jewelry box, a ziplock bag, or a small pouch. Do not pile it up or toss it around, as it can get tangled or damaged. You can also use a bracelet holder, a display stand, or a wall hanger to organize and showcase your bracelets.
Related DIY Jewelry Making Ideas
Discover creative and inspiring DIY jewelry making ideas to unleash your inner artist. From necklaces to bracelets, explore endless ideas for unique and personalized accessories.
- DIY Bracelets: Explore your creativity with our easy DIY bracelets guide, filled with cute bracelet ideas to make at home.
- Necklace Ideas: Craft unique and personalized pieces with our awesome DIY necklace ideas, teaching you how to make necklaces that express your style.
- DIY Tassel Earrings: Add a touch of elegance to your look with our cute DIY tassel earrings guide, providing easy ideas to make your own.
- Polymer Clay Earrings: Unleash your inner artist with our wonderful DIY polymer clay earrings guide, packed with creative ideas to make stunning jewelry.
- Bead Bracelet Patterns: Adorn your wrists with custom-made accessories by learning how to make beaded bracelets using our easy bead bracelet patterns.
- Wire Wrapped Rings: Create beautiful and bespoke pieces with our amazing DIY wire wrapped rings guide, featuring an easy ring making tutorial for beginners.
- Paracord Bracelet Patterns: Learn to weave durable and stylish accessories with our awe-inspiring paracord bracelet patterns, helping you make your own bracelets in no time.
- Chevron Friendship Bracelet: Celebrate friendship with a handmade token using our guide on how to make a chevron friendship bracelet, complete with a free pattern.
- DIY Earrings: Discover the joy of jewelry-making with our guide on stunning DIY earrings that you can make at home, perfect for beginners.
Conclusion:
Friendship bracelets are more than just accessories. They are a way of expressing your personality, creativity, and affection for your friends. Whether you choose a simple braid, a colorful chevron, or a dazzling embellishment, you can make a unique and meaningful gift for someone special. With these 30 easy friendship bracelet patterns for beginners, you can learn how to make all kinds of designs that will impress your friends and yourself. All you need is some embroidery floss, a pattern, and some time to enjoy this fun and relaxing craft. So grab your floss and start knotting! You’ll be amazed by what you can create with just a few simple knots.

