Building Adirondack chairs can be a rewarding DIY project that adds comfort and style to your patio or garden. Learn how to build Adirondack chairs with these 25 free DIY Adirondack chair plans, including easy-to-follow instructions for beginners. Designed with comfort in mind, our free Adirondack chair plans to provide a clear, detailed guide to help you make your own Adirondack chair.
DIY Adirondack chairs are not only elegant but also very cozy, making them a great choice for outdoor furniture. You can make these classic pieces from various materials, such as leftover wood, plywood, or 2x4s. They are as practical as they are beautiful, with their wide armrests perfect for a refreshing drink on a warm summer day. Adirondack chair plans vary from simple designs perfect for a quick afternoon project to more complex ones, like the Adirondack chair with a back leg and footstool.
The variety of options for your DIY Adirondack chair also includes plans suited to different skill levels. So, even if you’ve never tried a project like this before, there’s a DIY Adirondack chair plan for you. With these free Adirondack chair plans, including templates and blueprints, you will not only save money but also have the pleasure of building something with your own hands. So, get ready with your DIY tools and start building your Adirondack chair today!
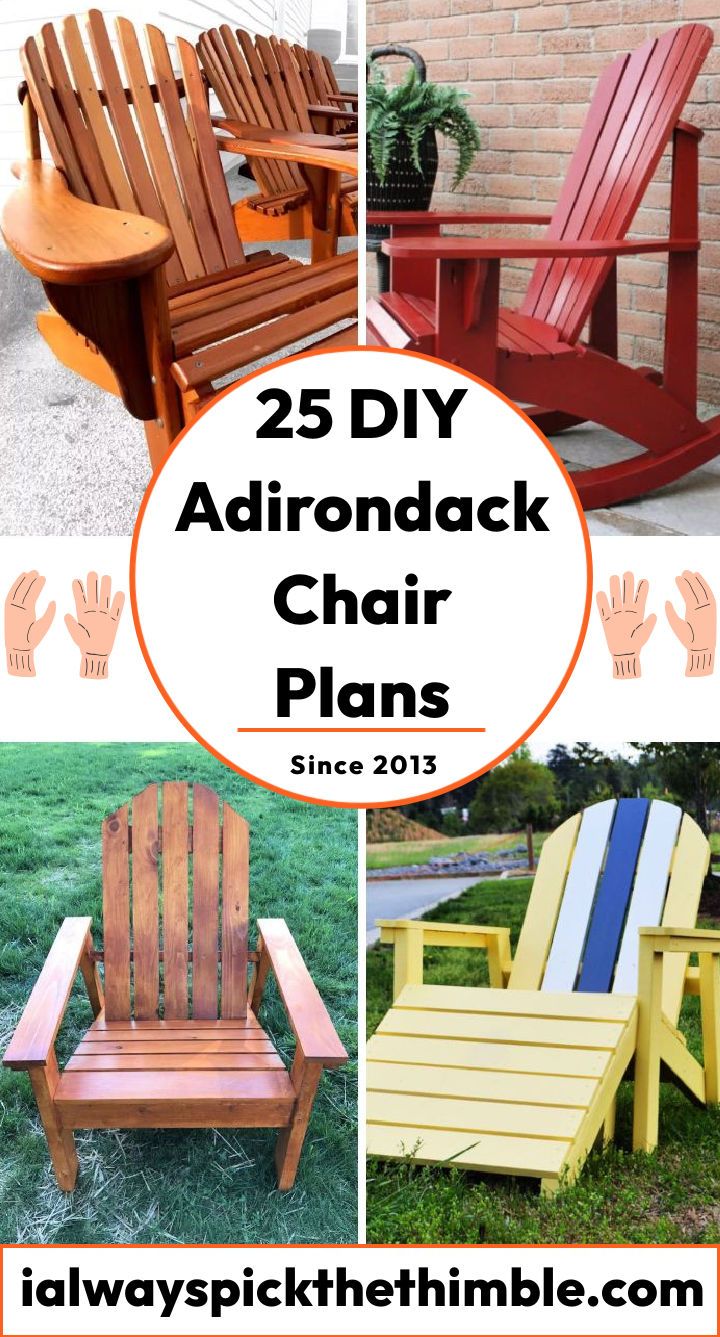
DIY Adirondack Chair Plans
DIY Adirondack chairs are classic wooden chairs that have a distinctive design with a sloped seat, a curved back, and wide armrests. They are perfect for lounging on your porch, patio, or backyard, enjoying the fresh air and the scenery.
Learn how to build your own Adirondack chair from scratch, using simple tools and materials. We will also provide you with some helpful tips and resources to make your DIY project easier and more fun. Whether you are a beginner or an experienced woodworker, you can follow these steps and create a beautiful and sturdy chair that you can be proud of.
What is an Adirondack chair and why you should make one
An Adirondack chair is a type of outdoor chair that originated in the Adirondack Mountains of New York in the early 20th century. It was designed by Thomas Lee, who wanted to create a comfortable chair for his family’s summer home. He experimented with various shapes and angles until he came up with the iconic design that we know today.
An Adirondack chair has many advantages over other types of outdoor chairs. Here are some of them:
- It is ergonomic and supports your back, neck, and legs.
- It is spacious and allows you to stretch out and relax.
- It has wide armrests that can hold your drinks, books, or snacks.
- It is long-lasting and can withstand harsh weather conditions.
- It is easy to customize and decorate according to your taste and style.
Making your own Adirondack chair is also a rewarding and enjoyable experience. You can save money, learn new skills, express your creativity, and have fun along the way. Plus, you will have a unique piece of furniture that you can use for years to come.
How to choose the right material and tools for your DIY project
Before you start building your Adirondack chair, you need to choose the right material and tools for the job. Here are some factors to consider:
- Material: The most common material for Adirondack chairs is wood, because it is natural, sturdy, and beautiful. However, not all woods are suitable for outdoor use. You need to choose a wood that is resistant to rot, insects, and moisture. Some of the best options are cedar, redwood, cypress, teak, or pressure-treated pine. You can also use composite or plastic lumber if you prefer a low-maintenance material that mimics the look of wood.
- Tools: The basic tools you need for this project are a saw (circular, jigsaw, or miter), a drill, a router (optional), a sander (optional), a tape measure, a pencil, a square, a level, clamps, screws, nails, glue, and paint or stain (optional). You can also use templates or plans to guide your cuts and assembly. You can find many free or affordable plans online or in magazines or books.
- Cost: The cost of this project will rely on the size and quality of the material and tools you use. On average, you can expect to spend between $50 and $150 per chair. Of course, you can save money by using recycled or reclaimed wood or by borrowing or renting tools.
How to choose the right adirondack chair plans?
Choosing the right Adirondack chair plans depends on your skill level, budget, and personal preference. There are many free plans available online that you can download and follow, or you can buy a template and project plan from a woodworking store or website. Here are some tips to help you decide:
- Consider the style and comfort of the chair. Adirondack chairs come in different variations, such as classic, modern, curved, straight, tall, low, etc. Some have features like footstools, cup holders, or rockers. You may want to try sitting in different types of chairs before choosing a plan to see what suits you best.
- Consider the materials and tools you need. Most Adirondack chairs are made from wood, but you can also use plastic, metal, or composite materials. Wood is the most traditional and natural option, but it may require more maintenance and protection from the weather. Plastic and metal are more durable and easy to clean, but they may not have the same aesthetic appeal as wood. Composite materials are a blend of wood and plastic that offer the best of both worlds. You will also need some basic tools like a saw, a drill, a router, a sander, and some screws and glue. Some plans may require more advanced tools or skills than others, so make sure you check the difficulty level and the tool list before starting.
- Consider the cost and time involved. Adirondack chair plans vary in how much they cost and how long they take to complete. Some plans are free to download online, while others may require you to buy a template or a project plan. Some plans use simple cuts and assembly methods, while others may involve more complex curves and joints. Some plans may also include instructions for finishing the chair with paint or stain. Depending on your budget and schedule, you may want to choose a plan that fits your needs and expectations.
The basic steps and skills to build an Adirondack chair from scratch
Once you have gathered your material and tools, you are ready to start building your Adirondack chair. Here are the basic steps to follow:
- Cut the pieces: Using your saw and templates or plans, cut out all the pieces for the chair according to the dimensions given. You will need pieces for the legs, seat slats, back slats, armrests, supports, braces, and crosspieces.
- Assemble the base: Using your drill and screws or nails, attach the front legs to the seat support. Then attach the back legs to the back support. Then connect the two pairs of legs with the crosspieces.
- Attach the seat slats: Using your drill and screws or nails, attach the seat slats to the seat support and crosspieces. Make sure they are evenly spaced and aligned.
- Attach the back slats: Using your drill and screws or nails, attach the back slats to the back support and crosspieces. Make sure they follow the curve of the template or plan.
- Attach the armrests: Using your drill and screws or nails, attach the armrests to the front legs and back support. Make sure they are level and secure.
- Attach the braces: Using your drill and screws or nails, attach the braces to the back legs and back slats. These will provide extra stability and strength to the chair.
- Sand and finish: Using your sander or sandpaper, smooth out the rough edges or splinters on the chair. Then apply a coat of paint or stain to protect and beautify the wood. You can also add cushions, pillows, or accessories to make your chair more comfortable and attractive.
Common mistakes and problems to avoid when making an Adirondack chair
Building an Adirondack chair is not a difficult project, but it does require some attention to detail and accuracy. Here are some common mistakes and problems to avoid when making your chair:
- Cutting the pieces wrong: Make sure you measure and mark the pieces correctly before cutting them. Use a square and a level to check for straightness and angles. Use templates or plans to guide your cuts and avoid wasting material.
- Drilling the holes wrong: Make sure you drill the holes in the right places and at the right depths. Use a drill bit that matches the size of the screws or nails you are using. Use clamps to hold the pieces together while drilling. Pre-drill the holes to prevent splitting or cracking the wood.
- Assembling the pieces wrong: Make sure you follow the instructions and diagrams for assembling the pieces. Use the right screws or nails for each joint. Tighten them securely but not too tightly. Check for gaps, misalignments, or wobbles and fix them as needed.
- Sanding and finishing wrong: Make sure you sand the chair thoroughly and evenly to remove any roughness or imperfections. Use a fine-grit sandpaper for a smooth finish. Apply a coat of paint or stain that is suitable for an outdoor use and follow the manufacturer’s directions. Let it dry completely before using the chair.
Tips and tricks to customize and decorate your Adirondack chair
One of the best things about making your own Adirondack chair is that you can customize and decorate it according to your style. Here are some tips and tricks to make your chair more unique and personal:
- Choose a color that matches your outdoor decor or mood. You can use bright colors for a cheerful look, neutral colors for a classic look, or dark colors for a sophisticated look. You can also use multiple colors for a fun and funky look.
- Add some patterns or designs to your chair using stencils, decals, stickers, or paint pens. You can use geometric shapes, floral motifs, animal prints, or anything else that suits your personality.
- Add some cushions, pillows, blankets, or throws to your chair to make it more cozy and comfortable. You can use fabrics that are weather-resistant, washable, and durable. You can also use fabrics that have prints, textures, or embellishments that match your theme.
- Add some accessories to your chair to make it more functional and fun. You can use hooks, baskets, trays, cup holders, or lights to hold your items or add some ambiance. You can also use plants, flowers, candles, or ornaments to add some life and charm.
How to care for and maintain your Adirondack chair
To keep your Adirondack chair in good shape and extend its lifespan, you need to care for and maintain it regularly. Here are some tips on how to do that:
- Clean your chair periodically with a mild soap and water solution. Wipe it dry with just a soft cloth or let it air dry.
- Inspect your chair for any cracks, splits, loose screws, or nails. Repair them as soon as possible to prevent further damage.
- Apply a fresh coat of paint or stain every year or two to protect the wood from fading, peeling, or rotting.
- Store your chair indoors or cover it with a waterproof tarp during the winter or rainy season to prevent moisture damage.
Adirondack chair plans for different styles and sizes of chairs
If you are looking for some variety and diversity in your Adirondack chair plans, you will be happy to know that there are many different styles and sizes of chairs to choose from. You can find plans that suit your personal taste, your outdoor space, your skill level, and your budget. Here are some examples of different Adirondack chair styles and sizes:
- Classic: This is the original and most popular style of Adirondack chair, with a simple and elegant design that features a curved back, a sloped seat, and wide armrests. It is easy to build and comfortable to sit in.
- Modern: This is a more contemporary and sleek style of Adirondack chair, with a straight back, a flat seat, and narrow armrests. It is more suitable for smaller spaces and minimalist decor. It is also easy to build and comfortable to sit in.
- Rocking: This is a fun and relaxing style of Adirondack chair, with a rocking base that allows you to sway back and forth gently. It is perfect for sunshiny afternoons on the front porch or around a cozy fire pit. It is a bit more challenging to build than the other styles, but it is worth the effort.
- Folding: This is a practical and versatile style of Adirondack chair, with a folding mechanism that allows you to collapse and store the chair when not in use. It is ideal for small spaces or for transporting the chair to different locations. It is also easy to build and comfortable to sit in.
- Ottoman: This is an accessory that adds extra comfort and functionality to your Adirondack chair, with a footrest that matches the shape and style of the chair. It allows you to stretch out your legs and relax more fully. It is also easy to build and attach to the chair.
We have these free Adirondack chair plans below that can suit your needs and preferences. You can also mix and match unique styles and sizes of chairs to create a unique and inviting outdoor seating area. Let’s explore now:
1. How to Build Adirondack Chair
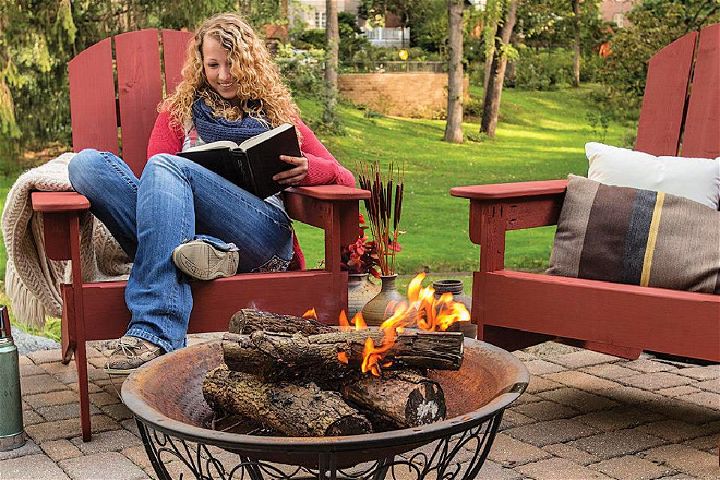
This adirondack chair plan is a great choice for anyone who loves the classic lines of the iconic outdoor seating design. Build your own and have one or two comfy chairs in your backyard oasis! This moderately-difficult project requires cedar boards, 1×6, 1×4 and 1×3. Get started and enjoy lounging on a beautiful handmade adirondack chair this summer! kregtool
2. DIY Adirondack Chair With Back Leg and Footstool
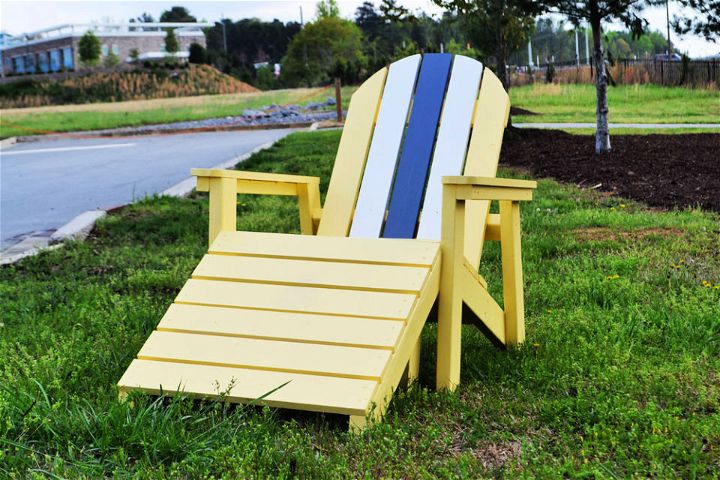
Build your dream Adirondack chair with this easy-to-follow guide! This DIY project uses 2x4s for the legs and back leg, making the chairs more affordable and easier to build while retaining comfort with its deep recline and optional footstool plans.
The instructions come with a cut list and shopping list, including all the supplies you’ll need to make this sturdy, durable piece. Make your outdoor space more inviting with these Adirondack chairs that won’t disappoint. Plus, learn some helpful tips for outdoor wood finishing to make your furniture last longer. ana white
3. Homemade Adirondack Chair
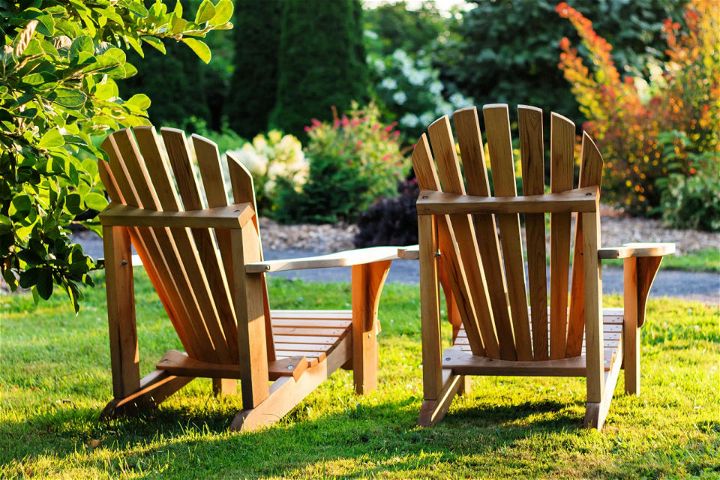
Step into the DIY world and seize the opportunity to craft your adirondack chair! This classic outdoor seat is ideal for relaxing in the garden, and with a helpful guide, you can make one in less than a day.
All you need are weather-resistant materials like pressure-treated decking lumber, balusters and screws, and plenty of elbow grease! These step-by-step instructions will help you build a sturdy, roomy seat with a fan back and wide armrests that’s perfect for lounging in the sunshine. With this easy DIY project complete, you’ll soon be enjoying the comfiest seat in your yard. thisoldhouse
4. Easy DIY Adirondack Chair
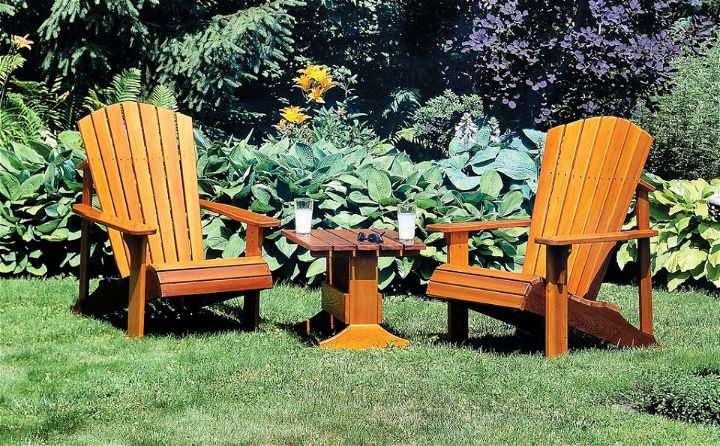
Make a classic outdoor seating area with this easy-to-build Adirondack chair! This DIY project is the perfect way to make your backyard or patio more inviting. Despite the curved slats and several pieces, there’s no fancy joinery – everything is held together with deck screws. Made from durable materials, this chair lasts through all seasons and stands up well to weathering. Customize it as you like by adding cushions, pillows and other decorations for extra comfort and style! Get started on your Adirondack chair today! instructables
5. How to Make an Adirondack Chair
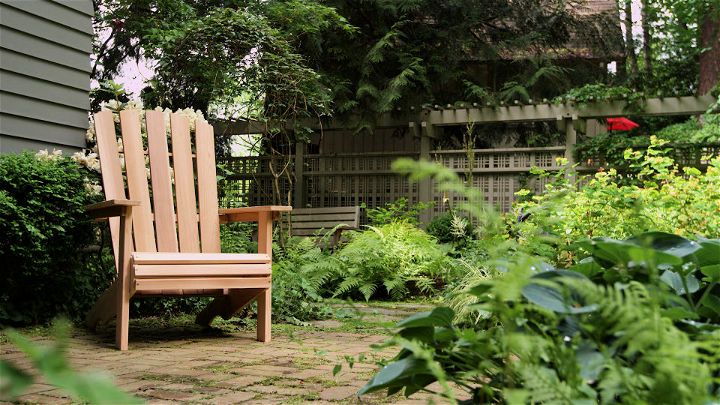
Save money and have fun with these diy adirondack chair plans. You can customize your chair to match your decor and personality. Building an Adirondack chair is a great way to add comfortable outdoor seating to your property. Start by purchasing the necessary clear grain cedar lumber, which will cost around $100 for each chair.
This type of wood is easy to work with since you don’t need to worry about working around knots. To save money, build two chairs at once using 1 x 2 cedar, 5/4 x 4 cedar, 1 x 4 cedar, 1 x 6 cedar and 2 x 2 cedar plus floor glides for stability. With some basic tools and supplies, you can have an attractive and sturdy Adirondack chair that provides friends and family years of comfort and relaxation! dunnlumber
6. Norm Abrams Adirondack Chair Plan
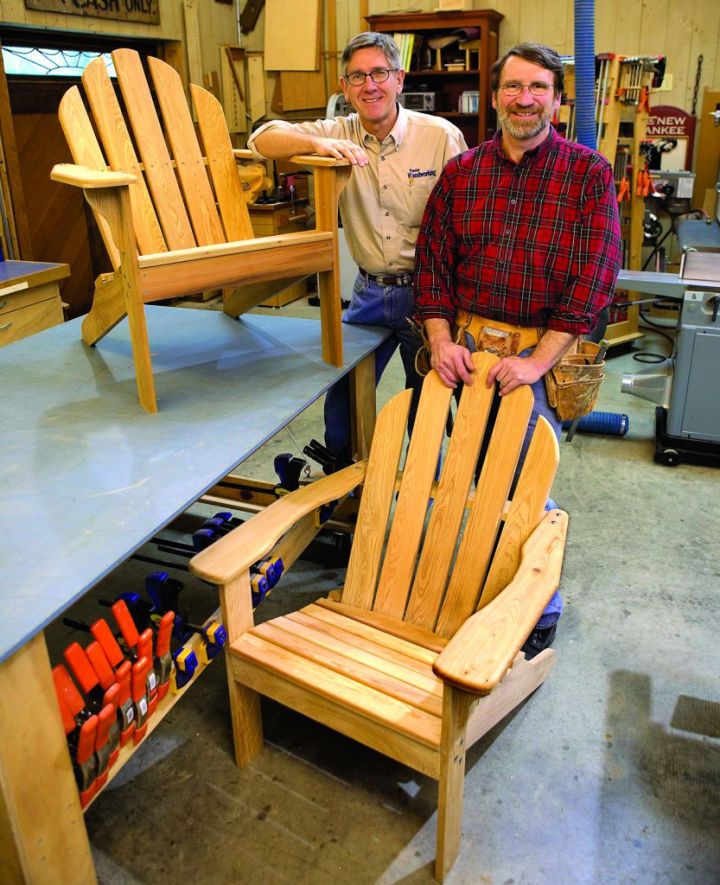
This Adirondack chair is a stylish and comfortable outdoor seating solution. Its traditional design makes it a great addition to any backyard or patio. This chair can be easily built at home with the help of the provided tutorial. Make yours today and enjoy the comfort of your own Adirondack chair in your favorite outdoor space! Get ready to make your outdoors more inviting than ever. popularwoodwork
7. Building an Adirondack Chair From Scratch
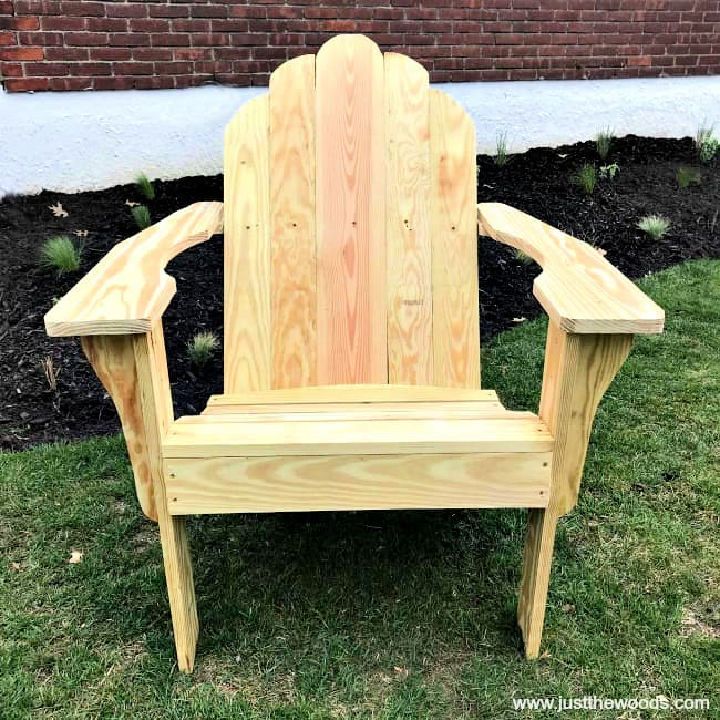
If you’re looking for a stylish and comfortable outdoor project, look no further than Adirondack chairs. These free printable plans will help you build your own from scratch quickly! All you need are wood, spray adhesive and trigger clamps – perfect for the DIY enthusiast who wants to save a small fortune on expensive store-bought versions.
With these easy-to-follow instructions and helpful tips, you can make beautiful, durable Adirondack chairs that will last season after season. So get ready to relax in style outdoors this summer with your hand-crafted furniture! justthewoods
8. Build Your Own Adirondack Chairs
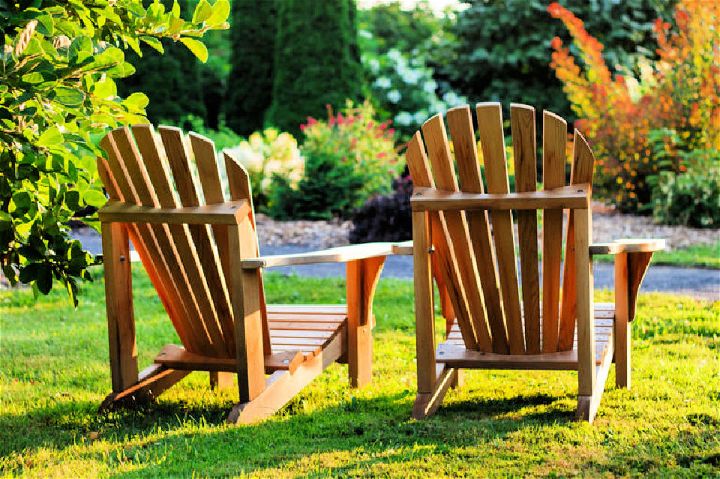
Add a touch of classic style to your outdoor seating with beautiful, hand-crafted Adirondack chairs. Enjoy the sunshine from a comfortable, timeless design that has stood the test of time. You can build two chairs for just $200 over a weekend – perfect for garden or patio lounging! With so many colors & styles of timber available, you’ll be sure to find something that suits your home and environment. Get ready to enjoy summer in luxury with these stylish Adirondack chairs! handyman
9. DIY Outdoor Adirondack Chair
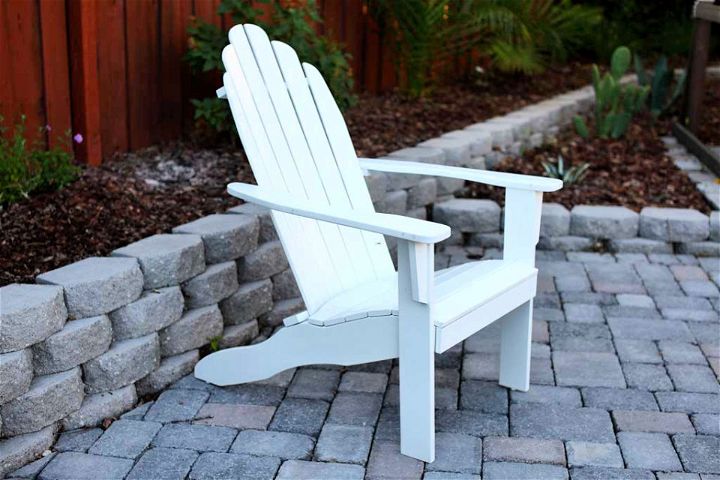
Diy adirondack chair plans for every skill level. Whether you want a simple or a fancy chair, these plans will guide you through the process. The Adirondack chair is a classic outdoor furniture piece with a cozy seat to relax and enjoy your backyard. With many different styles, materials and designs, these chairs are perfect for relaxing outdoors. Build your DIY Adirondack chair with this easy-to-follow guide – you need 1x10s, 5 hours, intermediate skill level and just $60. Get started today and make a cozy spot in your backyard oasis that will bring relaxation all season long. thediyplan
10. Free Adirondack Rocking Chair Plan
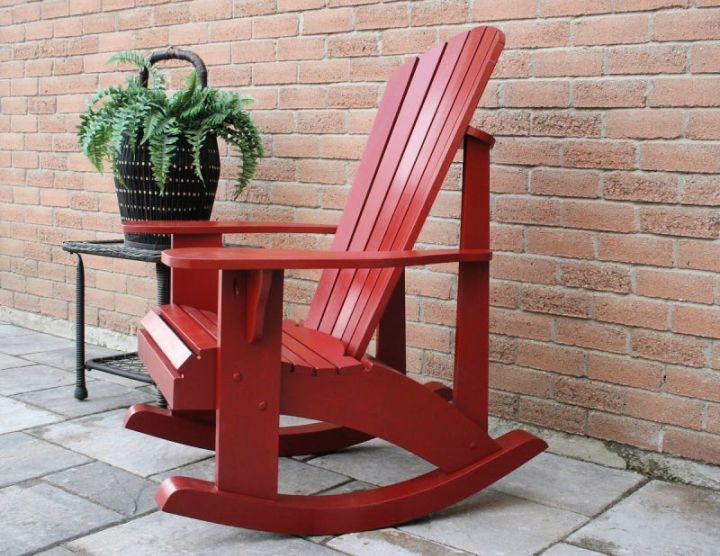
Relax in style with a custom Adirondack rocking chair! Crafted from durable materials, this chair allows you to rock comfortably with your feet flat on the ground. Perfect for taking a deep nap or enjoying outdoor time, it’s customizable, too – paint it in any color you choose. Get ready to experience relaxation like never before with an Adirondack rocking chair today! instructables
11. Handmade Scrap Adirondack Chair
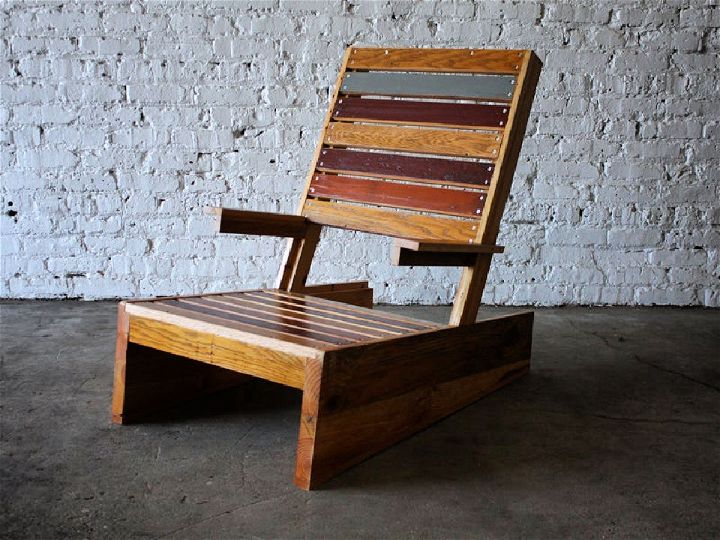
Snuggle up and enjoy the cool breeze with a scrap Adirondack chair! This low-set modern take on the classic rustic design is constructed from 2″ x 12″ & 2″ x 4″, making it ideal for any cabin deck or poolside patio. You can bask in the sun with an outdoor-grade finish while enjoying it’s angled back and cantilevered arms. Get cozy in this comfortable chair before summer’s gone! instructables
12. Make Your Own Wooden Adirondack Chair
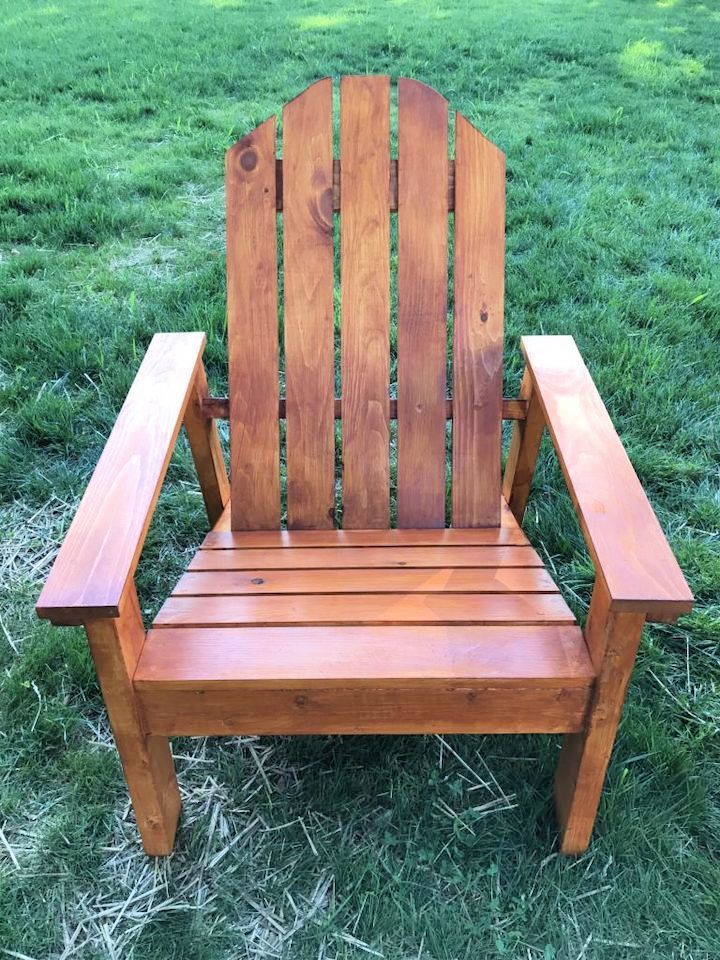
Unleash your inner craftsman and transform your outdoor space into an inviting oasis with handmade Adirondack chairs. Perfect for any backyard, these wooden chairs have a classic and comfortable design that can be crafted with minimal tools: 2″ x 4″, 2″ x 2″, 1″ x 4″ wood boards and wood glue to assemble. Finish your project by staining or painting the chair exterior for a unique look. You can easily make stylish Adirondack chairs with only a few materials! chiselandfork
13. How to Make an Adirondack Chair at Home
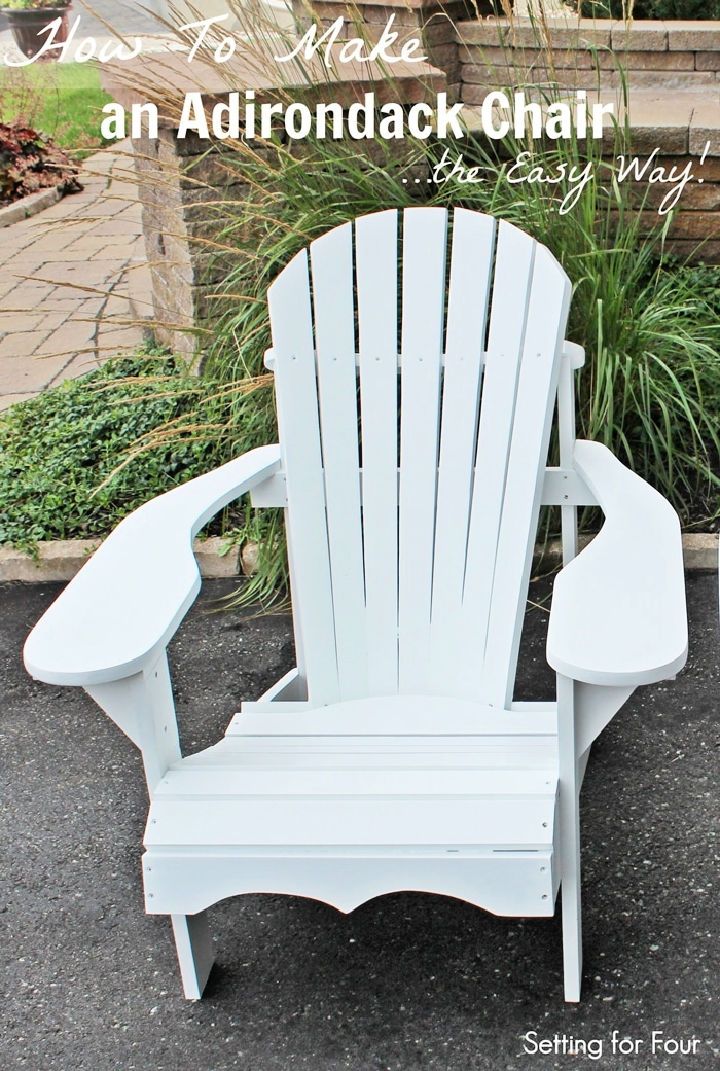
Make this comfy, stylish Adirondack chair with ease in just one weekend! Perfect for a beginner or experienced DIYer, all you need is 6″ x 1′ white pine and 4″x 1″white pine, as well as wood primer paint and exterior semi-gloss white paint. You’ll be lounging on your new chair around the fire pit or table on your patio or front porch in no time! A tangled back makes it perfect for relaxation after a long day. Don’t wait – start building an Adirondack chair of your own today! settingforfour
14. DIY Bar Height Adirondack Chair
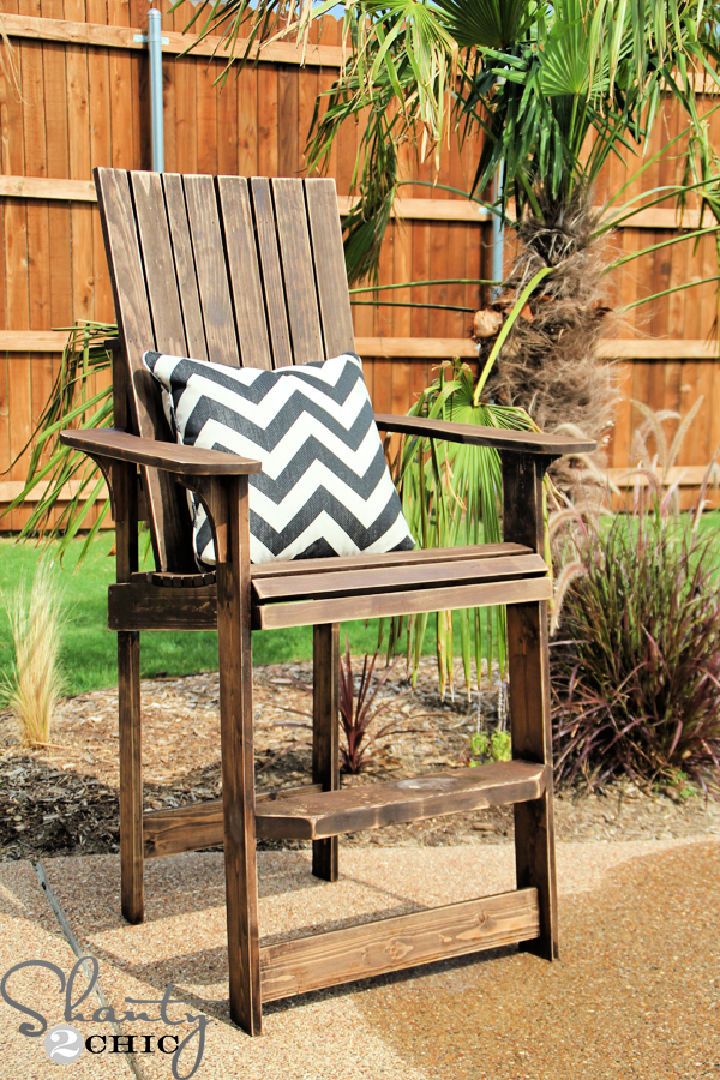
Turn your backyard into a summer paradise with this stylish, comfortable bar-height Adirondack chair! Crafted from premium wood, this giant chair will provide comfort and stability for years of enjoyment. Its unique design and bar height makes it an eye-catching addition to any backyard or patio. Easily assemble your chair in a few steps – no special tools necessary! Enjoy a summer afternoon outside with friends and family around this beautiful piece. shanty 2 chic
15. Making an Outdoor Adirondack Chair
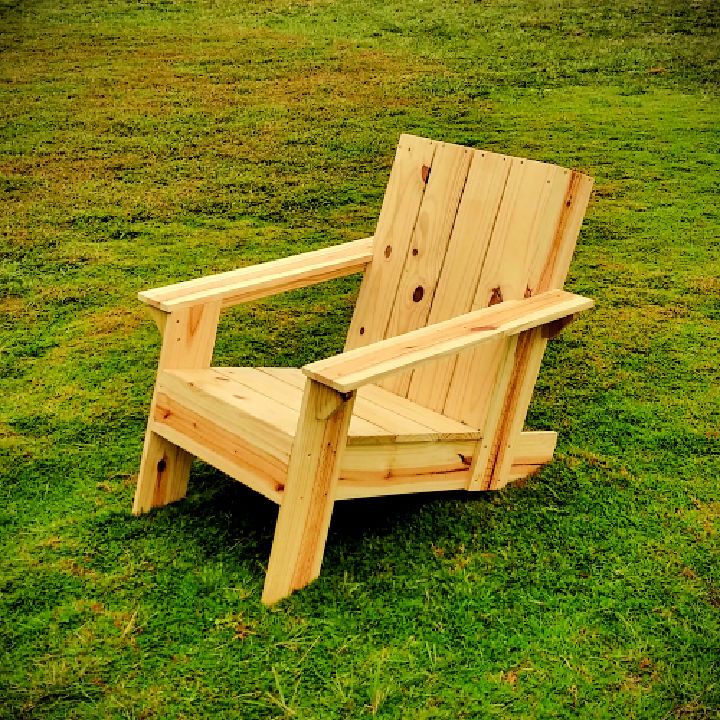
Unlock your creative side and bring a unique piece of furniture to life with an Adirondack chair! This DIY Adirondack chair guide offers a budget-friendly, easy-to-follow plan to build outdoor seating. You can assemble and customize the perfect chair in less than one day using only six 1x6s and one 2×2.
With this project, it’s simple to pick out the design that best fits your style, as these chairs come in all types of designs ranging in material, color, and complexity. Plus, some even rock for extra comfort! Get creative with this DIY Adirondack chair plan and enjoy stylish outdoor seating that will turn heads. thecraftsmanblog
16. Modern DIY Adirondack Chairs
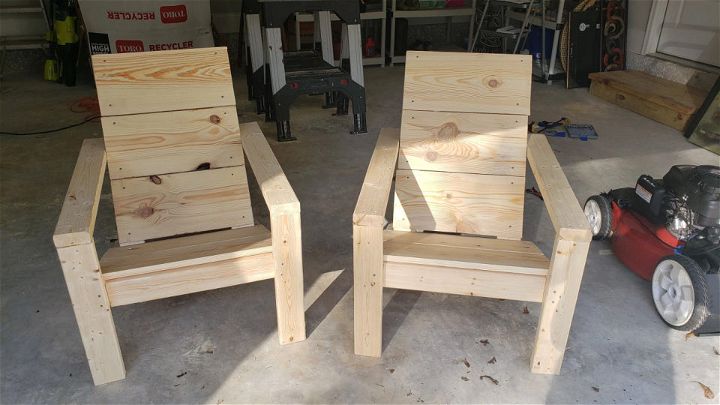
Construct the perfect outdoor seating area with these easy-to-follow DIY modern Adirondack chairs! With only basic woodworking skills and less than $100, you can build two beautiful modern chairs that stand out. All you need is 2×4, and 1×10 wood, waterproofing stain & sealant, and plastic wood filler – this plan provides step-by-step instructions to finish your project quickly! Perfect for any home or backyard setup. Add a touch of modern style to your space today with these unique DIY Adirondack chairs! changenfocus
17. DIY Backyard Adirondack Chairs
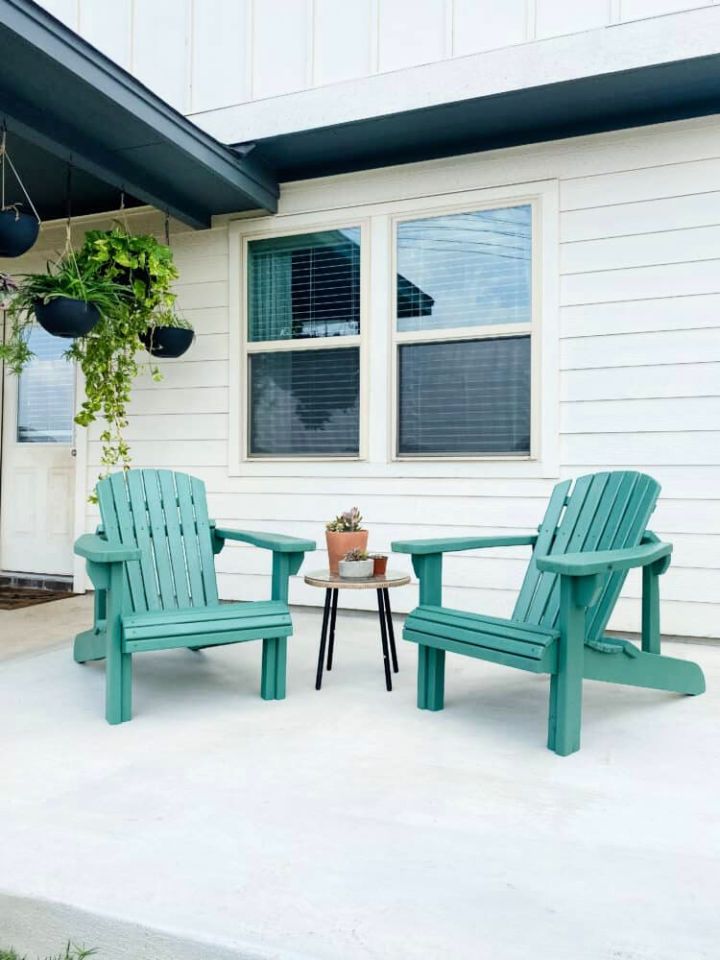
Check out these diy adirondack chair plans and create a cozy spot to relax and unwind. Sit back, relax and get ready to bring the outdoors closer to home with these stylish Adirondack chairs! The detailed instructions will guide you through tracing, cutting and assembling the chairs yourself. With just wood, paint and spar urethane, you’ll have these gorgeous outdoor pieces in no time – for an incredibly low cost of $128.98! Build a set today and enjoy them for many years to come. loveandrenova
18. Make an Adirondack Chair From Plywood
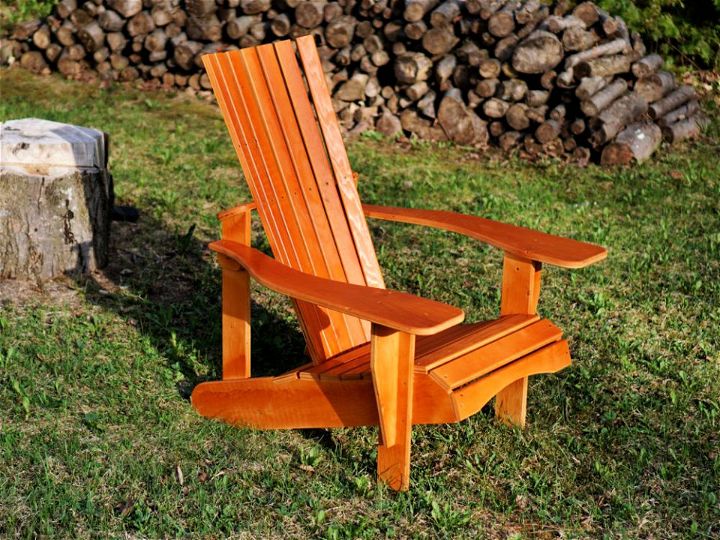
Bring a classic look to your outdoor patio with handmade adirondack chairs made from ¾″ exterior grade sheathing plywood. This project will impress and add warmth and personality to any outdoor area. With the right tools and techniques, you can make a one-of-a-kind chair that will last for years of enjoyment. Get creative by adding stains or paints in colors of your choice, or leave it plain for an iconic rustic look. Either way, you’ll have a piece of furniture that fits perfectly into your backyard oasis! ibuildit
19. How to Build Child Size Adirondack Chair
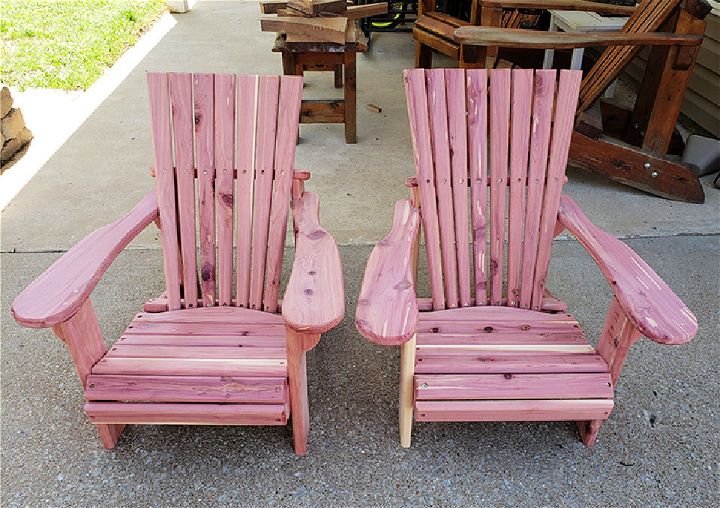
Build a special seat for your little ones with a child-size Adirondack chair! Perfect for relaxing on the back porch, these chairs provide both comfort and safety. With its sturdy construction to prevent tipping over, your kids can roughhouse in their little spot without you worrying about them. Make one today and let them experience the comforts of an adult-sized Adirondack chair in miniature form! baynecustomwood
20. DIY 2×4 Adirondack Chairs
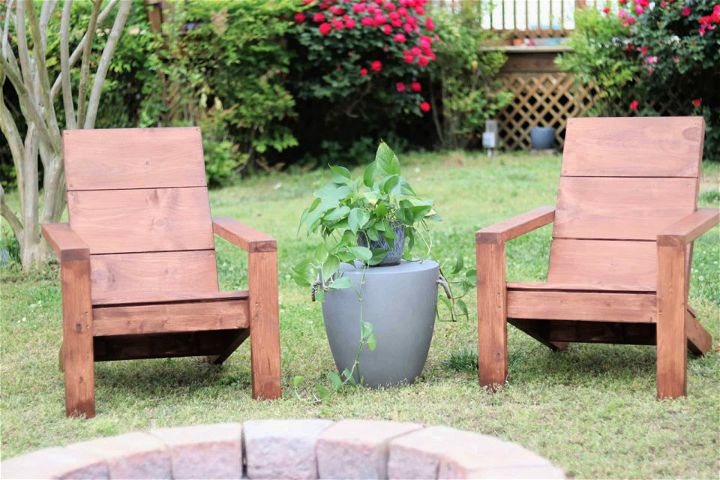
Build your dream outdoor furniture with these diy adirondack chair plans. Experience the perfect union of relaxation and affordability with this Adirondack chair! This plan will show you everything you need to know about building 2×4 Adirondack chairs. This plan has covered everything from gathering the materials, tools and techniques for cutting down boards to assembling your chairs! You can customize them with wood stain or sealer to give these DIY outdoor chairs more character. With this simple step-by-step guide, anyone can make their outdoor seating look great and comfortable too! raisingnobles
21. Simple DIY Adirondack Chairs
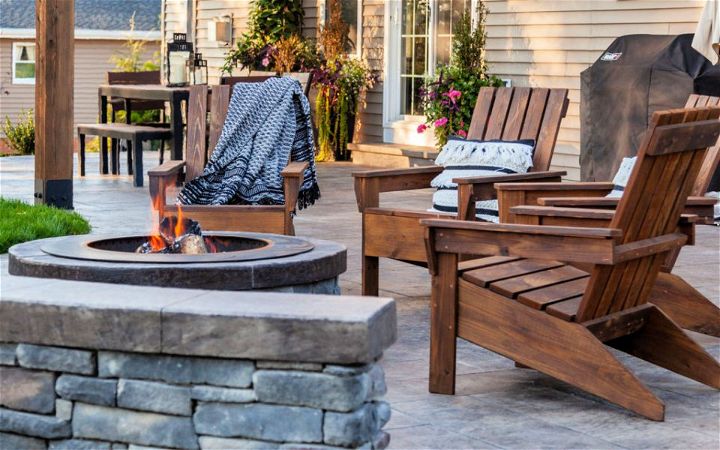
Love the classic style of Adirondack chairs? Make your own with these DIY Adirondack chairs! These simple, clean, modern designs are perfect for any outdoor area. Using pressure-treated wood for 1×8 stringers and apron gives you a heavier and more solid option at an affordable price. For that timeless look everyone loves, try out these DIY Adirondack chairs today! hamiltonparkhome
22. How to Make Adirondack Chairs
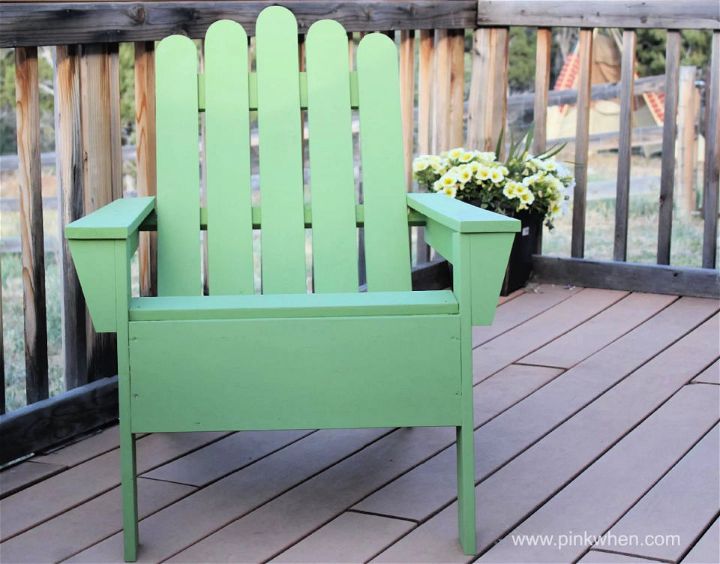
Making Adirondack chairs is a great way to spruce your patio or deck. With the sleek design and comfortable seating, you can make a beautiful outdoor space for entertaining family and friends, relaxing on summer evenings, or enjoying the sunshine. Make your Adirondack chairs with these easy-to-follow instructions – from choosing materials to assembling the pieces – and make an attractive addition to any backyard! With simple tools and supplies in most hardware stores, you can have gorgeous handmade Adirondack chairs in no time! pinkwhen
23. Building an Adirondack Chair Out Of Wood
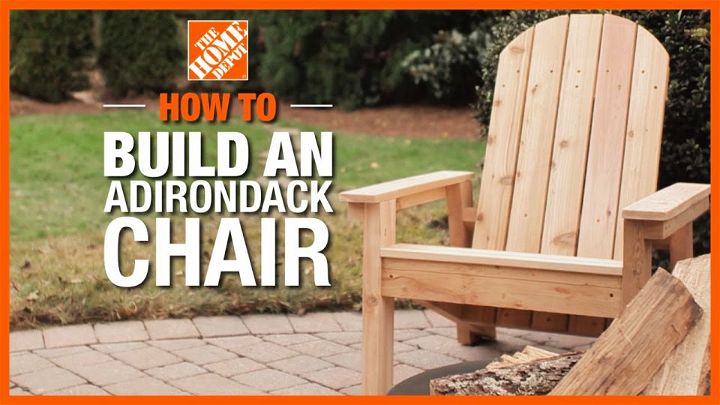
Let your creative spirit soar as you transform an ordinary patch of grass into a peaceful outdoor oasis with a DIY Adirondack chair! Enjoy a rustic, classic look and superior comfort in this sturdy yet comfortable design that will make any outdoor space more inviting and enjoyable. Take it easy in its low-slung seat while you rest your drink or snack on one of its wide armrests—it’s time for some relaxation! This easy guide for building an Adirondack chair today achieves the look you want!
24. Ultimate DIY Adirondack Chair
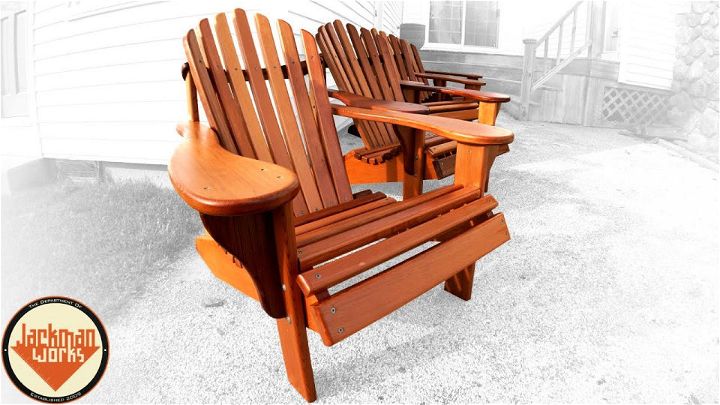
Step out of your comfort zone and explore the possibilities in the Adirondack chair! Crafted from clear grain western red cedar, fastened with stainless steel screws and carriage bolts, this chair will surely be a stunning addition to your outdoor patio or backyard. The entire project can be completed in just seven days, including dry time for finishing. Enjoy comfortable seating while admiring an elegant design that will turn heads. Make it simple by following this step-by-step guide today!
25. Building an Adirondack Chair – Step By Step Instructions
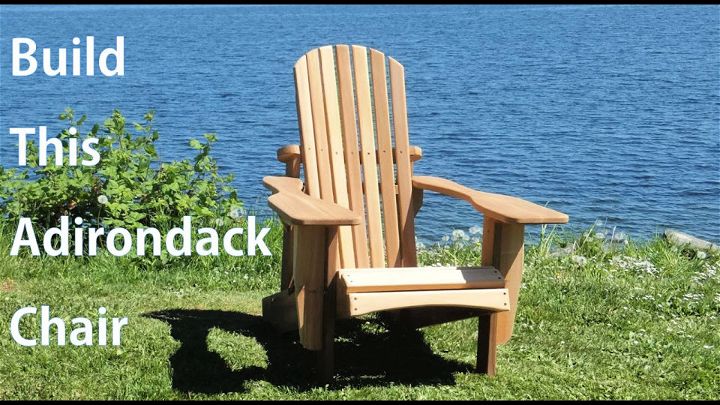
Make the perfect outdoor seating with a handmade Adirondack chair. From beginner to experienced woodworker, this project is easy to complete and adds style and comfort to your garden or porch. With sturdy wooden construction, you can be sure that it will last for years of enjoyment in the sun! Whether you’re looking for an afternoon hobby or want to make something special for friends and family, building your Adirondack chair will surely bring satisfaction. Get started today and make the most of warm summer days outside!
Conclusion:
Adirondack chairs are the perfect outdoor furniture for anyone who loves comfort, style, and DIY. With 25 free DIY Adirondack chair plans you can build, you have plenty of options to choose from. Whether you want a classic design, a modern twist, a love seat, a kid-sized chair, or a budget-friendly project, you can find the right plan for you.
All you need are some basic tools, materials, and a bit of creativity. You can also customize your chair with different colors, finishes, or decorations to suit your taste and personality. Building your own Adirondack chair is not only rewarding but also fun. You can enjoy the process of creating something with your own hands and then relax in your cozy chair for years to come. So don’t wait any longer and start your DIY Adirondack chair project today! Happy Adirondack chairs building!

