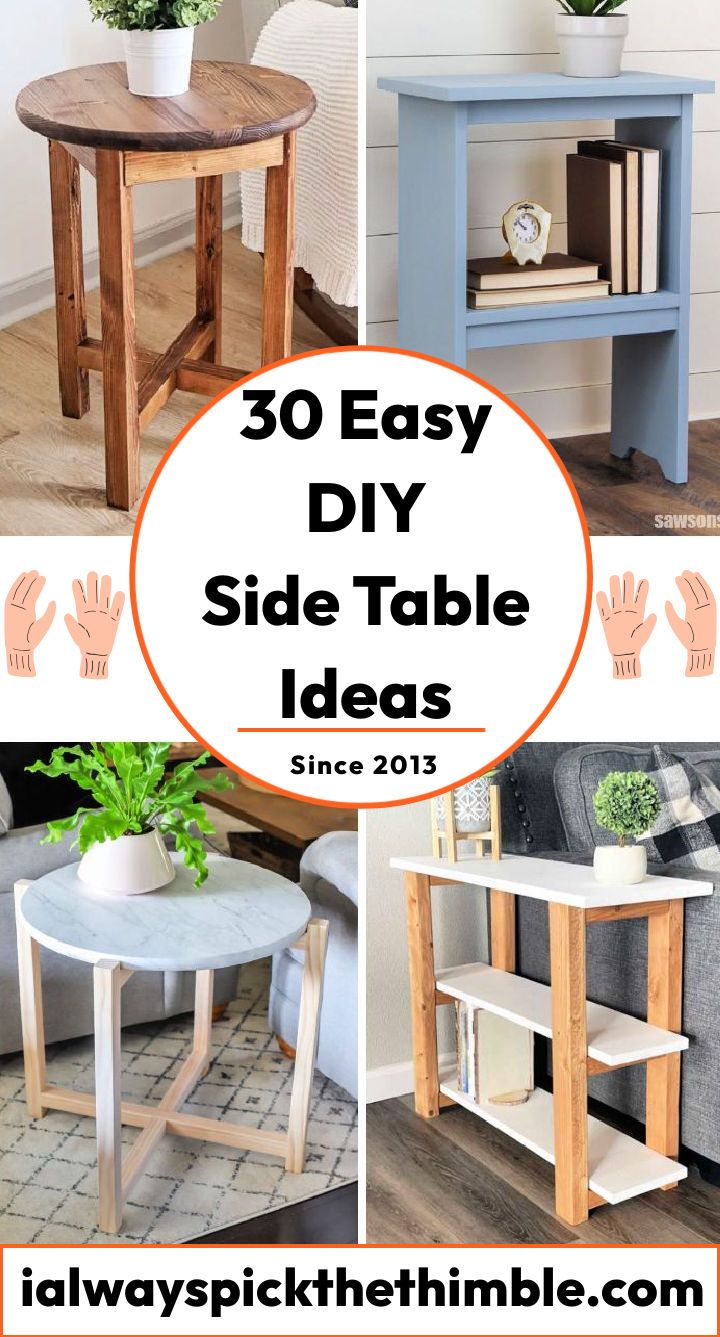
Transform your living space with a unique DIY side table! Learn how to make a side table with these 30 cheap DIY side table ideas and plans for you to choose from, featuring different designs and styles. All of DIY side table ideas come with simple, step-by-step instructions. DIY side tables are not only useful but also let you express your personal style and creativity in your space. You will find a variety of styles in our collection, such as the elegant DIY bedside table, the rustic DIY wood side table, or the clever DIY lamp table.
Our assembly guides give you a full list of the materials needed, easy-to-follow visual diagrams, and even some video tutorials. These DIY side table plans are suitable for both beginners and experienced DIYers. You can pick something as easy as a DIY small side table or try a more complex DIY accent table project.
The DIY side table ideas include the slim side table for a cozy living room, the contemporary DIY Z side table, which has a unique architectural look. Some other interesting options are the recycled fluted bedside table, the budget-friendly side table, and even an outdoor patio side table for less than $10.
Choosing a DIY side table project lets you customize it to your liking and saves you money compared to buying one from a store. With these free and cheap DIY side table ideas and plans, you can make a practical and stylish piece that matches your decor. So get your toolbox and start your DIY side table project today!
How to Choose the Right Material for Your DIY Side Table
One of the most important decisions you have to make when making a DIY side table is what material to use. The material will affect the cost, durability, appearance, and ease of your project. There are many options to choose from, such as wood, metal, glass, plastic, concrete, and more. Each material has its own pros and cons, so you have to consider your budget, style, purpose, and skill level before you decide.
Here are some factors to keep in mind when choosing a material for your DIY side table:
- Cost: Some materials are more expensive than others, so you have to balance your budget with your desired quality and look. For example, wood is a versatile and natural material that can range from cheap to pricey depending on the type and finish. Metal is a sturdy and modern material that can be affordable or costly depending on the thickness and shape. Glass is a sleek and elegant material that can be pricey or cheap depending on the size and thickness.
- Durability: Some materials are more durable than others, so you have to think about how long you want your side table to last and how much wear and tear it will endure. For example, wood is a strong and resilient material that can last for years if properly treated and maintained. Metal is a hard and rust-resistant material that can withstand harsh conditions and heavy loads. Glass is a fragile and breakable material that can crack or shatter if dropped or hit.
- Appearance: Some materials are more attractive than others, so you have to consider your personal taste and the style of your room. For example, wood is a warm and cozy material that can suit any decor and color scheme. Metal is a cool and industrial material that can add a touch of sophistication and contrast. Glass is a clear and minimalist material that can create a sense of spaciousness and lightness.
- Ease: Some materials are easier to work with than others, so you have to assess your skill level and the tools you have available. For example, wood is a flexible and forgiving material that can be cut, drilled, glued, nailed, sanded and painted with basic tools. Metal is a rigid and sharp material that can require special tools such as saws, drills, clamps, and welders. Glass is a smooth and slippery material that can need careful handling and cutting with glass cutters or diamond blades.
10 Tips to Avoid Common Mistakes and Problems When Making a Side Table
Making a DIY side table can be a fun and rewarding project, but it can also come with some challenges and frustrations. To avoid common mistakes and problems that can ruin your work or waste your time, follow these 10 tips:
- Measure twice, cut once: This is a golden rule of any DIY project. Make sure you measure your materials accurately before you cut them to avoid wasting material or ending up with pieces that don’t fit together.
- Use the right tools: Using the wrong tools can damage your materials or cause injuries. Make sure you use the appropriate tools for each task, such as saws for cutting, drills for making holes, clamps for holding pieces together, etc.
- Follow instructions: If you are following a tutorial or a plan for making a side table, make sure you read and follow the instructions carefully. Don’t skip steps or improvise unless you know what you are doing.
- Check for levelness: A side table that is not level can look sloppy or unstable. Use a level tool or app to check if your tabletop and legs are levels before you attach them together.
- Sand smoothly: Sanding your wood pieces can make them smooth and ready for painting or staining. However, sanding too much or too little can cause problems such as uneven surfaces, scratches or splinters. Use the right grit of sandpaper for each stage of sanding, from coarse to fine, and sand in the direction of the wood grain.
- Paint evenly: Painting your side table can give it a fresh and colorful look. However, painting too thickly or thinly can cause problems such as drips, bubbles or streaks. Use the right type of paint for your material, such as acrylic for wood or spray paint for metal, and apply thin coats with even strokes.
- Stain properly: Staining your wood pieces can enhance their natural beauty and protect them from moisture. However, staining too darkly or lightly can cause problems such as blotches, uneven tones or fading. Use the right type of stain for your wood type, such as oil-based for hardwoods or water-based for softwoods, and apply it with a rag or brush following the wood grain.
- Glue securely: Gluing your pieces together can make them strong and durable. However, gluing too much or too little can cause problems such as gaps, cracks or weak joints. Use the right type of glue for your material, such as wood glue for wood or epoxy for metal, and apply it sparingly and evenly on the surfaces to be joined.
- Nail carefully: Nailing your pieces together can make them fast and easy to assemble. However, nailing too hard or soft can cause problems such as splits, dents or loose nails. Use the right size and type of nails for your material, such as finishing nails for wood or rivets for metal, and hammer them gently and straight into the holes.
- Fix mistakes: If you make a mistake or encounter a problem while making your side table, don’t panic or give up. Most mistakes can be fixed with some patience and creativity. For example, if you cut a piece too short, you can add a filler piece or a decorative element to cover the gap. If you paint a piece the wrong color, you can sand it off and repaint it. If you glue a piece the wrong way, you can use a heat gun or a solvent to loosen the glue and reposition it.
How to Build a Simple and Stylish Side Table with Minimal Tools and Skills
If you are looking for a simple and stylish side table that you can make with minimal tools and skills, this project is for you. All you need are some wood boards, some metal pipes and fittings, some screws and some paint. Here are the steps to follow:
- Step 1: Cut your wood boards to size. You will need one board for the table top and four boards for the legs. You can use any type of wood you like, such as pine, oak, or plywood. The size of your boards will depend on how big you want your table to be, but a good example is 18 x 18 inches for the top and 16 x 2 inches for the legs.
- Step 2: Sand your wood boards to smooth them and remove any rough edges. You can use a hand sander or a sanding block with medium-grit sandpaper. Wipe off any dust with a wet cloth.
- Step 3: Paint your wood boards with your desired color. You can use any type of paint you like, such as acrylic, latex or chalk paint. Apply only two coats of paint with a brush or a roller, letting each coat dry completely before applying the next one.
- Step 4: Assemble your metal pipes and fittings to form the base of your table. You will need four pipes for the vertical supports, four flanges for the feet, four elbows for the corners, and four tees for the crossbars. You can use any type of metal pipe you like, such as galvanized steel, copper or black iron. The size of your pipes and fittings will depend on how tall you want your table to be, but a good example is ¾ inch diameter pipes and fittings. Screw the pipes and fittings together by hand or with a wrench until they are tight.
- Step 5: Attach your wood top to your metal base with screws. You will need eight screws, four for each side of the top. You can use any type of screw you like, such as wood screws, sheet metal screws, or self-tapping screws. The size of your screws will rely on the thickness of your wood top and the diameter of your pipes, but a good example is 1-inch long screws. Drill pilot holes through the wood top and into the pipes using a drill bit slightly smaller than your screws. Then drive the screws through the holes using a drill or a screwdriver until they are flush with the wood surface.
And that’s it! You have just made a simple and stylish side table with minimal tools and skills. Enjoy your new piece of furniture!
How to Customize and Decorate Your DIY Side Table to Suit Your Style and Space
Now that you have made your DIY side table, you can customize and decorate it to suit your style and space. There are many ways to personalize your side table, such as adding stickers, decals, stencils, knobs, handles, hooks, baskets, trays, lamps, plants, books, candles and more. Here are some ideas to inspire you:
- Add stickers or decals: You can add some stickers or decals to your wood top or metal base to give it some flair and character. You can use any type of sticker or decal you like, such as letters, numbers, shapes, animals, flowers, stars, etc. You can easily buy them online or at craft stores, or you can make your own with vinyl sheets and a cutting machine. Just peel and stick them on your side table wherever you like.
- Add stencils: You can add some stencils to your wood top or metal base to create some patterns and designs. You can use any type of stencil you like, such as geometric, floral, tribal, abstract, etc. You can buy them at craft stores, or you can make your own with cardboard and a craft knife. Just place the stencil on your side table and paint over it with a sponge or a brush.
- Add knobs or handles: You can add some knobs or handles to your wood top or metal base to make it easier to move and carry. You can use any type of knob or handle you like, such as wood, metal, ceramic, glass, etc. You can repurpose some old ones from other furniture. Just drill holes through your side table and attach the knobs or handles with screws and nuts.
- Add hooks: You can add some hooks to your metal base to hang some items and accessories. You can use any type of hook you like, such as S-hooks, C-hooks, J-hooks, etc. You can buy them online or at hardware stores, or you can bend some wire hangers into hooks. Just hook them onto your pipes wherever you like.
- Add baskets or trays: You can add some baskets or trays to your wood top or metal base to store some items and organize your space. You can use any type of basket or tray you like, such as wicker, metal, plastic, wood, etc. You can buy them online or at home stores, or you can repurpose some old ones from other furniture. Just place them on your side table wherever you like.
- Add lamps: You can add some lamps to your wood top or metal base to light up your space and create some ambiance. You can use any type of lamp you like, such as table lamps, floor lamps, desk lamps, etc. You can buy them online or at home stores, or you can make your own with some bottles, jars, cans, etc. Just plug them in and turn them on.
- Add plants: You can add some plants to your wood top or metal base to bring some life and color to your space. You can use any type of plant you like, such as succulents, cacti, herbs, flowers, etc. You can buy them online or at garden centers, or you can grow your own from seeds or cuttings. Just place them in some pots or containers and water them regularly.
- Add books: You can add some books to your wood top or metal base to display your interests and knowledge. You can use any type of book you like, such as novels, magazines, comics, cookbooks, etc. You can buy them online or at bookstores, or you can borrow them from libraries or friends. Just stack them or arrange them on your side table wherever you like.
- Add candles: You can add some candles to your wood top or metal base to create some warmth and coziness. You can use any type of candle you like, such as pillar candles, votive candles, tea light candles, etc. You can buy them online or at home stores, or you can make your own with some wax, wicks, and scents. Just light them up and enjoy the glow.
These are just some of the ways you can customize and decorate your DIY side table to suit your style and space. Feel free to experiment and have fun with your creativity!
What You Need to Know About the Basics of Side Table Design and Function
A side table is a versatile and useful piece of furniture that can serve many purposes and functions in your home. It can provide extra surface space, storage space, display space, and more. It can also enhance the look and feel of your room with its style and color. However, to make the most of your side table, you need to know some basics of side table design and function. Here are some things to consider:
- Size: The size of your side table should match the size of your room and the furniture around it. It should not be too big or too small, but just right. A good rule of thumb is to make sure your side table is about the same height as the arm of your sofa or chair and about the same width as half of your sofa or one-third of your bed. This way, your side table will be easy to reach and use and will not look out of place or cluttered.
- Shape: The shape of your side table should complement the shape of your room and the furniture around it. It should not clash or contrast but harmonize. A good rule of thumb is to mix and match different shapes for balance and interest. For example, if you have a rectangular sofa or bed, you can choose a round or oval side table to soften the edges and add some curves. If you have a round or oval sofa or bed, you can choose a square or rectangular side table to create some angles and structure.
- Style: The style of your side table should reflect your personal taste and the theme of your room. It should not clash or contrast but coordinate. A good rule of thumb is to choose a side table that matches or complements the style of your other furniture and accessories. For example, if you have a modern and minimalist room, you can choose a sleek and simple side table with clean lines and neutral colors. If you have a rustic and cozy room, you can choose a warm and textured side table with natural materials and earthy colors.
- Function: The function of your side table should suit your needs and preferences. It should not be useless or redundant but useful and convenient. A good rule of thumb is to choose a side table that offers the features and functions that you need and want. For example, if you need extra storage space, you can choose a side table with drawers, shelves, or baskets. If you need extra display space, you can choose a side table with a glass top, a mirror top, or a tray top. If you need extra lighting space, you can choose a side table with a built-in lamp, a hanging lamp, or a candle holder.
These are some of the basics of side table design and function that you need to know to make the most of your DIY side table. Remember, there is no right or wrong way to design and use your side table as long as it works for you and your space. Have fun and enjoy your DIY project!
DIY Side Table Ideas
If you are looking for some DIY side table ideas to inspire you, explore ways to make a DIY side table with different materials, styles, and functions. You can use items that you already have at home, or you can buy some cheap and easy materials from online or local stores. Also, you can follow some plans, or you can improvise and make your own design. You can make a simple and basic side table, or you can make a complex and unique side table. Let’s explore these DIY side table ideas below:
1. Making a Narrow Side Table for Living Room
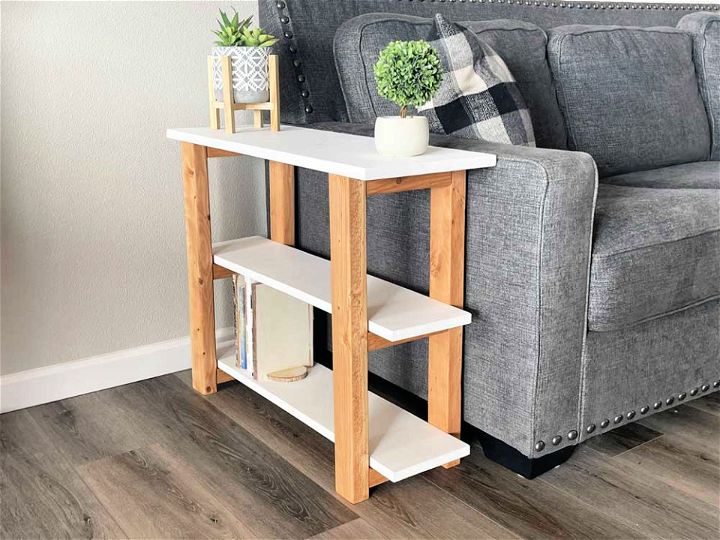
Build your narrow side table with free plans designed to be beginner friendly. No complex tools or materials are needed – just 1×8, 1×12 & 2×4 boards to make a functional side table for your home. Enjoy the convenience of having somewhere to rest a cup or phone and add storage and grounding to the room! With this simple plan, you can easily craft your own narrow side table with minimal effort. ana white
2. Modern DIY Z Side Table
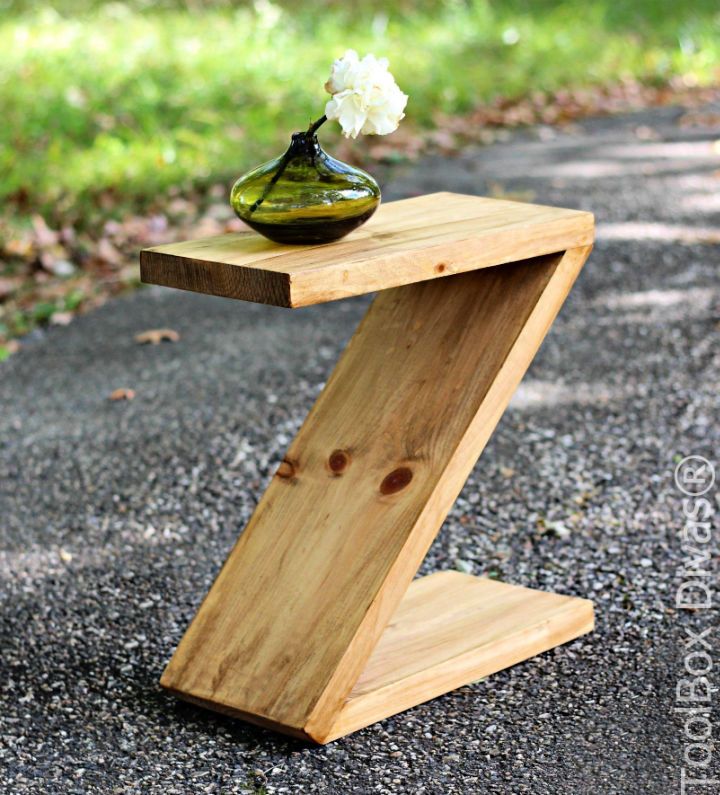
This DIY modern “z” side table is the perfect addition to any home. This easy-to-follow tutorial uses 1x8x6 premium wood and provides everything you need to make a stylish, contemporary side table that looks like it came from a designer showroom. With just basic tools and materials such as wood glue, wood filler, stain or paint of your choice, you can make this beautiful piece of furniture with minimal effort. The unique “z” shape gives an elegant look while remaining simple and modern. Transform your space in no time with this DIY side table! toolboxdivas
3. DIY Thrifty Side Table
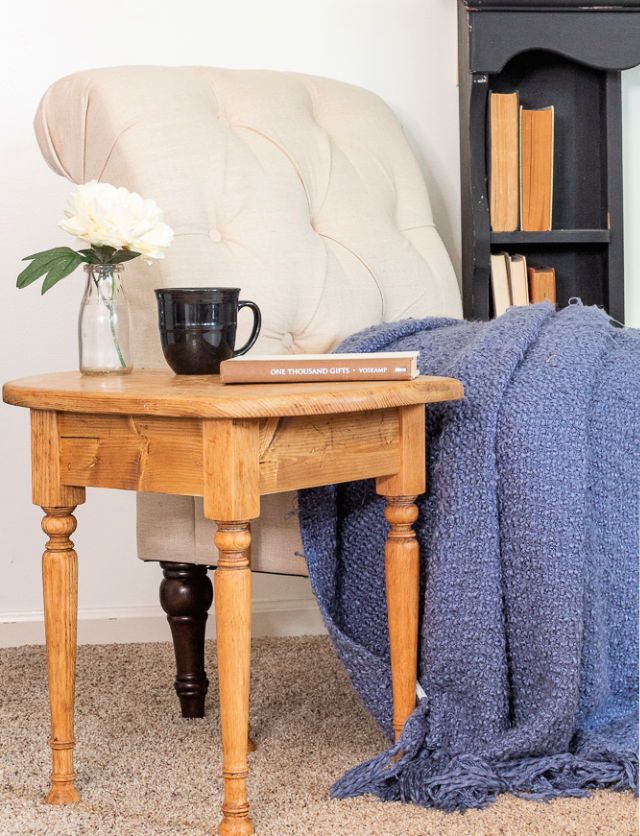
Are you looking to add a touch of charm and character to your home? Try building a beautiful, thrifty DIY side table! With just some basic supplies like taxidermy plaques or pieces of wood for the tabletop, stair spindles and 1×3 boards, you’ll soon have an elegant piece that will envy all your friends. Not only is this project easy enough for even beginner DIYers, but it’s also budget-friendly! So don’t wait any longer; start crafting today and bring some european farmhouse style into your living space. opendoorsopenheart
4. How to Build Hairpin Side Table
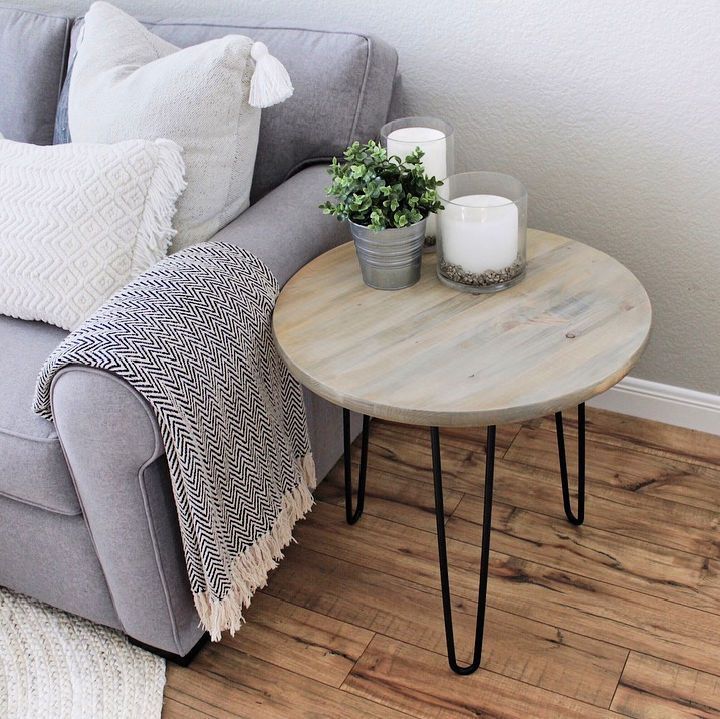
Make beautiful and unique furniture with this easy DIY project – make your hairpin side table! With just a round laminated pine board, hairpin legs, weathered oak stain, white wash pickling stain, water based clear polyurethane and lint-free cloth for staining, you can make custom pieces for your home in no time. Get creative using different stains to achieve your desired look and make something special that will last for years. With this simple tutorial, you’ll be an expert in making these trendy yet timeless tables in no time! domesticblonde
5. Build Your Own Skinny Side Table
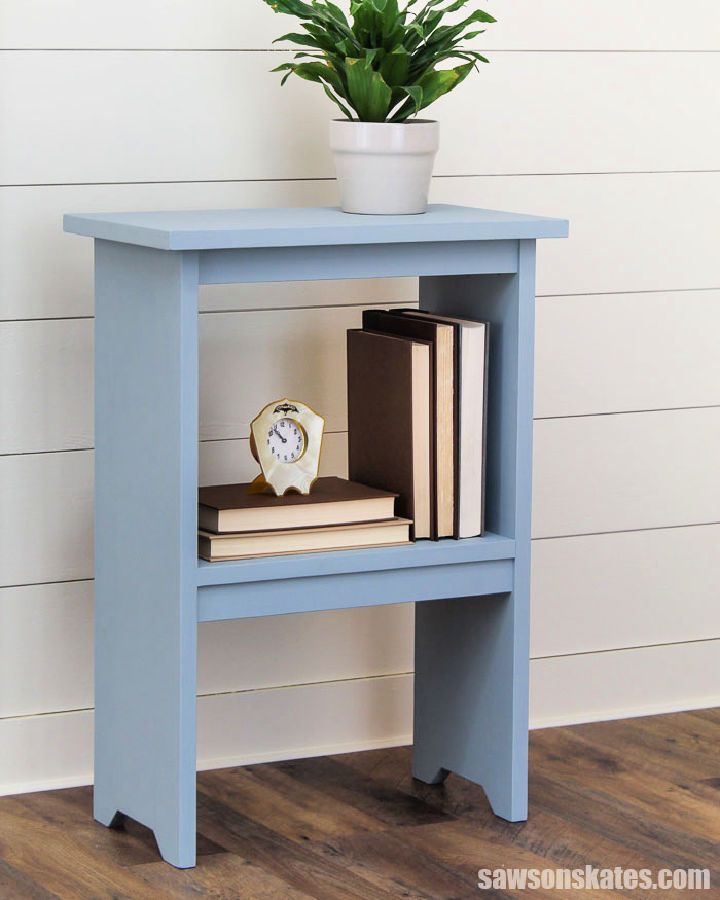
Make your own simple wooden DIY side table with ease. This small-sized, casual-style table is perfect for any room in your home, and the best part is that it only requires 3 tools to make! The tabletop can fit a lamp, while the storage shelf below provides great space to display plants, organize books and store remotes. All you’ll need are wood, wood glue, and some basic tools to get started on this easy afternoon project. Don’t hesitate – make extra functional storage in any room with this DIY wooden side table today! sawsonskates
6. Handmade Round Faux Marble Side Table
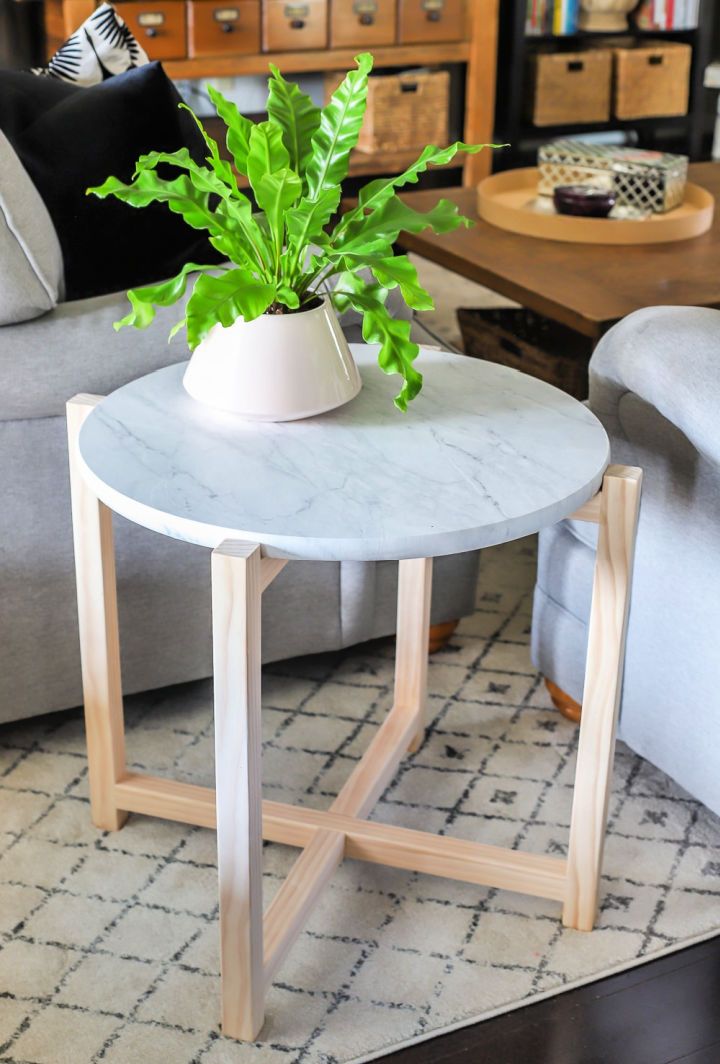
Find DIY side table ideas for every style and budget. Whether you want a rustic, modern, or vintage table, these ideas will show you how to make it happen. Here is this stylish round marble side table that is a great beginner-friendly DIY project that can be created in just 3 hours! Costing only around $50, you’ll need a ¾ inch round wooden project panel, 2 x 2 board and marble contact paper to complete it. The modern design makes it perfect for any living space, adding an elegant yet minimalistic touch. Get creative with your furniture pieces and make the perfect home environment – all for a fraction of the price! jenwoodhouse
7. Upcycled Fluted Bedside Table Building Plans
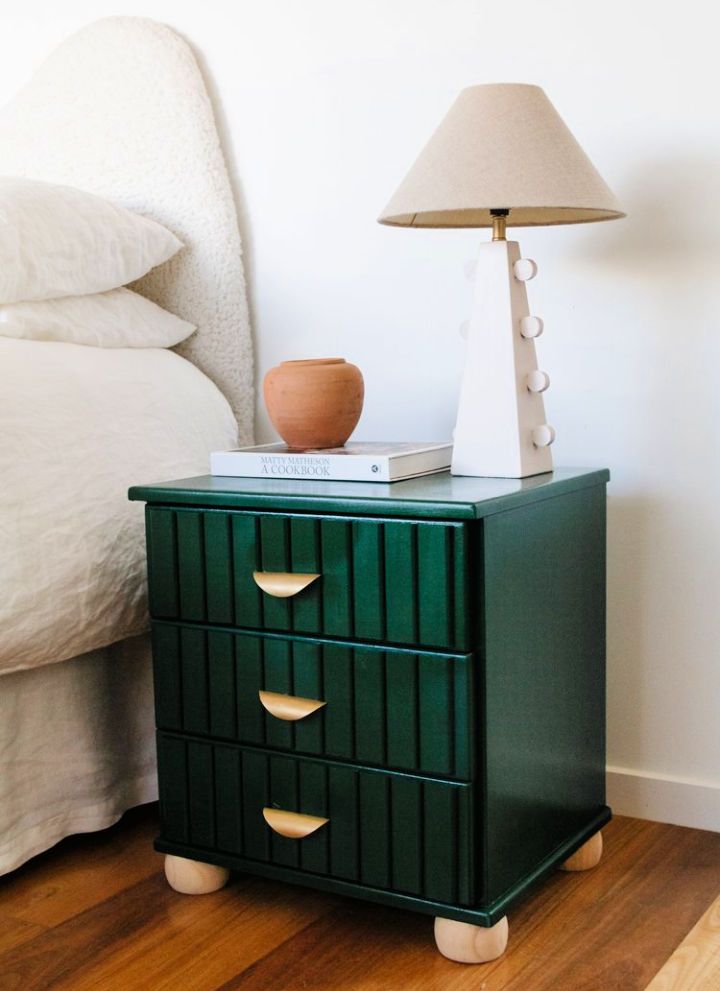
DIY a unique, upcycled fluted bedside table in just 4 to 5 hours with an intermediate DIYer skill level. All you need is a secondhand bedside table, baby wipes for cleaning, 2 x 2.4m rounded edge molding for decorating the sides of your new piece, interior wood glue and ball furniture legs, plus spray paint that matches the look you want. And all at only $100! This stylish and affordable upcycled fluted bedside table project gives your bedroom furniture a special twist. smorhome
8. Cheap DIY Boho Chic Side Table
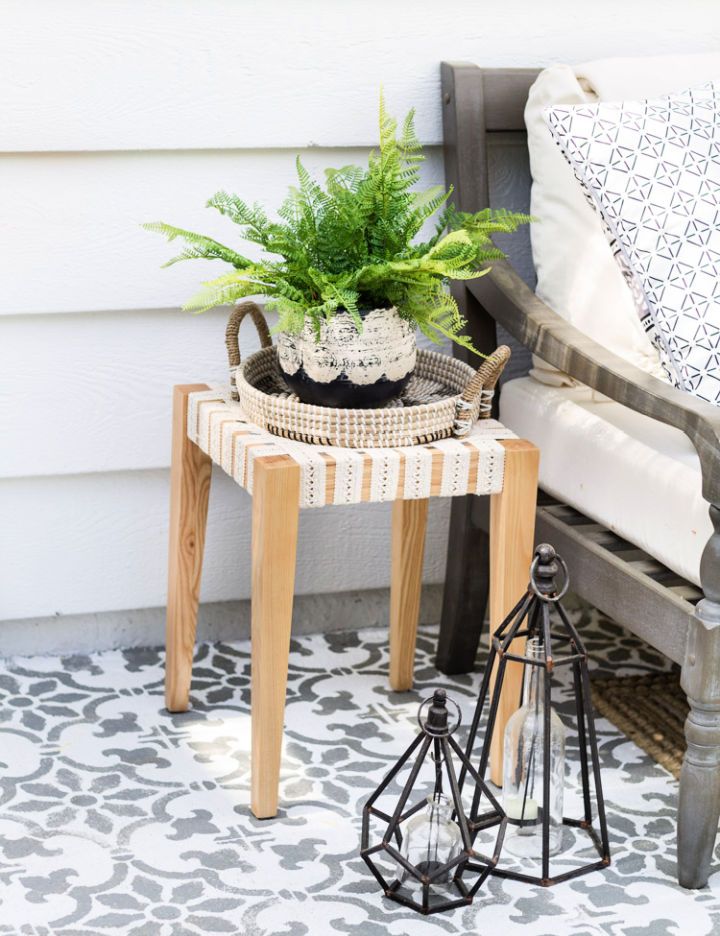
Craft the perfect outdoor setup with this chic, handmade side table and make an affordable yet eye-catching addition to your backyard. To get started, you need a few simple materials that’ll likely be in most DIYers’ toolbox. With creativity and personal touches, this boho-chic side table can be yours at little cost while still looking fabulous next to your outdoor sofa. Best of all, its weatherproof construction will ensure it stands against the elements for years! zevyjoy
9. DIY Nautical Accent Table
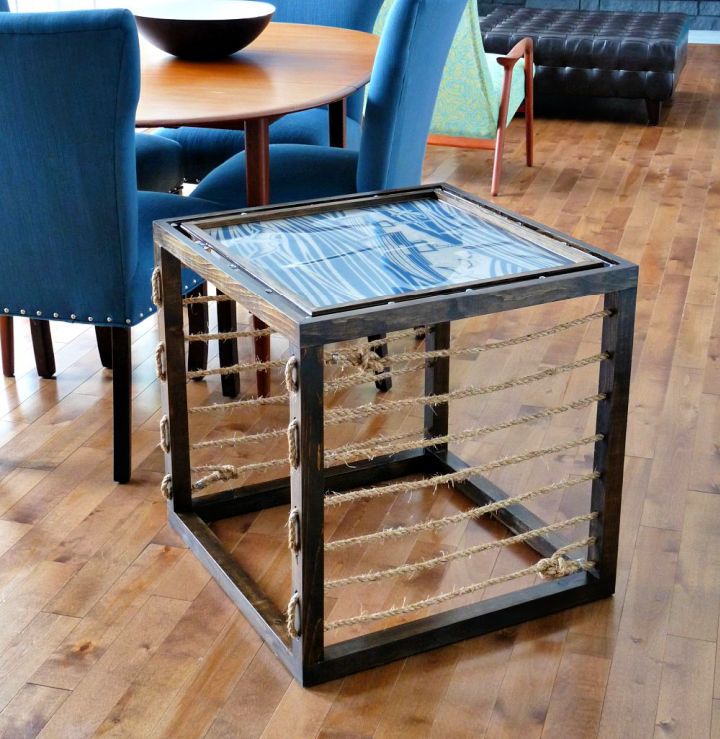
These diy side table ideas are easy, fun, and cheap to do. Put together a chic and stylish nautical-inspired accent table quickly and easily with simple materials like 1.5″ x 1.5″ pine lumber pieces, ¾″ x 1.5″ pine lumber pieces, ¾″ x ¾″ pine lumber pieces, scrap pieces of pine ⅜″ plywood, wallpaper and rope for decoration as well as round blue marbles secured by epoxy glue to complete the look! All you need is a couple of hours – no special tools or skills required – for an eye-catching addition to any room in your home. danslelakehouse
10. DIY Small Side Table With Storage
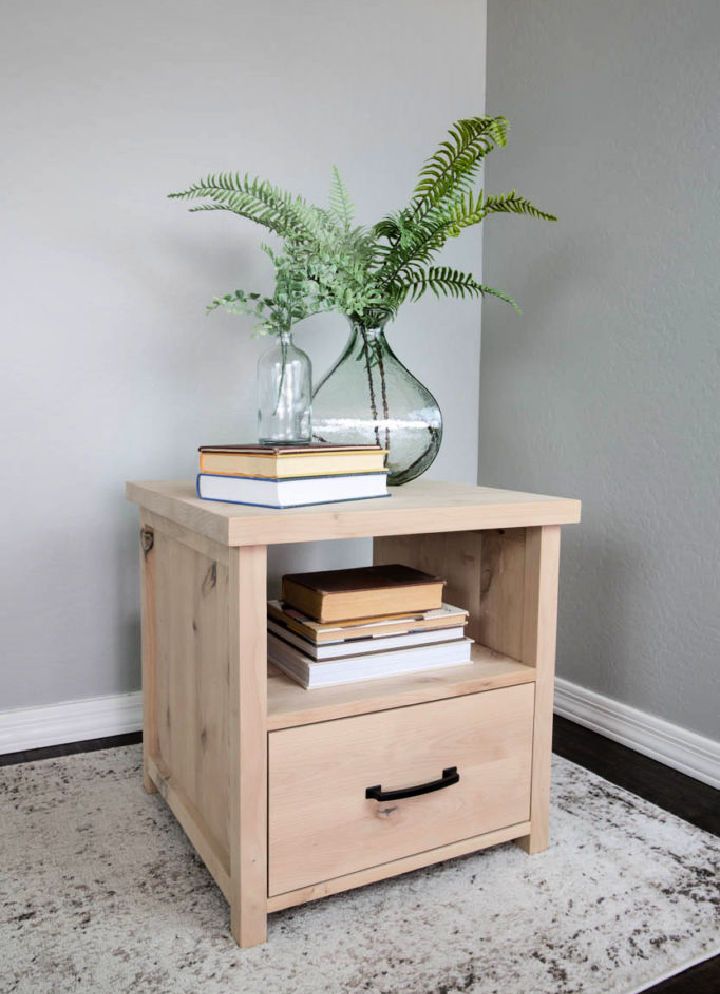
Looking for an easy yet rewarding project to spruce up your home? Build a side table with storage that is not only stylish but also practical! With plenty of room for blankets, books or games, you can get all the materials from your local store to make this beautiful piece of furniture. It’s cost-effective, too, as it costs much less than buying pre-made pieces. Follow the step-by-step instructions and make a DIY side table with storage in no time – perfect for any modern home looking to add more style and functionality! addicted2diy
11. Plywood Side Table Idea
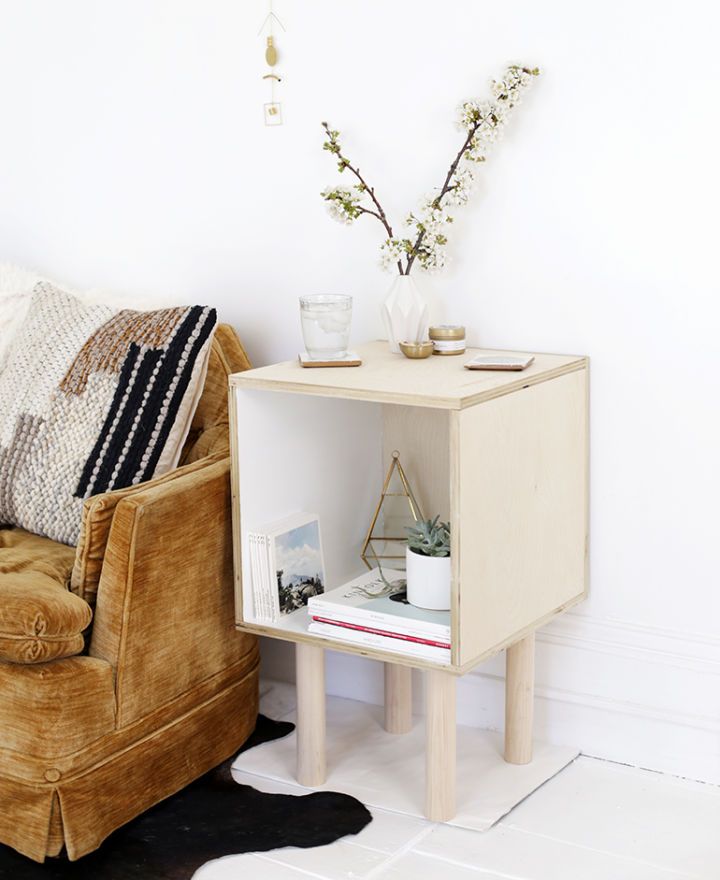
Introducing a stylish DIY side table made out of birch plywood! Not only will it save you money, but it’s also customizable to make it look just how you want. Plus, with extra storage space for books or planters, this piece is perfect for any room in your home. All you need are simple materials like dowels and wood filler to complete the project – then just add some paint and sandpaper to personalize it! Start building yours today and bring some charm into your living space! themerrythought
12. Simple DIY Side Table
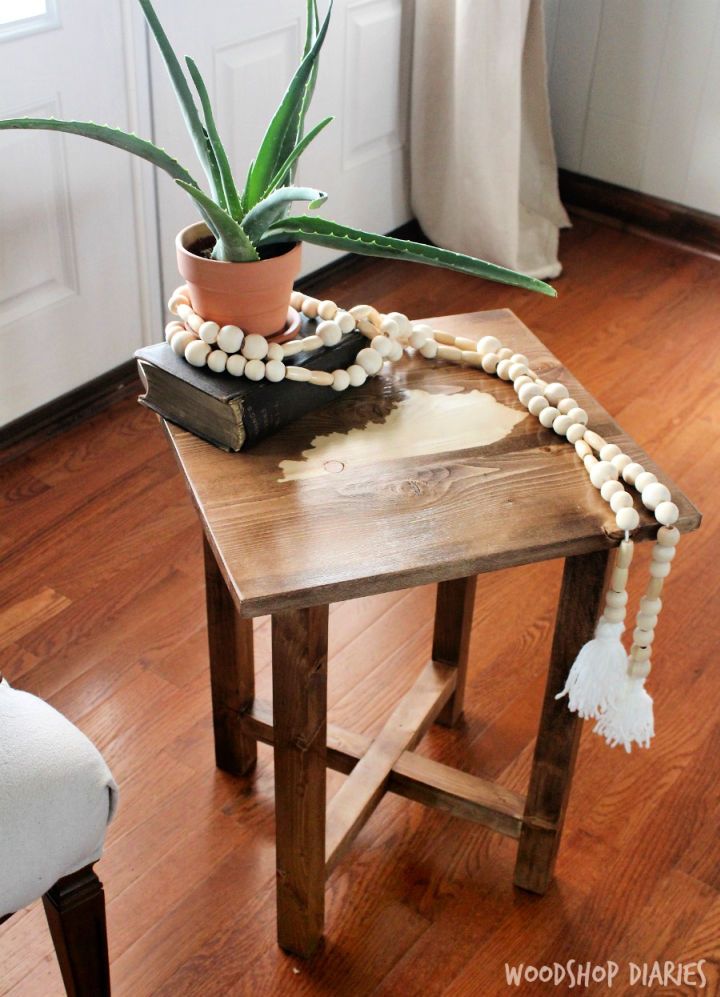
Get crafty and save some cash with this simple DIY side table! This easy-peasy project requires just 1×6 boards, 2×2 boards, and some basic tools. In no time, you’ll have a sturdy side table to store your phones or rest drinks on while lounging on the sofa – plus, it will add character to your space too! Get creative and make something unique that’s tailored just for you. Don’t wait – start building today! jenwoodhouse
13. DIY Wooden End Table
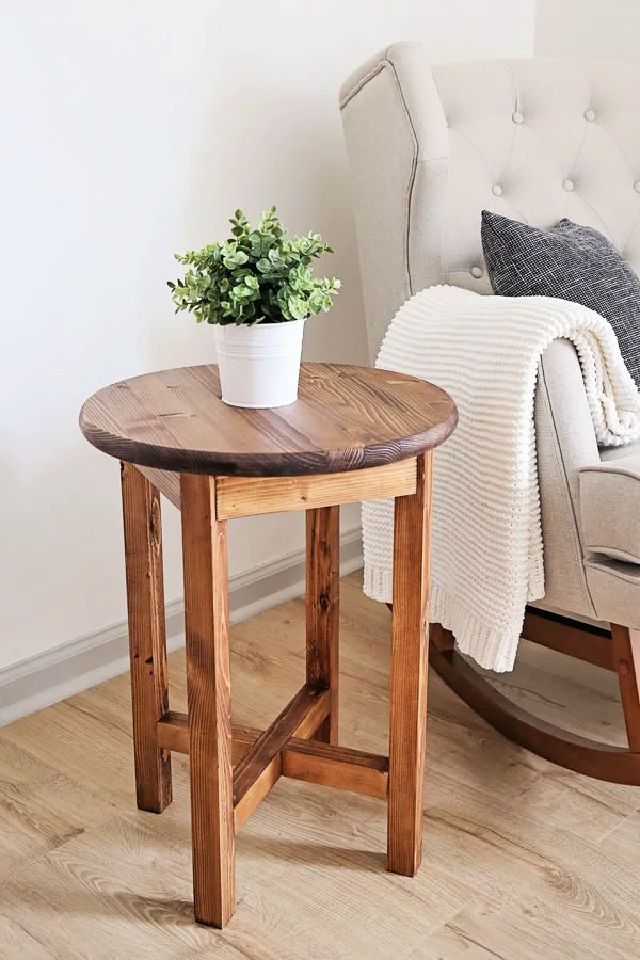
Assemble your perfect end table with this easy DIY project! This stylish side table is budget-friendly and only costs about $16 in lumber. You need an 18″ round panel board, 2x2s and 1x3s, wood glue, wood filler and wood stain. Customize the design to fit any space, from home decor to office areas. Get creative and finish it with a personal touch – use different stains or paints for an extra unique look! With patience and skill, anyone can make this affordable DIY end table that will last years. angelamariemade
14. Cool DIY Fluted Side Table
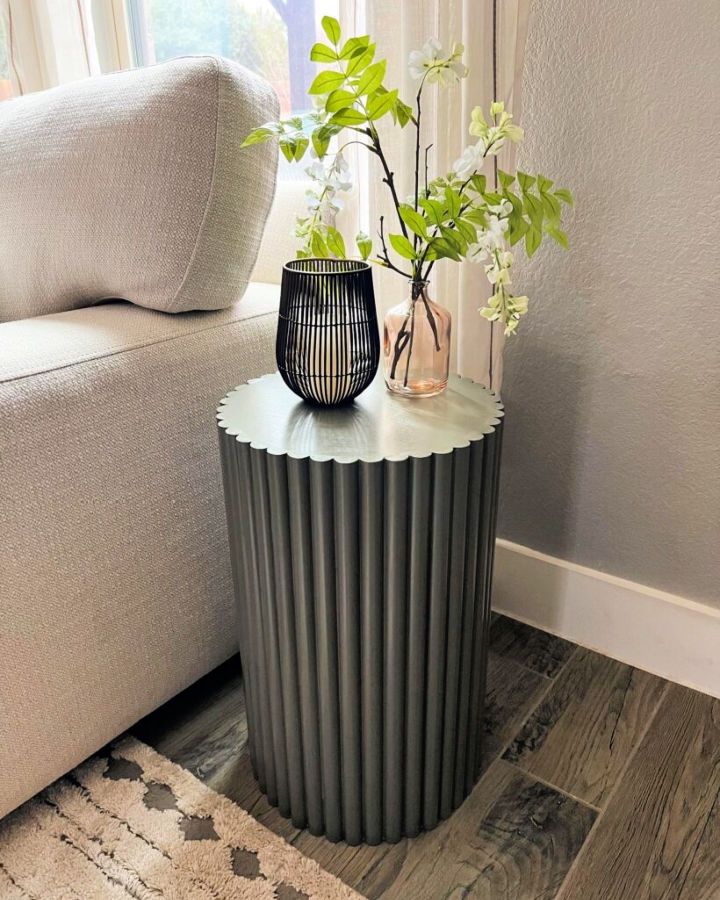
Make a stylish and timeless furniture piece with this DIY fluted side table! It’s easier than you think – even without power tools. All you need is a concrete form tube, ½ round trim, ½” or ¾” plywood sheet, construction adhesive, wood glue, wood filler and caulk. With these supplies and a few assembly steps, you can update your living space, which will last for years. And when it’s ready to go, just add some paint for the perfect finishing touch! Get creative with this unique project today for an eye-catching look in any home. ourfauxfarmhouse
15. Make a Chic Fluted Side Table
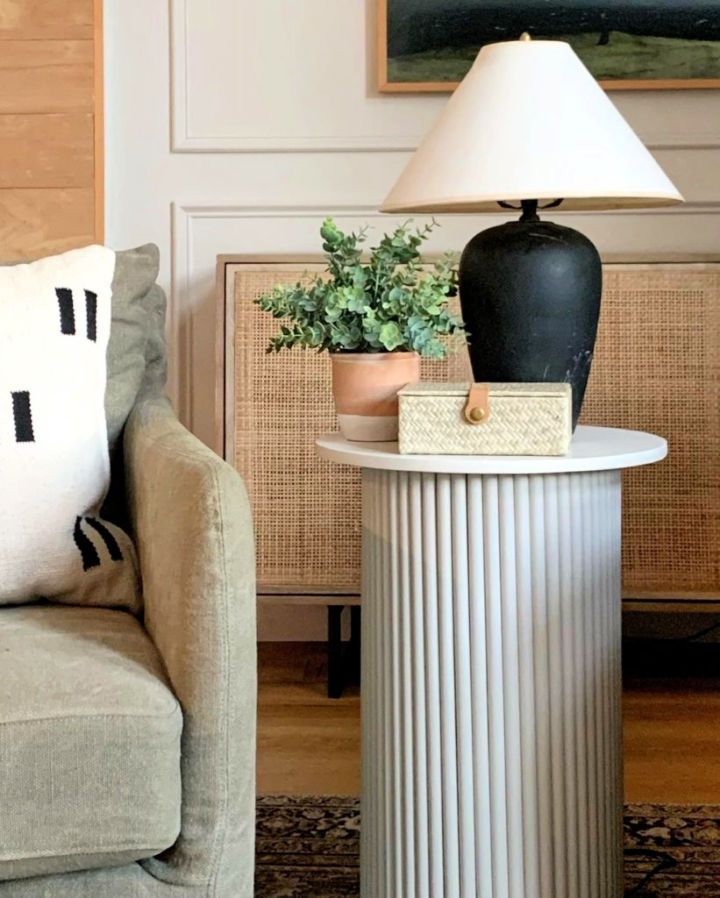
Searching for a unique and chic fluted side table for your home? Make one yourself with this easy weekend DIY! Save money and time by building the table on your own. All you need is ⅝ wood dowels, 10-inch diameter concrete form tubing, 16-inch wood craft medallion, and all-purpose adhesive. With these simple supplies plus some skill in cutting the dowels to size, you can make a stylish statement piece at an affordable cost of just $140! kismet house
16. Homemade Brass Side Tables
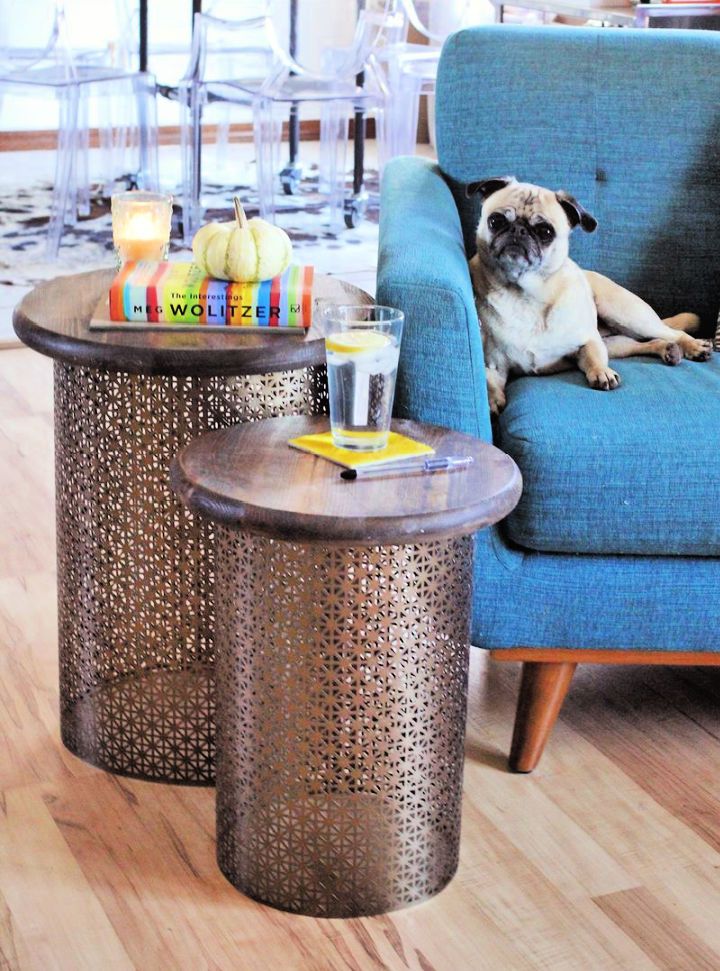
These DIY side table ideas will inspire you to create a unique and stylish piece of furniture. Add a unique touch to your living space with these easy-to-make DIY brass side tables. Enjoy the satisfaction of makingsomething without spending a fortune on premade pieces. All you need is three aluminum sheet metals, two wood rounds, wood stain, polyurethane, heavy-duty glue and brass spray paint – you’ll have your side tables ready soon! Combining brass and wood adds an eye-catching look that can be placed next to your sofa or big-size chairs for convenience and style. Try this creative project today and add chic flair to your home! abeautifulmess
17. Side Table Woodworking Plans
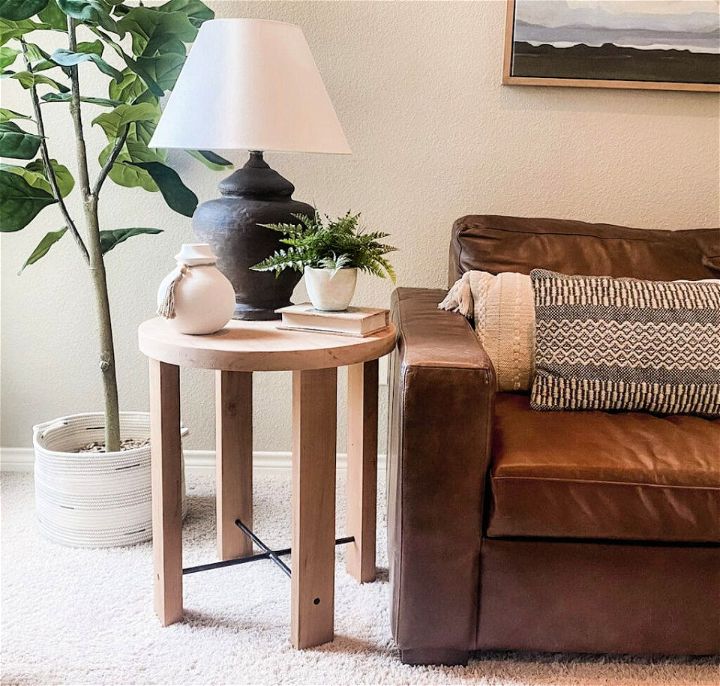
Transform your space with these diy side table ideas. From repurposing old items to building from scratch, these ideas will give you a beautiful and practical table. Bring a touch of elegance to your home and round out your decor with this unique end table! It’s simple enough to keep your costs down but has a great contrast of black and wood to make it stand out beautifully. All you need is 2x4s, 2x6s, ½″ diameter wood dowels, wood epoxy, faux metal spray paint and black stain – all for around $30 or less, depending on the type of wood you buy. Building this side table with clear instructions and tips will be easy and rewarding. theaccentpiece
18. Free Slatted Side Table Plan
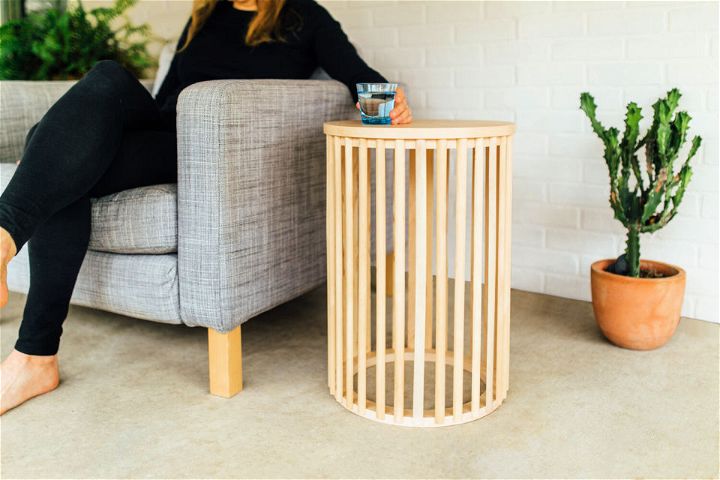
Transform your space with the timeless beauty of a handmade slatted side table. Perfect for any living room, bedroom or dining area, the plan provides detailed instructions on how to build this elegant side table using only birch wood dowels, edge banding and simple tools. Learn how to save money without compromising style by crafting your slatted end table! Finishing touches are easily achieved using professional-looking wood finishes. Get ready to take home decorating into your own hands with these helpful plans! makergray
19. Building a Mid-Century Nightstand
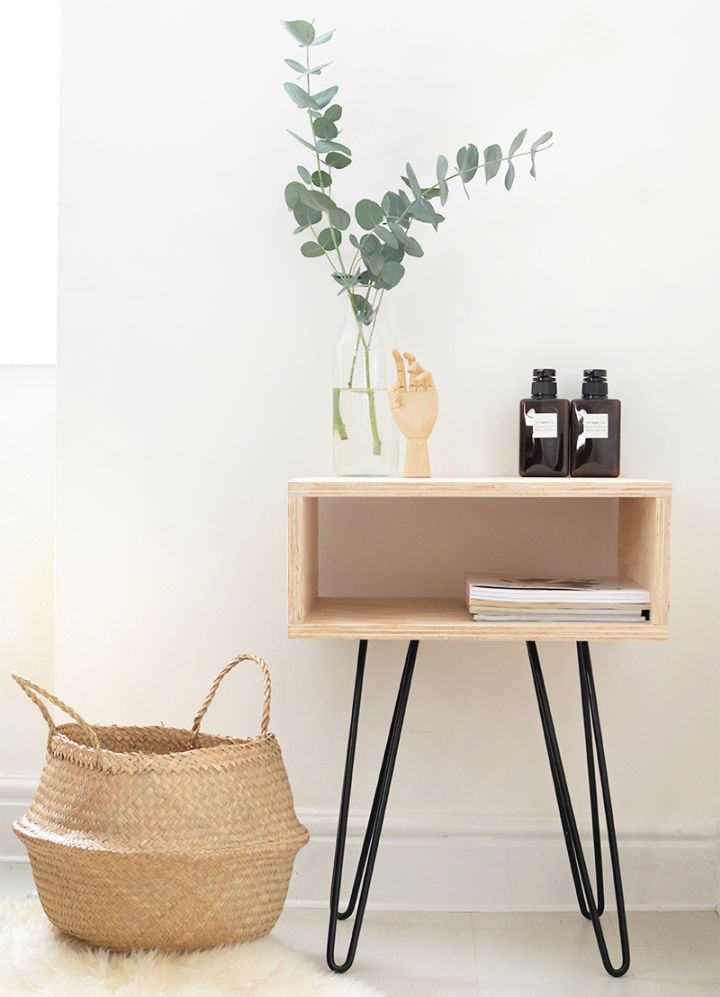
Build your own stylish DIY mid-century nightstand with ease! This timeless furniture piece is perfect for completing the look of any room and adding a bit of mid-century flair. Made from sturdy plywood sheets, all you need are hairpin legs, wood glue/nails/screwdriver to make this iconic design. The top can be used to display decorative elements, while the storage space is great for books or remotes, making it functional and fashionable. Add a touch of modern style today with this easy-to-build DIY mid-century nightstand! burkatron
20. DIY Concrete Side Table
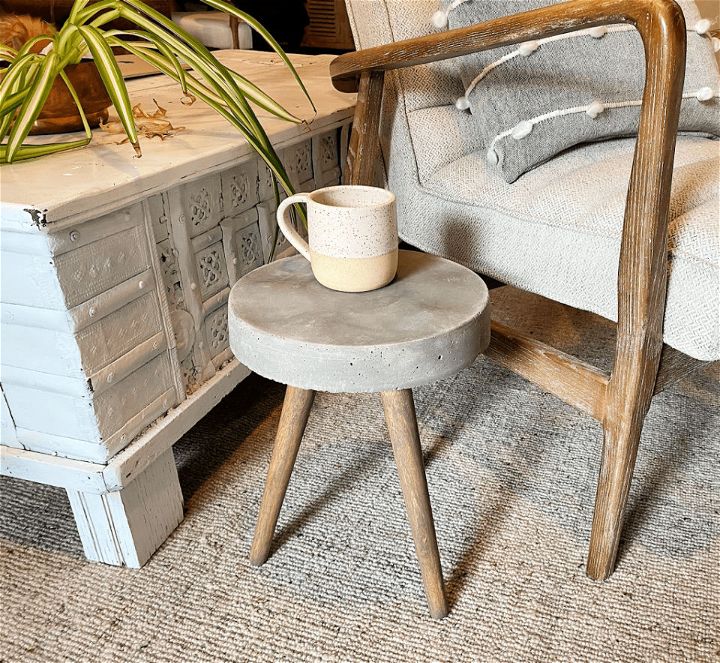
Make a DIY concrete side table for your home with this easy tutorial. Craft an industrial/mid-century accent table perfect for any modern decor! All you need are concrete, multi-purpose buckets, measuring tape, a pen, some wood furniture legs and wood stain to give it a unique look. Follow the step-by-step guide to make this stylish and durable side table – no experience necessary! Transform your living space today with this affordable DIY project that will last time. decorlovin
21. DIY Wood Crate Side Table
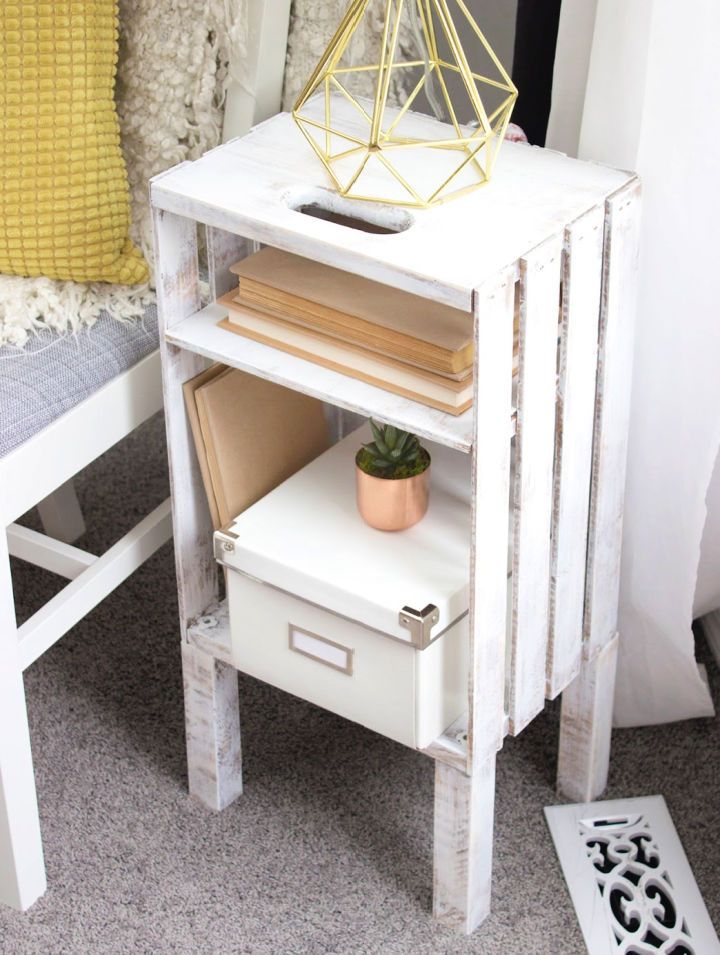
Give your home a unique and rustic touch with a DIY wood crate side table! With just a few simple supplies, like wooden crates, 2x2x8 lumber pieces, plywood or pine boards – you can make unique rustic side tables that will blend perfectly with modern farmhouse decor. Ideal for bedrooms as nightstands, living rooms as end tables, or beside accent chairs – these quick and easy DIY projects are great for anyone looking for an affordable renovation solution! thecreativeglow
22. DIY End Table With Drawer
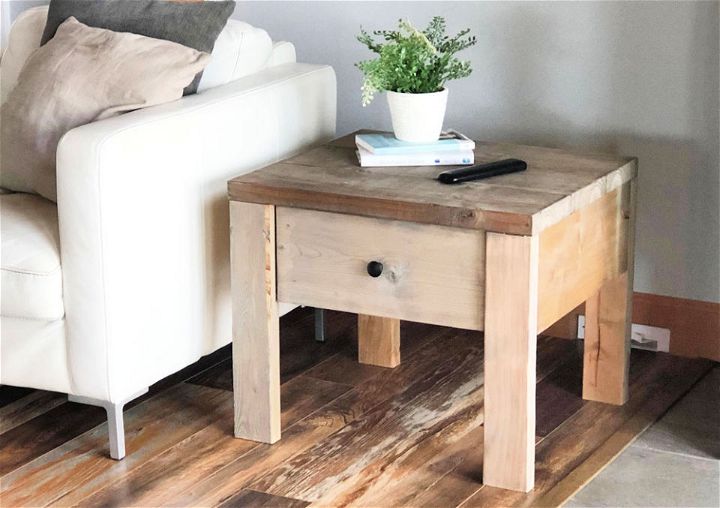
Put together your beautiful, solid wood end table or nightstand with drawer for about $50 using 2x4s and 2×6 lumber. This substantial & sturdy piece features a large, roomy drawer and planked wood top — perfect for living rooms and bedrooms! You can start building with easy, beginner plans and just a few basic power tools today. It’s time to finish off that room in style! ana white
23. Unique DIY Bedside Table
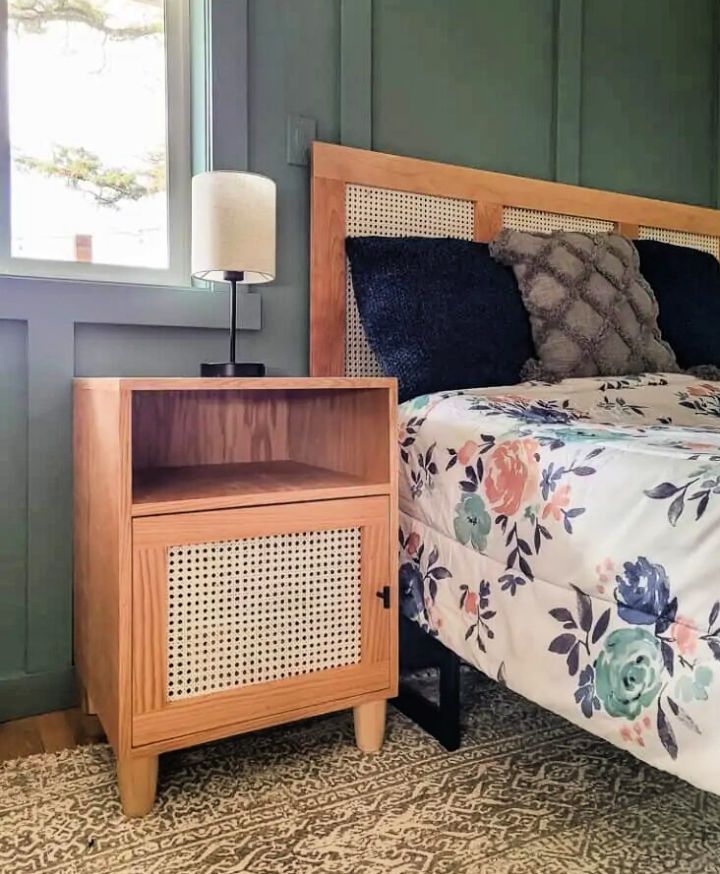
Get the look of a trendy cane boho nightstand without spending big bucks! Easily build it yourself with these free easy DIY bedside table plans. All you need is ¾” x 4′ x 8′ sanded oak plywood, ¾” x 2 ½” red oak, edge banding, inset hinges, magnetic catch and cabinet door hardware to make your one-of-a-kind nightstand. You can even add in some fun cane webbing for a unique touch. Try these simple DIY bedside table plans today and get the stylish furniture you’ve always wanted! makingmanzanita
24. How to Make Side Table Out of Wood
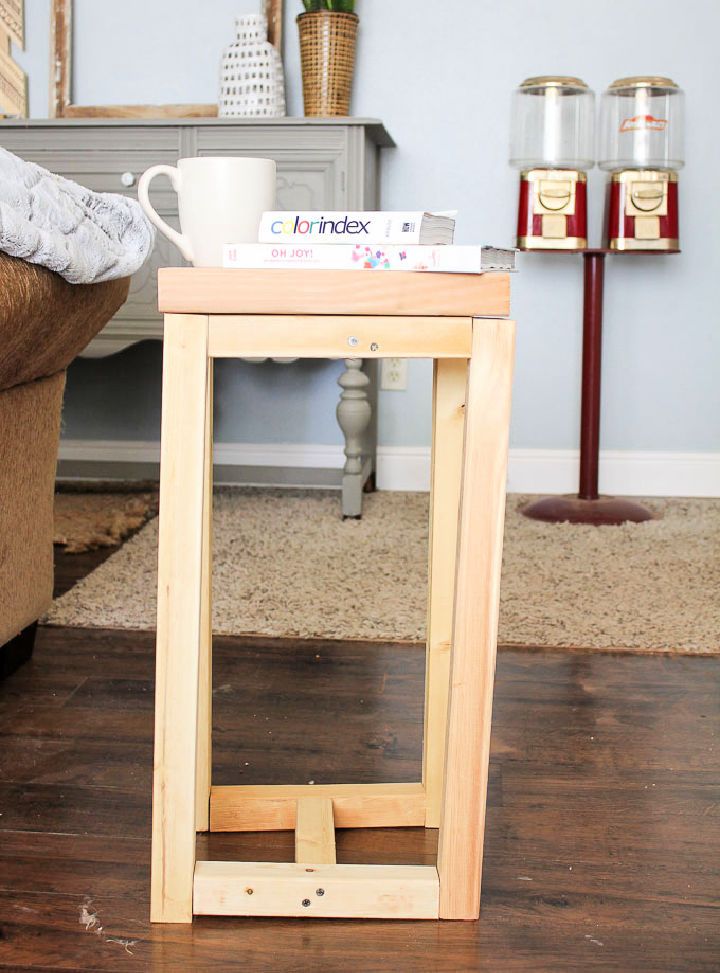
Make your unique style with this simple DIY wood side table. This easy-to-follow project gives you the satisfaction of makingsomething yourself and won’t cost much more than buying a pre-made table. With the perfect height to fit next to your sofa, it’s great for holding books, phones, and drinks in style. All you need is some 2×2 wood pieces, a 2×12 board, wood screws, a drill and wood glue – assemble them according to the instruction guide to make this side table that’ll add character to any room! hawthorneandmain
25. Make Your Own Farmhouse End Table
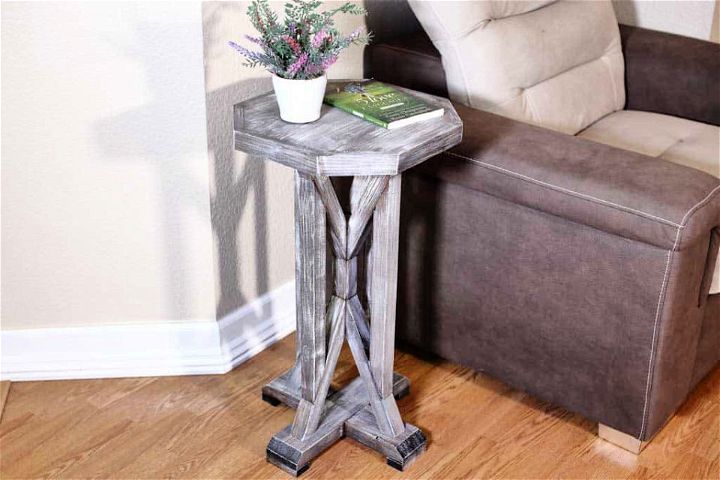
Inject a rustic charm into your home decor with this one-of-a-kind farmhouse end table! This project may look like it requires complicated angle cuts, but this guide will show you how to easily assemble the table. It takes 5 hours to complete and should cost around $30. Though it is an intermediate skill level, anyone can follow along with the instructions. You’ll need 2×2, 1×2, 2×4, and 1×8 lumber pieces plus wood glue, stain/paint of your choice – get creative or use traditional farmhouse colors! Give your home an upgrade today & build your end table for a great price. thediyplan
26. Creative Dollar Tree Side Table
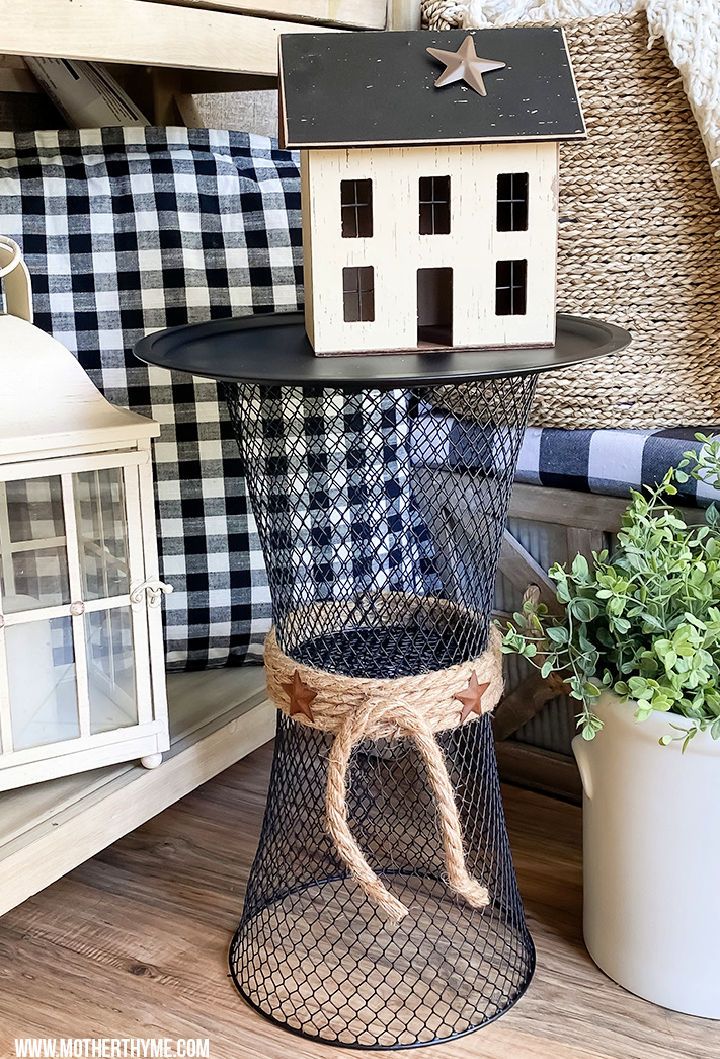
Add some flair and functionality to your living room with these DIY side table ideas. Assemble this chic DIY dollar tree side table with only a few supplies from your local dollar tree store! Transform two wire trash baskets, a pizza pan, and some nautical rope into an adorable side table for any room in your home. The best part? It’s easy to make and super affordable too! All you need is a clear e6000, spray paint, and the abovementioned items. Perfect addition to any home décor without breaking the bank – get crafting today! motherthyme
27. IKEA Side Table Hack
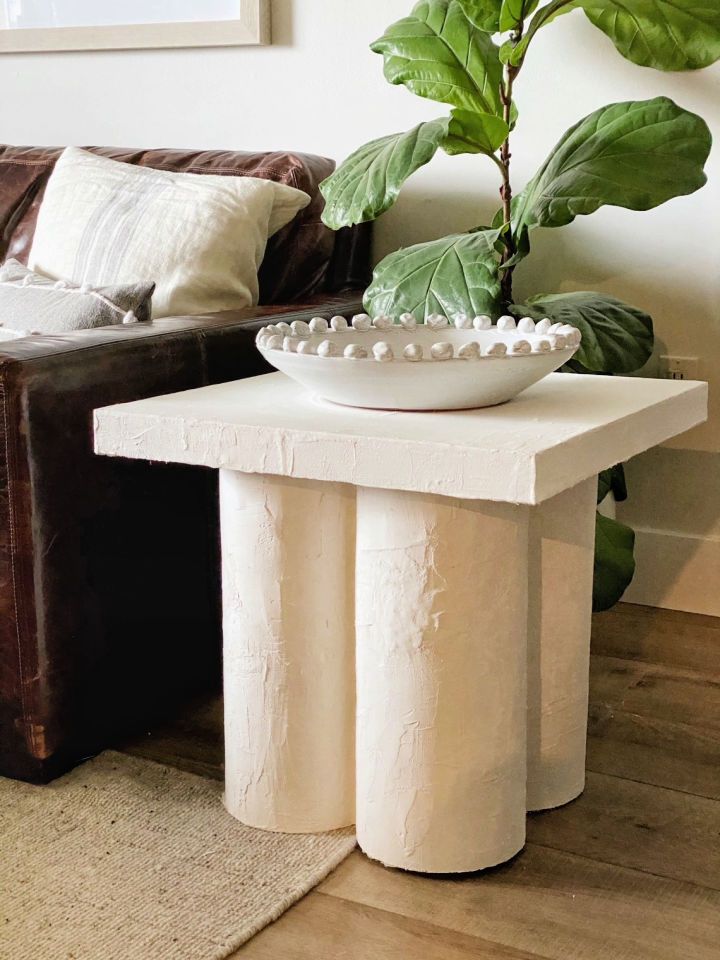
Turn a basic Ikea lack side table into a beautiful, sculptural accent piece with this Ikea side table hack! With just wood glue, plaster of Paris, cheesecloth, and quikrete building forms 8″ x 4′, you can easily make an expensive-looking piece that’ll add chic style to your home. Best of all, it’s incredibly easy – any old side table will do! Transform yours today for an unbeatable high-end look at a low cost. decorlovin
28. Easy DIY Wood Side Table
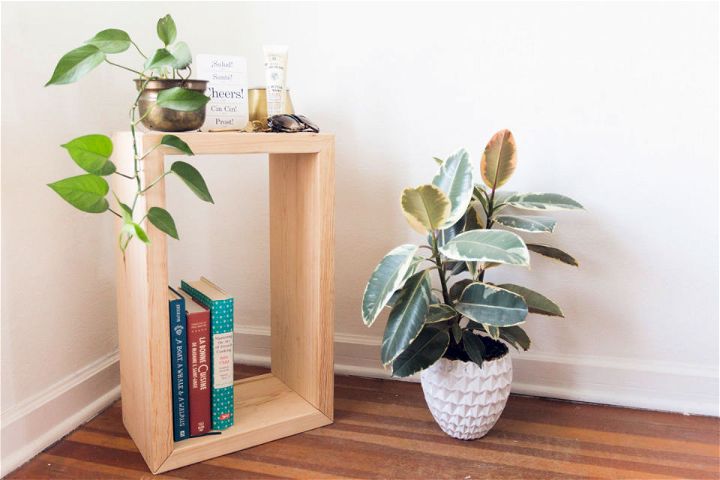
Are you looking for a way to spruce up your home’s interior with an attractive side table? Look no further! With this DIY guide, you can fashion a unique and stylish side table in 30 minutes using basic tools and materials like 2 x 10 spruce, screws, fast-drying glue, and more. It’s easy to make and looks better than anything you could buy from the store. Make an amazing piece of furniture that adds character to your home today with this simple how-to guide! diy dunnlumber
29. Build a Lamp Side Table for the Bedroom
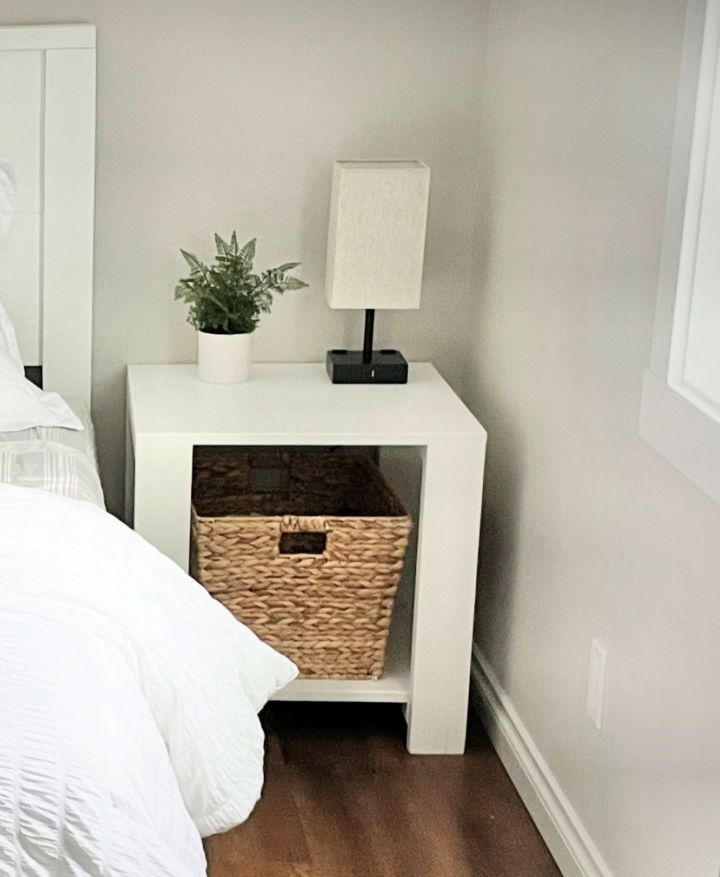
Bring style and convenience to your home with an effortless, affordable side table or nightstand. This solid wood construction end table or nightstand is generously sized and sturdy. Plus, its low bottom shelf provides easy access to whatever you need. Paint or stain the end table in any color you choose – it’s sure to be an eye-catching addition to your home décor! ana white
30. DIY Outdoor Patio Side Table Under $10
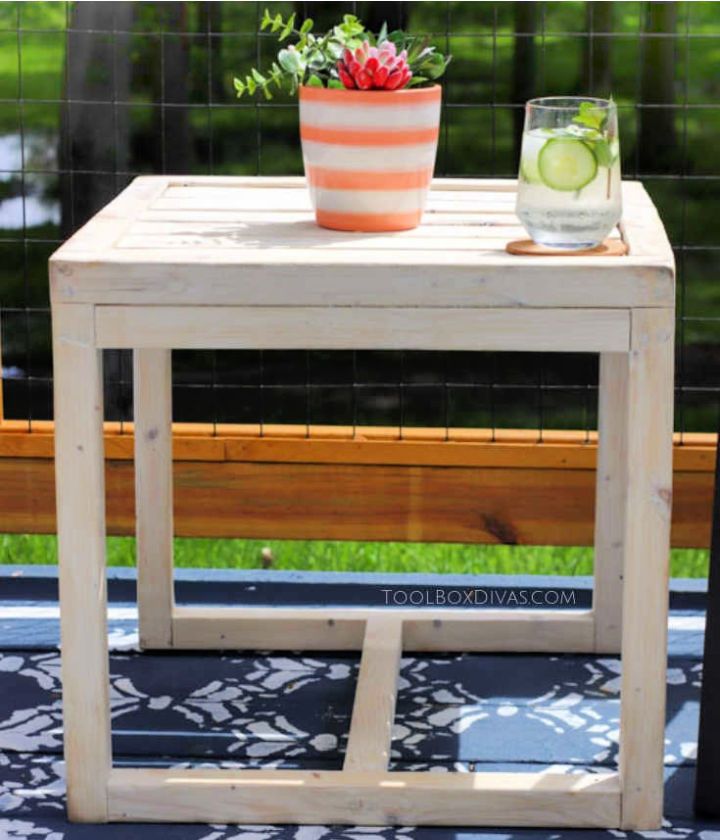
If you’re searching for an inexpensive way to spruce up your outdoor patio or deck, you’ve come to the right place! This easy DIY outdoor side table takes around $10 and a few basic supplies, like 2×2 boards, 1×3 boards, and corner brackets. This accent table can be built in the afternoon and make the perfect addition to any backyard living space. Get creative with paint colors or stain choices – make this project uniquely yours! See the detailed instructions today to learn how to build this simple side table inexpensively. toolboxdivas
Conclusion:
A DIY side table is a great way to add some personality, functionality, and style to your space. Whether you want a simple makeover, a rustic farmhouse look, or a modern geometric design, you can find the perfect DIY side table plan for you. You can use these DIY side table ideas and plans to make a nightstand, an end table, or an accent table for any room in your house. You can also customize them to fit your color scheme, decor style, and budget. Plus, you can have fun building your own furniture and saving money at the same time. So don’t wait any longer and start your DIY side table project today! You will love the results!

