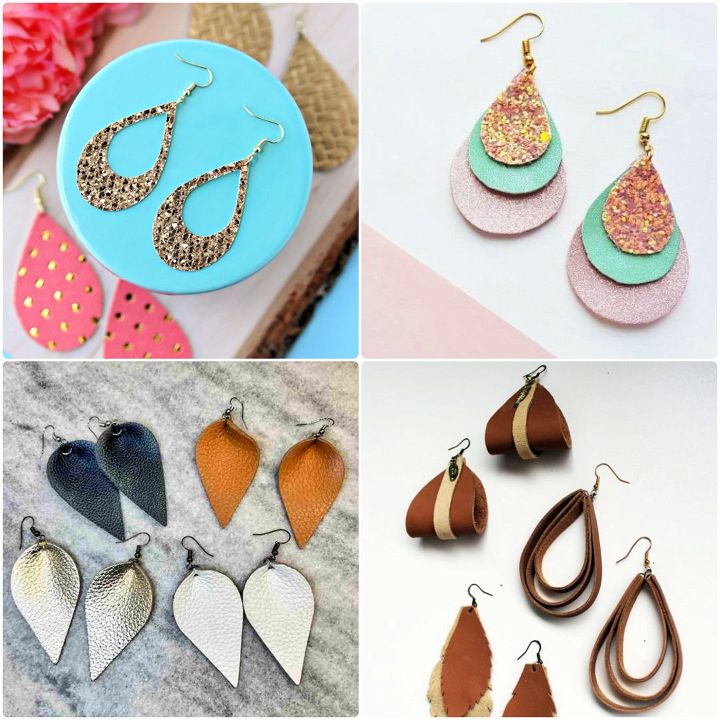
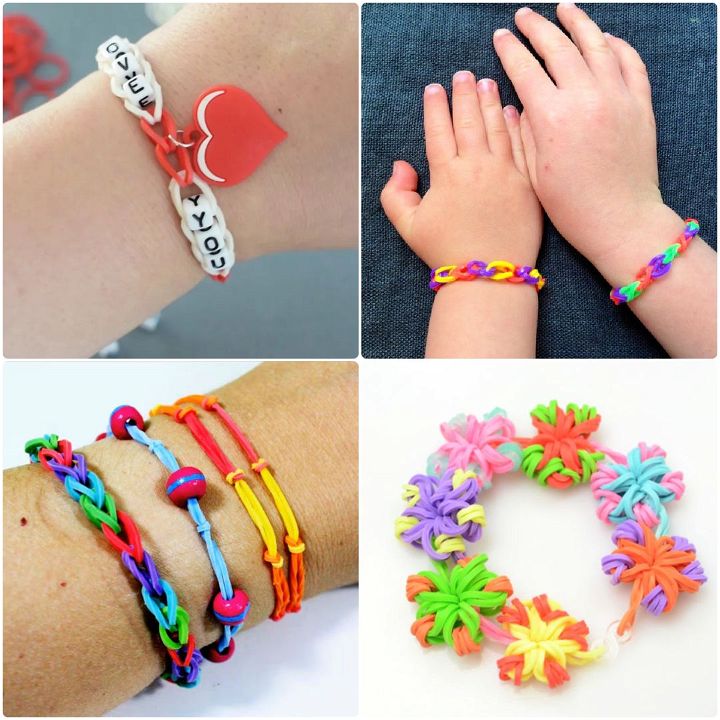
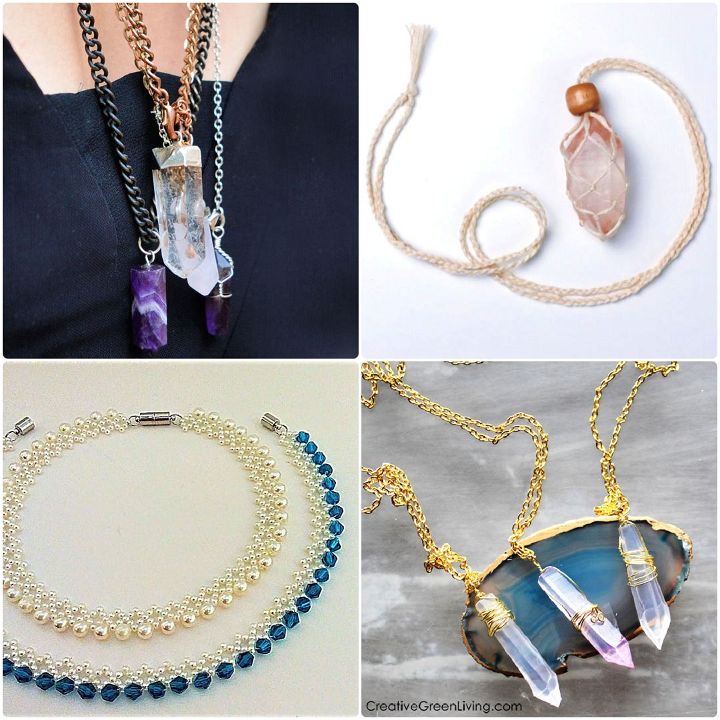
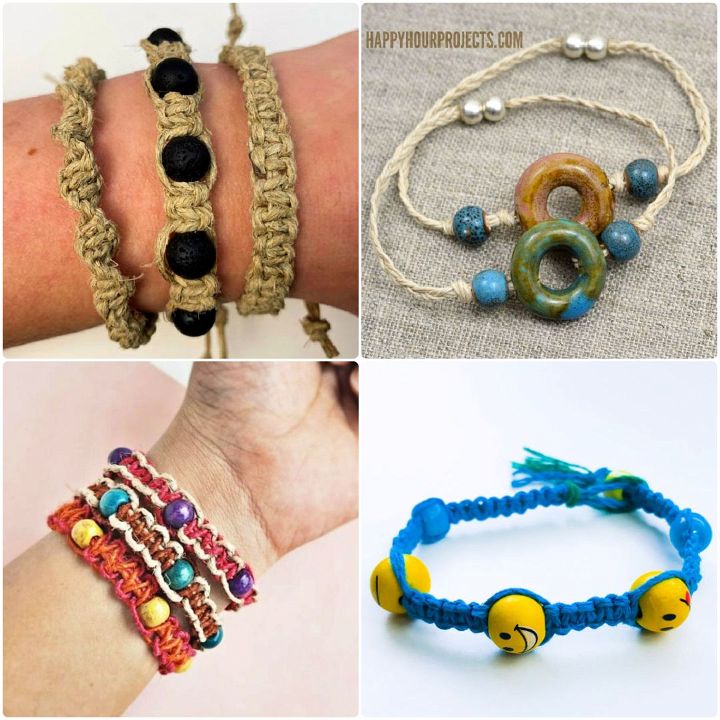
Resin jewelry making is a creative and engaging craft that allows you to design and make unique jewelry. Learn how to make resin jewelry with these 25 easy DIY resin jewelry making ideas, from crushed opal earrings to fairy pendants. Each resin jewelry making idea has clear, detailed instructions to help you along the way.
You can start with some stunning DIY crushed opal and resin earrings or a colorful resin necklace made with alcohol inks. If you want to make something more personal, you can try making resin jewelry with pressed flowers or botanicals. This way, you can capture a special flower or plant inside a gorgeous piece of jewelry.
Or maybe you want to make resin jewelry with a fun theme? You can make a resin pendant for Halloween or resin friendship necklaces to share with your best friends. If you’re inspired by nature, check out the cute seashore resin jewelry, with sand and seashells, or make resin butterfly wing earrings for a bit of magic.
Resin jewelry making suits different tastes. Whether you like modern and colorful resin earrings, handmade resin glitter bracelets or an epoxy resin pendant with rose petals, you can find ways to make resin jewelry that matches your style. Each piece is a work of art, showing your creativity and skill.
These 25 easy resin jewelry making ideas are ideal for anyone who wants to learn how to make resin jewelry. With these simple guides, you can create beautiful and unique pieces. So grab your supplies and get ready to explore the world of DIY resin jewelry today!

What is resin jewelry?
Resin jewelry is a type of jewelry that uses resin as the main material. Resin is a liquid that can be cured into a solid plastic by applying heat, UV light, or a chemical catalyst. A resin can be clear or colored and can be mixed with various additives to make different effects. Resin jewelry can be made by pouring resin into molds, casting resin in bezels or frames, or using resin as a coating or a glue for other materials. Resin jewelry can have different shapes, sizes, styles, and designs depending on the type of resin, the mold or bezel used, and the materials added to the resin.
Materials needed for resin jewelry making
To make resin jewelry, you will need the following materials:
- Resin: There are different types of resin available for jewelry making, such as epoxy resin, UV resin, or polyester resin. Each type of resin has its own advantages and disadvantages, depending on the project you want to make. For example, epoxy resin is easy to work with and has a long working time, but it takes longer to cure and may require a heat source. UV resin cures quickly under UV light, but it has a short working time and may yellow over time. Polyester resin is cheap and durable, but it has a strong odor and may shrink or crack when cured.
- Molds or bezels: Molds are silicone or plastic containers that have different shapes and sizes that you can pour resin into. Bezels are metal frames or settings that have a recessed area that you can fill with resin. You can use molds or bezels to create different types of resin jewelry pieces, such as pendants, earrings, rings, bracelets, etc.
- Pigments: Pigments are substances that can color your resin. You can use different types of pigments for resin jewelry making, such as liquid pigments, powder pigments, mica powders, alcohol inks, acrylic paints, etc. You can also mix different pigments together to create custom colors for your resin.
- Glitters: Glitters are small particles that can add sparkle and shine to your resin. You can use different types of glitters for resin jewelry making, such as fine glitters, chunky glitters, holographic glitters, iridescent glitters, etc. You can also mix different glitters together to create unique effects for your resin.
- Flowers: Flowers are natural or artificial plants that can add beauty and elegance to your resin. You can use different types of flowers for resin jewelry making, such as dried flowers, pressed flowers, fresh flowers, silk flowers, etc. You can also use other plant materials for your resin jewelry making project, such as leaves 🍃 , herbs 🌿 , seeds 🌱 , etc.
- Beads: Beads are small objects that have a hole through them that can be strung together or added to your resin. You can use different types of beads for your project, such as glass beads 💎 , crystal beads 💠 , metal beads 🔘 , wood beads 🌰 , etc. You can also use other objects that have holes in them, such as charms 🔗 , pendants 🎁 , buttons 🔘 , etc.
- Other materials: Other materials are anything else that you want to add to your project, such as photos 📷 , stickers 🎫 , paper 📄 , fabric 🧶 , feathers 🪶 , shells 🐚 , etc. You can use your imagination and creativity to add anything you like to your project as long as it is compatible with the type of resin you are using.
How to choose the right resin for your project
Choosing the right type of resin for your project is important because it will affect the outcome and quality of your project. Here are some easy tips on how to choose the right type of resin for your jewelry project:
- Consider the size and shape of your project. If you are making a large or thick project, you may want to use a resin that has a low viscosity and a long working time, such as epoxy resin. If you are making a small or thin project, you may want to use a resin that has a high viscosity and a short working time, such as UV resin.
- Consider the curing method and time of your project. If you have access to a heat source or a UV light, you may want to use a resin that cures with heat or UV light, such as epoxy resin or UV resin. If you don’t have access to a heat source or a UV light, you may want to use a resin that cures with a chemical catalyst, such as polyester resin.
- Consider the clarity and durability of your project. If you want your project to be clear and transparent, you may want to use a resin that has a high clarity and resistance to yellowing, such as epoxy resin or UV resin. If you want your project to be opaque and colorful, you may want to use a resin that has a low clarity and can be easily colored, such as polyester resin.
- Consider the cost and availability of your project. If you have a budget or a limited supply of materials, you may want to use a resin that is cheap and easy to find, such as polyester resin. If you have more money or resources, you may want to use a resin that is more expensive and high quality, such as epoxy resin or UV resin.
How to avoid common mistakes when working with resin
Working with resin can be fun and rewarding, but it can also be frustrating and messy if you make some common mistakes. Here are some common mistakes beginners make when working with resin and how to avoid them:
- Not measuring or mixing the resin properly. Resin usually comes in two parts: a resin part and a hardener part. You need to measure and mix these two parts in the right ratio and in the right way to ensure that your resin cures properly. If you don’t measure or mix the resin properly, your resin may not cure at all, or it may cure too fast or too slow, or it may cure with bubbles or cracks. To prevent errors, carefully follow the resin package instructions. Use precise measuring tools like cups or syringes, and mix the resin thoroughly in a clean container with a stir stick.
- Not preparing the mold or bezel properly. The mold or bezel is where you pour your resin into. You need to prepare the mold or bezel properly before pouring your resin into it. If you don’t prepare the mold or bezel properly, your resin may stick to it, leak out of it, or have imperfections on it. To avoid this mistake, you need to clean the mold or bezel with soap and water and dry it completely, apply a release agent such as wax or oil if needed, and secure the mold or bezel on a flat surface with tape or glue.
- Not adding enough or too much pigment, glitter, flower, bead, or other material to the resin. The pigment, glitter, flower, bead, or other material is what gives your project its color, texture, and design. You need to add enough or too much of these materials to the resin to achieve the effect you want. If you don’t add enough of these materials to the resin, your project may look dull or plain. If you add too much of these materials to the resin, your project may look cluttered or uneven. To avoid this mistake, you need to test the amount of these materials on a small amount of resin first before adding them to the whole batch of resin.
How to mix and pour resin
Mixing and pouring resin is one of the most important steps in making your project. You need to mix and pour the resin correctly to ensure that your project cures properly and looks good. Here is a step-by-step guide on how to mix and pour resin for your project:
- Step 1: Prepare your work area. You need to work in a well-ventilated area with good lighting and temperature control. You also need to cover your work surface with plastic sheets or newspaper and wear protective gloves 🧤 , goggles 👓 , and mask 😷 .
- Step 2: Prepare your materials. You need to gather all the materials you need for your project, such as the resin, the hardener (if needed), the mold or bezel, the pigment, glitter 🎇 , flower 🌼 , bead 💎 , etc., and arrange them in an accessible way.
- Step 3: Measure the resin and hardener (if needed). You need to measure the exact amount of resin and hardener (if needed) according to the instructions on the package of your resin using accurate measuring tools such as cups or syringes and mix the resin thoroughly in a clean container with a stir stick.
- Step 4: Add the pigment, glitter, flower, bead, or other material to the resin. You need to add the desired amount of pigment, glitter, flower, bead, or other material to the resin and stir well to distribute them evenly. You can also create different effects by adding these materials in layers or swirls.
- Step 5: Pour the resin into the mold or bezel. You need to pour the resin slowly and carefully into the mold or bezel, making sure to fill it up to the rim or slightly below. You can also use a toothpick or a skewer to guide the resin into the mold or bezel and remove any air bubbles.
- Step 6: Let the resin cure. You need to let the resin cure according to the instructions on the package of your resin. You can also use a heat source or a UV light to speed up the curing process if needed. You need to avoid moving or touching the resin while it is curing.
How to add color and texture to your resin jewelry
Adding color and texture to your resin jewelry can make your project more attractive and unique. Here are some tips on how to add color and texture to your resin jewelry:
- Use different types of pigments for different effects. You can use liquid pigments, powder pigments, mica powders, alcohol inks, acrylic paints, etc. to color your resin. Each type of pigment has its own characteristics and effects. For example, liquid pigments are easy to mix and give a solid color, powder pigments are more intense and give a metallic or pearlescent effect, mica powders are shiny and give a glittery or holographic effect, alcohol inks are vibrant and give a translucent or marbled effect, acrylic paints are opaque and give a matte or glossy effect.
- Use different types of glitters for different effects. You can use fine glitter, chunky glitter, holographic glitter, iridescent glitter, etc., to add sparkle and shine to your resin. Each type of glitter has its own size, shape, color, and reflection. For example, fine glitters are small and subtle; chunky glitters are large and noticeable, holographic glitters are rainbow-colored and change with the light, and iridescent glitters are clear and reflect different colors.
- Use different types of flowers for different effects. You can use dried flowers, pressed flowers, fresh flowers 🌺 , silk flowers 🌸 , etc. to add beauty and elegance to your resin. Each type of flower has its own shape, size, color, and texture. For example, dried flowers are crisp and delicate, pressed flowers are flat and preserved 🌼 , fresh flowers are vibrant and natural 🌹 , silk flowers are soft and realistic 🌷 .
- Use different types of beads for different effects. You can use glass beads 💎 , crystal beads 💠 , metal beads 🔘 , wood beads 🌰 , etc. to add dimension and contrast to your resin. Each type of bead has its own material, shape, size, color, and shine. For example, glass beads are smooth and transparent 💎 , crystal beads are faceted and sparkling 💠 , metal beads are shiny and metallic 🔘 , wood beads are natural and rustic 🌰 .
- Use other materials for different effects. You can use anything you like to add color and texture to your resin, such as photos 📷 , stickers 🎫 , paper 📄 , fabric 🧶 , feathers 🪶 , shells 🐚 , etc. You can use your imagination and creativity to add anything you like to your project as long as it is compatible with the type of resin you are using.
How to cure and finish your resin jewelry
Curing and finishing your resin jewelry is the final step in making your project. You need to cure and finish your resin jewelry properly to ensure that your project is durable and beautiful. Here is a guide on how to cure and finish your resin jewelry once it’s done:
- Step 1: Remove the cured resin from the mold or bezel. Once your resin is fully cured according to the instructions on the package of your resin, you need to remove it from the mold or bezel carefully. You can use a knife 🔪 , scissors ✂️ , or pliers 🔧 to loosen the edges of the resin from the mold or bezel if needed.
- Step 2: Trim or sand any excess or rough edges of the resin. You may notice some excess or rough edges of the resin after removing it from the mold or bezel. You need to trim or sand these edges with a knife 🔪 , scissors ✂️ , sandpaper 📄 , or a file 🗄️ to make your project smooth and even.
- Step 3: Polish or glaze the surface of the resin. You may notice some scratches, bubbles, or dullness on the surface of the resin after trimming or sanding it. You need to polish or glaze the surface of the resin with a cloth 🧻 , a polish 💦 , or a glaze 🍯 to make your project shiny and smooth.
- Step 4: Add any hardware or accessories to your resin jewelry. You may want to add some hardware or accessories to your resin jewelry, such as chains 📿 , clasps 🔗 , hooks 🔪 , rings 💍 , etc., to make your project wearable and functional. You can use a drill 🔩 , a glue 🧴 , or a wire 🧶 to attach these hardware or accessories to your project.
Resin jewelry making tips and tricks
Resin jewelry making can be a fun and rewarding hobby, but it can also be challenging and tricky at times. Here are some tips and tricks that can help you create beautiful resin jewelry pieces:
- Use a torch 🔥 , a heat gun 💨 , or a straw 🥤 to pop any bubbles in your resin before it cures. Bubbles can ruin the clarity and appearance of your project, so you need to pop them as soon as possible.
- Use a mold release agent such as wax 🕯️ , oil 🛢️ , or spray 🚿 to prevent your resin from sticking to your mold or bezel. This will make it easier for you to remove your project once it’s cured and avoid any damage or residue on your project.
- Use a silicone mold for easy removal and flexibility. Silicone molds are soft and flexible, which makes them easy to remove your project from. They also come in various shapes and sizes, which gives you more options for your project.
- Use a UV resin for quick curing and convenience. UV resin cures in minutes under UV light, which makes it convenient and time-saving. It also has a high clarity and resistance to yellowing, which makes it ideal for clear and transparent projects.
- Use an epoxy resin for versatility and durability. Epoxy resin has a long working time and a low viscosity, which makes it versatile and easy to work with. It also has high durability and strength, which makes it ideal for large and thick projects.
- Use a polyester resin for affordability and colorability. Polyester resin is cheap and easy to find, which makes it affordable and accessible. It also has a low clarity and can be easily colored, which makes it ideal for opaque and colorful projects.
- Use different techniques to create different effects with your resin. You can use different techniques, such as layering, swirling, embedding, doming, etc., to create different effects with your resin. You can also experiment with different combinations of materials, colors, textures, etc., to create unique designs for your project.
Common problems when working with resin and their solutions
Working with resin can sometimes result in some problems that can affect the quality and appearance of your project. Here are some common problems beginners face when working with resin and how to solve them:
Problem: The resin does not cure properly or at all.
Solution: This problem may be caused by several factors, such as incorrect measurement or mixing of the resin and hardener (if needed), insufficient curing time or temperature, exposure to moisture or air, contamination of the resin or the container, etc. To solve this problem, you need to follow the instructions on the package of your resin carefully, use accurate measuring tools such as cups or syringes, mix the resin thoroughly in a clean container with a stir stick, allow enough curing time and temperature according to the type of resin you are using, avoid exposing the resin to moisture or air while curing, use fresh and clean resin and container, etc.
Problem: The resin has bubbles in it.
Solution: This problem can have several causes, such as stirring the resin too vigorously, pouring it too quickly, adding excessive amounts of pigment or other materials, or using a mold or bezel with air pockets. To solve this, stir the resin gently, pour it slowly into a smooth mold or bezel, add small amounts of pigment gradually, remove any bubbles using a torch, heat gun, or straw before it cures.
Problem: The resin has cracks in it.
Solution: Possible causes of this problem include pouring excessive resin, improper curing speed, extreme temperature changes, and high-shrinkage resin. To address this, pour resin in thin layers with partial curing between each layer. Maintain a consistent and moderate curing temperature based on the resin type, and avoid exposing it to extreme temperatures like direct sunlight or freezing. Opt for a low-shrinkage resin such as epoxy or UV resin.
Problem: The resin has yellowed or discolored over time.
Solution:This problem may be caused by factors like using a non-UV resistant resin, prolonged exposure to UV light or heat, excessive pigment or material in the resin, or using a dirty or rusted mold or bezel. To solve it, use UV resistant resins like epoxy or UV resin, avoid prolonged exposure to UV light or heat (e.g., direct sunlight or hot surfaces), add small amounts of pigment or material to the resin at a time, and ensure clean and rust-free molds or bezels.
DIY Resin Jewelry Making Ideas that You Can Try.
If you are looking for some inspiration and ideas for your DIY resin jewelry ideas, here are some you can try:
1. DIY Crushed Opal and Resin Earrings
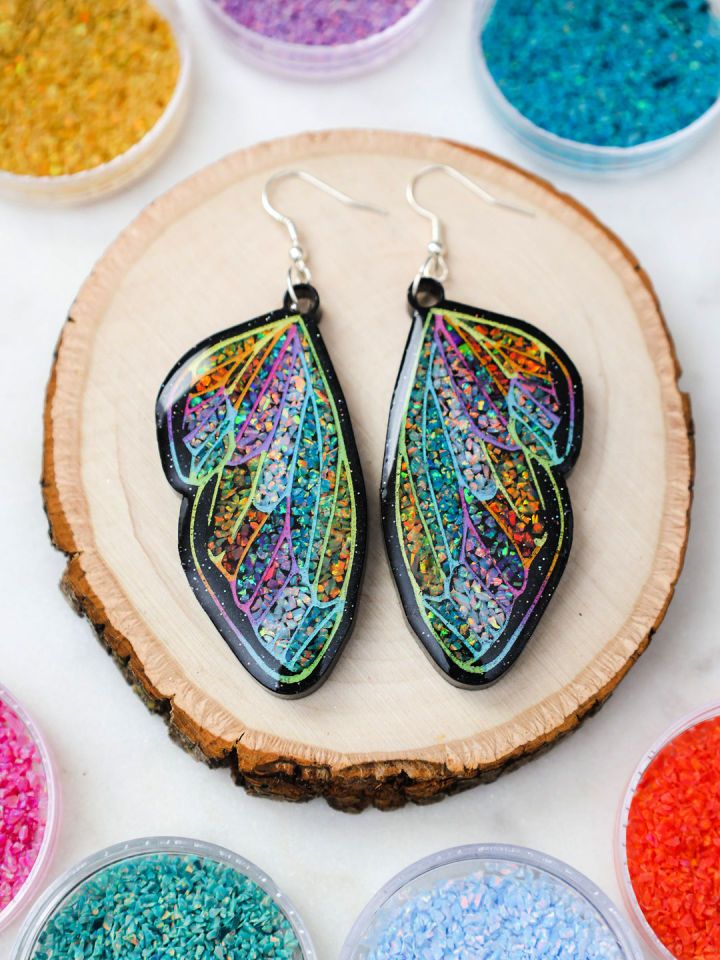
Capture the attention of everyone with your creative flair and make gorgeous crushed opal & resin earrings! Get step-by-step instructions to craft a one-of-a-kind pair.
Start with an engraved mold, add opals and resin, wait for it to settle, then fill the entire mold – let it dry for 24 hours. After demolding, complete the design by filling the engravings with acrylic paint and adding a resin topcoat for protection.
Finally, attach earring hardware – you’ll be ready to show off your masterpiece! The materials needed are crushed opal, epoxy resin, butterfly earrings mold, acrylic paint, and earring hardware. theopaldealer
2. Make a Beautiful Resin Necklace With Colorful Alcohol Inks
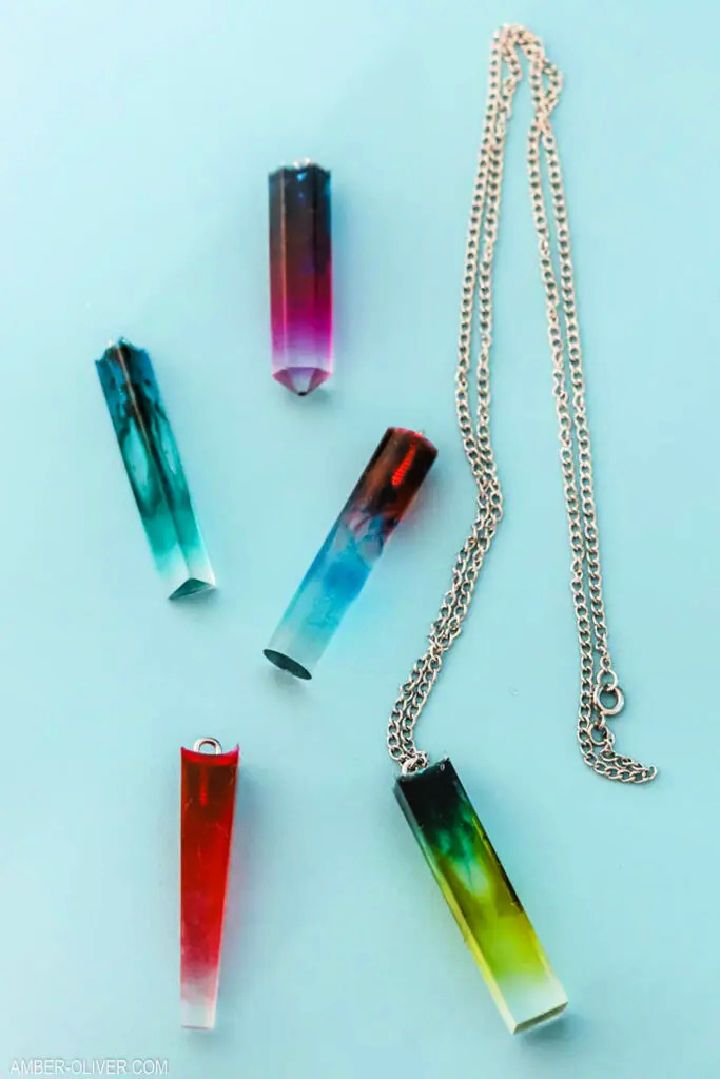
Marvel at the creative potential of this exquisite DIY resin necklace! With only a few simple materials, such as easycast clear-casting epoxy, alcohol inks, necklace eye hooks, silicon tube molds, and more, you can easily make amazing color combinations and designs.
Perfect for those new to working with resin, mix up your desired colors and let them cure before popping out of the molds. Then attach them to a necklace or use your imagination for other projects – it’s that easy! Delight in this fun project and make something truly unique today! amber oliver
3. Making Earrings With Resin at Home
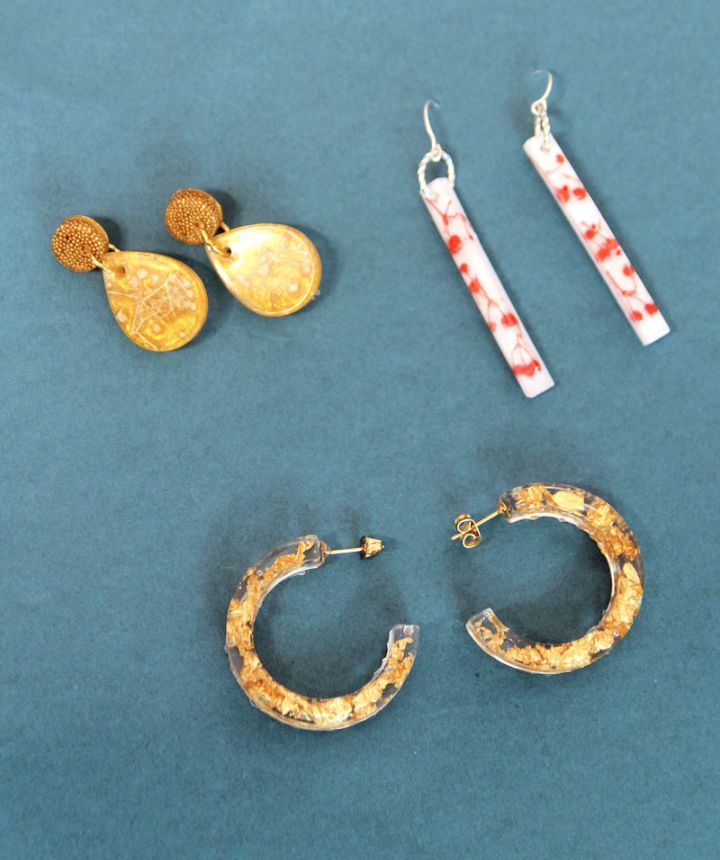
Fabulous for fashionistas, this amazing tutorial will demonstrate how to make your gorgeous resin earrings at home. Learn the step-by-step process of makingtwo styles – resin flower earrings and resin hoop earrings – with UV resin, a UV lamp, molds, and other materials.
Get invaluable advice, like tips on mixing colors, avoiding air bubbles, and attaching posts. With this guide in hand, you’ll need uv resin, molds; add-ins such as gold flakes or dried flowers; plastic cups; toothpicks; flat pad ear studs; optional items including dye, silicone mats & gloves, plus a respirator mask also recommended.
Unlike epoxy, which can take much longer & be more costly for small projects – quick-setting layers make using uv resins favorable! momsandcrafters
4. DIY Resin Flower Pendant for Birth Month
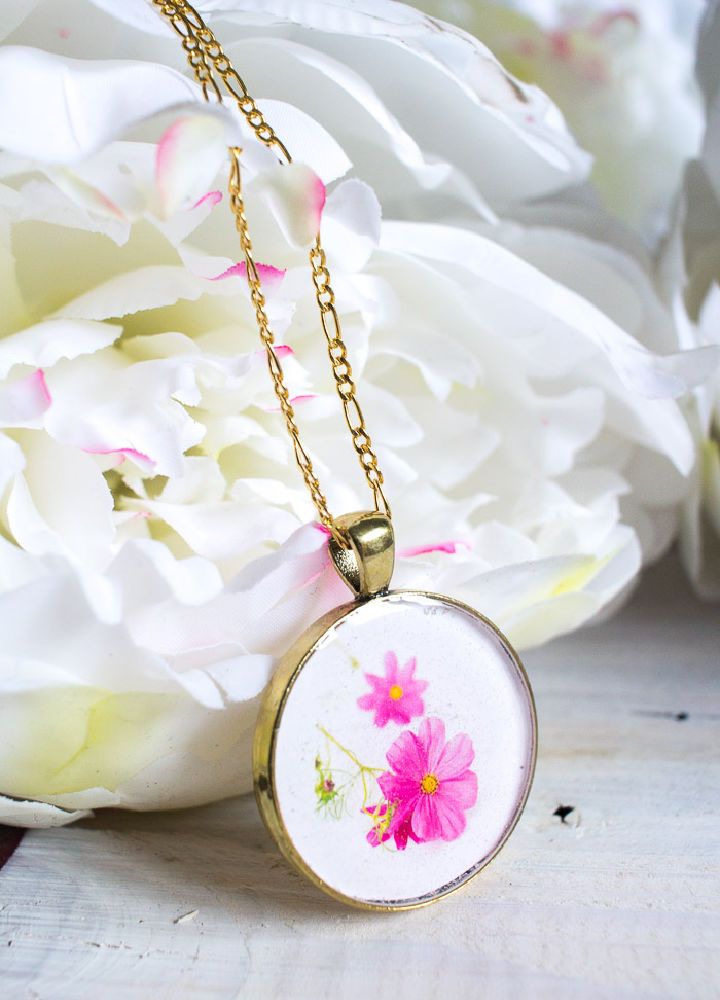
Craft a unique birth month flower pendant with this easy DIY resin jewelry tutorial. With only a few inexpensive materials such as a decorative jewelry bezel, a photograph of the flower of the month, gloves, wooden craft sticks, toothpicks, paper towels, and more – make this budget-friendly gift for special occasions like birthdays or Mother’s Day. Follow the guide to make your personalized piece of jewelry that will impress friends and family alike! resincraftsblog
5. Adorable Seashore Resin Jewelry for Beginners
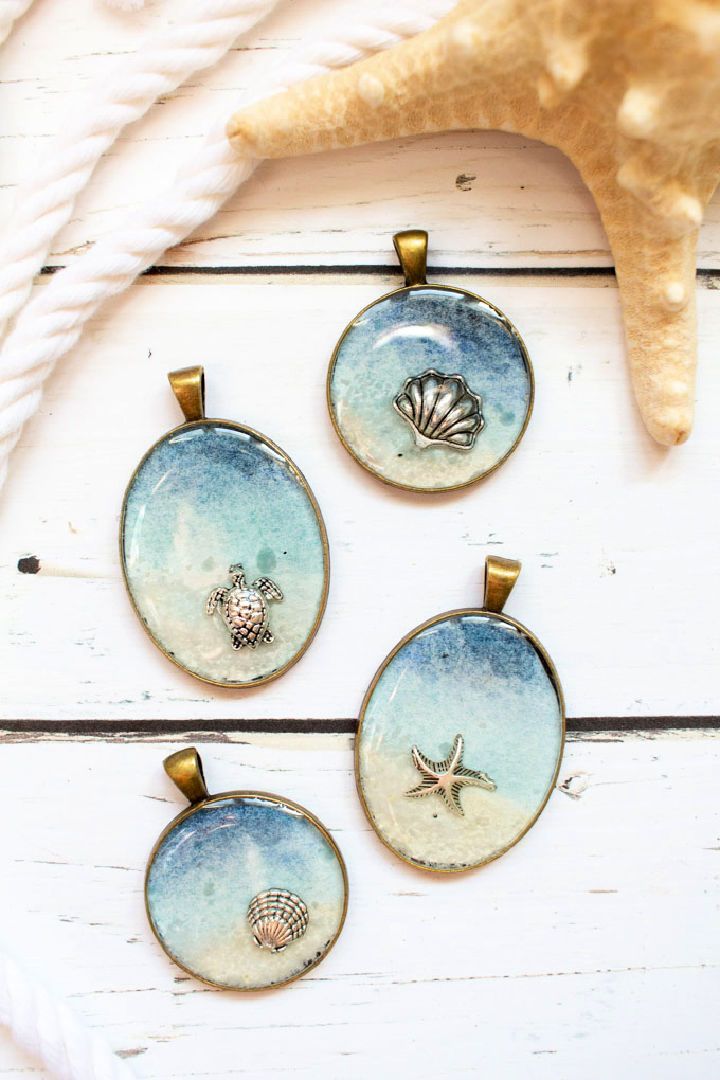
Astonishingly craft your beach-inspired jewelry with this DIY tutorial! Embellish watercolor paper, bezels, and sea creature charms with paint, sand, and envirotexlite jewelry resin for a stunning shoreline effect. Use protective gloves, measuring cups, and stir sticks while makingthis beautiful DIY seashore resin jewelry.
Perfect for any summer outfit or as a keychain or purse charm – take a bit of the beach everywhere! Don’t forget to seal it with ultra seal or water-based sealer to keep its beauty intact – remember to work in a well-ventilated area and protect your working surface. resincraftsblog
6. How to Make Resin Pendant for Halloween
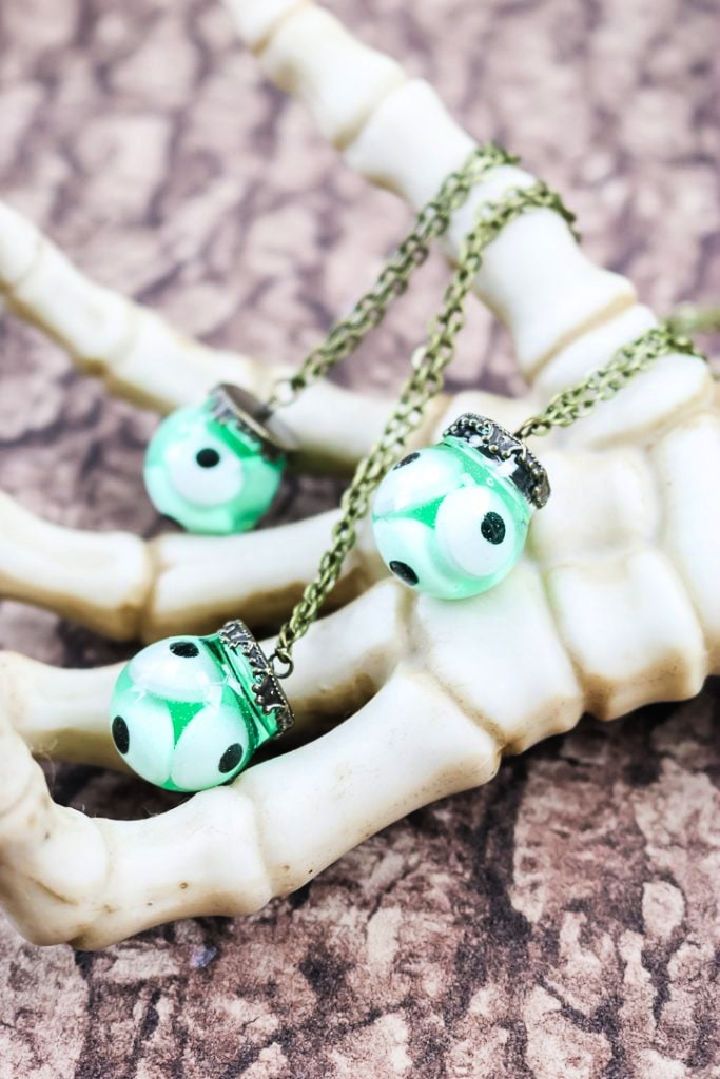
Captivate your craftiness with this supernatural DIY resin pendant tutorial! Everything you need is provided – easycast clear casting epoxy, universal, transparent dye in green, candy eyes, a small bowl necklace, necklace chain, jewelry glue, jump ring, and more. Follow the instructions to make a Halloween-inspired pendant perfect for any spooky gathering or party. Personalize it by adding spiders or other eerie details inside the globe. Make sure to grab all the materials and get ready to cast some frightful fun! thecountrychic
7. Real Beetles and Bugs Resin Jewelry Idea
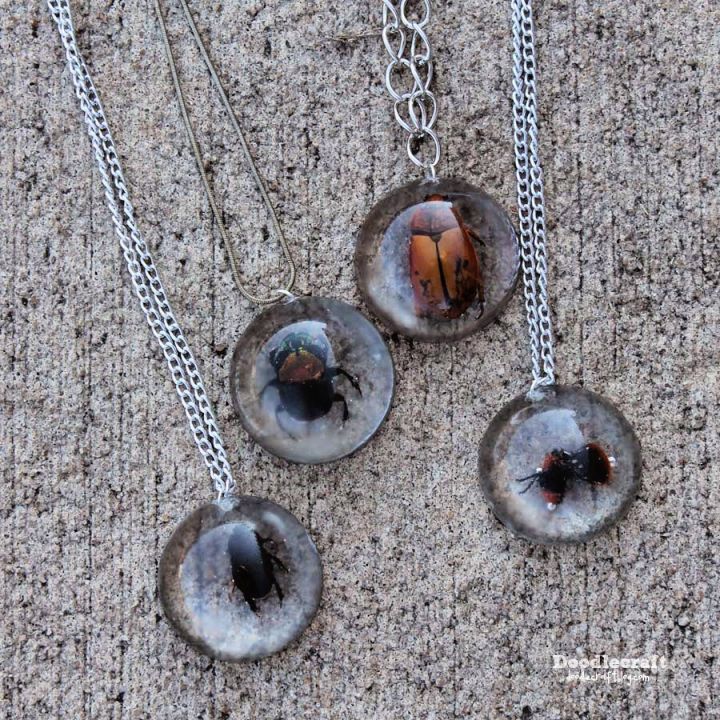
Entice your eerie-inspired creativity with this halloween necklace-making experience! Make one-of-a-kind pieces of jewelry or paperweights using real beetles, clear polyester casting resin, a plastic cup, popsicle sticks, and a silicone cake pop mold. Although the casting process can be intricate and tricky, the results will be worth it. Get ready to produce amazing accessories bound to spook any onlooker during this haunting season! doodlecraftblog
8. How to Make Resin Friendship Necklaces

Enticing your creative side? Learn how to craft beautiful resin jewelry with this comprehensive tutorial. You only need a resin kit, measuring cups, toothpicks, bezels, chains, glitter, or other fillers. Spice up your pieces by using images printed on photo paper with Hodgepodge. With plenty of tips from thorough instructions, crafting distinctive pieces will be easier than ever! Perfect for self-indulgence or as gifts – resin jewelry is an addictive and fun activity to try at home! thehandmadehome
9. Homemade Druzy Style Resin Necklace
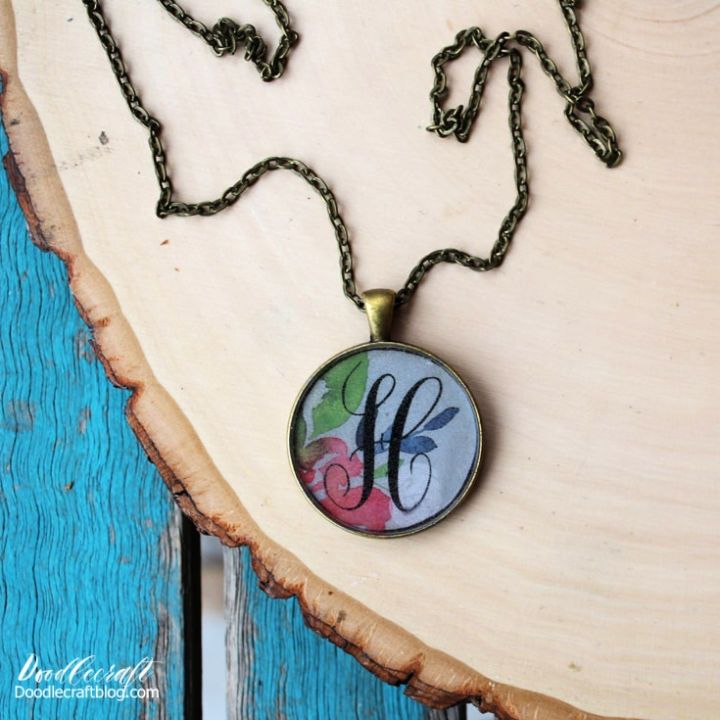
Craft a personalized monogram necklace in minutes with this DIY resin monogram necklace with a vinyl tutorial! Perfect for beginners, jewelry resin will give your project a glossy finish that resists yellowing over time. You’ll need scrapbook paper, a punch tool, mod podge or sealer, black vinyl/transfer tape, and the cricut maker. Select your favorite font and letter for an exquisite handmade gift that will surely please you every time! doodlecraftblog
10. How to Fill Open Back Bezels With Resin
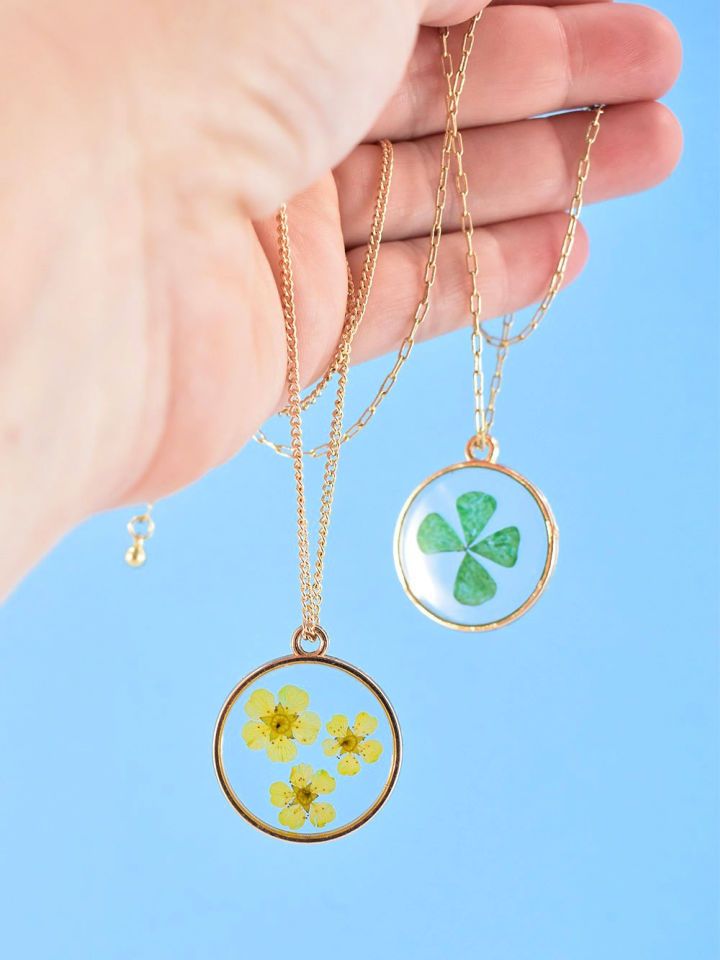
Glimmering open-back bezels are an artful way to craft custom resin jewelry. These trays made of metal or wood have an open back and a lip that securely holds items like dried flowers, charms, and glitter. To begin crafting your masterpiece, add resin tape around the rim; this acts as a temporary sealant so the resin won’t leak out. Once taped off, pour the resin inside; it should cure in no time! Open-back bezels are great options for making beautiful pieces of wearable art, as they’re affordable yet simple. dreamalittlebigger
11. Handmade Colorful Resin Glitter Bracelets

Make an eye-catching accessory with this easy tutorial to make your rainbow resin bangle bracelets! With epoxy resin, fine glitter, and a silicone mold, you can make beautiful and unique pieces of jewelry that are perfect for dress-up or gifting. All you need is equal parts of resin and hardener; stir slowly to avoid air bubbles. Then customize the bracelets with glitter or pigment – it’s up to you! After 24 hours of curing time, you’ll have beautiful creations that everyone will admire. Get started today and make your custom bangle bracelets at home! apumpkinandaprincess
12. Homemade Resin Butterfly Wing Earrings
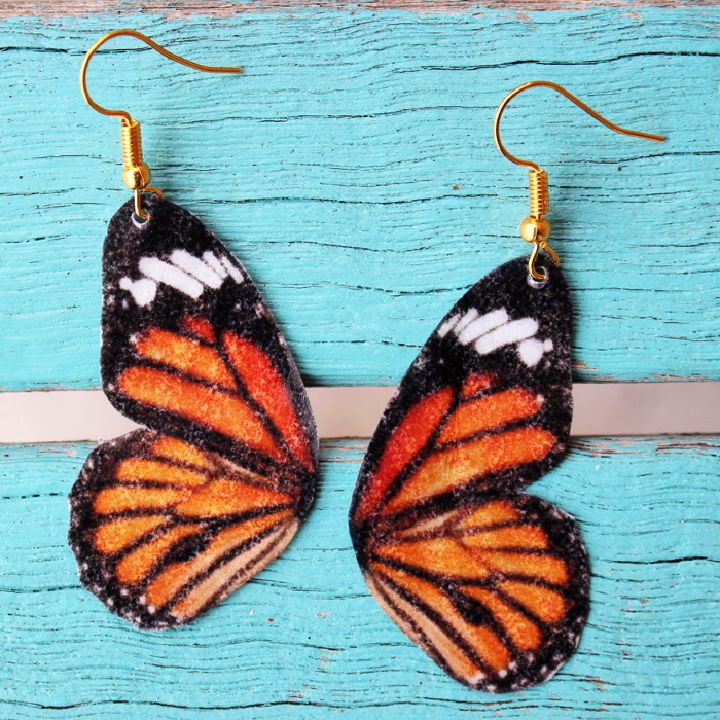
Unearthly beauty with a twist of ethics – make stunning butterfly wing resin earrings with this easy DIY tutorial! This guide will show you how to make your monarch wings earrings perfect for spring. All you need is envirotex lite pour-on resin, printed monarch on vellum cardstock, earring hooks, and more. No real butterflies are required – making this an ethical choice will surely please everyone. Gather up measuring cups, stirring sticks, disposable gloves, pliers, and an old paintbrush, too… grab all the materials and create! resincraftsblog
13. Make Your Own Wonderful Resin Ring
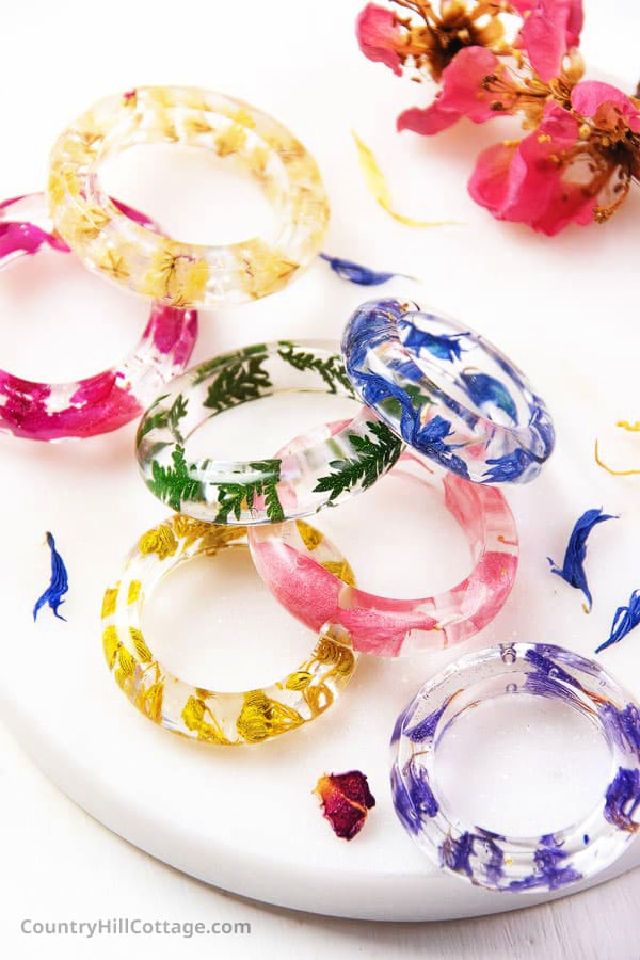
Amazing ideas for crafting beautiful resin rings! This step-by-step tutorial reveals the best materials and techniques for makingmagnificent flower resin rings, wedding bands, and men’s rings. Transform fast-curing casting resin into vibrant, translucent colors with a subtle shimmer effect using colorful pigments, mica powder, and more.
Make your handmade resin jewelry even more alluring with dried flowers, pressed botanicals, glitter, gold leaf, or rhinestones. Express your creativity while making thoughtful gifts for friends and family. countryhillcottage
14. Modern and Colorful Resin Earrings
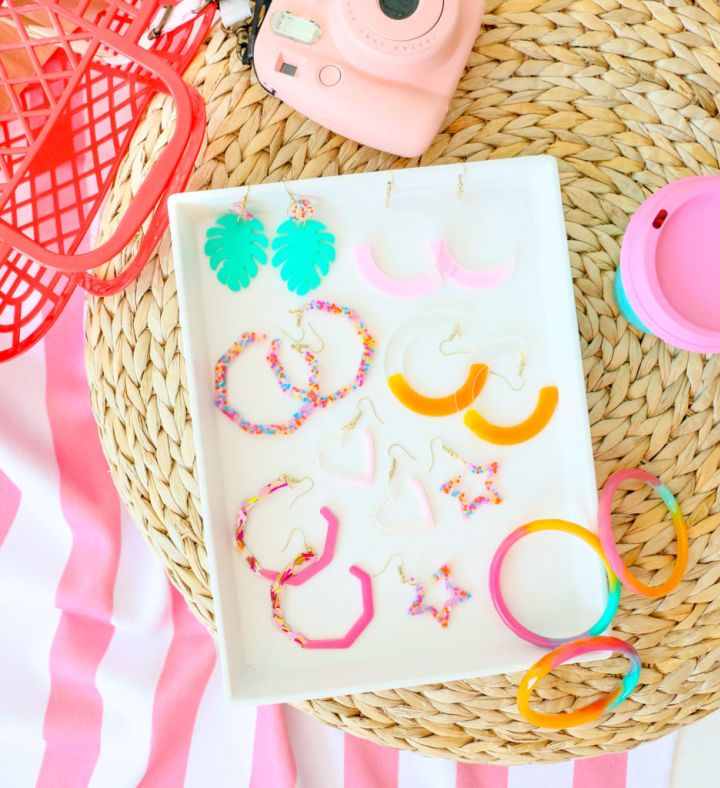
Put together your custom earrings with this fun DIY, colorful modern resin earring tutorial! Accompanied by easy-to-use silicone molds, resin, and hardener – plus vibrant colorants, confetti, and glitter for a truly eye-catching effect – you’ll have the perfect personalized accessory in no time. Mix equal parts of resin and hardener, add colorful embellishments to make a one-of-a-kind 80’s inspired look, and pour into the mold. After curing, attach ear hooks/jump rings with pliers to finish off these gorgeous statement earrings that will pair perfectly with any outfit! akailochiclife
15. Making Resin Jewelry With Pressed Flowers
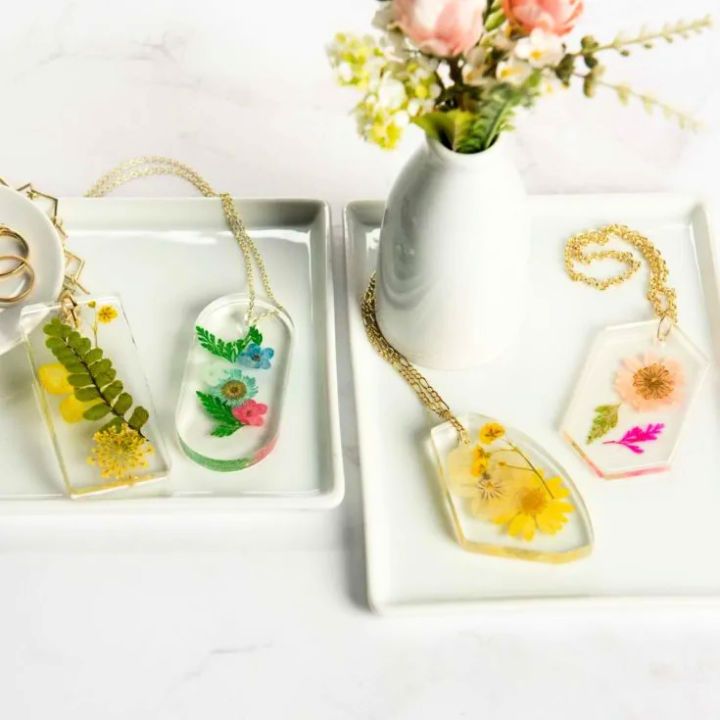
Awesome jewelry creations await! This DIY tutorial teaches how to make beautiful and lightweight necklaces, earrings, bracelets, rings, hair accessories, pendants, and more. Utilizing mod podge resin, dried pressed flowers, and a few other items such as gloves, cups, craft sticks, torch, and jewelry pliers, you can make stunning custom pieces in only 4 steps that take 24 hours or less to dry and cure. The post includes a helpful video tutorial to begin crafting your unique gifts or products for selling today! modpodgerocks
16. DIY Resin Necklace Pendants With Sand and Seashells
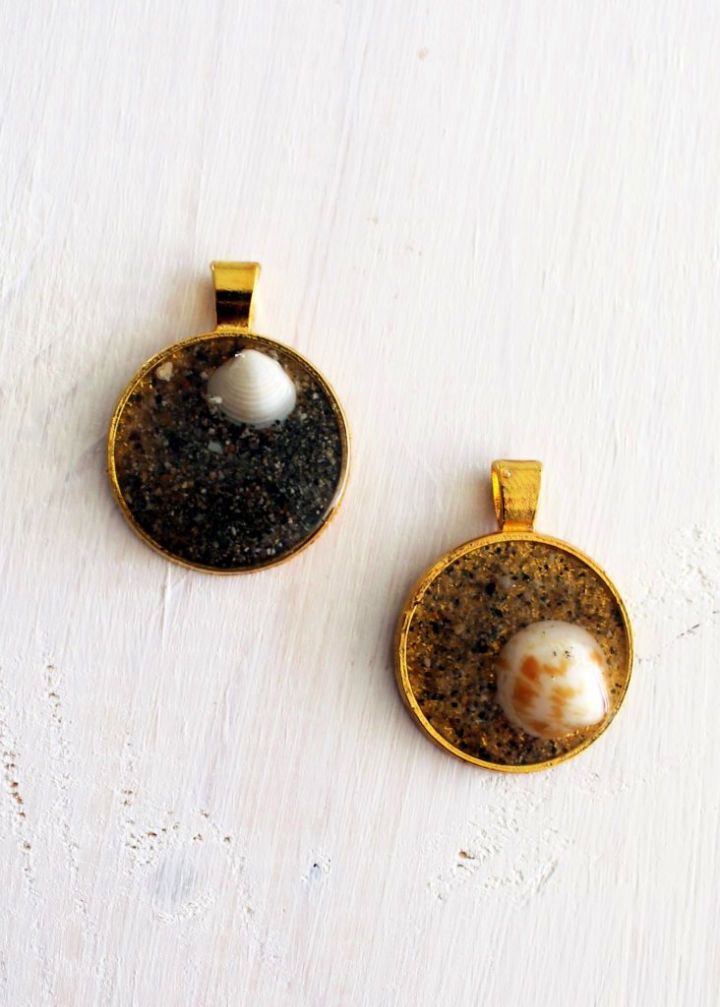
Smartly craft your unique jewelry pieces like a pro! This DIY resin jewelry tutorial will show you how to easily make stunning pendants using sand, seashells, and dandelions. Gather the supplies needed for this project, such as a casting resin kit, plastic tablecloth, rubber gloves, disposable cups, and spoons.
Follow the instructions in the resin kit carefully and mix it up exactly as mentioned. Place some sand or seashell at the bottom of your jewelry blank, followed by a tiny seashell to give it an eye-catching look. Lastly, pour enough resin over the mixture to cover it completely. Try the simple step-by-step guide now to make beautiful custom-crafted designs! creativefashion
17. Resin Dangle Earrings and Hanging Pendants Jewelry
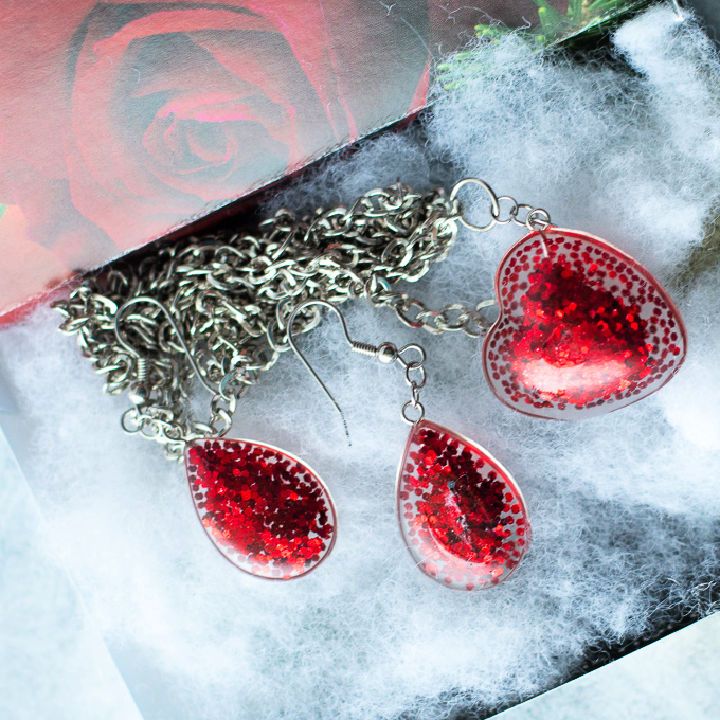
Beautiful and unique dangle earrings and pendants make the perfect gift for Galentine’s day or any other special occasion. With just a few supplies, you can make stunning jewelry pieces with an envirotex jewelry resin kit, red glitter, castin’ craft mold release, easycast resin jewelry molds, gloves, stirring sticks, straws, and more.
This DIY resin jewelry project has an amazing tutorial to help you make beautiful resin jewelry for all the lovely ladies in your life. So why wait? Make this Valentine’s Day extra special by crafting some truly beautiful gifts! resincraftsblog
18. Make an Epoxy Resin Jewelry
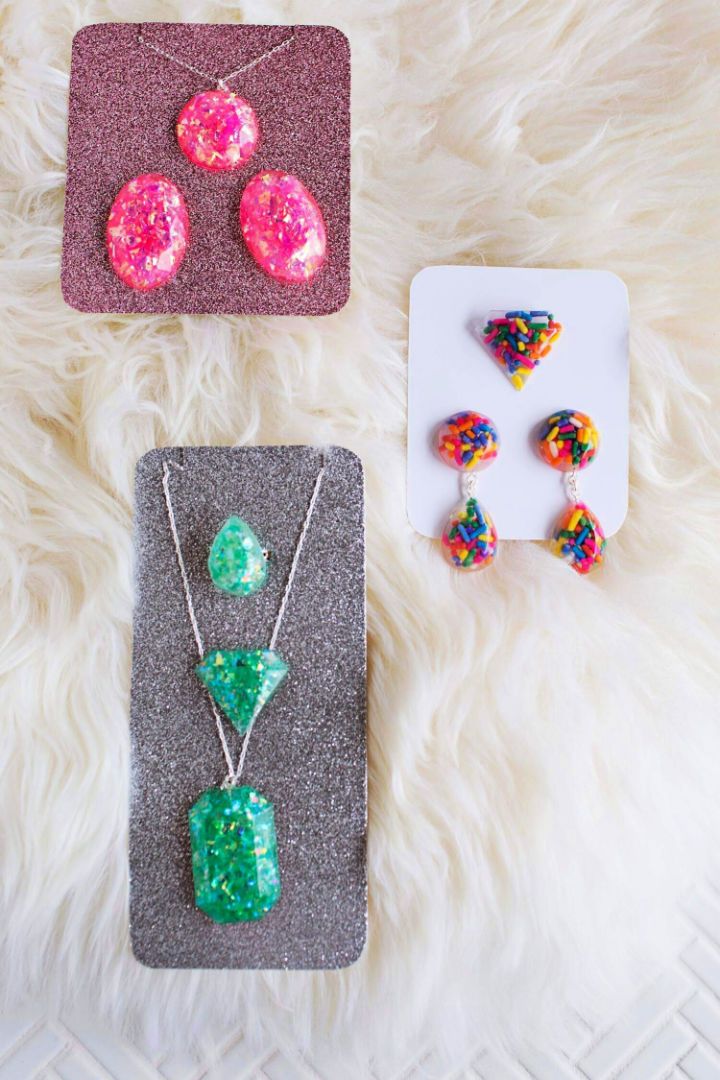
Jazz up your jewelry collection with this great DIY epoxy resin project! Make earrings, necklaces, rings, and even pins using silicone molds along with a set of epoxy resin. Jazz up your pieces by adding sprinkles, glitter, or confetti for some added sparkle. For customization, use different kinds of jewelry hardware as per your preference. To work effortlessly with the epoxy resin craft, grab crazy glue, needle nose pliers, disposable cups and spoons, and toothpicks from any local store before you start crafting. abeautifulmess
19. How to Make a Resin Pendant With Flowers
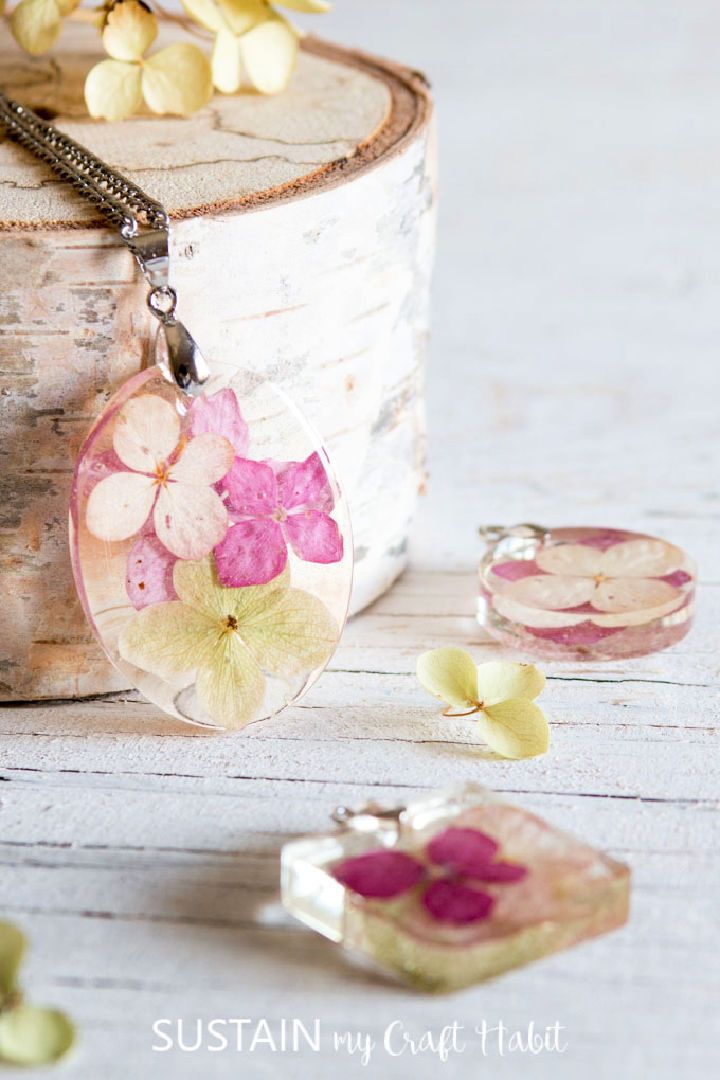
Make beautiful DIY resin flower pendants with these easy-to-follow instructions! Dried hydrangea flowers, envirotex jewelry resin, silicone molds, gloves, measuring cups, toothpicks, and pendant bails are all you need to get started. To ensure the best results possible, ensure your flowers are completely dry before embedding them in the resin – air drying it or pressing in a book will do the trick. This economic project is an ideal gift for any occasion, and supplies cost around $50, enough to make at least 50 distinct pieces. sustainmycraft
20. Making Resin Jewelry With Botanicals
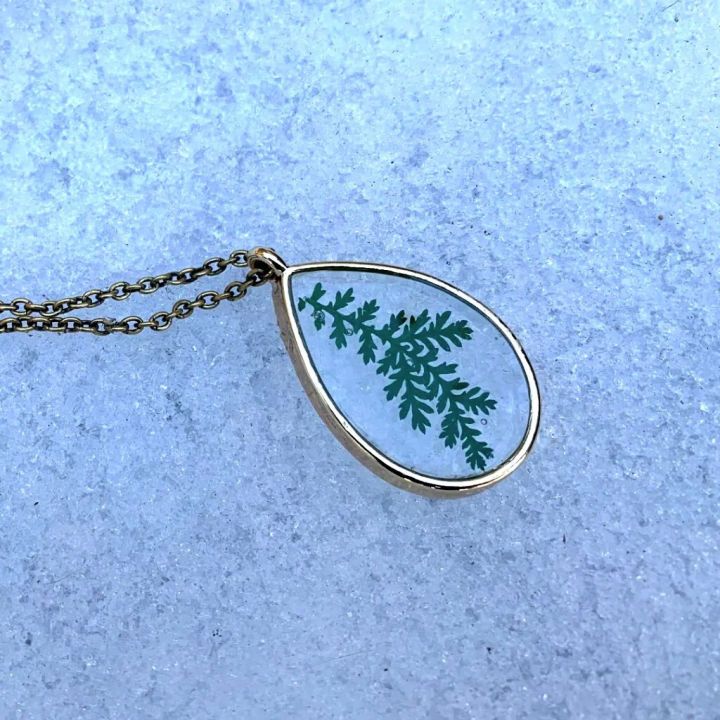
Stupendous resin jewelry crafted with dried flowers and leaves is easily achievable! Follow this simple tutorial to make your masterpieces and botanical pendants. With a silicone mat, uv resin, bezel, and a UV lamp or sunlight, trim your botanicals and carefully layer the resin, ensuring no bubbles form. Use a heat gun if needed before curing each layer. Finally, you can proudly wear or gift your exquisite botanical pendant creation! interweave
21. DIY Embed Paper Resin Jewelry
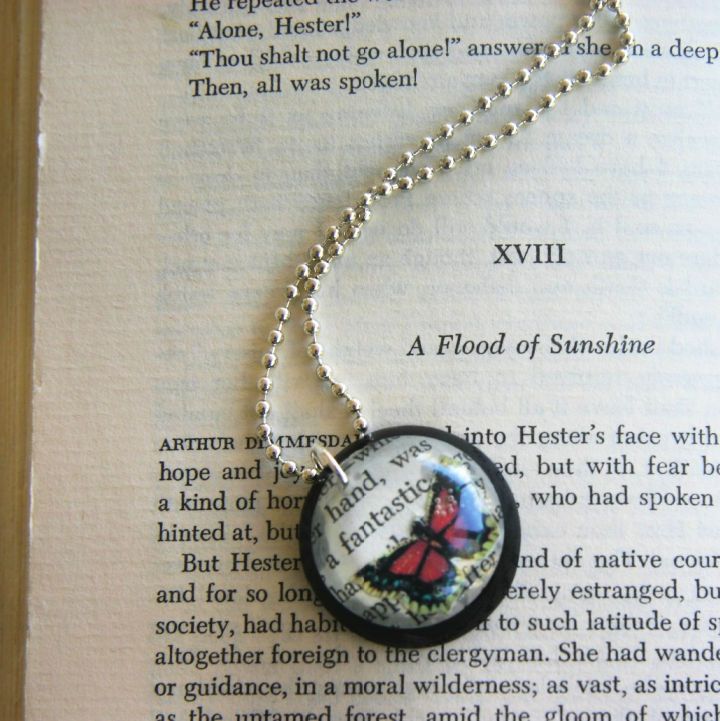
Unearth the secrets of crafting exquisite, personalized resin jewelry with this comprehensive tutorial! Discover the art of embedding paper into resin with just a few simple steps. From image selection and cutting to sealing with mod podge, create unique projects effortlessly.
All you need are scissors, a craft punch (optional), glue, a small container, a plastic work surface, a cheap paintbrush, and a black marker (optional). Once you’ve mastered these basics, feel free to get creative & experiment with various techniques & materials. skinnerstudio
22. DIY Resin Jewelry Tutorial for Beginners
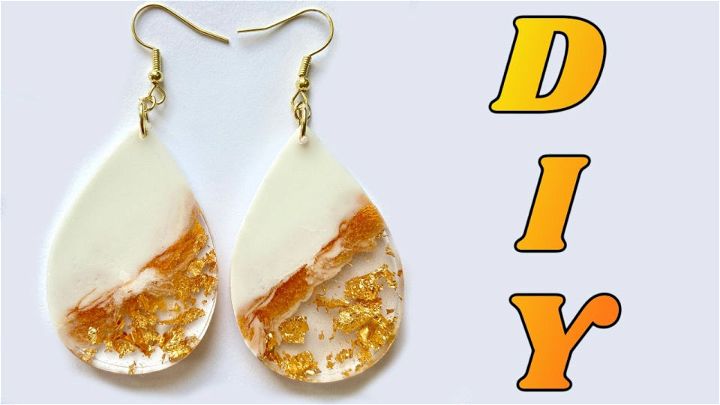
Marvel at the dazzling earrings you can make with this simple DIY tutorial! This video provides a comprehensive overview of the resin earring-making process, perfect for beginners. To get started, you’ll need supplies like a teardrop and square molds, jdiction epoxy, gold foil, white acrylic paint, and mica powder gold. Get creative as you learn how to craft your magnetic resin jewelry! With just a few steps, you can make stunning earrings that captivate. Don’t hesitate – start crafting today!
23. Fairy Pendants Made From Dried Plants and Epoxy Resin
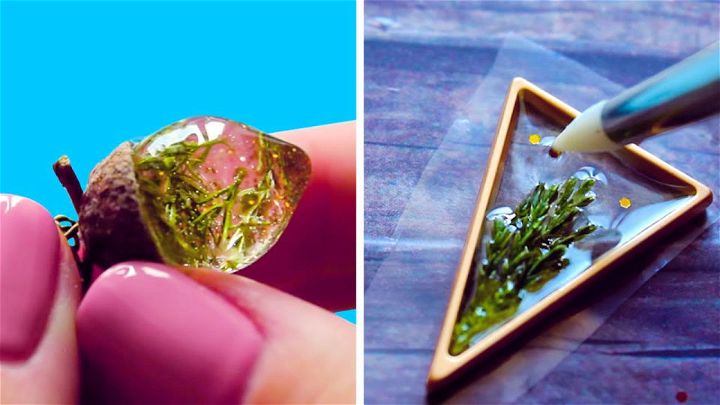
Enrapturing, handmade fairy pendants can be yours with this sensational tutorial! Learn how to use dried plants and epoxy resin to make unique jewelry. All materials are provided for you, from the silicone molds to sandpaper, including instructions so you may follow along step by step. With a bit of ingenuity and tenacity, these marvelous creations can become a reality. Let your dreams come alive as you experience the magic of crafting enchanting fairy pendants!
24. How to Make Resin Ring
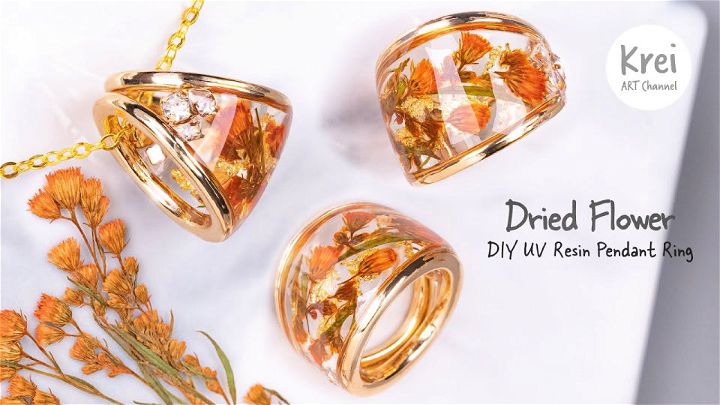
Amaze everyone with your craftsmanship and make a beautiful, unique dual-purpose accessory out of dried flowers! Follow this advanced crafting tutorial for an exquisite finish – from cutting the silicone pad to pouring uv resin and adding gold leaf. Get all your materials ready: silicone pad, metal rings, crystals, uv resin, and gold leaf. This high-difficulty project is perfect for seasoned crafters looking for a challenge; make something you can be proud of wearing!
25. DIY Epoxy Resin Pendant With Rose Petals
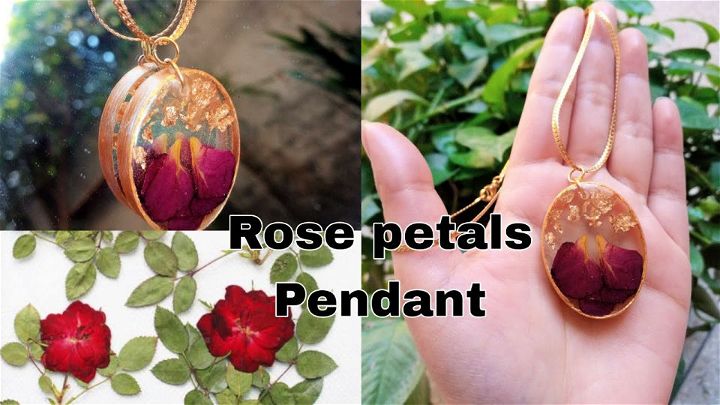
Revitalize your creativity with a DIY epoxy resin pendant featuring rose petals! This easy-to-follow tutorial takes you through the process step-by-step so even beginners can make a beautiful statement piece. All safety precautions are considered, from drying petals to mixing resins and hardeners, layering resin and petal layers, and adding metallic finishes. Keep your hands safe by wearing gloves when heating the resin to avoid bubbles for a stunningly unique, personalized, eye-catching final product!
Conclusion:
Resin jewelry is a fun and rewarding hobby that allows you to express your personality and style. You can make earrings, necklaces, bracelets, rings, and more with resin and various embellishments. Whether you prefer simple or elaborate designs, we have shared 25 easy DIY resin jewelry making ideas to inspire you.
You can use dried flowers, seashells, glitter, paper, wood, and other items to create stunning resin jewelry. All you need are some basic tools, materials, and a little patience. Resin jewelry is also a great gift idea for your friends and family. With resin jewelry, you can make your own mini masterpieces that will last for years. Let’s explore our list of resin jewelry making ideas above.

