DIY nightstand is a stylish and functional addition to your bedroom decor. Learn how to build a nightstand with these 25 easy and free DIY nightstand ideas and plans, each with detailed step-by-step instructions to help you successfully build your DIY bedside table.
Discover a variety of DIY nightstand ideas, from the rustic charm of a farmhouse nightstand to the sleek elegance of a mid-century modern design. You could experiment with making a simple wooden nightstand, or challenge yourself with a more complex project like a DIY nightstand with a hidden charging station or compartment. Some plans even include a smart IKEA hack, turning a basic piece of furniture into a unique DIY nightstand.
Whether you opt to make a wooden nightstand from butcher block or a floating nightstand for a modern flair, these DIY nightstand plans are a fun and practical way to improve your skills and add a personal touch to your bedroom decor. And if you love the popular Pottery Barn styles, you’ll find DIY nightstand ideas inspired by their designs too.
The assembly details and materials required for each project are clearly stated, with visual aids included in many of the tutorials to ensure a smooth building process. Remember, you are not just making a piece of furniture; you’re making a functional piece of art that can enhance the aesthetic appeal of your bedroom. So, grab your tools and materials and start your DIY nightstand project today!
Understanding the basics of DIY nightstands
A DIY nightstand is a simple project that you can easily do with some basic tools and materials. You can customize your nightstand to suit your preferences and needs, such as the size, shape, color, design, and features. Also, you can save a lot of money by using recycled or inexpensive materials, such as wood, metal, or cardboard.
You can choose from many types of DIY nightstands, depending on your skill level and style. Some common examples are:
- A simple box-shaped nightstand with a drawer and a shelf
- A modern nightstand with tapered legs and a sliding barn door
- A rustic nightstand with X-shaped sides and a planked top
- A farmhouse nightstand with a crate-like design and a basket
- A mid-century modern nightstand with hairpin legs and a geometric pattern
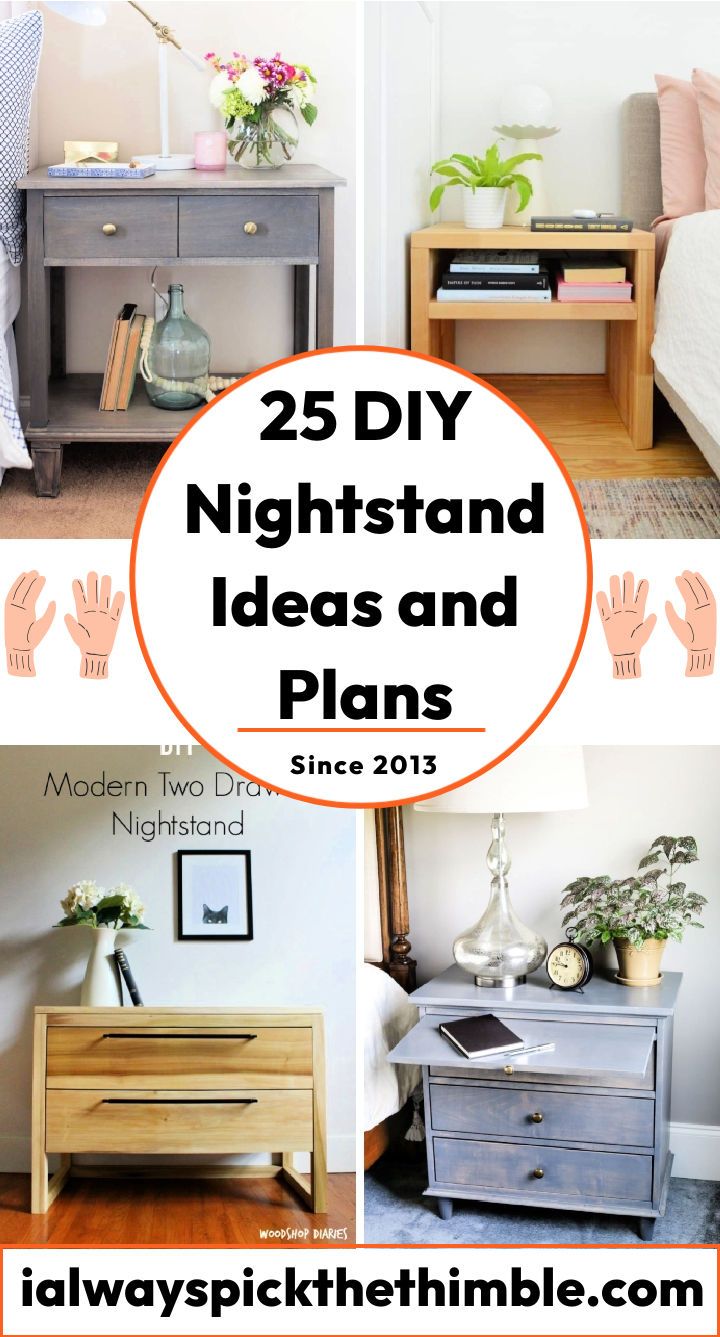
You can find 25 free DIY nightstand plans below that will guide you through the steps of building your own nightstand. These DIY nightstand plans have detailed instructions, diagrams, photos, videos, materials lists, and tools lists.
What you need to know before starting your DIY nightstand project
Before you start building your own DIY nightstand, there are some things that you need to consider and prepare. Here are some tips to help you plan and execute your project successfully:
- Measure your space and decide how big you want your nightstand to be. Ensure it fits well with your bed height, mattress size, and room layout.
- Choose a DIY nightstand design that matches your style and personality. You can browse different DIY nightstand plans below to build your design.
- Make a list of the required materials and tools that you will need for your project. Check what you already have at home and what you need to buy or borrow. Some of the common materials and tools for DIY nightstands are:
- Wood (such as poplar, pine, plywood, or pallet wood)
- Screws, nails, dowels, hinges, knobs, pulls, etc.
- Wood glue, wood filler, sandpaper, stain, paint, polyurethane, etc.
- Saw (such as miter saw, table saw, circular saw, or jigsaw)
- Drill (with drill bits and driver bits)
- Hammer, screwdriver, tape measure, level, square, clamps, etc.
- Gather all the materials and tools in one place and make sure they are in good condition. Clean and sharpen your tools if necessary.
- Follow the instructions carefully and work step by step. Don’t skip any steps or cut any corners. If you encounter any problems or difficulties, ask for help or look for solutions online.
- Wear safety gear, such as gloves, goggles, earplugs, etc., when working with power tools or hazardous materials. Avoid working in wet or windy conditions. Keep children and pets away from your work area.
The benefits of using DIY nightstand plans for your project
Using DIY nightstand plans for your project has many benefits that can make your experience more enjoyable and rewarding. Some of the benefits are:
- You can save time and money by following a proven plan that has been tested and reviewed by others.
- You can learn new skills and techniques that can improve your woodworking abilities.
- You can easily avoid common mistakes and errors that can ruin your project or cause injuries.
- You can customize your nightstand to fit your needs and preferences by modifying the plan or adding your own touches.
- You can have a lot of fun and express your creativity by building something unique and personal.
How to choose the right DIY nightstand plans for your skill level
When choosing a DIY nightstand plan for your project, consider your skill level and experience in woodworking. Some plans are more suitable for beginners who have little or no experience in woodworking. Others are more challenging for intermediate or advanced woodworkers who have more skills and confidence in woodworking.
To choose the right DIY nightstand plan for your skill level, you should look for these factors:
- The complexity of the nightstand design: The simpler the design, the easier it is to build. Look for designs that have fewer parts, cuts, joints, angles, and features. Look for designs that have simple shapes, straight cuts, basic joints, and minimal hardware.
- The difficulty of the instructions: The clearer the instructions, the easier it is to follow. Look for instructions that have detailed steps, diagrams, photos, videos, tips, and explanations.
- The availability of the materials and tools: The more accessible the materials and tools, the easier it is to obtain. Look for materials and tools that are common, cheap, or easy to find in your local stores or online.
- The duration of the project: The shorter the project, the easier it is to complete. Look for projects that can be done in a few hours or days, depending on your availability and patience.
To help you choose the right DIY nightstand plan for your skill level, here are some examples of DIY nightstand plans for beginners, intermediate, and advanced woodworkers:
- Beginner: A simple box-shaped nightstand with a drawer and a shelf. This plan requires only a few basic tools and materials, such as a saw, a drill, wood, screws, glue, and paint. The instructions are easy to follow and have clear diagrams and photos. The project can be done in a few hours or a day.
- Intermediate: A modern nightstand with tapered legs and a sliding barn door. This plan requires some more advanced tools and materials, such as a table saw, a router, wood, plywood, metal pipe, hinges, knobs, etc. The instructions are detailed and have helpful tips and explanations. The project can be done in a weekend or a few days.
- Advanced: A mid-century modern nightstand with hairpin legs and a geometric pattern. This plan requires some specialized tools and materials, such as a jigsaw, a sander, wood, plywood, veneer, hairpin legs, dowels, etc. The instructions are complex and have intricate diagrams and photos. The project can be done in a week or more.
How to choose the right materials for your DIY nightstand
The materials that you choose for your DIY nightstand will affect the appearance, durability, and cost of your project. Therefore, you should choose the materials that suit your style, budget, and skill level. Here are some tips on how to choose the right materials for your DIY nightstand:
- Wood: Wood is the most common and versatile material for DIY nightstands. You can use different types of wood, such as poplar, pine, plywood, or pallet wood, depending on the quality and finish you want. Wood is easy to cut, join, sand, stain, paint, and decorate. However, wood can also warp, crack, rot, or get infested by insects if not treated properly. You should look for wood that is dry, straight, smooth, and free of knots and defects. You should also seal and protect your wood with a coat of polyurethane or other finish.
- Metal: Metal is another popular material for DIY nightstands. You can use metal pipes, rods, sheets, or wire to create a modern, industrial, or rustic look for your nightstand. Metal is strong, durable, and resistant to weather and insects. However, metal can also rust, corrode, or scratch if not treated properly. You should look for metal that is clean, smooth, and free of rust and dents. You should also paint or coat your metal with a primer or other finish.
- Cardboard: Cardboard is a cheap and eco-friendly material for DIY nightstands. You can use cardboard boxes, tubes, or sheets to create a simple, lightweight, and portable nightstand. Cardboard is easy to cut, fold, glue, and decorate. However, cardboard can also bend, tear, or get damaged by water or fire if not treated properly. You should look for cardboard that is thick, sturdy, and clean. You should also reinforce and protect your cardboard with a layer of mod podge or other finish.
These are some of the common materials that you can use for your DIY nightstand project. You can also mix and match different materials to create a unique and creative nightstand. For example, you can use wood for the frame and metal for the legs of your nightstand. Or you can use cardboard for the base and wood for the top of your nightstand.
You can find more ideas and inspiration for DIY nightstand materials online or in magazines. You can also visit your local hardware store or thrift store to see what materials are available and affordable for you.
Tips for avoiding common mistakes when building a DIY nightstand
Building a DIY nightstand can be a fun and rewarding project, but it can also be challenging and frustrating if you make some common mistakes. Here are some tips on how to avoid these mistakes and ensure a smooth and successful DIY nightstand project:
- Plan ahead: Before you start building your DIY nightstand, you should have a clear plan of what you want to achieve and how you want to do it. You should choose a design that suits your style, skill level, and budget. You should also make a list of the materials and tools that you will need and gather them in one place. You should also measure your space and mark your cuts and joints accurately. Planning ahead will help you avoid wasting time, money, and materials.
- Follow the instructions: If you are using a DIY nightstand plan from online or elsewhere, you should follow the instructions carefully and work step by step. Don’t skip any steps or cut any corners. If you encounter any problems or difficulties, ask for help or look for solutions online. Following the instructions will help you avoid making errors or damaging your project.
- Test fit: Before you glue, nail, or screw anything together, you should test fit your parts and make sure they align properly. You should also check if your drawer slides smoothly and your door opens and closes easily. Test fitting will help you avoid gaps, cracks, or misalignments in your project.
- Sand and finish: After you have assembled your DIY nightstand, you should sand it smooth and remove any rough edges or splinters. You should also apply a coat of stain, paint, or polyurethane to protect and beautify your project. Sanding and finishing will help you avoid injuries or damage to your project.
- Decorate: The last step of building your DIY nightstand is to decorate it according to your taste and personality. You can add some knobs, pulls, handles, baskets, lamps, books, plants, or other items to your nightstand. You can also add some stickers, decals, or paint to create some patterns or designs on your nightstand. Decorating will help you add some flair and charm to your project.
These are some of the tips on how to avoid common mistakes when building a DIY nightstand. I hope these tips will help you achieve a better result and enjoy your project more.
How to train yourself to build a DIY nightstand
If you are new to woodworking or DIY projects, building a DIY nightstand may seem daunting or intimidating. However, don’t let that stop you from trying it out. Building a DIY nightstand is a great way to learn new skills and techniques that can improve your woodworking abilities. Here are some ways on how to train yourself to build a DIY nightstand:
- Watch videos: One of the best ways to learn how to build a DIY nightstand is to watch videos of other people doing it. You can find many videos online that show different DIY nightstand projects from start to finish. You can watch how they cut, join, sand, finish, and decorate their nightstands. You can also learn from their tips, tricks, and mistakes. Watching videos will help you visualize the process and gain some confidence.
- Read blogs: Another way to learn how to build a DIY nightstand is to read blogs of other people who have done it before. You can find many blogs online that share their experiences, challenges, and successes in building their own DIY nightstands. You can read about their designs, materials, tools, instructions, and photos of their nightstands. You can also read their comments and feedback from other readers. Reading blogs will help you learn from their insights and perspectives.
- Join forums: A third way to learn how to build a DIY nightstand is to join forums of other DIY enthusiasts who share their passion and knowledge. You can find many forums online that discuss different topics related to DIY projects, such as woodworking, furniture, home improvement, etc. You can join these forums and ask questions, seek advice, share your ideas, or show your progress. Joining forums will help you connect with other people who can support and inspire you.
- Practice: The best way to learn how to build a DIY nightstand is to practice. You can start with a simple and easy project that matches your skill level and budget. You can follow a DIY nightstand plan or create your own design. You can use the materials and tools that you have or buy or borrow some. You can work at your own pace and enjoy the process. Practicing will help you improve your skills and confidence.
These are some of the ways on how to train yourself to build a DIY nightstand. I hope these ways will help you achieve your goal and have fun along the way.
A beginner guide to building a DIY nightstand
If you are a beginner who wants to build your own DIY nightstand, you may feel overwhelmed or confused by the many options and steps involved. However, don’t worry. Building a DIY nightstand is not as hard as it seems. In fact, it can be quite easy and enjoyable if you follow some simple guidelines. Here is a beginners guide to building a DIY nightstand:
- Choose a simple and easy design: As a beginner, you should choose a design that is simple and easy to build. You should avoid designs that have too many parts, cuts, joints, angles, or features that may complicate your project. You should also choose a design that suits your style, space, and budget. You can find many free DIY nightstand plans below that are suitable for beginners.
- Gather the materials and tools: Once you have chosen your design, you should gather the materials and tools that you will need for your project. You should check the materials list and tools list that come with your plan and see what you already have at home and what you need to buy or borrow. You should also make sure that your materials are in good condition and your tools are clean and sharp. You should also wear safety gear, such as gloves, goggles, earplugs, etc., when working with power tools or hazardous materials.
- Cut the wood: The next step is to cut the wood according to the measurements and diagrams that come with your plan. You should use a saw that is appropriate for the type and size of wood that you are cutting, such as a miter saw, table saw, circular saw, or jigsaw. You should also use a tape measure, level, square, pencil, and clamps to mark and secure your wood before cutting. You should also follow the safety precautions when using a saw, such as keeping your fingers away from the blade, unplugging the saw when not in use, etc.
- Assemble the frame: After you have cut the wood, you should assemble the frame of your nightstand according to the instructions that come with your plan. You should use wood glue, screws, nails, dowels, or other fasteners to join the pieces of wood together. You should also use a drill, a screwdriver, a hammer, or other tools to make holes and drive the fasteners into the wood. You should also use a level, a square, or a ruler to make sure that your frame is straight and square. You should also follow the safety precautions when using these tools, such as wearing gloves, goggles, etc.
- Attach the top and the bottom: The next step is to attach the top and the bottom of your nightstand to the frame according to the instructions that come with your plan. You should use wood glue, screws, nails, or other fasteners to secure the top and the bottom of the frame. You should also use a drill, a screwdriver, a hammer, or other tools to make holes and drive the fasteners into the wood. You should also use a level, a square, or a ruler to make sure that your top and bottom are level and aligned with the frame.
- Install the drawer and the door: The next step is to install the drawer and the door of your nightstand according to the instructions that come with your plan. You should use wood glue, screws, nails, dowels, hinges, knobs, pulls, or other hardware to assemble and attach the drawer and the door to the nightstand. You should also use a drill, a screwdriver, a hammer, or other tools to make holes and drive the hardware into the wood. You should also use a level, a square, or a ruler to make sure that your drawer and door are straight and fit well with the nightstand.
- Sand and finish: The final step is to sand and finish your nightstand according to your preference. You should use sandpaper or a sander to smooth out any rough edges or splinters on your nightstand. You should also use stain, paint, or polyurethane to protect and beautify your nightstand. You should follow the directions on the product labels and apply them evenly and carefully on your nightstand. You should also let your nightstand dry completely before using it.
Congratulations! You have successfully built your own DIY nightstand!
How to start building your own DIY nightstand
If you want to start building your own DIY nightstand but you not have a specific design or plan in mind, you can use some of these methods to generate some ideas and inspiration:
- Sketch: One of the simplest and easiest ways to start building your own DIY nightstand is to sketch your ideas on paper. You can use a pencil, a pen, a marker, or any other drawing tool to draw the shape, size, style, and features of your nightstand. You can also use some colors, stickers, or stamps to add some details and decorations to your sketch. Sketching will help you visualize your ideas and express your creativity.
- Collage: Another way to start building your own DIY nightstand is to make a collage of images that inspire you. You can use magazines, newspapers, catalogs, flyers, or any other printed materials to cut out pictures of nightstands or other furniture that you like. You can also use photos, drawings, paintings, or any other artwork that you find online or elsewhere. You can then glue, tape, or pin these images on a board, a wall, or a notebook. Collage will help you collect and organize your ideas and find some patterns and themes.
- Model: A third way to start building your own DIY nightstand is to make a model of your nightstand using some materials that you have at home or can easily find. You can use cardboard, paper, foam, clay, wood, metal, or any other materials that are suitable for making a miniature version of your nightstand. You can also use some tools such as scissors, knives, glue guns, staplers, or any other tools that are helpful for cutting, shaping, joining, and decorating your model. The model will help you test and refine your ideas and see how they look in reality.
These are some of the ways to start building your own DIY nightstand. You can use one or more of these methods to generate some ideas and inspiration for your project. You can also combine different methods to create more diverse and original ideas.
What you need to learn before building a DIY nightstand
If you want to build your own DIY nightstand but you don’t have enough knowledge or experience in woodworking or DIY projects, If you want to build your own DIY nightstand, but you don’t have enough knowledge or experience in woodworking or DIY projects, you may need to learn some basic skills and techniques before you start. Here are some of the things that you need to learn before building a DIY nightstand:
- Woodworking basics: You need to learn some woodworking basics, such as how to measure, mark, cut, join, sand, and finish wood. You also need to learn how to use different types of wood, such as hardwood, softwood, plywood, or pallet wood, and how to choose the best wood for your project. You also need to learn how to use different types of tools, such as saws, drills, hammers, screwdrivers, clamps, etc., and how to maintain and store them properly. You can learn woodworking basics from online courses, books, videos, or workshops. For example, you can check out this [free online course] from Instructables that teaches you the fundamentals of woodworking.
- DIY nightstand plans: You need to learn how to read and follow DIY nightstand plans, which are detailed guides that show you how to build a specific nightstand design. DIY nightstand plans usually include a materials list, a tools list, a cut list, step-by-step instructions, and some diagrams, photos, or videos. You need to learn how to interpret these elements and apply them to your project. You can find many free DIY nightstand plans online from various websites, such as The Spruce Crafts, House Grail, Family Handyman, or DIYnCrafty.
- Safety precautions: You need to learn how to take safety precautions when working on your DIY nightstand project. You need to wear safety gear, such as gloves, goggles, earplugs, etc., when working with power tools or hazardous materials. You need to avoid working in wet or windy conditions. You need to keep children and pets away from your work area. You need to follow the directions on the product labels and use them carefully and responsibly. You also need to be aware of the potential risks and hazards of your project and how to deal with them if they occur.
These are some of the things that you need to learn before building a DIY nightstand. I hope these things will help you prepare and succeed in your project.
The most popular DIY nightstand plans for beginners
If you are looking for some popular DIY nightstand plans that are suitable for beginners, check out our list of ideas below:
1. Pottery Barn Inspired Nightstand – Free Plan
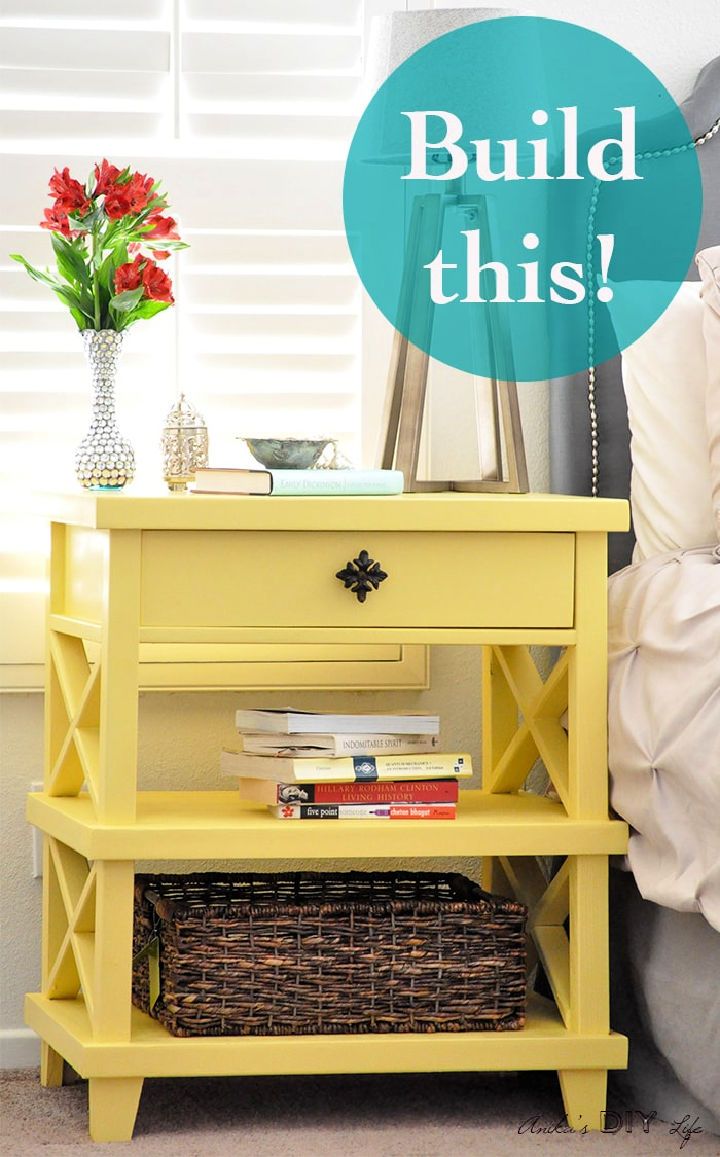
Revamp your bedroom with a stunning DIY pottery barn-inspired nightstand! This easy-to-follow tutorial and free plan will guide you step by step on transforming the Clara lattice bedside table into a stunning nightstand for only a fraction of the cost. This simple yet beautiful project will transform your space perfect for any skill level. So why not get creative today and craft something special – build your pottery barn-inspired nightstand? Make it yours today and save money while doing so! anikasdiylife
2. Handmade Mid-Century Modern Nightstand
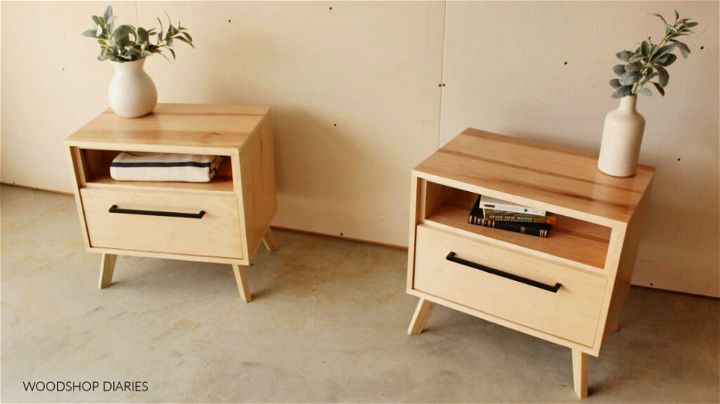
Have a unique and charming bedroom masterpiece with this DIY Mid-Century modern nightstand project. This adorable mid-century classic is crafted with one sheet of plywood and some scrap wood to cut the legs from.
With a step-by-step video guide and the plans included, you can easily build this stunning piece quickly! To complete the project, you will need plywood, scrap wood for legs, pocket hole screws, wood screws, ball-bearing drawer slides, wood glue and edge banding. Achieve a classically clean look that is sure to turn heads with this beautiful handmade nightstand today! woodshopdiaries
3. DIY Wooden Nightstand With Blueprints
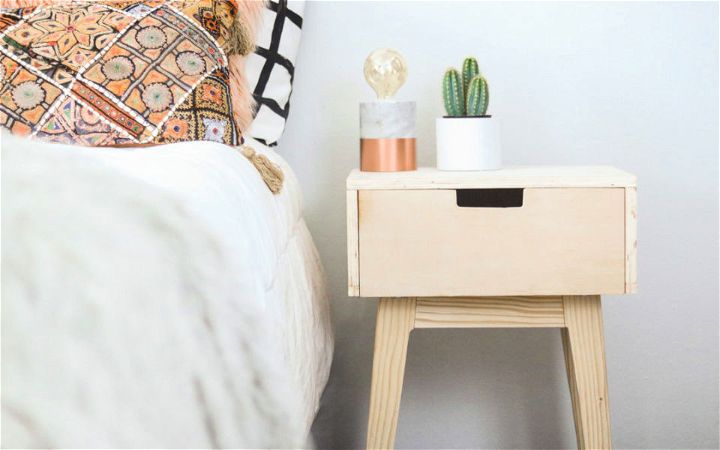
Make your bedroom a stylish sanctuary with this DIY wooden nightstand. Featuring simple Scandinavian charm, it’s the perfect way to update any decor on a budget. You can easily bring warmth and character while keeping things neutral by using just one 2″ x 3″ x 8′ length of pine plywood and tapering legs. And with the blueprints included, you can easily remake this pretty piece at home! Give yourself an affordable upgrade today – from the comfort of your home. lilyardor
4. Simple Wood Nightstand With Drawer
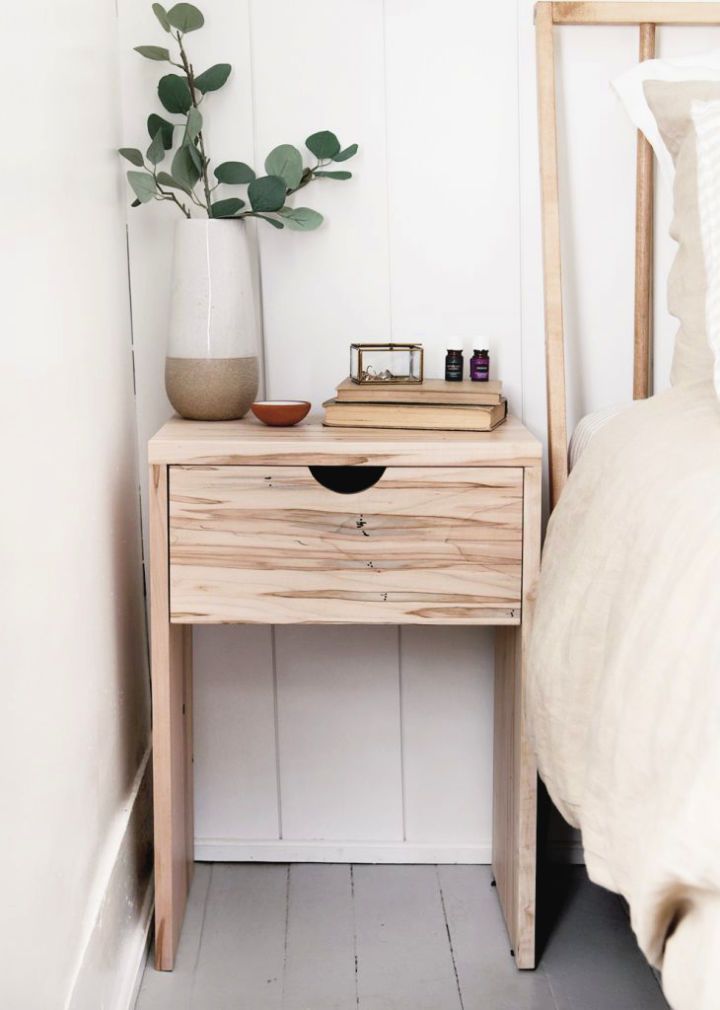
Rejuvenate your bedroom with this stunning DIY simple wood nightstand! Crafted from beautiful ambrosia maple, the natural pattern in the wood is so pleasing to look at. The pretty big-size drawer offers plenty of storage for everyday items. Plus, you can customize it to ensure the right height and size fits perfectly into your space. Get ready for a lovely bedroom makeover with this nice piece of furniture! themerrythought
5. Mid-Century Nightstand Using Plywood Sheet
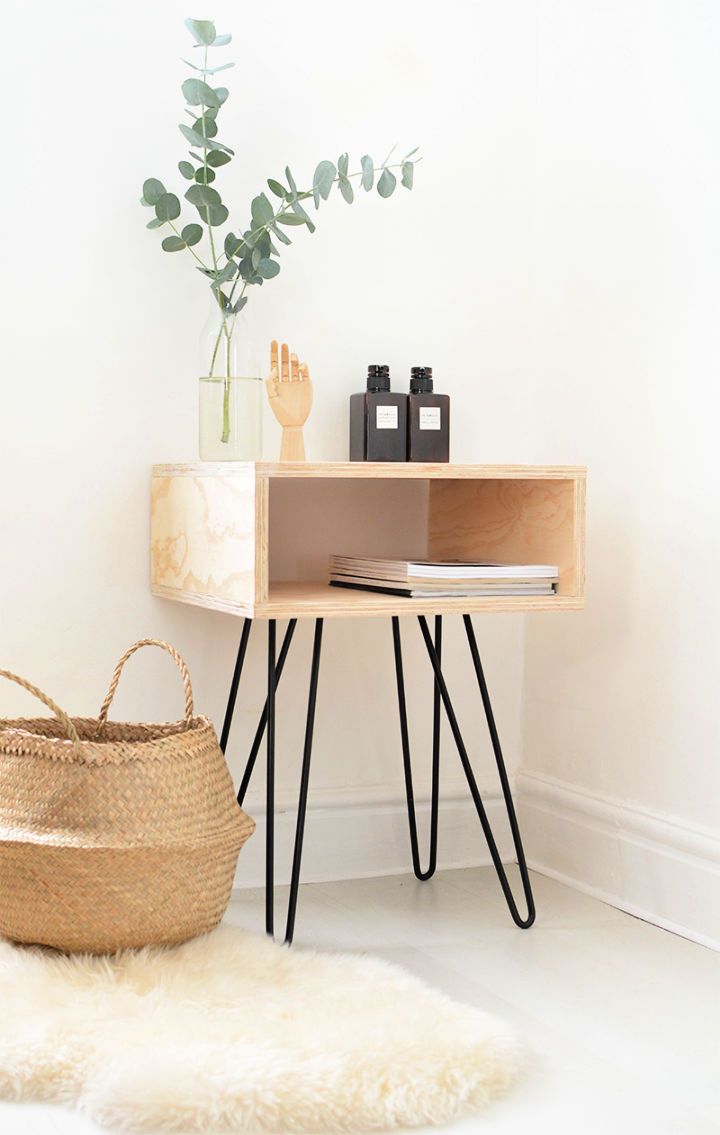
Craft the perfect DIY mid-century nightstand with this tutorial! This minimalistic yet stylish design will impress while costing much cheaper than any market-bought nightstand. With its more popular mid-century shape, this is one of the easiest pieces of furniture to build with just a plywood sheet, hairpin legs, wood glue or nails, and a screwdriver. Get creative and show off your crafting skills with a beautiful piece that adds class and style to any bedroom decor. burkatron
6. Tarva Nightstand IKEA Hack
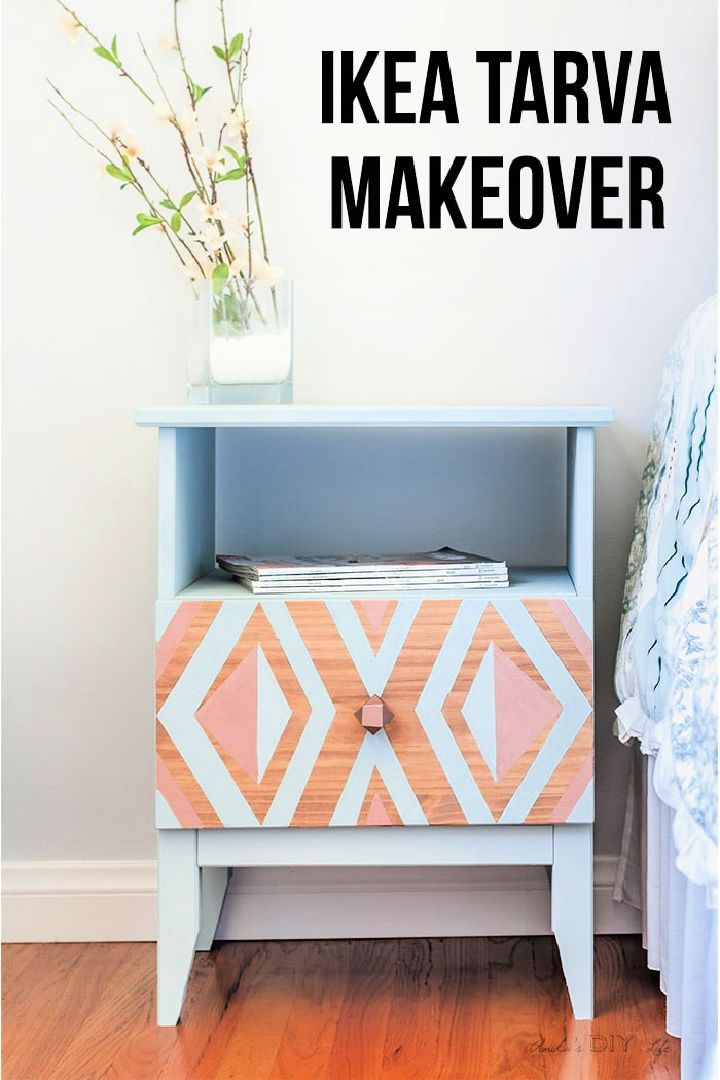
This DIY Tarva nightstand Ikea hack will help make your bedroom look elegant and modern! This simple makeover will add a punch to your room in just a few hours without spending too much time or effort. You only need some stain or paint, and metallic paint for the beautiful three-tone effect. Afterward, enjoy the lovely nightstand makeover to give your bedroom an amazing new look – it’s that easy! Don’t wait any longer – try this Ikea hack today and upgrade your room instantly. anikasdiylife
7. DIY Nightstand With Hidden Charging Station
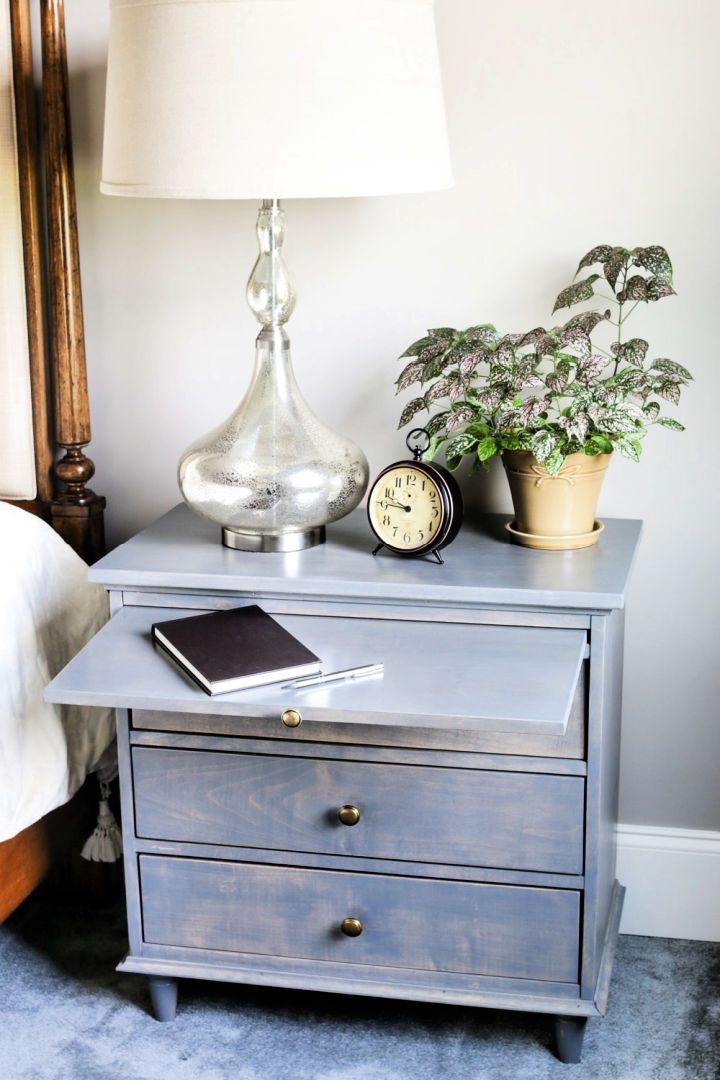
Tired of the same old nightstands? It’s time to switch things up with this DIY nightstand with a remote charging station! This stylish, inexpensive piece is easy to build for any space and comes with printable PDF building plans. Make your bedroom look its best while staying organized: charge your devices in the remote station and store small items in the tray. Get creative and customize the dimensions as you please—it’s a great way to add charm without breaking the bank! jenwoodhouse
8. Rustic Nightstand With Hidden Compartment
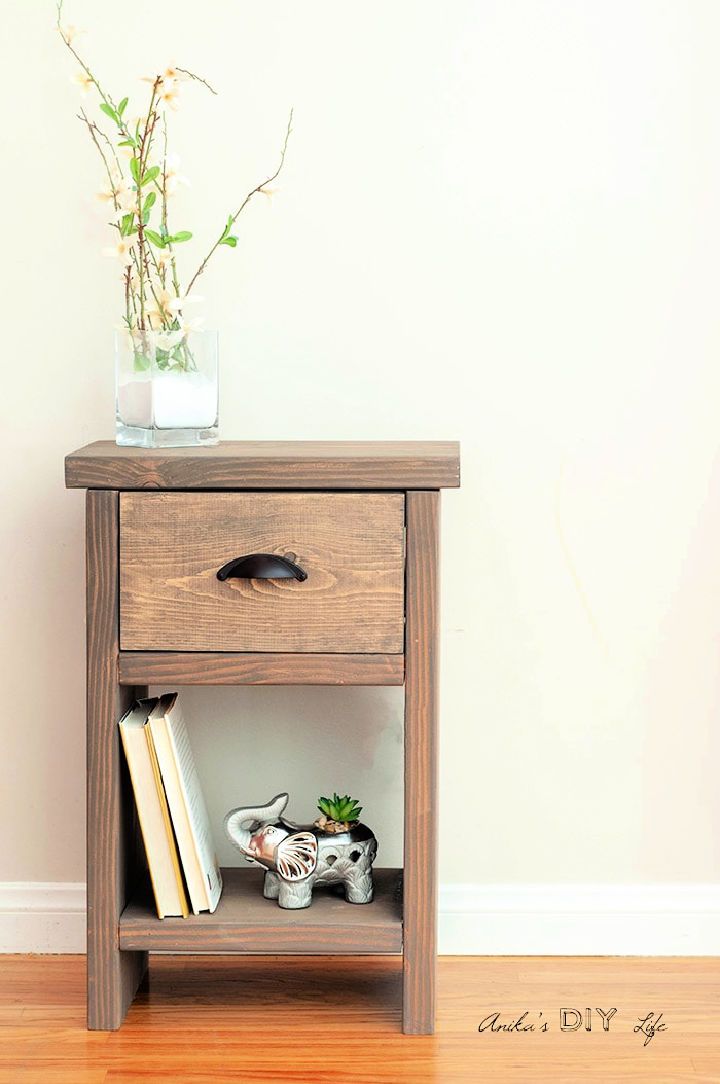
Impress your friends and family by making a beautiful DIY rustic nightstand with a hidden compartment and drawer! This step-by-step tutorial, video and plans make this an easy beginner woodworking project.
The unique design uses concealed joints instead of screws to assemble the body, making it a versatile piece that can be used as Nightstands, end table or bedside table in your bedroom or living room.
Plus, you’ll love the simple materials needed: lumber, wood glue, drawer slides, hinge lid support, finish nails, and finish nailer. Make something special for your home today – start building your rustic nightstand now! anikasdiylife
9. Easy DIY Floating Nightstand
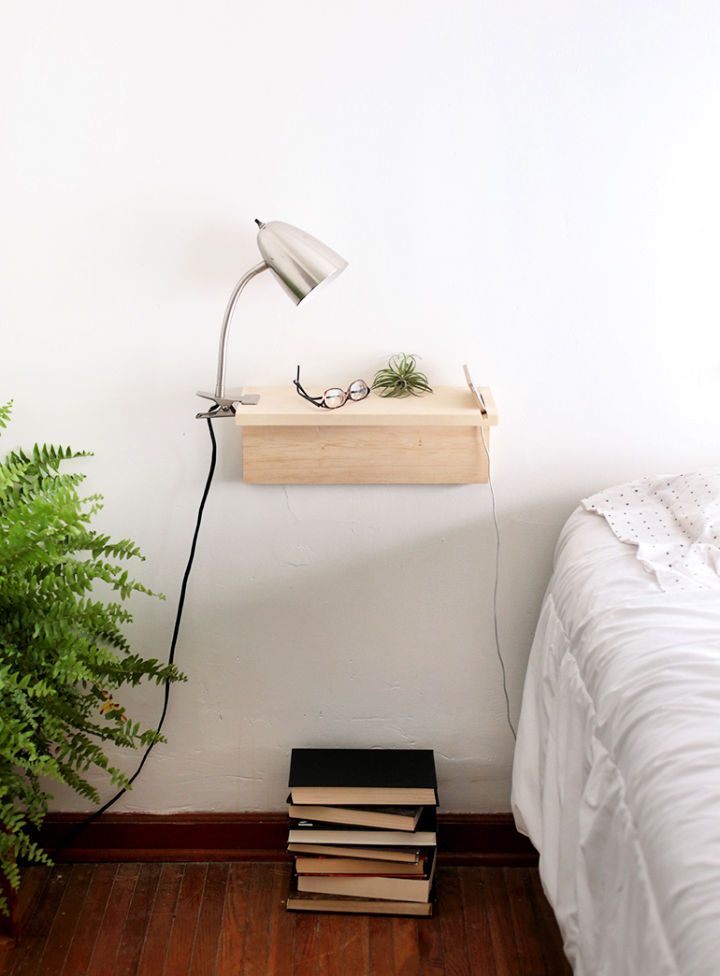
Transform your boring bedroom with a beautiful, appealing DIY floating nightstand! This easy build is the perfect space-saver – allowing you enough room for the few things you need next to your bed without losing a lot of floor space. The design can be easily customized to fit your needs and preferences – stain or paint the wood, adapt the size as desired, and adjust the phone slot for a custom fit. With just pine boards, wood glue, clamps, nails/nail gun sandpaper screws and some handy tools, you’ll have an updated bedroom in no time! themerrythought
10. Homemade Pottery Barn Inspired Nightstand
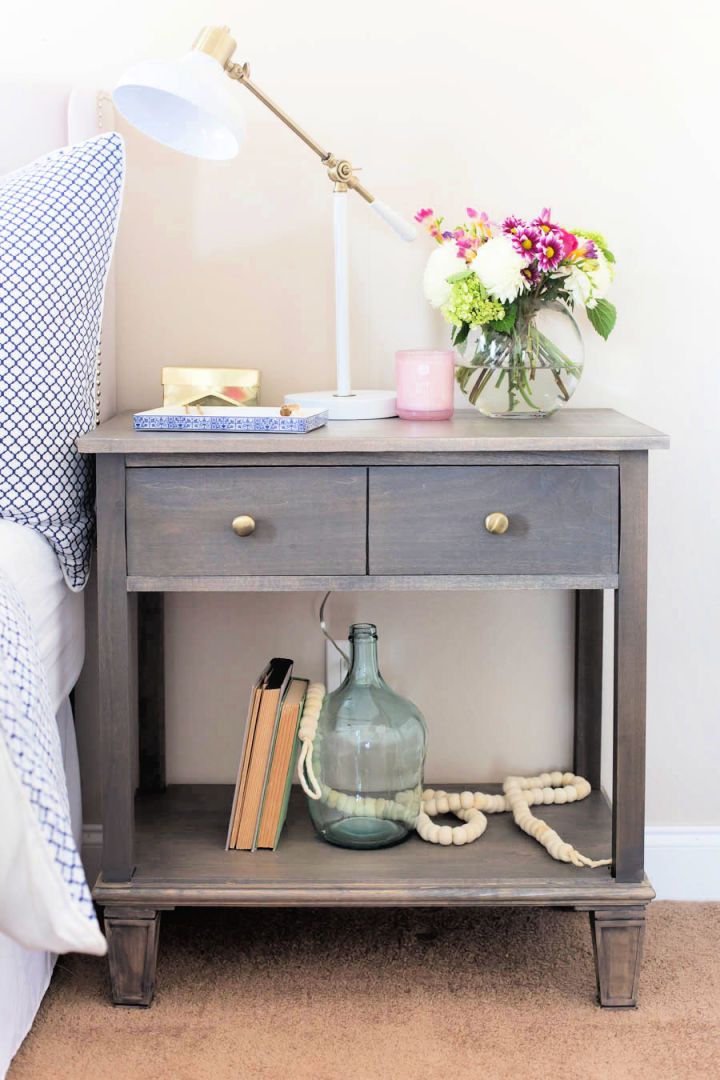
Transform your bedroom with a gorgeous homemade Pottery Barn-inspired nightstand. With the free building plans and tutorial, you can make your beautiful piece of furniture out of plywood, dimensional wood boards, cove molding, 4 – furniture feet, metal corner brackets, drawer knobs and sliders, pocket hole screws and brad nails.
All the supplies necessary for this project are easy to find in most local hardware stores, including wood glue, iron-on edge banding and wood screws. Get creative with colors or stains to make it unique! Follow the instructions in this guide for the best results – start building your dream bedroom today! jenwoodhouse
11. Make Your Own Floating Night Stand
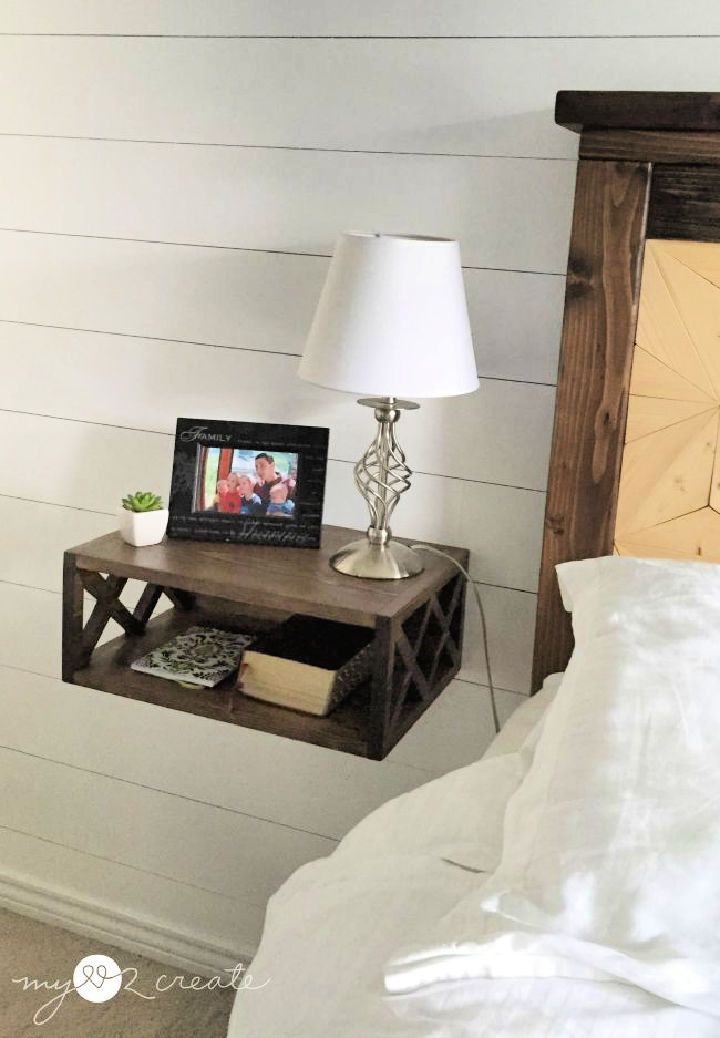
Love the idea of a DIY floating nightstand but have limited floor space? Look no further! This easy tutorial with free building plans for a floating night Stand is your perfect bedroom makeover solution. You can construct this fun piece quickly with just one single 1x8x8 board and some basic tools.
You’ll gain not only extra storage with the drawer that’s accessible on both sides of the bed but also save valuable floor space in any size room. So what are you waiting for? Upgrade your master bedroom today with this easy-to-build DIY nightstand! mylove2create
12. Unique DIY Wooden Nightstand
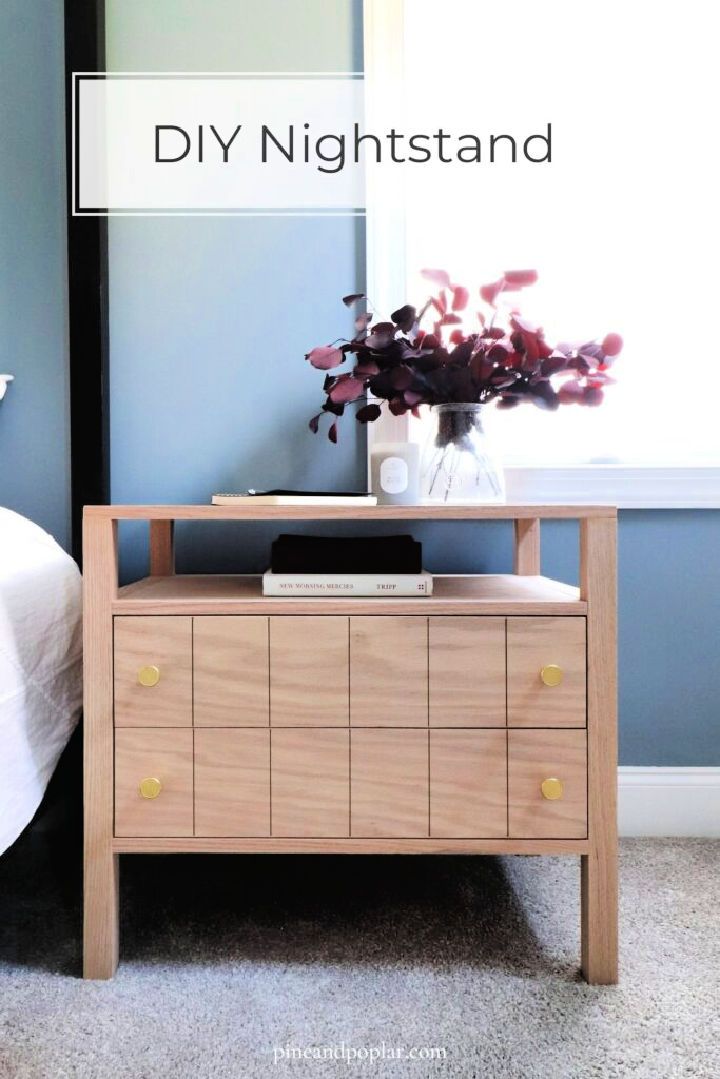
Enjoy an elevated and modern look in your bedroom with this unique DIY wooden nightstand. Crafted from red oak and maple plywood, you can customize the design to perfectly fit your space. For around $300 for two nightstands, you’ll get dimensions of 28″ w, 18″ d, 25.5″ h, giving your room a sleek aesthetic. This tutorial includes free printable plans to make construction easier than ever! Elevate the look of your bedroom today with this beautiful and custom-made wooden nightstand! pineandpoplar
13. Building a Tall Nightstand – Free Plan
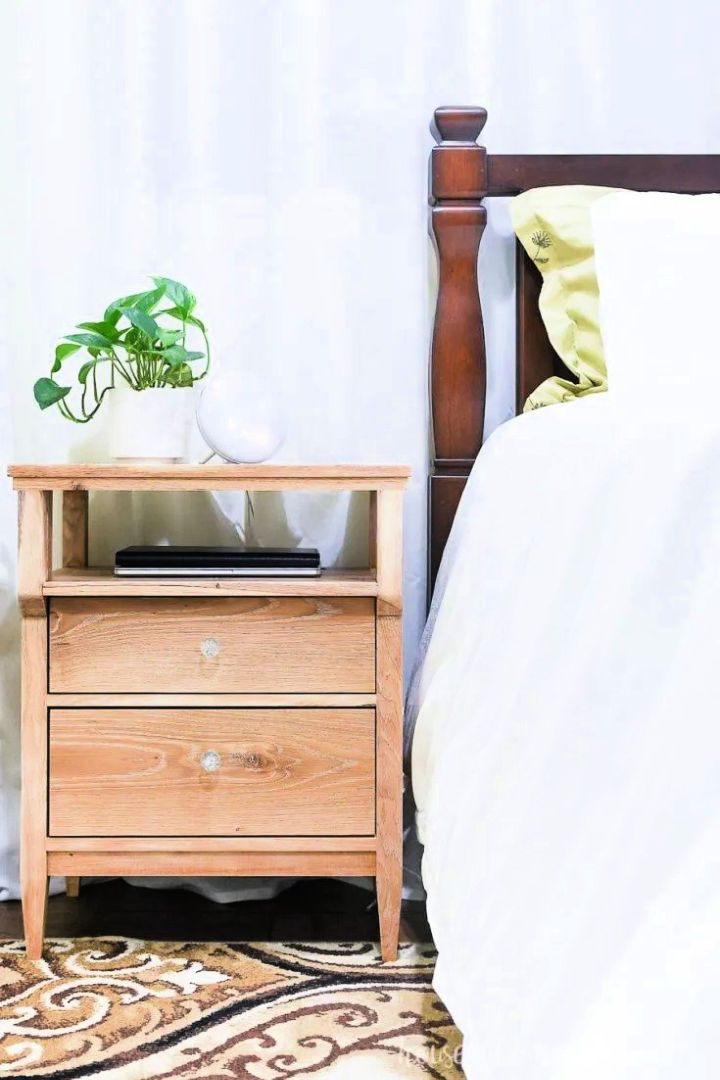
Exalt the look of your bedroom with this gorgeous DIY tall nightstand! This project allows you to make a beautiful tall nightstand that is not limited to standard heights following the free plans. This nightstand will add storage and style to your master bedroom, giving it a lovely makeover. It is 28 ¾″ tall – perfect for standing next to any bed, even modern mattresses with taller profiles. Don’t let those necessary items be out of reach when in bed; get everything easily within arm’s length by making this easy-to-build nightstand today! handmade
14. Modern DIY Two Drawer Nightstand
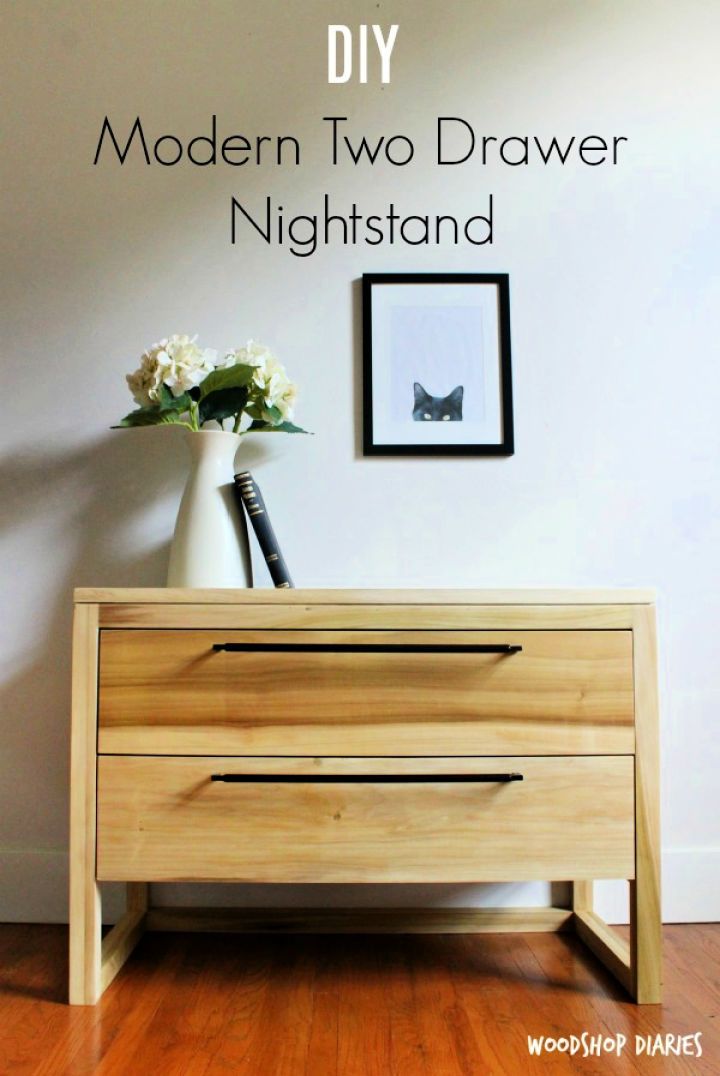
This modern DIY two-drawer nightstand provides a great way to add style and storage space to any home. With two large drawers, you’ll have plenty of room for whatever you need without taking much space overall – the dimensions are 17″ deep, 24 ¾” tall, and 33″ wide. Plus, this project is easy on your wallet: supplies cost about $200 for two nightstands. Get creative with wood boards, ½ sheet ¼″ plywood, dowels, wood glue pocket hole screws, drawer slides, and modern drawer pulls! Don’t worry if you’re not a pro – printable plans make it simple to build one yourself in no time. woodshopdiaries
15. Wooden Nightstand From Butcher Block
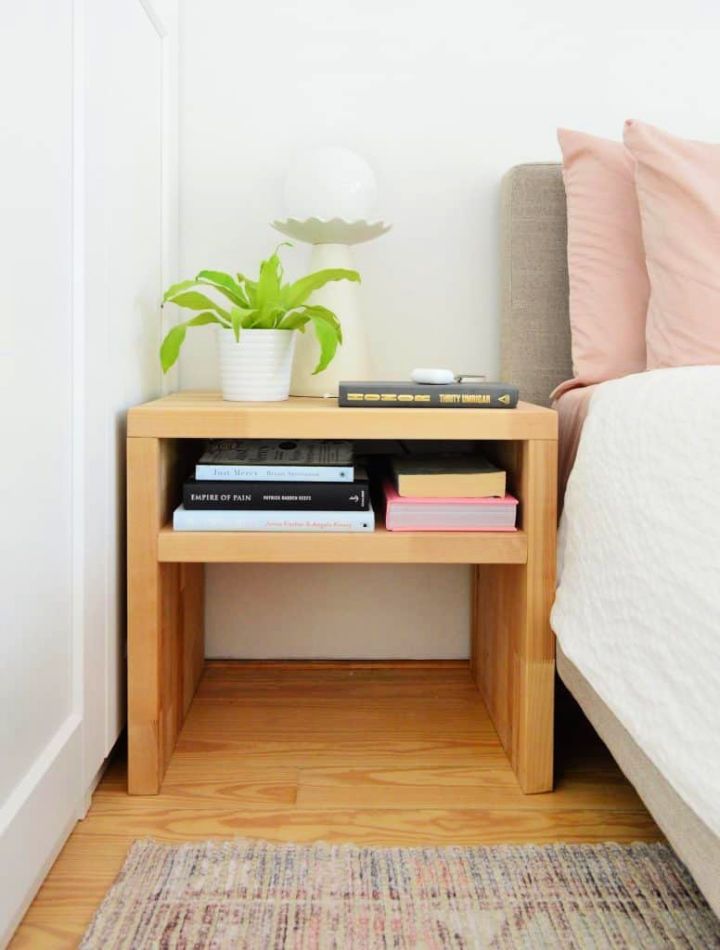
Beautiful, functional and affordable – this DIY wooden nightstand made of butcher block is the perfect solution for upgrading your space! With plenty of room for a lamp, books and a glass of water, this custom nightstand adds eye-catching detail to any living area. Its chunky solid wood design also makes it great as a side table. Plus, you get the look you want without breaking the bank! Easily assemble in no time for an effortless upgrade that will last for years. Get creative with this handmade wooden nightstand today and make your home one-of-a-kind! younghouselove
16. Creative Wooden Nightstand With Drawer
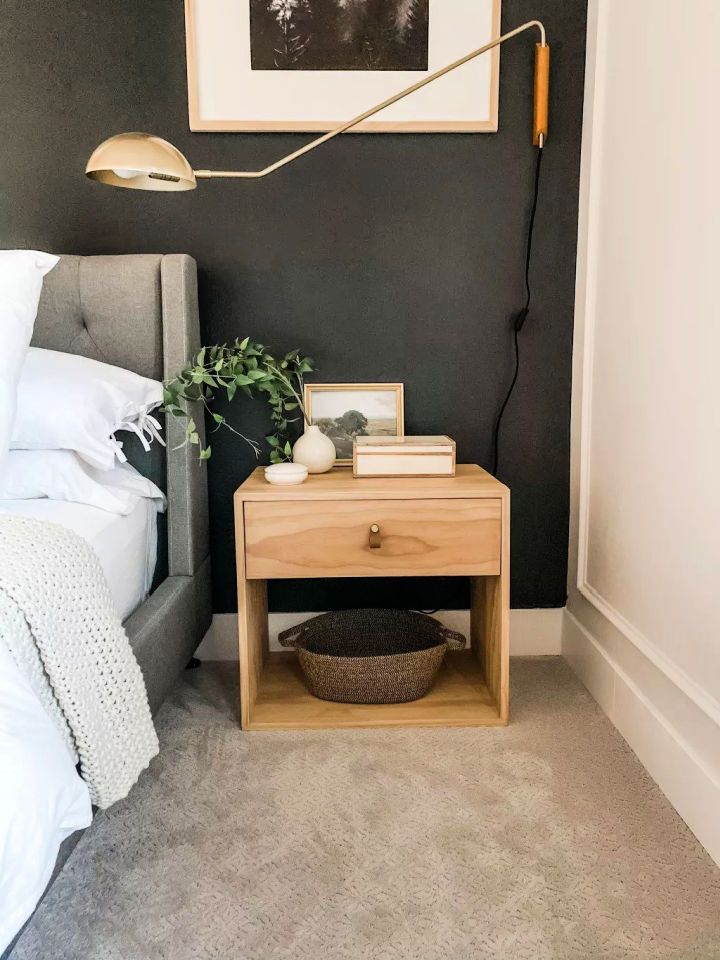
Are you searching for a unique and stylish piece of furniture that won’t break the bank? Look no further! This creative DIY wooden nightstand is a gorgeous statement piece. It looks like it costs a million bucks but can be made with simple plywood pieces fairly straightforwardly – you can have this lovely piece in your home for under $200. With its minimalist design, drawer feature, and lovely look, this nightstand will make your bedroom stand out in all the right ways. Get ready to make your stunning wooden nightstand today! realhomes
17. How to Build a Wooden Nightstand
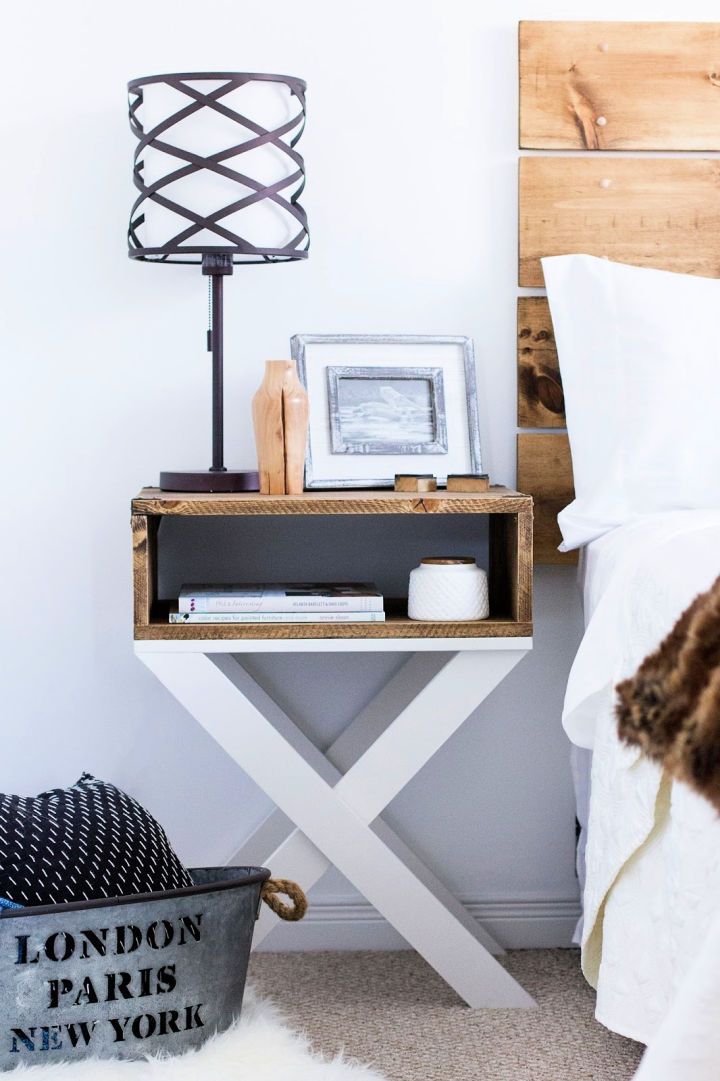
Adding warmth and rustic style to your home has never been easier with this DIY wooden nightstand. With beautiful x-shaped legs and an easy-to-replicate design, this open-concept storage piece will look great in any room. The simple build is perfect for DIYers of all levels and will look just as good as a box without legs. Follow this step-by-step guide to help you make your stylish nightstand, adding a touch of charm to your living space! brittanystager
18. Adorable DIY Floating Nightstand
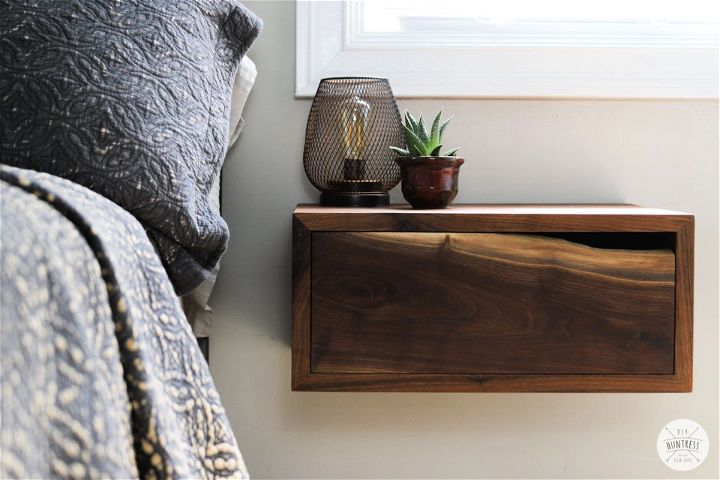
Welcome to the future of your bedroom decor – an adorable DIY floating nightstand that will add some pizazz and coziness to your space! This unique nightstand has a live edge drawer built with walnut boards, poplar boards, a ⅝ inch dowel (optional), a Hangman French Cleat Hanger and various screws, nails and wood finish products. Follow the instructions in the tutorial for easy assembly, or customize your version for a truly one-of-a-kind look. With plenty of storage options and quality materials, you can make a beautiful homey atmosphere in no time! diyhuntress
19. Make Your Own Farmhouse Nightstands
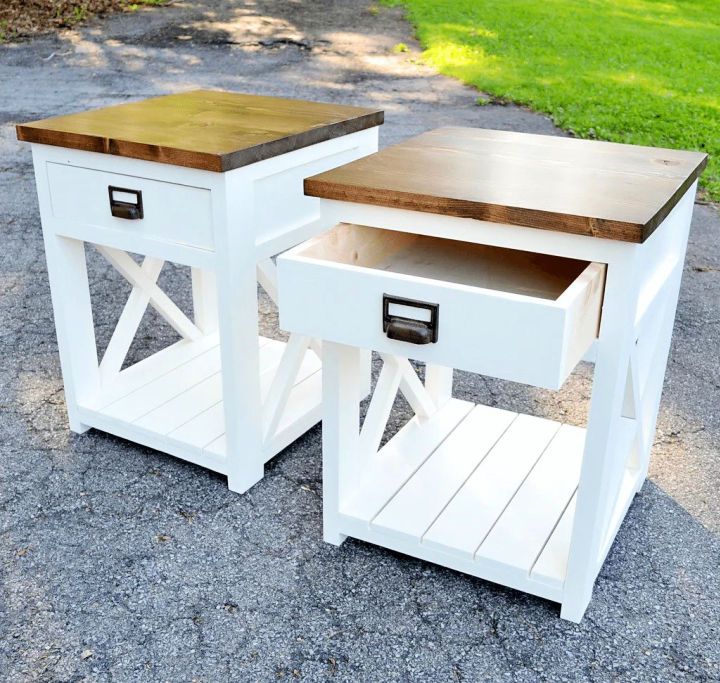
Enhance the ambiance of any room with this awesome DIY farmhouse nightstand! You can easily build your farmhouse-inspired side table using this 3D plan with printable plans for the cut list. It’s a great way to add a stylish yet practical farmhouse vibe to your home while providing storage and organization. This easy-to-build nightstand is made from dimensional wood boards and plywood, so you can quickly have your dream piece in no time. Don’t wait – get building now! handmade haven
20. How to Make Parsons Nightstand
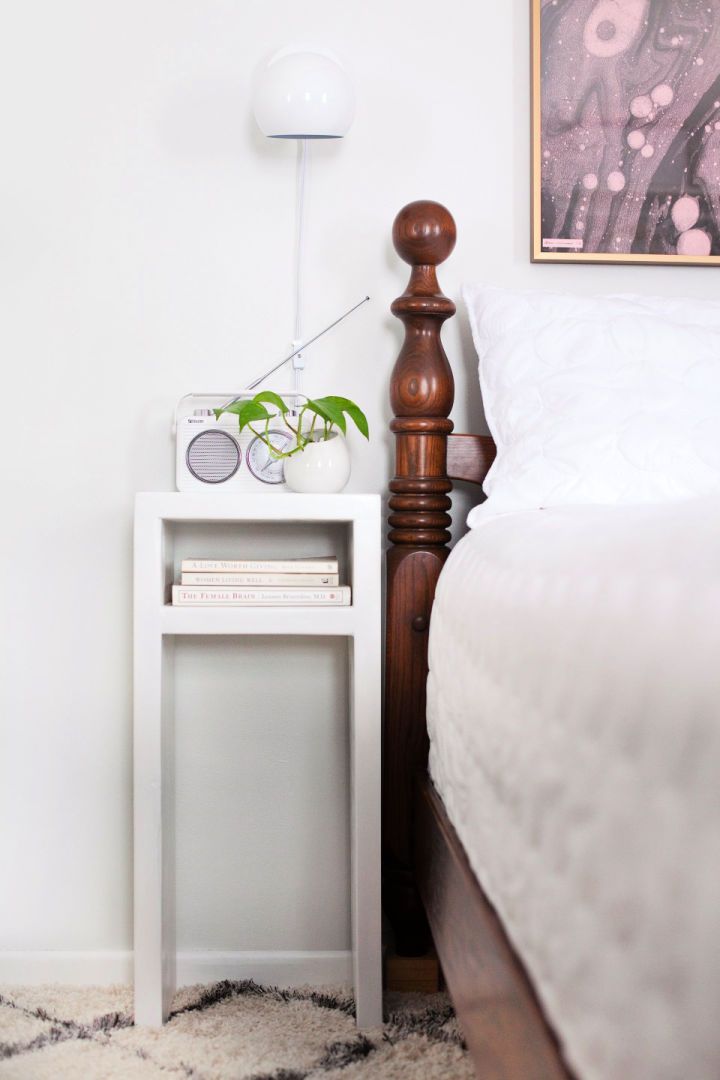
Spend your weekend tackling this DIY Parsons nightstand project, and you’ll be rewarded with a soothing sense of relief. Taking up very little space in your bedroom, the hodgepodge vintage nightstand is a space-saving and surprisingly inexpensive solution! Money saver aside, it also adds style to any room – sleek and modern, making for a stunning upgrade next to a king-size bed. You only need two pieces of 8′ 2×10 lumber, sandpaper, paint/primer, wood filler and wood glue. Get crafting now for an instant upgrade to any sleeping space! abeautifulmess
21. Super Easy DIY Nightstand for Beginners
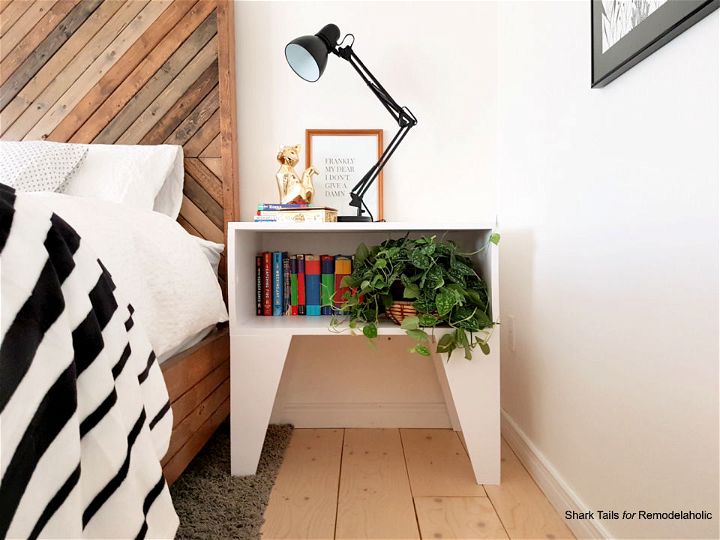
Ready to tackle a DIY project that even the most novice of Do-It-Yourselfers can handle? This super easy and basic DIY nightstand is perfect for beginner woodworkers, as it can be completed in just one weekend using materials you might already have. This tutorial provides detailed instructions on how to build with Knotty pine or ¾″ plywood. So you’ll be sure to get this nightstand built easily. With this easy build plan, your new nightstand will be ready quickly! So why wait? Get building today! remodelaholic
22. Build Your Own Ashley Nightstand
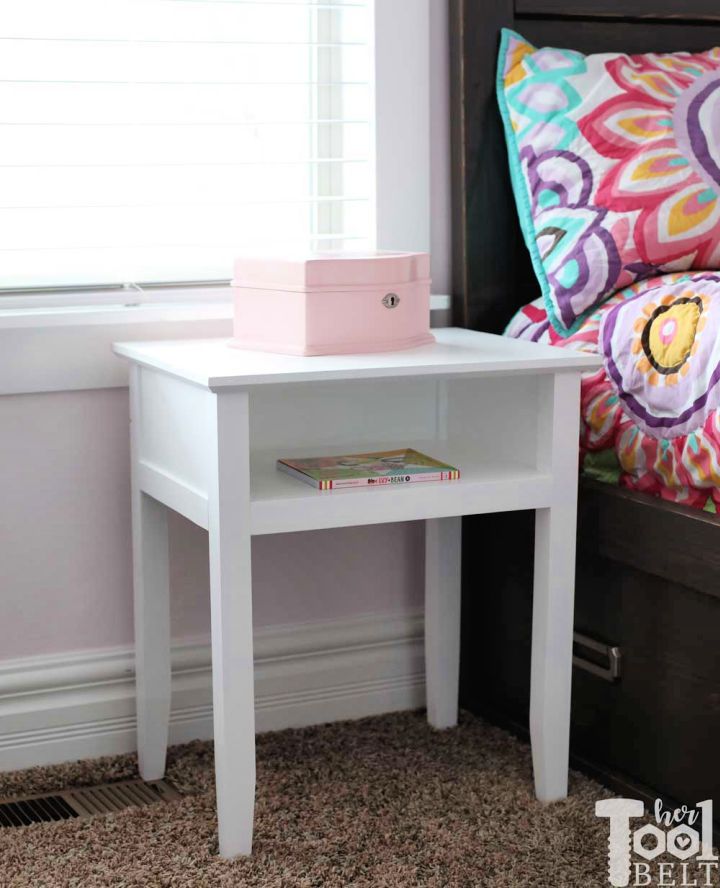
Update your bedroom with a unique nightstand! This DIY Ashley nightstand is an easy build, made from scrap wood and only costs about $15 for the lumber. You’ll love the elegant design of this cute nightstand – perfect for putting your alarm clock on or storing a book or two. Plus, it’s easy to make with dimensional wood boards, pocket hole screws, wood glue, sandpaper, wood filler/spackle, primer/paint or stain/top coat and brush. Get creative and make something special today! Get creative with the free plans – build your own today! hertoolbelt
23. Simple DIY Hardwood Nightstand
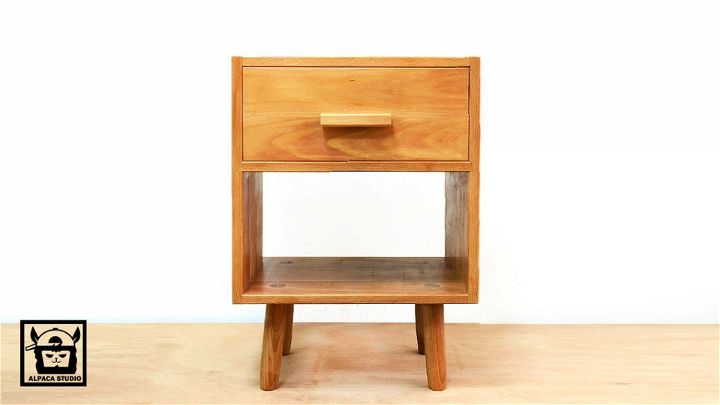
This simple DIY hardwood nightstand is the perfect project for anyone who loves DIY! It is a simple yet beautiful hardwood nightstand that is a great way to upgrade your bedroom with minimal effort. This easy-to-follow tutorial will take you through the entire build process in less than a week. From start to finish, this project showcases 100% hardwood construction. Attentioning to detail, resulting in a sleek and stylish design with a storage drawer and open shelf features. Make an efficient storage solution while freshening up your bedroom decor with this charming and unique DIY nightstand! instructables
24. How to Make a Modern Nightstand
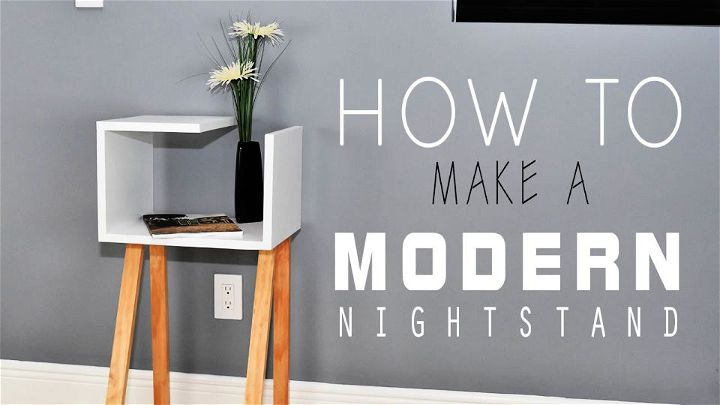
Be the talk of the town with this stunning DIY modern nightstand. With this easy-to-follow, step-by-step tutorial, you can make an elegant-looking nightstand with a sleek design that will make a statement in any room.
All you need is 1″ by 12″ pieces of lumber, four 1′ by 12″ pieces and basic tools to get started! Make a beautiful two-toned nightstand with simple designs – no unnecessary decorative elements included.
Featuring a lovely geometric design with stained legs and a white painted top portion for that perfect elegant look. Turn any bedroom into something special with this gorgeous modern nightstand today!
25. Building a Wooden Farmhouse Nightstand
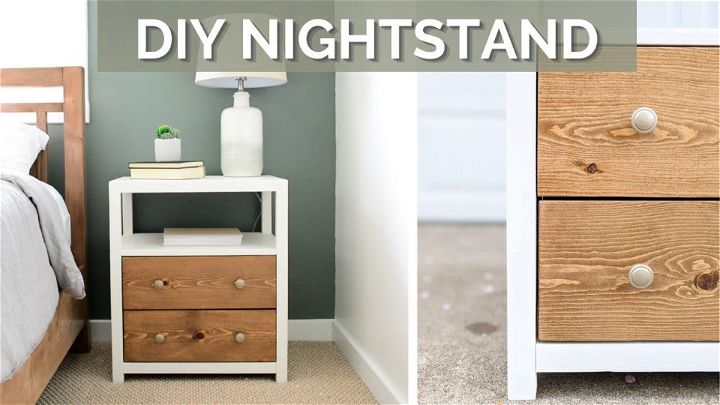
Enjoy an effortlessly stylish bedroom makeover with this DIY wooden farmhouse nightstand! It has a modern farmhouse vibe, clean lines and geometric charm, so it’ll look pretty in any large master bedroom. With written plans for easy assembly and off-the-shelf lumber, you can build your classy nightstand quickly and easily. Double-check the dimensions before building to ensure they’ll fit in your space. Give yourself a beautiful upgrade today with this handmade farmhouse nightstand!
Conclusion:
A nightstand is more than just a piece of furniture. It’s a personal statement that reflects your style, personality, and needs. Whether you want a simple bedside table with a drawer, a floating shelf with a hidden compartment, or a suitcase stand with a vintage flair, you can find the perfect idea for your bedroom in this list of 25 creative and inspiring DIY nightstand plans.
You don’t need to spend much money or time building your own nightstand. Just need some basic tools, materials, and imagination. You can customize your nightstand to fit your space, color scheme, and storage preferences. Also, you can add features like chargers, lights, or secret drawers to make your nightstand more functional and fun.
Building your own nightstand is a rewarding and satisfying way to upgrade your bedroom and make it more cozy and comfortable. So what are you waiting for? Grab your hammer, drill, and saw and get ready to build your own unique nightstand today!

