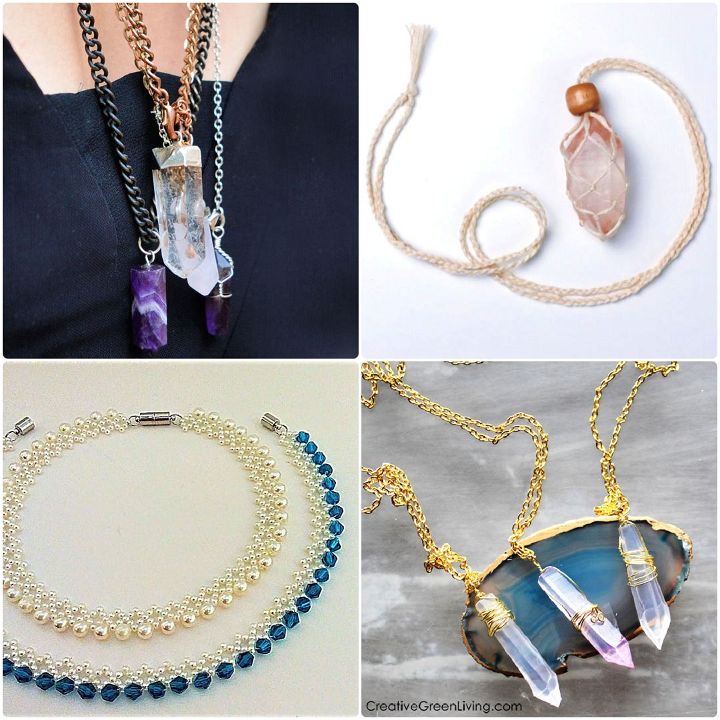
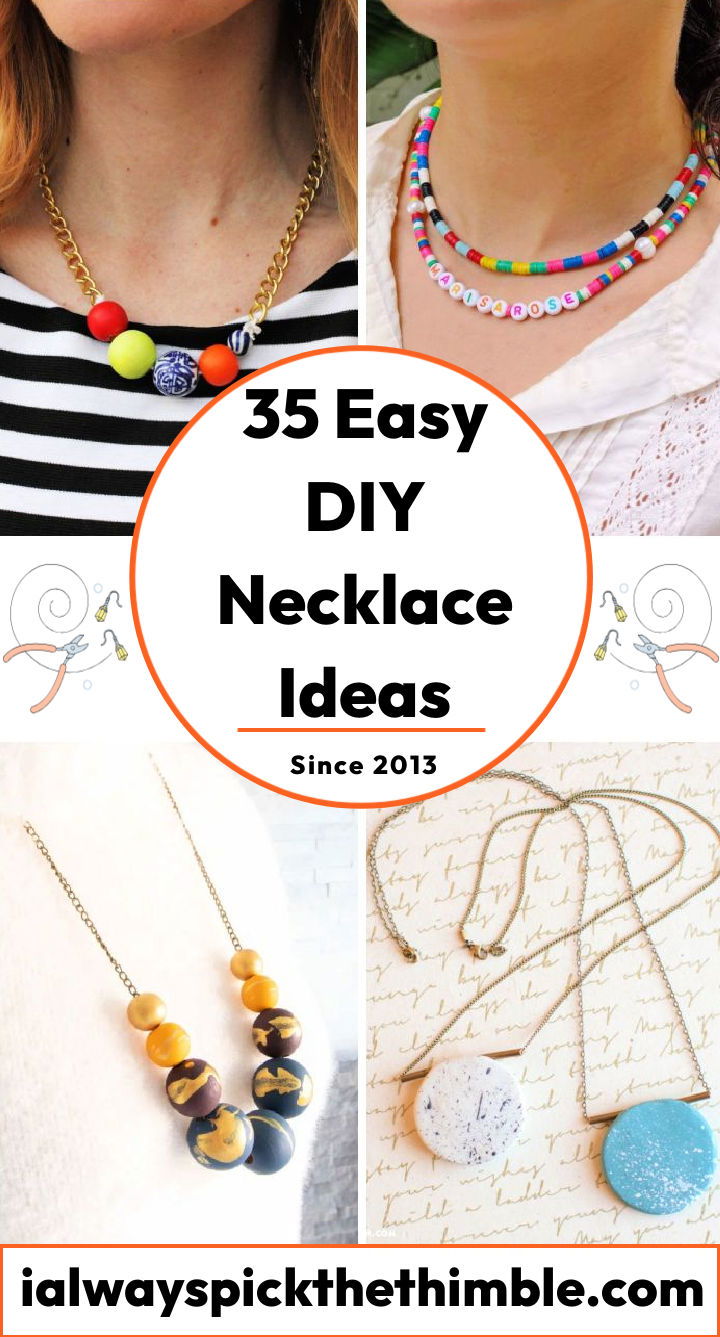
Making DIY necklaces at home is a fun and satisfying activity. Learn how to make necklaces with these 35 easy DIY necklace ideas. Each DIY necklace idea has detailed instructions, making it easy for you to learn how to make necklaces.
From designing colorful disk bead necklaces, woven bead statement necklaces, to trying unique crafts like lava stone necklaces, or simple macrame necklaces, the options are endless. You can also play with materials, making necklaces with vintage buttons or using resin and gift wrap. Whether you adore the sophistication of handmade knot necklaces, the stylish appeal of watercolor resin feather pendant necklaces, or the eclectic look of bead cluster web necklaces, there’s a tutorial for you.
DIY necklace making is a flexible craft, letting you create original jewelry items like Evanora’s emerald necklace, Scandinavian hoop necklaces, or boho fringe necklaces. And for those with business ambitions, there are also tips on how to make necklaces to sell, helping you turn your passion into a possible income source.
From simple DIY pearl necklaces, recycled necklaces, to copper necklaces, there’s a DIY necklace idea for every preference and personality. Make timeless pieces for yourself, thoughtful handmade gifts for others, or even gorgeous necklaces to sell. So grab your crafting tools and begin your DIY necklace adventure today. It’s time to unleash your creativity with these 35 DIY necklace ideas that will help you to learn how to make necklaces.
How to Choose the Right Materials and Tools for Your DIY Necklaces Project
Before you start making your own necklace, you need to decide what kind of necklace you want to make and what materials and tools you will need. There are many types of necklaces, such as beaded, pendant, multi-strand, choker, etc. Each type of necklace requires different materials and tools, so it is important to do some research and planning before you begin.
Some of the common materials and tools you will need are:
- Stringing material or chain: This is the base of your necklace that holds everything together. You can use thread, wire, cord, or chain depending on the style and weight of your necklace. Make sure that the stringing material or chain is strong enough to support your beads or components and that it matches the color and size of your design.
- Beads or components: These are the decorative elements that you will add to your necklace. You can use any kind of beads or components you like, such as glass, metal, wood, stone, clay, etc. Make sure that the beads or components have holes that are large enough to fit your stringing material or chain and that they complement each other in color, shape, and size.
- Clasp: This is the part that allows you to open and close your necklace. You can use a clasp that matches your stringing material or chain or a different one for contrast. There are many types of clasps, such as lobster claw, toggle, hook and eye, magnetic, etc. Choose a clasp that is easy to use and secure for your necklace.
- Crimps or knots: These are the parts that secure the ends of your stringing material or chain to the clasp. You can use crimps, which are small metal beads that you squeeze with pliers to hold the stringing material or chain in place, or knots, which are tied with thread or cord. Make sure that the crimps or knots are tight and neat for your necklace.
- Pliers: These are the tools that you will use to cut, bend, twist, and squeeze your wire or chain and crimps. You will need at least two pairs of pliers: one for cutting and one for bending. You can also use specialized pliers, such as round nose pliers for making loops or crimping pliers for crimping beads.
- Scissors: These are the tools that you will use to cut your thread or cord. Make sure that the scissors are sharp and clean for your necklace.
- Bead board: This is a tray with grooves and measurements that helps you lay out your beads or components before stringing them. It also helps you measure the length of your necklace and keep track of your design. A bead board is optional but very helpful for making necklaces.
The Basics of Necklace Making: How to Cut, String, Knot, and Finish Your Jewelry
Once you have gathered all your materials and tools, you are ready to start making your necklace. Here are the basic steps for making a simple beaded necklace:
- Cut the wire or thread 6 in (15 cm) longer than your desired necklace length. This will give you enough material to work with and secure the ends.
- Tie one end of the wire or thread around one end of the clasp using a crimp or a knot. If you are using a crimp, squeeze it with pliers to secure it. If you are using a knot, make sure it is tight and trim the excess wire or thread.
- String your beads or components onto the wire or thread following your design. You can use a bead board to help you arrange your beads or components before stringing them.
- When you have finished stringing your beads or components, tie the other end of the wire or thread around the other end of the clasp using a crimp or a knot. Make sure there is no slack in the wire or thread and that the beads or components are evenly spaced.
- Enjoy your handmade masterpiece!
You can follow these steps for making any type of beaded necklace with different materials and tools.
How to Avoid Common Mistakes and Problems When Making DIY Necklaces
Making necklaces can be fun and rewarding, but it can also be frustrating if you encounter some common mistakes and problems along the way.
Here are some tips on how to avoid them:
- Choose quality materials and tools: Cheap or low-quality materials and tools can break easily or damage your necklace. Invest in good-quality materials and tools that will last longer and perform better.
- Test your materials and tools: Before you start making your necklace, test your materials and tools to make sure they work well together. For example, check if your beads or components fit your stringing material or chain, if your clasp is easy to open and close, if your pliers are sharp and smooth, etc.
- Measure your necklace length: Before you cut your stringing material or chain, measure your necklace length to make sure it fits you well. You can use a tape measure or a ruler to measure your neck circumference and add some extra length for the clasp and the beads or components. You can also use a necklace that you already have as a reference.
- Secure your ends: Make sure that your ends are well secured with crimps or knots to prevent your necklace from falling apart. Check if your crimps or knots are tight and neat and trim any excess wire or thread.
- Store your necklace properly: After you finish making your necklace, store it properly to keep it in good condition. Avoid exposing your necklace to direct sunlight, heat, moisture, or chemicals that can damage it. Store your necklace in a jewelry box or a ziplock bag with some anti-tarnish strips or silica gel packets to prevent oxidation and corrosion.
How to Create Different Styles and Designs of DIY Necklaces with Simple Techniques
Making necklaces can be a great way to express your creativity and personality. You can create different styles and designs of necklaces with simple techniques that will make your necklace stand out. Here are some ideas:
- Add a pendant: A pendant is a focal point that hangs from your necklace. You can use any kind of pendant you like, such as a charm, a gemstone, a coin, a shell, etc. You can slide the pendant onto your chain or cord or attach it with a jump ring or a bail. A pendant can add some interest and meaning to your necklace.
- Mix and match beads or components: You can use different types of beads or components to create different effects and textures for your necklace. For example, you can use glass beads for sparkle, metal beads for shine, wood beads for warmth, stone beads for natural beauty, etc. You can also mix and match different shapes, sizes, and colors of beads or components to create contrast and harmony for your necklace.
- Make multiple strands: You can create multiple strands of beads or components to add some volume and dimension to your necklace. You can use the same type of beads or components for each strand or different ones for variety. You can also vary the length of each strand to create a layered look for your necklace.
- Add some embellishments: You can add some embellishments to your necklace to make it more fun and unique. For example, you can add some tassels, pom poms, feathers, ribbons, lace, etc., to the ends of your necklace or in between the beads or components. You can also add some charms, buttons, sequins, crystals, etc. to the beads or components themselves.
How to Care for and Store Your DIY Necklaces
After you have made your beautiful DIY necklaces, you want to keep them in good shape for as long as possible. Here are some tips on how to care for and store your DIY necklaces:
- Clean your necklaces regularly: Your necklaces can get dirty from dust, sweat, oil, makeup, etc. over time. To clean them, you can use a soft cloth dampened with water or mild soap to gently wipe them. Avoid using harsh chemicals or abrasives that can damage them.
- Polish your necklaces occasionally: Your necklaces can lose their shine from oxidation and corrosion over time. To polish them, you can use a jewelry polishing cloth or a mild jewelry cleaner to gently rub them. Avoid using too much pressure or rubbing too hard that can scratch them.
- Repair your necklaces promptly: Your necklaces can break from wear and tear over time. To repair them, you can use the same materials and tools that you used to make them. For example, you can replace broken beads or components, restring broken wire or thread, reattach broken clasps, etc.
- Store your necklaces separately: Your necklaces can get tangled or scratched from rubbing against each other over time. To store them separately, you can use individual jewelry pouches or boxes or hang them on hooks or racks. Avoid storing them in direct sunlight, heat, moisture, or chemicals that can damage them.
1. DIY Color Blocked Disk Beaded Necklace
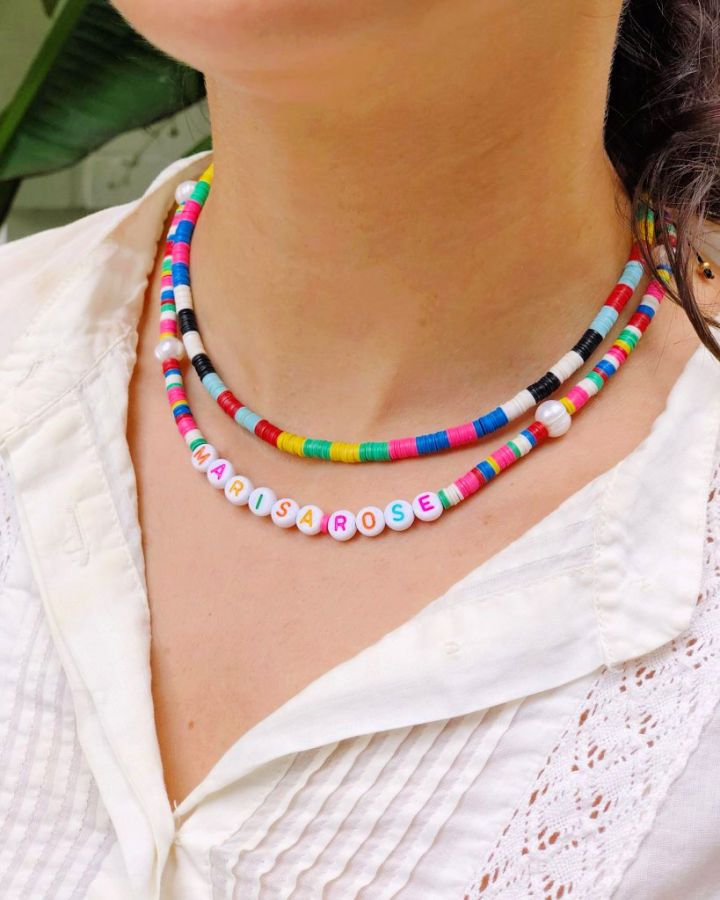
Make a unique fashion statement with this DIY color-blocked disk beaded necklace. All you need is African vinyl disk beads in #6 and #14, 40″ of knotting cord, 2 gold spacer beads, beading needle and needle threader, tapestry needle, lighter, washi tape, scissors, and bead board or tray.
Follow the step-by-step tutorial for easy-to-understand instructions. Use the colors of the African vinyl disk beads to make a stunning color-blocked necklace that will turn heads. Get creative with this craft project & show off your own personal style! theneonteaparty
2. Woven Bead Statement Necklace for Under $15
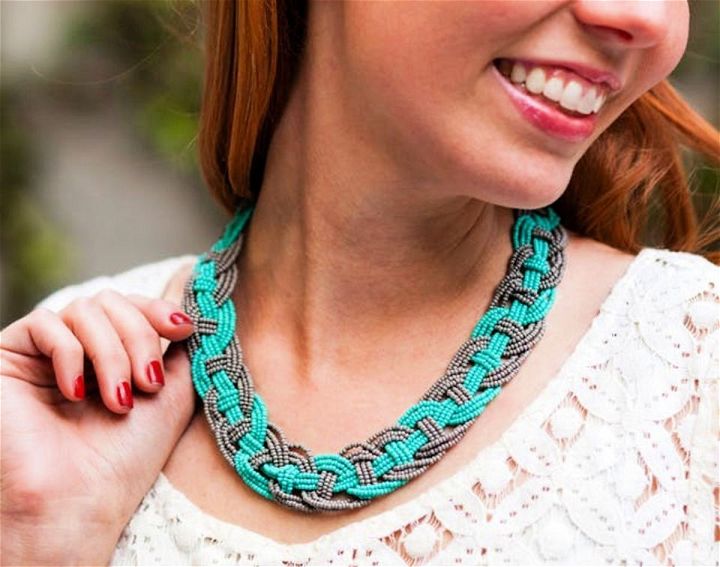
Spice up your wardrobe with this unique statement necklace made of woven beads! For under $15, you can make a stunning piece of jewelry with just four sets of three strands and two colors. Follow the instructions: tie them together and tape them to the table, then weave over and under until complete. Attach jump rings to silver cones before adding a lobster clasp for easy wearability.
Finally, cut any extra thread off the necklace and add some E6000 super glue for long-lasting durability – all done in one hour! Get creative with the color combinations and have yourself an eye-catching accessory that won’t break your budget. brit
3. Making a Lava Stone Necklace
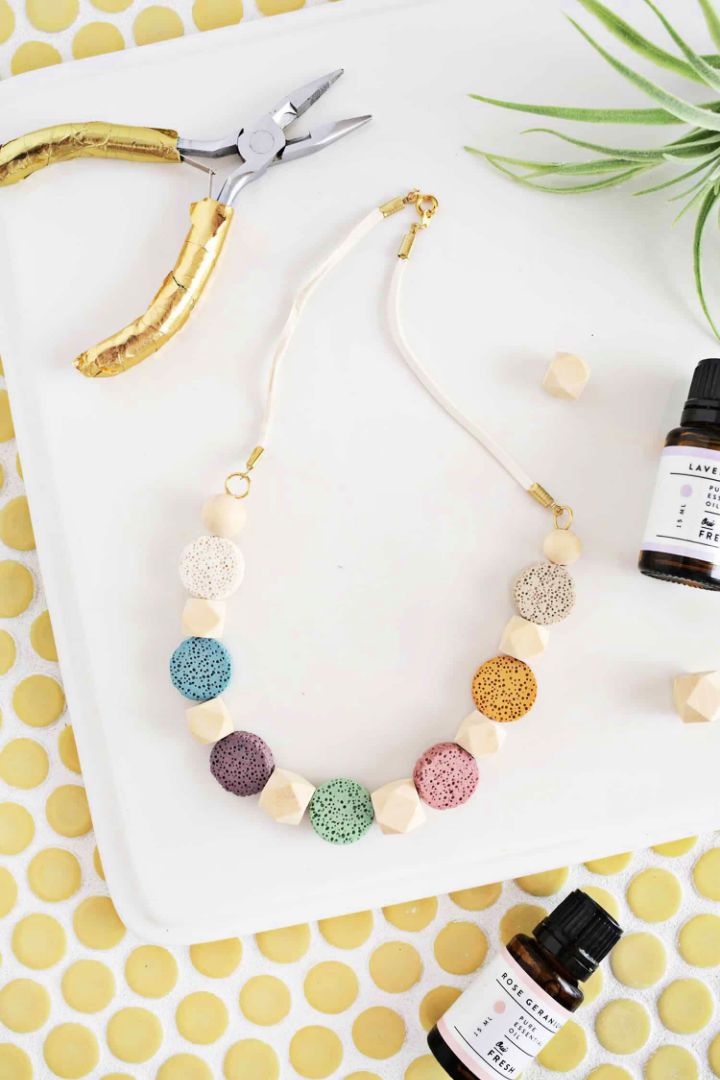
Discover how to make your own unique and stylish lava stone necklace. All you need is a few simple supplies, including lava stone beads, leather or suede-type flat cord, fold-over cord ends (x4), wooden beads, needle nose pliers, bead wire, jump rings & jewelry clasp. Plus, essential oil and carrier oil of choice. This helpful step-by-step guide on making your own lava stone necklace at home will make you feel like a pro in no time! Get ready to show off this handmade one-of-a-kind accessory that fits your personal style! abeautifulmess
4. Vintage DIY Button Necklace
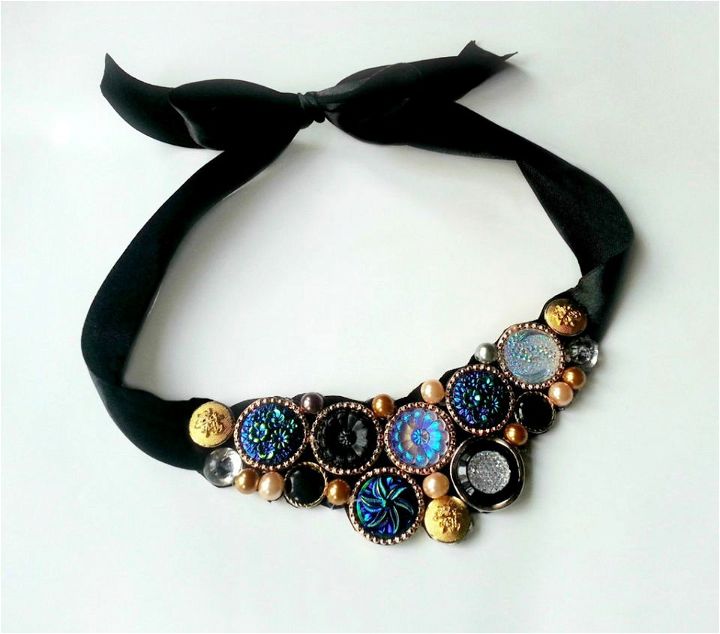
Fashion a vintage-style necklace with your own two hands! Craft an eye-catching DIY button necklace that no one else has. All you need is some vintage buttons, cutting pliers, rexine or faux leather, satin ribbon, sewing scissors, a hot glue gun, and some faux pearl beads. Just imagine how stylish it’ll look on you when you’re done! Put your skills to the test and make something unique out of these everyday materials – show off your creativity with this special DIY button necklace. instructables
5. Simple DIY Macrame Necklace
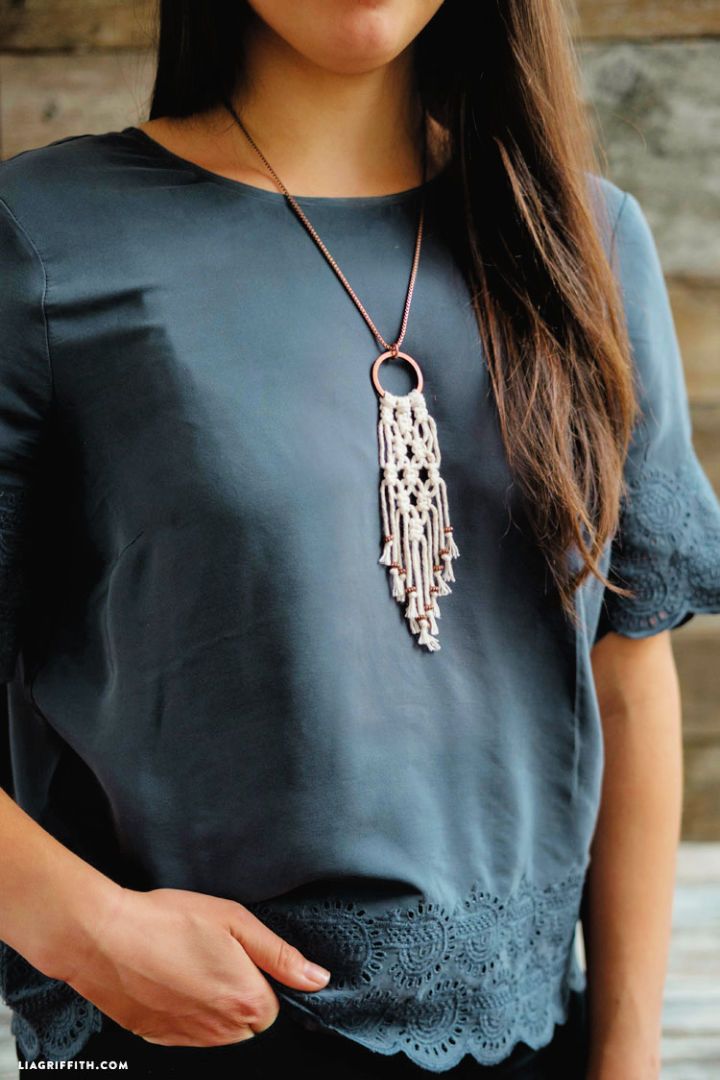
Flaunt your own unique piece of jewelry with this easy DIY macrame necklace tutorial! All you need is a chain, jewelry like jump rings and lobster clasp, and beads to customize it. Pick up these supplies at your local craft or jewelry store and grab some cotton twine and a hemp cord for the braiding part. Follow our step-by-step instructions in the photo tutorial to make a stunning necklace that will fit any style. Make an eye-catching statement piece with this DIY necklace idea and show off your handmade creation – perfect as a gift or just for yourself! liagriffith
6. Make Resin Jewelry Using Gift Wrap
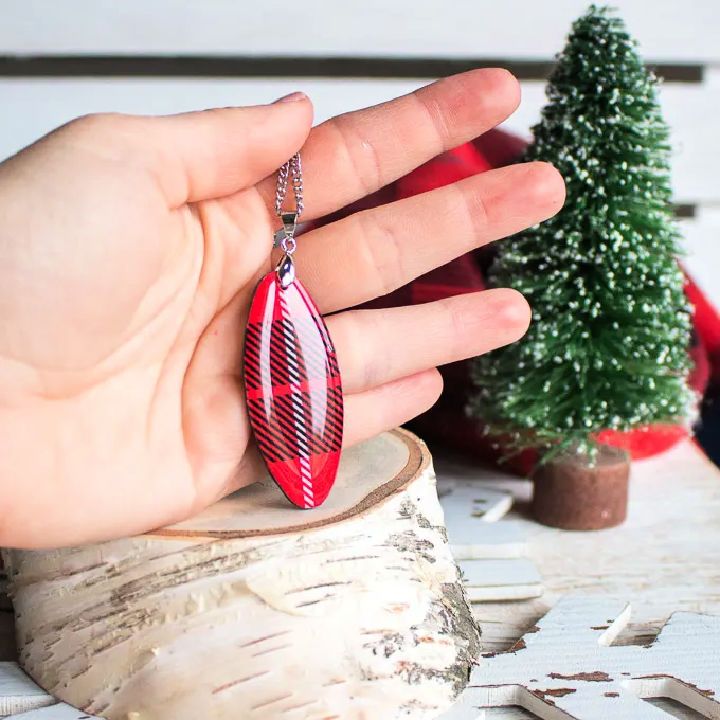
Craft a one-of-a-kind jewelry masterpiece using the environmentally-friendly EnviroTex resin! Start by gathering wood cutouts, wrapping paper scraps in a buffalo plaid pattern, and other materials like plastic measuring cups, gloves, wooden craft sticks, toothpicks, and more.
Follow the instructions to mix the resin and add it to your designs. Let dry with straws or earring posts for extra support if needed. Finish off with pendant bails for necklaces or earring posts for earrings. Show off your creativity with these beautiful one-of-a-kind pieces of jewelry made from gift wrap and resin! sustainmycraft
7. Handmade Knot Necklace
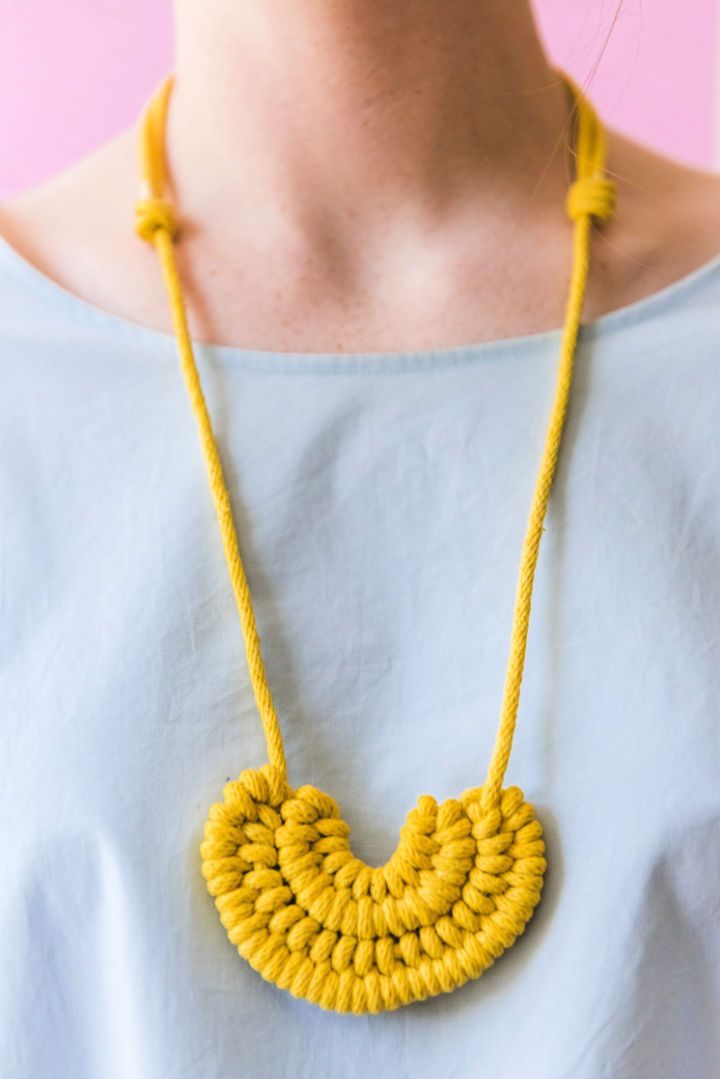
This handmade knot necklace brings the perfect combination of style and craftsmanship. Crafted from a 4.5′ long rope, this unique piece is designed with intricate knots to ensure a secure fit. The 6-in point forms a skinny horizontal loop to make two working cords that wrap tight turns around the upper and lower legs of the loop. Securely fastened by trimming excess rope and hot gluing both ends, this beautiful necklace will add an artisanal touch to any ensemble! thehousethatlar
8. Watercolor Resin Feather Pendant Necklace
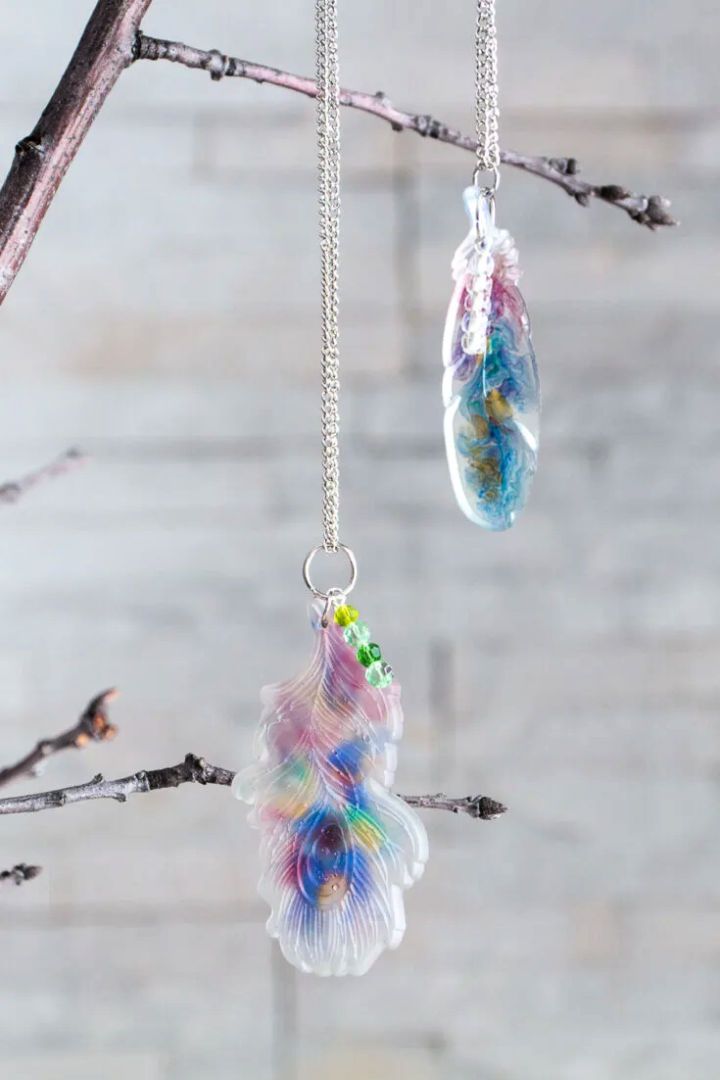
Get your hands on this watercolor resin feather pendant necklace idea – the guide comes with everything you need to make beautiful, custom jewelry. Included are a feather silicone mold, mold release/conditioner, easycast clear casting epoxy, and four transparent dyes (green, red, yellow, and blue).
You’ll also get toothpicks for stirring the dyes into the epoxy as well as gloves, cups, stirrings sticks, or this resin mixing cup set. Finally, have a drill and drill bits along with your favorite jewelry hardware to complete your necklace. With all these supplies, you can make one-of-a-kind creations that will be sure to turn heads! sustainmycrafthabit
9. DIY Bead Cluster Web Necklace
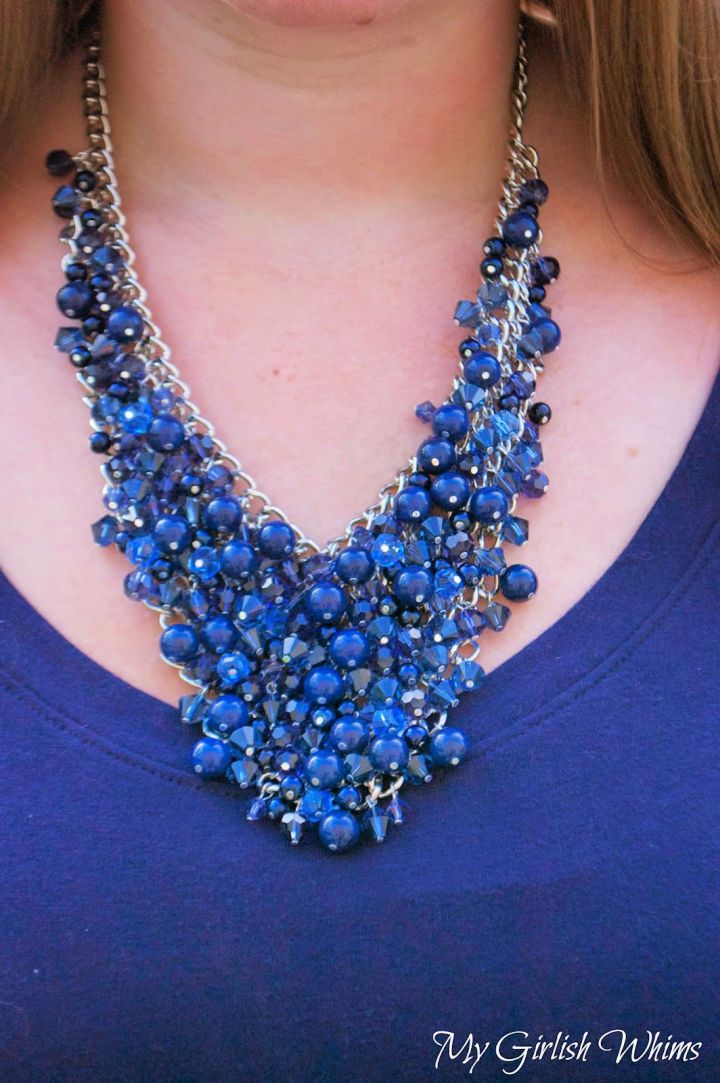
Craft a one-of-a-kind statement necklace that reflects your individual style using this DIY bead cluster web necklace! All you need are a few supplies such as chains, jump rings, head pins, round crystals, large bicones, small bicones, round beads, and other blue beads. You’ll also need tools like split ring pliers, needle nose pliers, and wire cutters for easy assembly. With this accessory piece on hand, add that extra “wow” factor to any outfit or occasion – no one will ever guess it was handmade by you! mygirlishwhims
10. DIY Beaded Statement Necklace
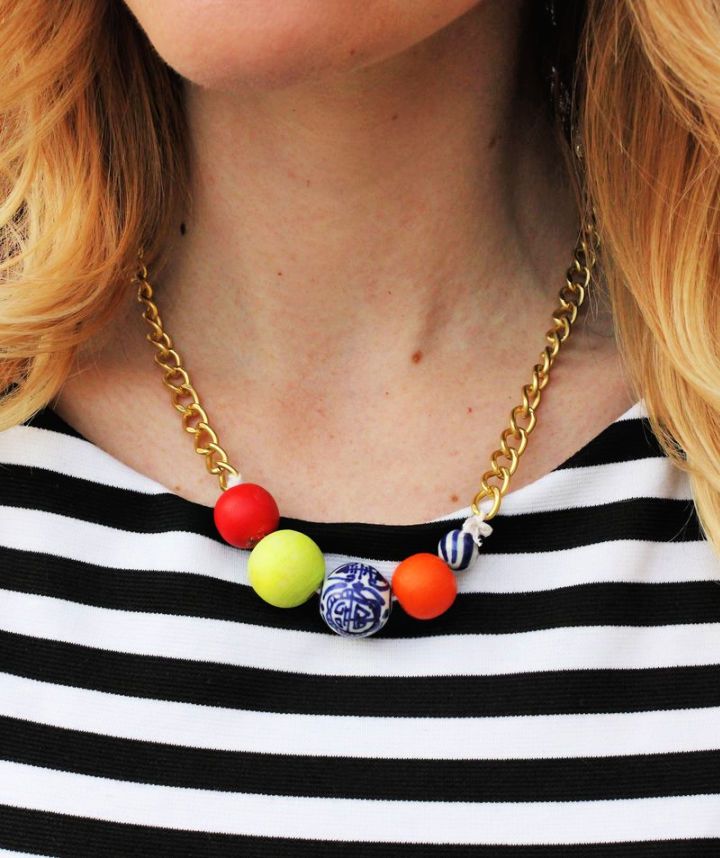
Spruce up your own unique DIY beaded statement necklace with this easy-to-follow tutorial! Just gather up 2-inch head pins, jewelry pliers, wire cutters, chains, and beads of your choice. Add 1-3 beads to each headpin, twist it onto the chain, forming a loop, then trim the excess wire and press the loop together with your pliers. You’ll need about 35 pins in total for a beautiful look every time! Take control of your style with this fun project that lets you make jewelry just like the pros. abeautifulmess
11. Make Your Own Stone Necklace
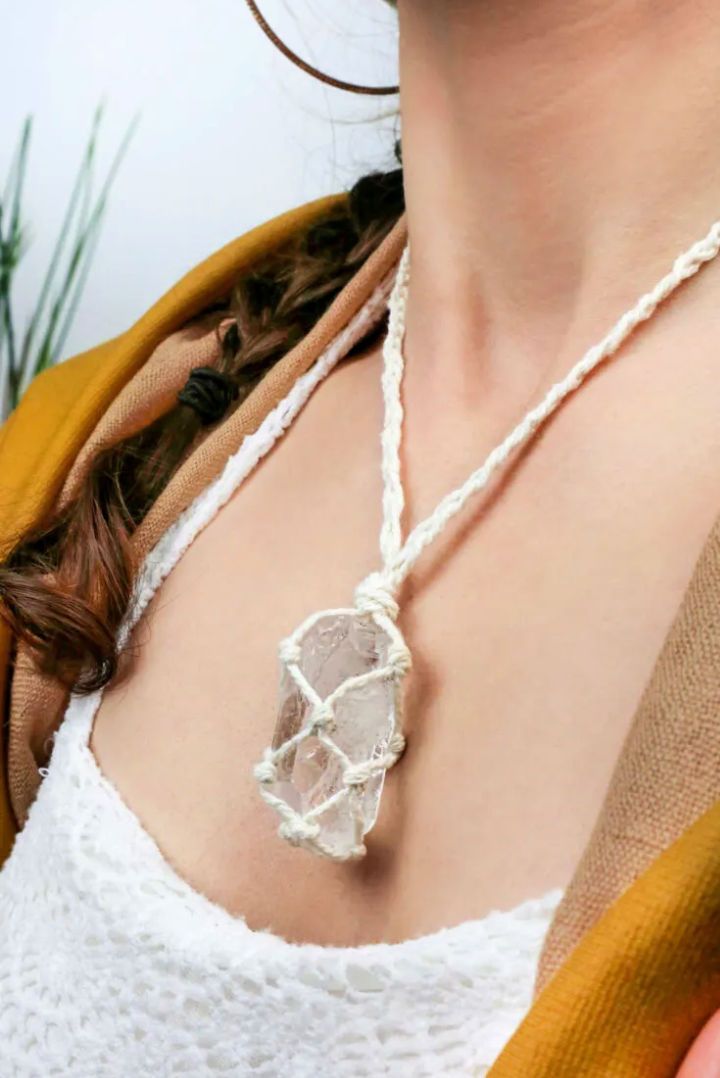
Looking to make a gorgeous stone necklace without breaking the bank? This easy DIY guide shows you how to do just that with simple steps and affordable materials. Learn how to braid cords, place your chosen gemstone, and fasten it all together into a stunning piece of jewelry. Whether you’re a beginner or an experienced crafter, this tutorial is perfect for anyone looking to add some stylish flair to their wardrobe. Follow along step-by-step and enjoy the satisfaction of making something beautiful with your own two hands! craftsyhacks
12. Making Valentine Heart Necklaces at Home
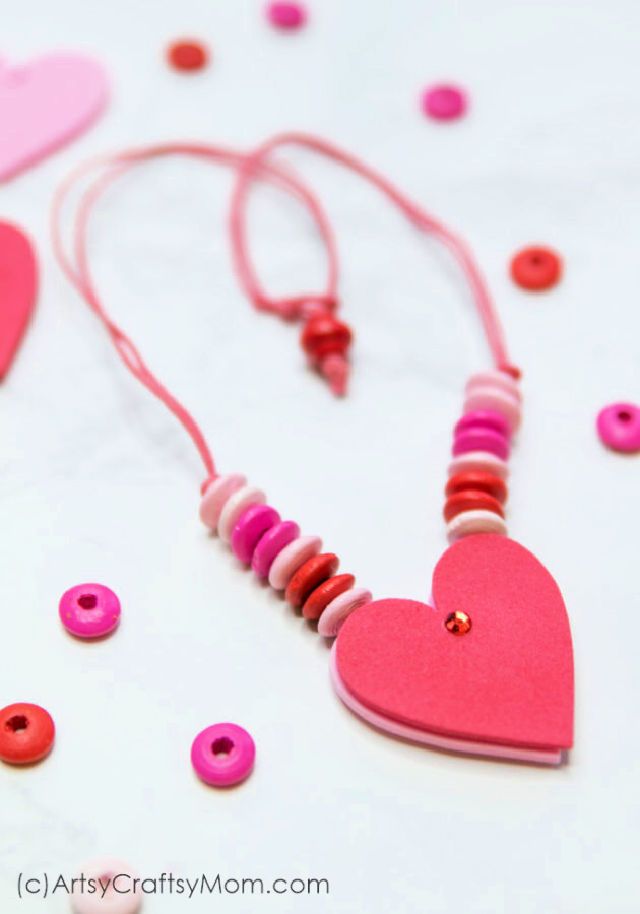
We bet you must be looking for a fun and festive DIY Valentine’s Day project. Look no further than this reversible heart necklace! With just a few simple steps, you can make a beautiful and unique piece of jewelry that is perfect for the holiday. Choose your favorite colors and patterns, thread the beads onto double-threaded string, add foam hearts in complementary shades, and secure with knots and slip knots – voila! You’ll have an eye-catching accessory that will make any outfit pop. Get creative this Valentine’s Day with this easy-to-follow tutorial. artsycraftsymom
13. DIY Evanoras Emerald Necklaces
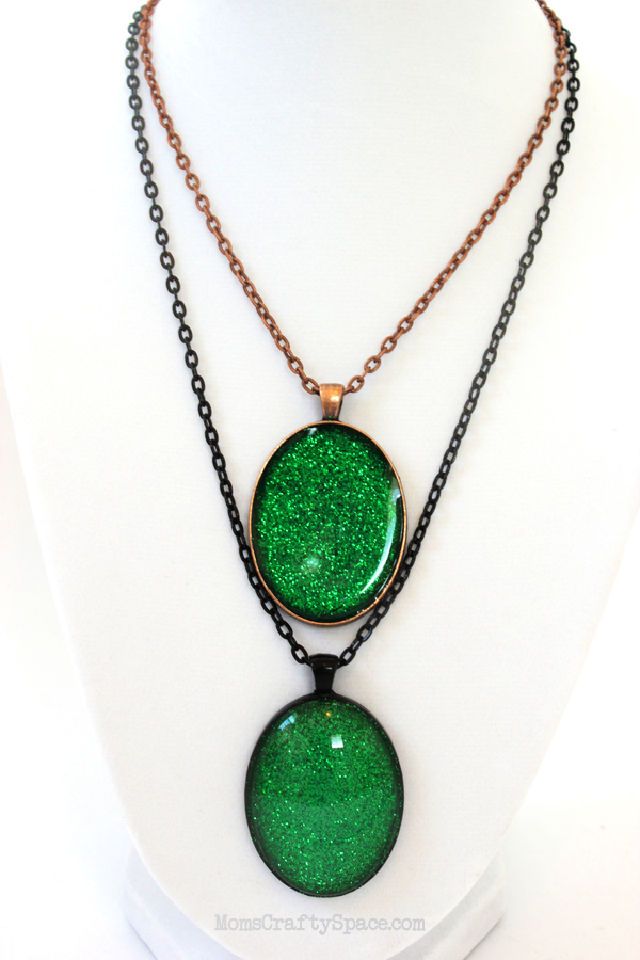
Elevate your accessory game with Evanora’s emerald necklace featuring a large oval pendant tray adorned with stunning emerald green extra fine glitter. The pendant is sealed with Mod Podge dimensional magic for added durability and shine and can be further customized with a glass cabochon if desired. Complete the look by pairing it with the included matching necklace chain. Make a statement and add some sparkle to any outfit with this unique and eye-catching piece of jewelry. happinessishome
14. Painted Wooden Bead Necklace Design
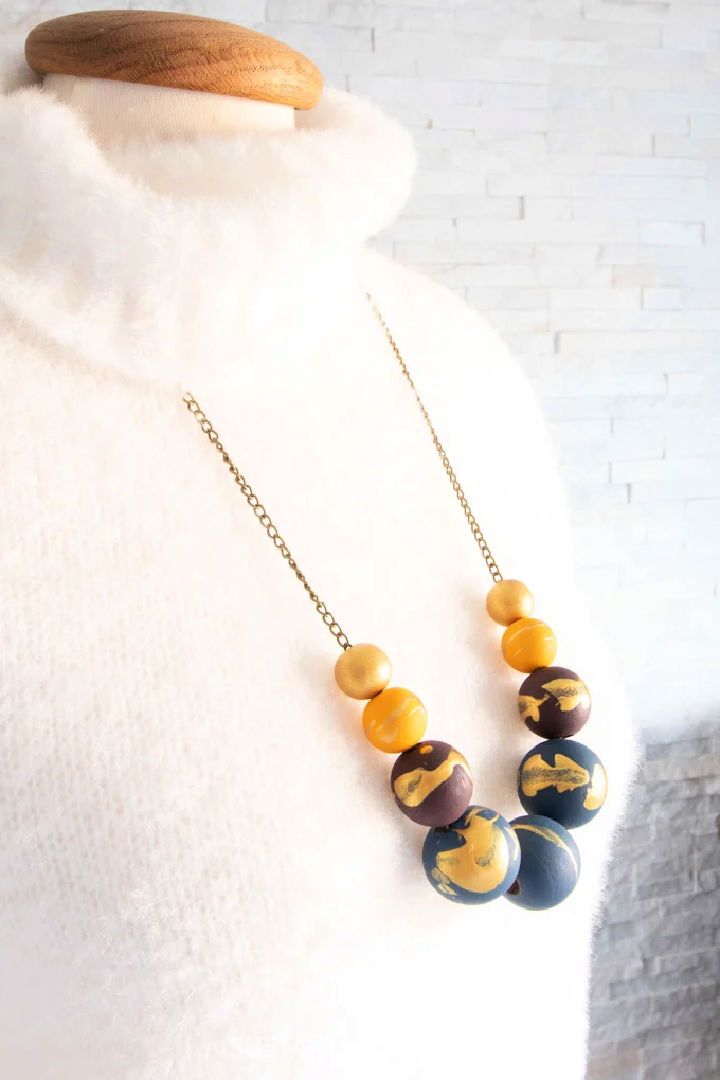
Make a Gorgeous DIY wood bead necklace with natural, unfinished round wood beads in 4 different sizes and an antique gold jewelry chain. You’ll also need jump rings, magnetic or lobster clasp, wooden skewers, necklace pliers & wire cutters, paintbrushes, and Decoart Americana Acrylics in deep midnight blue, black plum, saffron yellow, and extreme sheen in 24K gold. Use a wooden skewer to hold the beads while they dry on parchment paper. Allow the paint to dry fully before applying additional coats or changing color. Make sure your chain fits through the beads before painting for the best results! sustainmycraft
15. How to Make Polymer Clay Necklaces
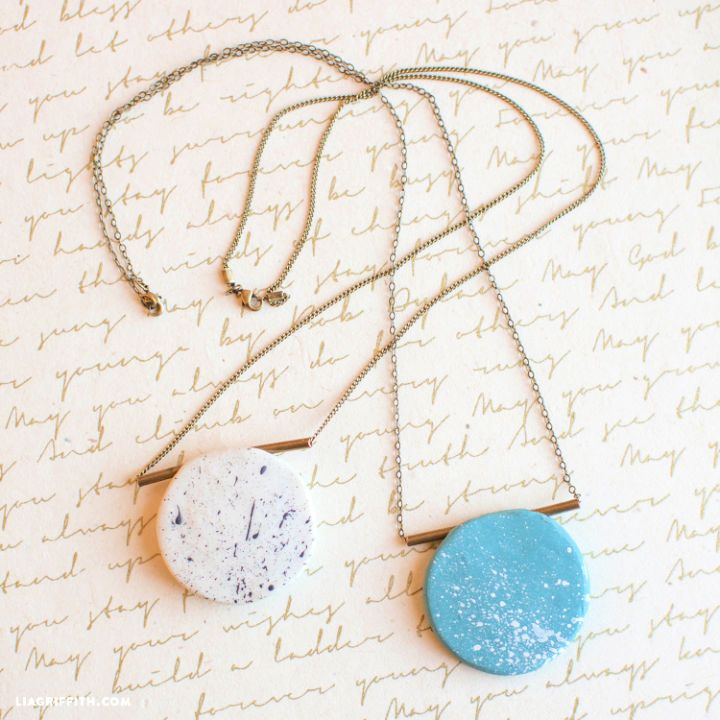
Looking to make your own unique jewelry? Try making a DIY polymer clay necklace! With just a few simple steps, you can roll out and shape the clay, bake it for durability, and add your own personal touch with acrylic paint splatters. Easily thread it onto a chain using copper needles and jump rings. Follow this easy tutorial for a fun and stylish accessory that’s sure to turn heads wherever you go. Get creative with colors, shapes, and sizes to customize your very own polymer clay necklace today! liagriffith
16. Easy Felt Necklace to Make
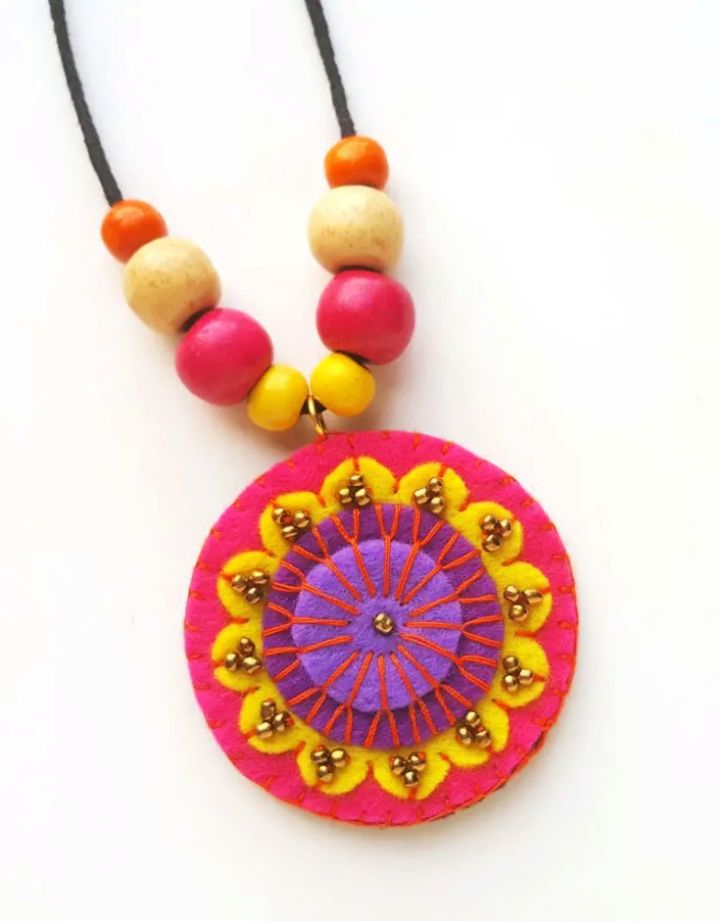
On the hunt for a fun and creative DIY project? Try making your own felt necklace! With just a few basic materials, including felt scraps, needle and thread, seed beads or small metal beads, wooden beads, black cords, and more, you can make a unique piece of jewelry that reflects your personal style. The template printed out on regular paper makes it easy to get started, while fabric and detail scissors help you craft intricate designs. Add some optional extras like cord end crimps, clasp, and connector for an even more polished finish. Get ready to show off your crafting skills with this simple yet stylish project! momsandcrafters
17. Cool Crescent Moon Necklace Ideas
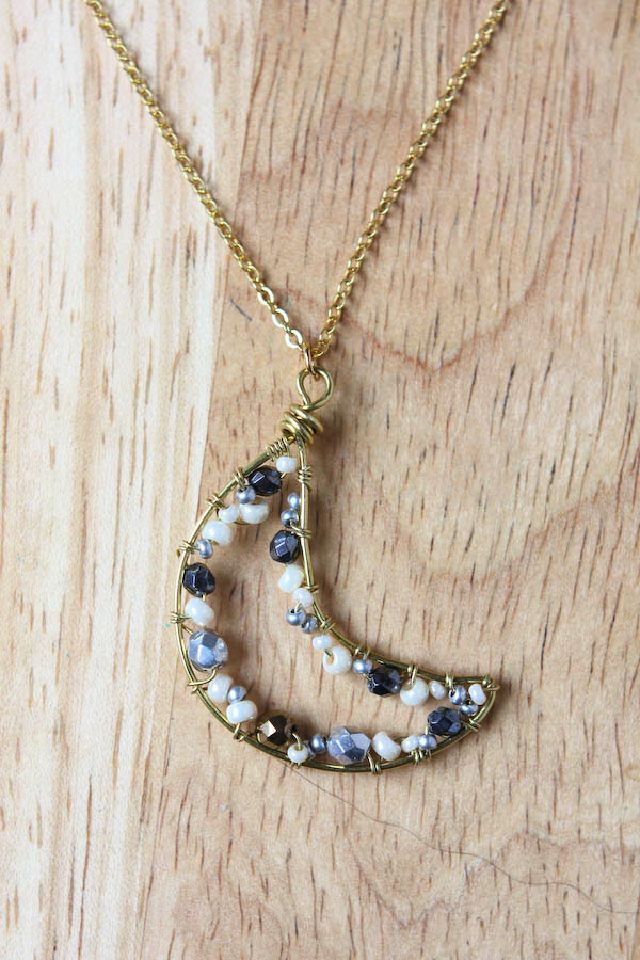
Learn how to make your very own crescent moon necklace with this easy-to-follow DIY tutorial. All you need is some wire, beads, pliers, and a few simple tools. The tutorial includes step-by-step instructions and helpful tips for making the perfect shape using a chunky marker pen or similar item. Make it unique by choosing from a selection of small beads in various sizes and colors, such as faceted Czech glass and seed beads. Elevate your jewelry game with this beautiful handmade crescent moon necklace. makeandfable
18. DIY Boho Fringe Necklace
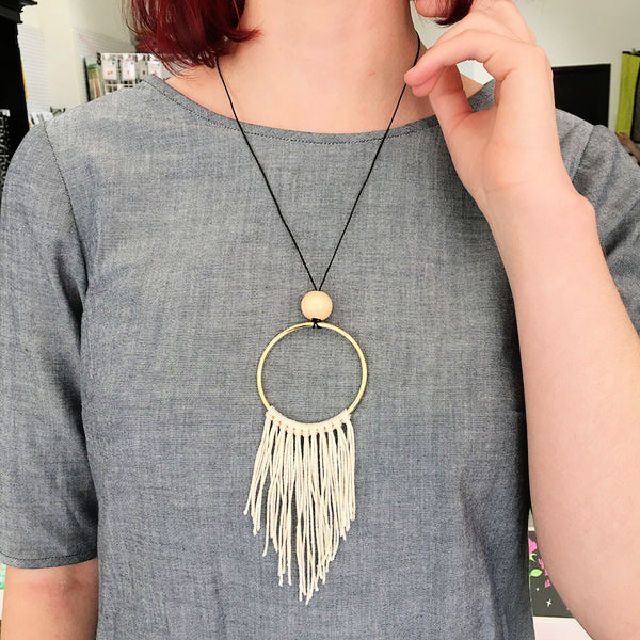
Learn how to make a beautiful Boho fringe necklace with this easy DIY necklace idea! This unique and stylish accessory is made using size 3 crochet thread, a thin black leather cord, a brass macrame ring, a large wooden bead, scissors, and more. Follow this step-by-step guide to make your own bohemian-inspired necklace that’s perfect for any occasion. With just a few simple materials and some creative flair, you can make this stunning piece of jewelry in no time! brooklyncraft
19. Cool St Patricks Day Necklace
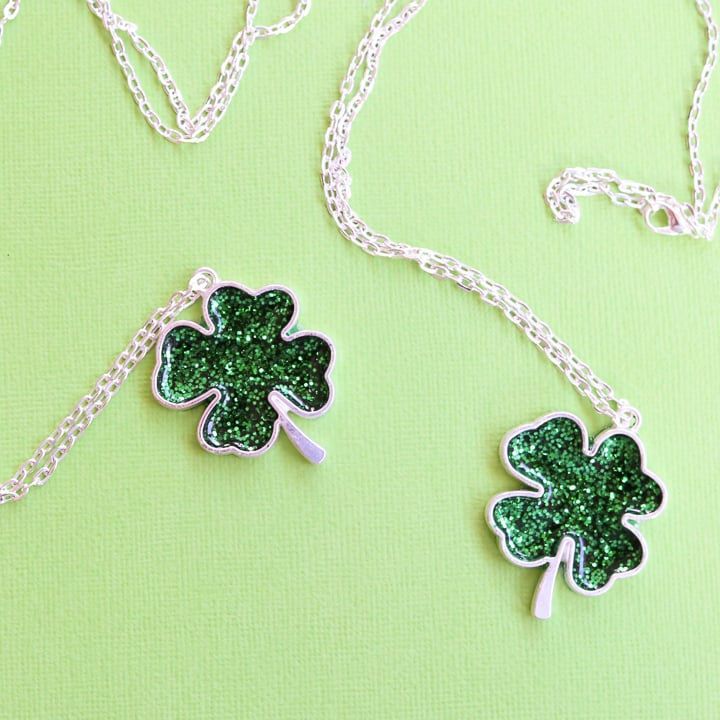
Looking to make a fun and festive St. Patrick’s Day accessory? Look no further than this DIY shamrock necklace! With just a few simple supplies, including EnviroTex jewelry resin, green dye and glitter, masking tape, and a necklace chain, you can easily craft your own unique piece of jewelry. Plus, with helpful tips like adding something to the back of the bezels to prevent resin overflow, making this beautiful necklace has never been easier! thecountrychic
20. How Do You Make a Copper Necklace
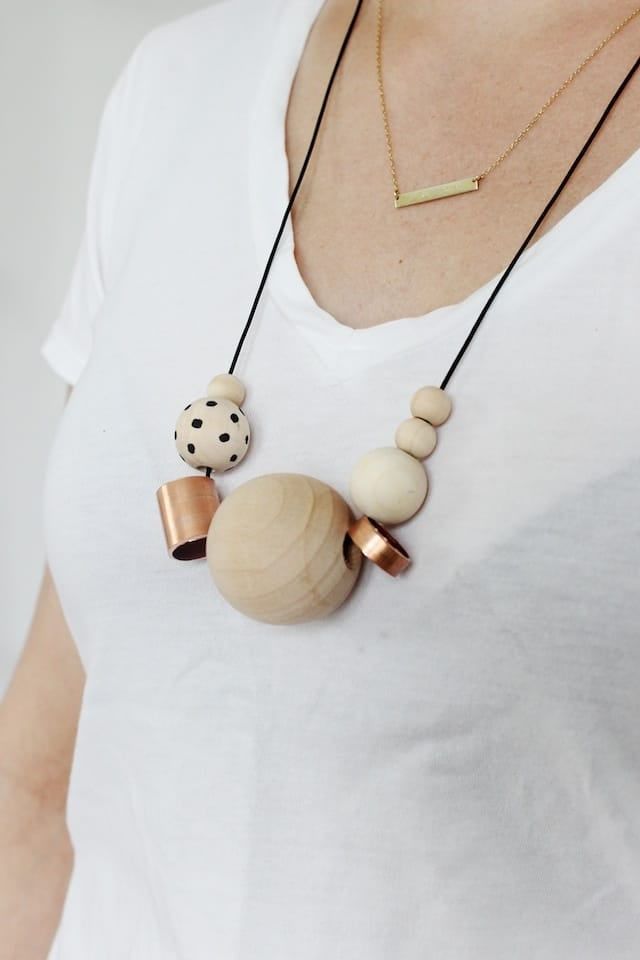
Discover a one-of-a-kind addition to your collection with this selection of unique accessories. Try making your own DIY wood + copper necklaces. With just a few supplies from the hardware store, you can make beautiful copper tube beads and customize wooden beads with polka dots. String them together on a leather cord for a trendy, earthy look, or try passing the cord through copper tubes for a twist on traditional bead necklaces. Finish off with small beads and knots to complete these one-of-a-kind pieces. Get creative and make it yours! seekatesew
21. DIY Hand Stamped Necklace
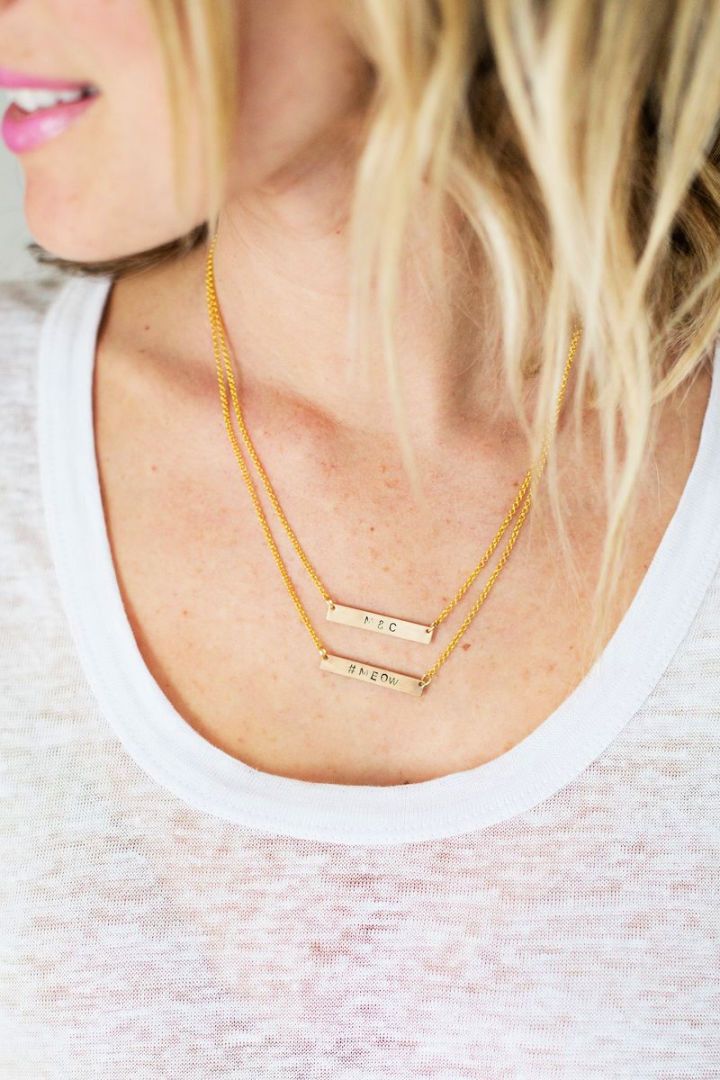
Make your own unique hand-stamped necklace with this easy-to-follow guide! With just a few basic stamping supplies, you can make a personalized piece of jewelry that reflects your style and personality. These step-by-step instructions will show you how to make a double pendant necklace using bar or circle stamping blanks, jump rings, and gold chains. Don’t wait any longer to express yourself through wearable art – start making today! abeautifulmess
22. Adorable DIY Pearl Necklace
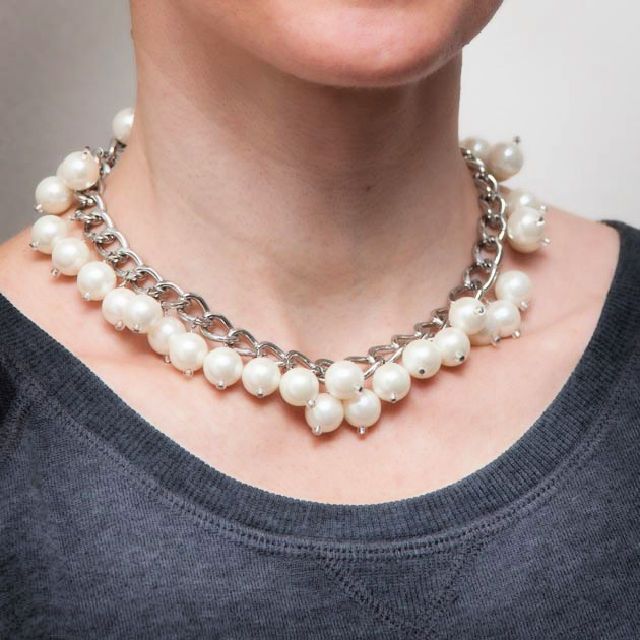
Looking for an adorable yet elegant accessory to add to your wardrobe? Look no further than this DIY pearl necklace. With its large chain, stunning pearls, and delicate small beads, this piece is sure to speak volumes about your graceful fashion appeal. Plus, with jump rings, a closure, pliers, and bead pins included in the kit, you’ll have everything you need to make a one-of-a-kind piece that’s truly unique. So why wait? Get started on your own DIY pearl necklace today! trinketsinbloom
23. Tassel Statement Necklace Design
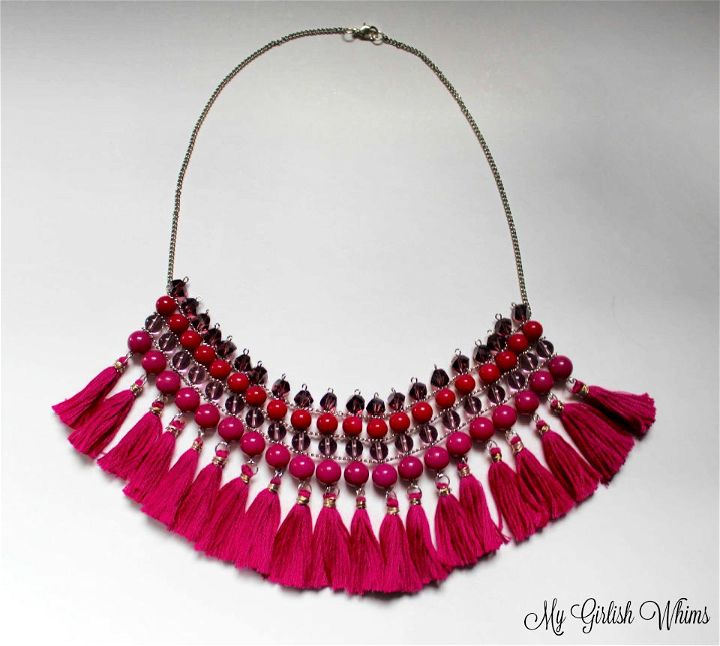
Grab this guide and make a stunning DIY tassel statement necklace with this simple tutorial! Cut three lengths of chain to your desired length and thread on large beads and crystals using eye pins. With wire cutters and round nose pliers, make closed loops to form the tassel fringe. Follow these easy steps to make a bold fashion statement that’s sure to turn heads. Perfect for adding some color and flair to any outfit, this unique necklace is a must-try for all DIY enthusiasts! mygirlishwhims
24. DIY Scandinavian Hoop Necklaces
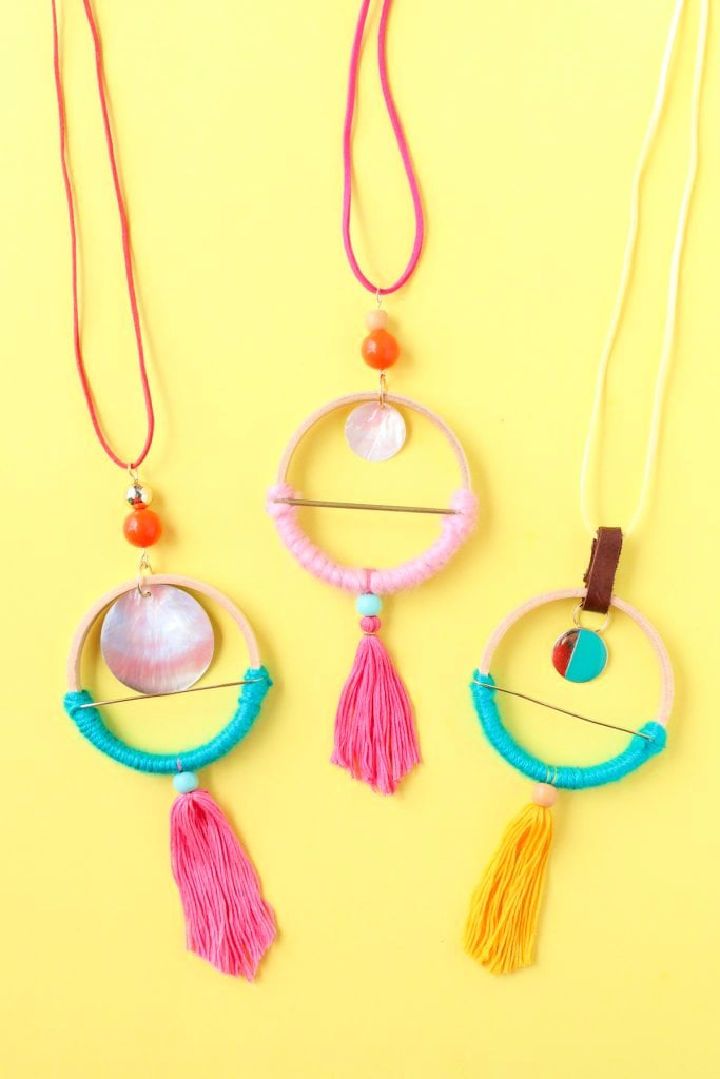
Get crafty with our DIY Scandinavian hoop necklaces! Using a 3″ wood embroidery hoop, yarn, embroidery floss, brass jewelry wire, gold jump rings, and colorful beads & pendants – you can make your own unique piece with the help of pliers and faux suede cording to make a statement necklace that will add some Nordic flair to any outfit. Follow this step-by-step guide to unleash your inner artist, and let’s get crafting! lovelyindeed
25. Super Fast Upcycled Necklace Tutorial
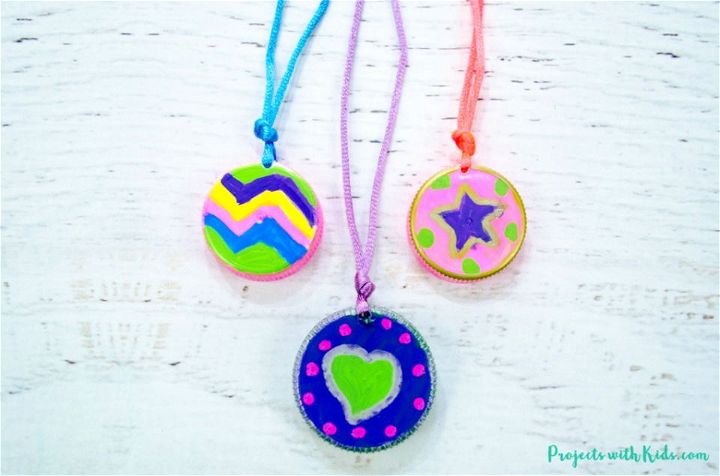
Discover a delightful and sustainable craft concept that will spark joy in your creative pursuits. This tutorial on making an upcycled necklace from plastic lids is perfect! With just a few supplies like satin jewelry cord, paint pens, and jewel stickers, you can make a unique accessory that’s both stylish and sustainable. Start off by gathering the plastic lids and cleaning and drying them! projectswithkids
26. Modern DIY Tassel Necklaces
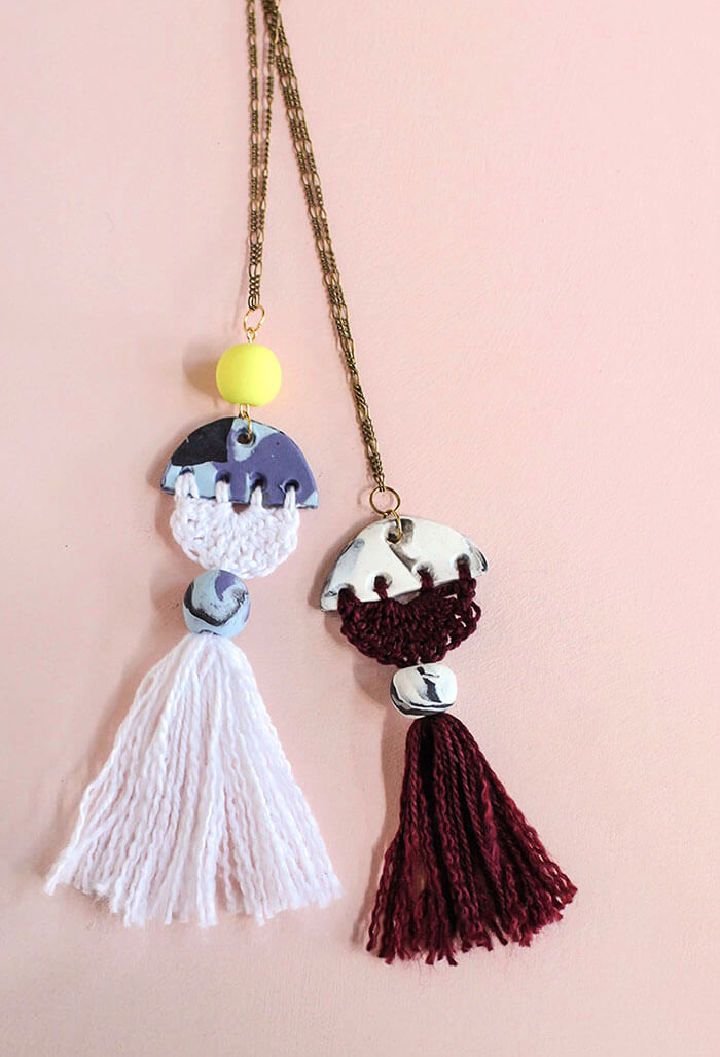
Slay a beautiful and modern tassel necklace with this DIY necklace idea. Using oven-baked clay, a craft knife, bamboo skewers, parchment paper, jewelry pliers, embroidery floss, crochet hooks (1.50 mm and 3.00 mm or D hook), small chain, and jump rings, you can easily follow these simple steps to make your own unique piece of jewelry. Start by marbling the clay in your desired colors, then roll it out into a ball shape before molding it onto the skewers to make tassels. Use the included materials to finish off your necklace for a stylish accessory that’s sure to turn heads! persialou
27. Simple DIY Washer Necklace
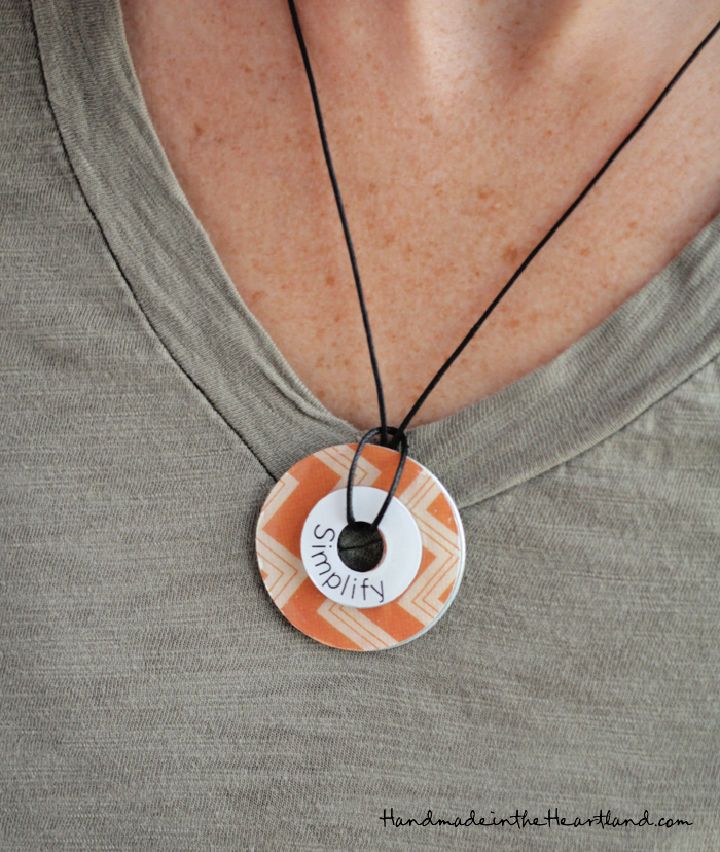
Fashion your own stylish necklaces with just a few supplies! This easy DIY washer necklaces guide shows you how to make fashionable accessories using washers, scrapbook paper, and Mod Podge dimensional magic. While a Cricut machine is recommended, this project can still be done without one. You’ll need a black jewelry cord with a simple clasp, spray adhesive, and paintbrushes as well. With endless design possibilities and easy-to-follow instructions, these necklaces are perfect for anyone looking for an affordable and fun DIY project! handmadeintheheartland
28. How to Make Necklaces to Sell
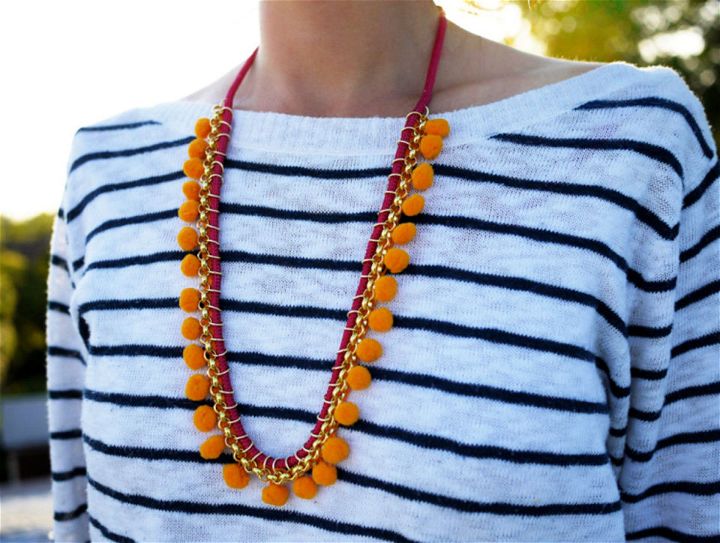
Learn how to make beautiful and unique necklaces that you can sell with this easy DIY necklace idea tutorial. Using just a few materials, including pom pom trim, chain, jump rings, nylon cord, and pliers, you’ll be able to make stunning pieces of jewelry in no time. With step-by-step instructions and helpful tips along the way, this guide will have you making necklaces that are sure to catch the eye of potential customers. Get started today and turn your creativity into profit! honestlywtf
29. Marbled Clay Pendant Necklace
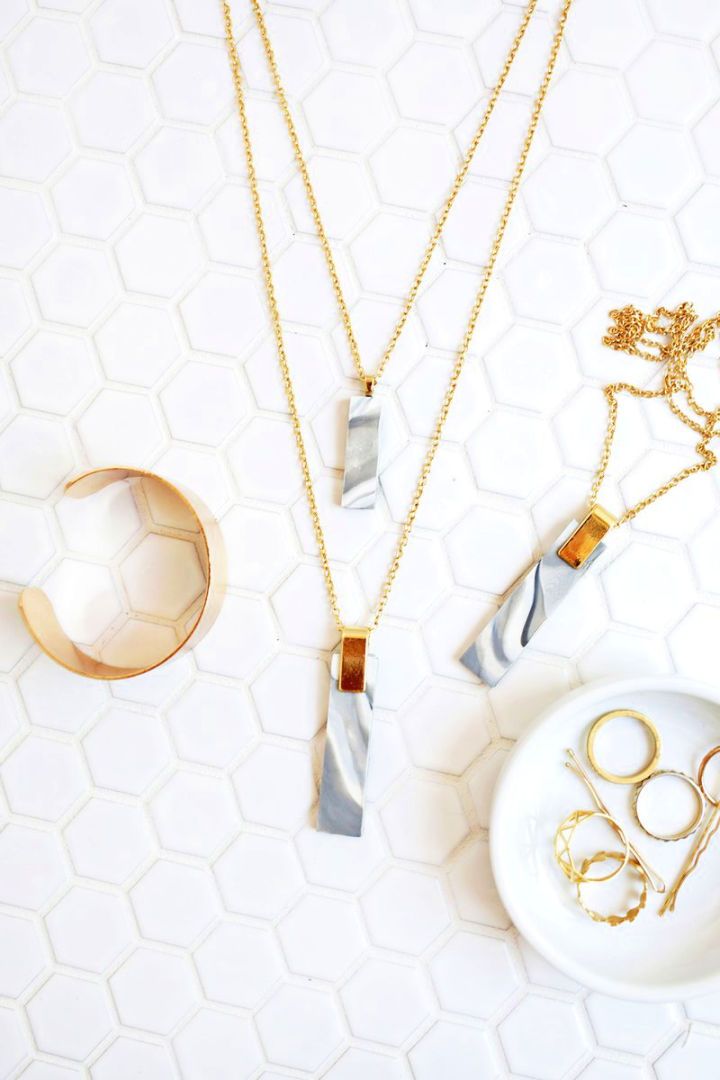
This marbled clay pendant necklace is a unique and handmade accessory that you can make at home with simple supplies like oven-baked clay, an X-Acto knife or clay knife, parchment paper, super glue, a necklace chain, jump rings, and closure. With the trendy marbled effect created using a silicone rolling pin or glass jar as your rolling pin, this pendant necklace is perfect for adding some color to your outfit while showcasing your crafting skills. The gold pendant bails add an extra touch of elegance to this one-of-a-kind piece! abeautifulmess
30. Necklace From Makers Mark Caps
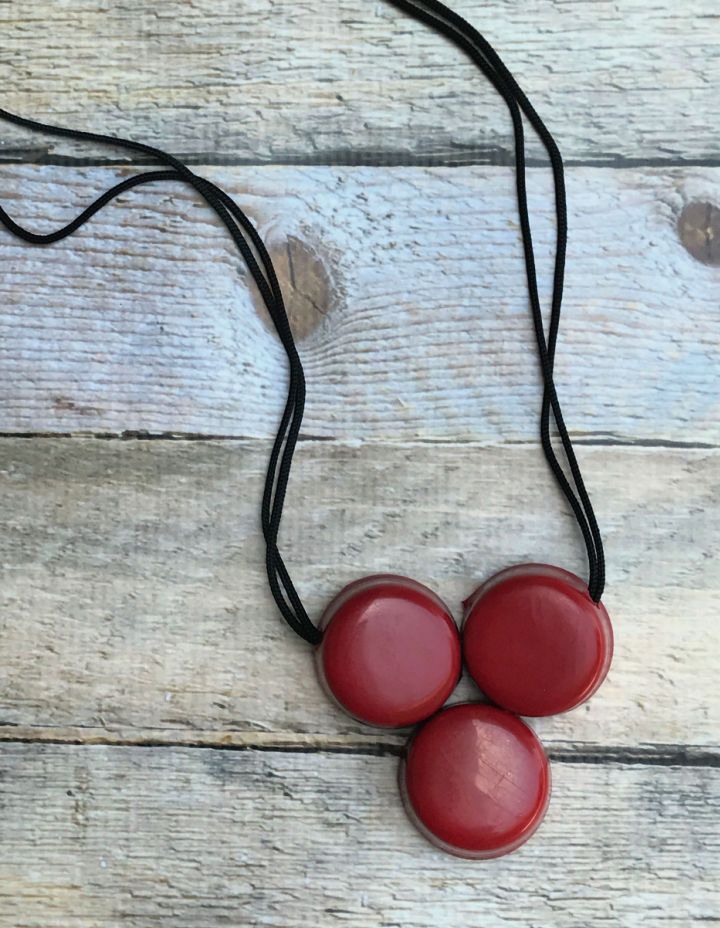
Learn how to make a unique and stylish necklace with maker’s mark caps in just a few simple steps! Using basic tools and materials, drill holes in the caps, secure them together with wire, thread cord through larger holes, and knot. This DIY project is perfect for those looking to show off their creative side while adding a little extra flair to their wardrobe. Follow these easy instructions for an eye-catching piece that is sure to turn heads. myfrenchtwist
31. Cool DIY Beaded Necklace
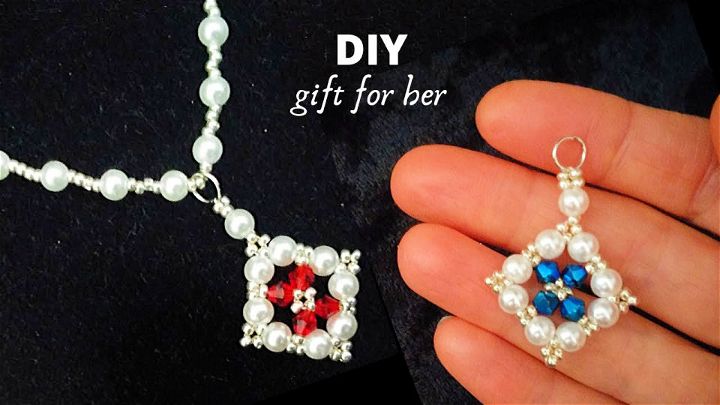
Looking for a cool and elegant DIY beaded necklace that you can make at home? Look no further than this simple yet stunning design that’s perfect for any occasion. Featuring high-quality seed beads, bicone seed beads, pearl beads, beading thread, a needle, and jump rings, this necklace is easy to make and will add the perfect finishing touch to any outfit. Whether you’re an experienced crafter or just starting out with jewelry making, this beaded necklace is sure to impress! So why wait? Get started today and make your own unique piece of wearable art!
32. Cute Beaded Flower Necklace
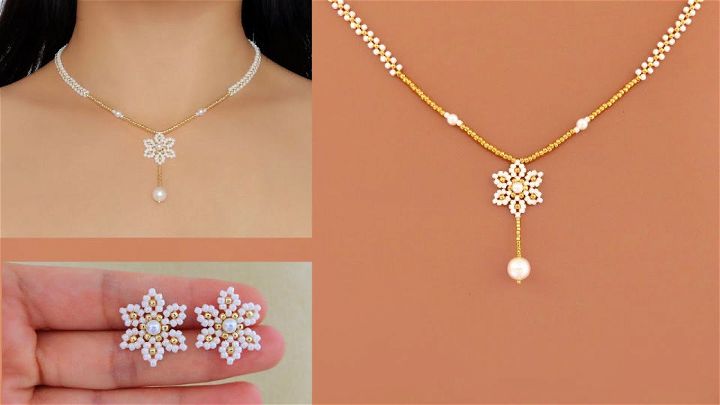
Complete your outfit with the perfect statement piece. Look no further than this stunning beaded flower necklace and matching beaded flower earring studs! You can handcraft it using a combination of delicate white seed beads, shimmering gold seed beads, and lustrous white pearls; these pieces are sure to turn heads. Each flower can meticulously be crafted by hand using a needle and thread, leaving a 220 cm tail for easy adjustment. Whether dressing up or down, these elegant accessories add just the right touch of glamour to any look. Make yours today!
33. Easy DIY Pearl Necklace at Home
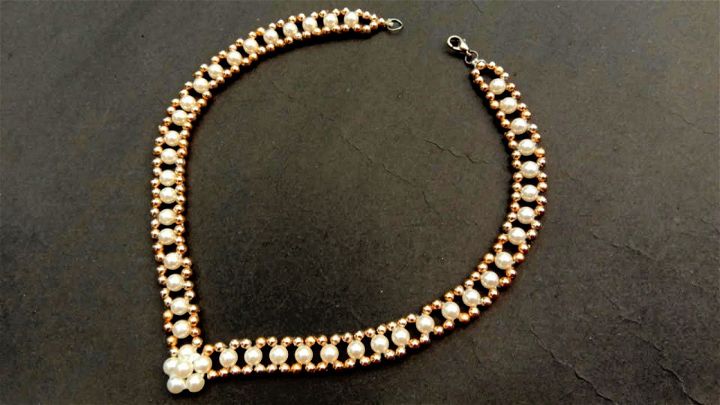
Learn to make a stunning pearl necklace from the comfort of your home with this simple and easy DIY tutorial. With just a few materials, including pearl beads, golden beads, needles, regular thread, lobster clasp, and jump rings, you can make an elegant piece of jewelry that will elevate any outfit. Follow our step-by-step instructions and master the art of making beautiful necklaces in no time. Perfect for beginners or experienced crafters looking for a fun project!
34. Charming Beaded Necklace With Bicone and Seed Beads
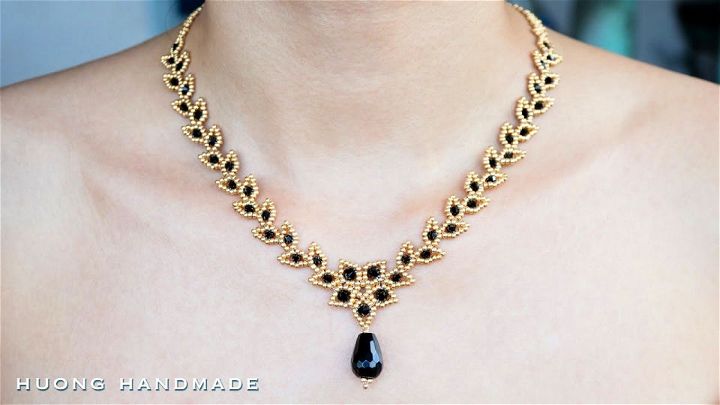
Elevate your jewelry collection with this charming beaded necklace featuring a stunning combination of bicone and seed beads. The intricate design showcases the beauty of 11/0 seed beads, paired with 3mm and 4mm faceted bicone beads for added sparkle. A focal point is created by a striking teardrop bead measuring 10x14mm. Completed with a secure box clasp, this piece is expertly crafted using a #11 beading needle and durable 0.2mm thread. Make a statement on any occasion with this unique accessory that exudes elegance and sophistication!
35. How to Do Pearl Necklace
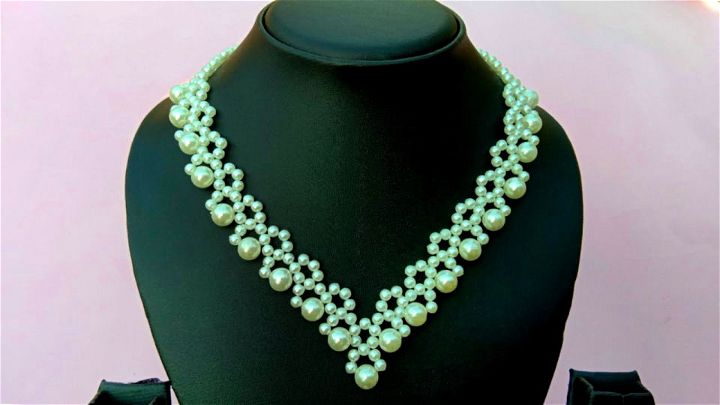
Unravel the secrets of designing an enchanting pearl necklace, one step at a time. Gather materials such as pearl beads in various sizes, needles, and thread (nylon or polyester), a lobster clasp or any type of clasp, jump rings, chain, and dangling beads. Follow this step-by-step guide to make a stunning piece that can be worn for any occasion. Explore your creativity and design the perfect necklace that suits your personal style. With these simple steps, you’ll have a gorgeous handmade pearl necklace that is sure to impress!
Related DIY Jewelry Making Ideas
Learn how to make stunning DIY jewelry with these simple and fun ideas. From earrings to necklaces, you’ll find something for every style.
- Bracelet Ideas to Make: Delve into the world of handmade jewelry with our remarkable DIY bracelets guide, packed with cute bracelet ideas to make yourself.
- Tassel Earrings: Make a stylish statement with our pretty DIY tassel earrings guide, offering easy ideas to create your own unique accessories.
- Polymer Clay Earrings: Discover a collection of creative polymer clay earring ideas for your DIY projects.
- Friendship Bracelet Patterns: Create meaningful keepsakes with our wonderful friendship bracelet patterns suitable for crafters of all levels.
- How to Make Beaded Bracelets: Discover the artistry of beadwork with our guide on how to make beaded bracelets, featuring easy bead bracelet patterns for beginners.
- DIY Earrings: Step into the world of homemade fashion with our guide on breathtaking DIY earrings that you can effortlessly create at home.
- Paracord Bracelet Patterns: Embrace the rugged charm of paracord with our amazing paracord bracelet patterns, empowering you to create your own durable designs.
- Chevron Friendship Bracelet: Discover a collection of chevron friendship bracelet patterns to create beautiful and unique accessories.
- Wire Wrapped Rings: Design your own handcrafted rings with our lovely DIY wire wrapped rings guide, complete with an easy ring making tutorial.
Conclusion:
If you love wearing necklaces, you will enjoy making your own with these 35 easy DIY necklace ideas. Whether you prefer simple or statement pieces, you can find a necklace project that suits your style and skill level. You can use materials like beads, wire, clay, pearls, wood, and more to create stunning necklaces that will add charm and personality to your outfits.
These DIY necklace ideas are easy to follow, fun to make, and rewarding to wear. You can also customize them with your favorite colors, shapes, and patterns. Plus, you can save money by making your own jewelry instead of buying it from stores. So, what are you waiting for? Grab your supplies and start making your own necklaces today! You will be amazed by what you can create with your hands and imagination. Check out our 35 easy-to-make DIY necklaces for inspiration and guidance!

