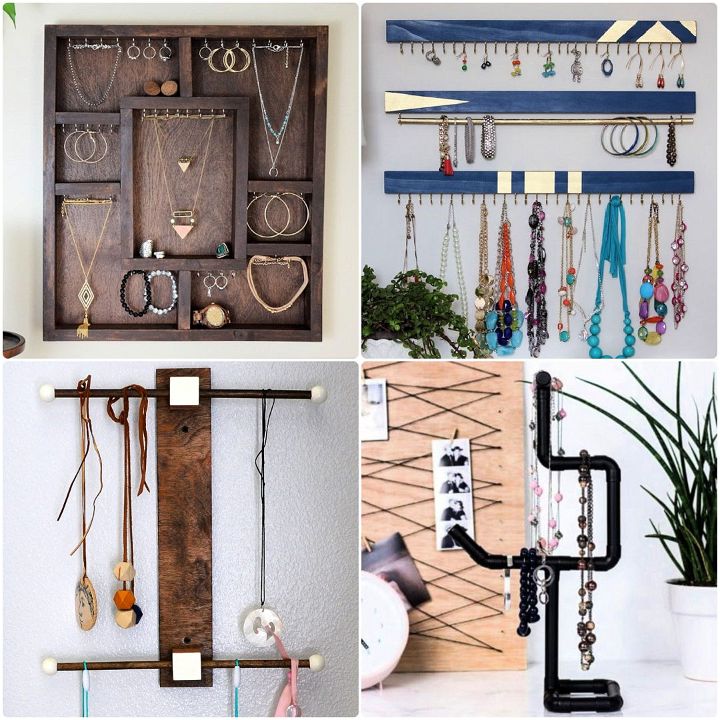
Keep your jewelry organized and accessible by making a DIY jewelry organizer. Let’s learn how to make a jewelry holder with these 30 functional DIY jewelry organizer ideas for you to try. You’ll find a variety of organizer styles that suit every kind of jewelry collection. Whether you need a DIY jewelry holder, a DIY jewelry stand, a DIY jewelry box, or a DIY necklace holder, we’ve got you covered. All you need are some basic materials and tools and our easy-to-follow instructions.
You can choose from simple and smart DIY jewelry organizer ideas, such as wall-mounted organizers or jewelry stands made from wood scraps or copper wire. Or you can get creative and try some more unusual concepts, like a homemade jewelry organizer made from cabinet hardware or a recycled silverware tray.
No matter what your skill level is, you’ll find a DIY jewelry box organizer and DIY jewelry display design that is fun and easy to make. And if you’re especially fond of earrings, you’ll love the unique DIY earring holder ideas.
Every DIY jewelry organizer comes with detailed instructions and a list of materials you need to complete the project. So don’t wait any longer. Check out these free DIY jewelry organizer ideas today and start making a beautiful and practical piece for your jewelry collection. Your accessories will be happy!
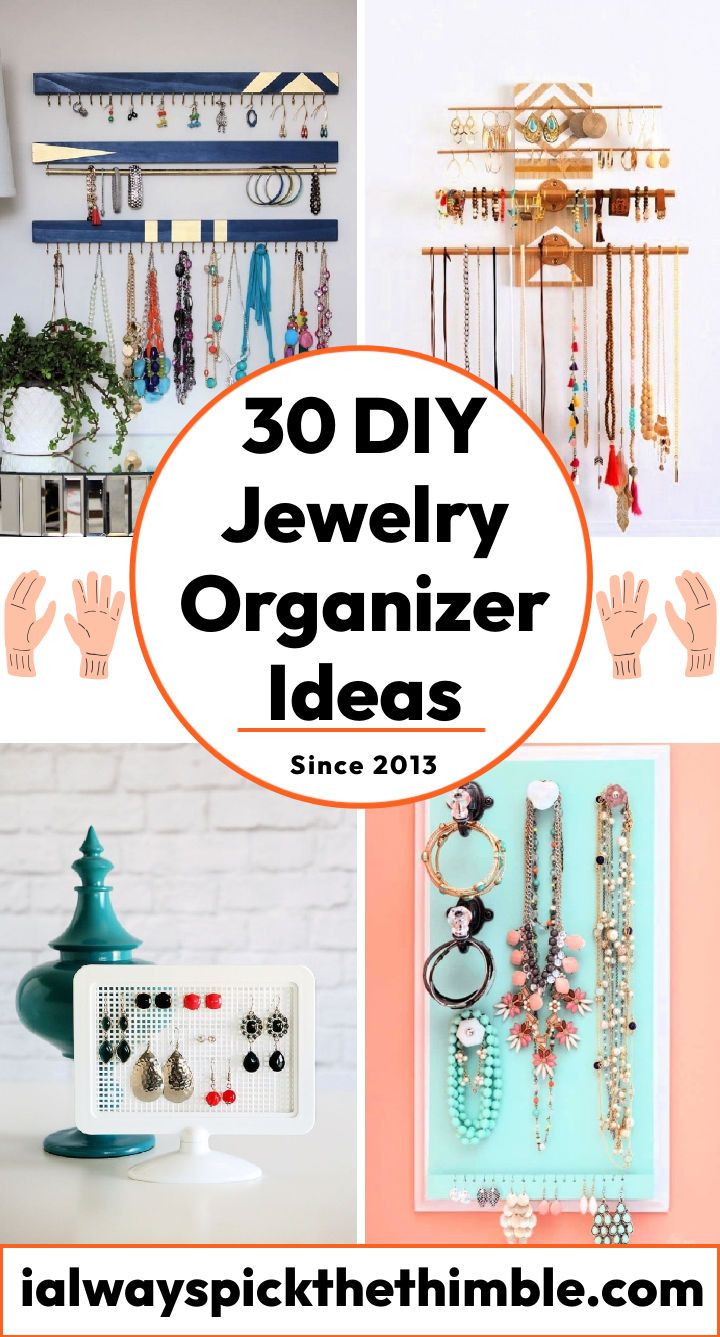
DIY Jewelry Organizer Ideas
Jewelry is one of the most common and popular forms of personal adornment, and many people have a collection of different pieces that they love to wear. However, keeping your jewelry organized and accessible is a challenge, especially if you have limited space or a lot of clutter. That’s why making your own jewelry holder can be a fun and rewarding task that will solve your jewelry storage problems and let you showcase your creativity.
There are many different ways to make a jewelry holder, depending on your preferences, budget, and skills. You can use various materials, such as wood, metal, cardboard, fabric, or even recycled items, to create a unique and functional piece that suits your style. You can also customize your jewelry holder with different colors, patterns, shapes, or decorations to make it more attractive and personal.
This article will guide you through the basics of making a jewelry holder, from choosing the right material to avoiding common mistakes. I will also provide you with a step-by-step tutorial on how to make a simple and elegant jewelry holder using a wooden frame and some hooks. By following these instructions, you will be able to create a beautiful and practical jewelry holder that will keep your accessories organized and easy to find.
Why You Need a DIY Jewelry Holder
A jewelry holder is not only a useful accessory for storing your jewelry but also a smart way to protect and preserve your pieces. Here are some of the benefits of having a jewelry holder:
- It prevents your jewelry from getting tangled, knotted, or damaged by other items in your drawers or boxes.
- It prevents your jewelry from getting lost or misplaced by keeping them in one place.
- It prevents your jewelry from getting tarnished or discolored by exposure to air, moisture, or dust.
- It makes it easier for you to see and choose what jewelry to wear for different occasions.
- It adds some charm and flair to your room by displaying your jewelry as art.
Materials You Need to Make a Jewelry Holder
The materials you need to make a jewelry holder will depend on the type and design of the holder you want to create. However, some of the basic materials that you will need for most projects are:
- A base or frame for the holder, such as a wooden board, a picture frame, a metal tray, or a cardboard box.
- Some hooks or hangers for hanging your jewelry, such as screw-in hooks, cup hooks, S-hooks, or adhesive hooks.
- Some tools for assembling the holder, such as a hammer, a drill, a screwdriver, scissors, glue, or nails.
- Some optional materials for decorating the holder, such as paint, spray paint, fabric, ribbon, lace, stickers, beads, or flowers.
Choosing the Right Material for Your DIY Jewelry Holder
When choosing the material for your jewelry holder, you should consider several factors:
- The size and weight of your jewelry collection. You should choose a material that is sturdy enough to support the weight of your jewelry without bending or breaking. You should also choose a material that is large enough to accommodate all your pieces without overcrowding them.
- The style and theme of your room. You should choose a material that matches or complements the color scheme and decor of your room. You should also choose a material that reflects your personality and taste.
- The availability and cost of the material. You should choose a material that is easy to find and affordable. You can also use recycled or repurposed items that you already have at home, such as old frames, trays, boxes, or bottles.
Avoiding Common Mistakes When Making a Jewelry Holder
Making a DIY jewelry holder can be a fun and simple project if you follow some basic guidelines. However, there are some common mistakes that you should avoid when making a jewelry holder:
- Not measuring or marking the base or frame before drilling or attaching the hooks. This can result in uneven or crooked placement of the hooks or holes that are too big or too small for the hooks.
- Not sanding or smoothing the edges or surfaces of the base or frame before painting or decorating it. This can result in rough or sharp edges that can scratch or snag your jewelry or hurt your fingers.
- Not sealing or coating the base or frame after painting or decorating it. This can result in chipping or fading of the paint or decoration over time.
- Not cleaning or dusting the base or frame before using it. This can result in dirt or dust transferring to your jewelry and causing tarnish or discoloration.
Tips for Making a Jewelry Holder for Beginners
If you are new to DIY projects or making a jewelry holder for the first time, here are some tips that can help you:
- Start with a simple and easy design that does not require a lot of materials or skills. You can find 30 easy DIY jewelry oganizer ideas below for inspiration and guidance.
- Use materials that are readily available and inexpensive, such as wood, cardboard, or metal. You can also use items that you already have at home, such as old frames, trays, boxes, or bottles.
- Use hooks that are easy to install and remove, such as adhesive hooks, S-hooks, or cup hooks. You can also use hooks that are already attached to the base or frame, such as picture hangers or key holders.
- Use tools that are safe and comfortable to use, such as scissors, glue, or nails. You can also use tools that are already in your home, such as a hammer, a drill, or a screwdriver.
- Have fun and be creative with your jewelry holder. You can add some color, pattern, shape, or decoration to your jewelry holder to make it more attractive and personal.
Step-by-Step Guide to Making a Jewelry Holder
To make a simple and elegant jewelry holder using a wooden frame and some hooks, you will need the following materials:
- A wooden frame (any size or shape)
- Some screw-in hooks (any size or color)
- A hammer
- A drill
- A pencil
- A ruler
- Some paint or spray paint (optional)
- Some fabric or ribbon (optional)
Here are the steps to make the jewelry holder:
- If you want to paint or decorate the frame, do it before attaching the hooks. You can use any paint or spray paint that is suitable for wood. You can also cover the frame with some fabric or ribbon for a different look. Make sure to let the paint or glue dry fully before moving to the next step.
- Measure and mark the spots where you want to attach the hooks on the frame. You can use a ruler and a pencil to make sure the hooks are evenly spaced and aligned. You can also vary the distance between the hooks depending on the size of your jewelry.
- Drill small pilot holes on the marked spots using a drill. This will make it easier to screw in the hooks and prevent the wood from splitting or cracking.
- Screw in the hooks on the pilot holes using a screwdriver or your fingers. Make sure the hooks are firmly attached and facing the same direction.
- Hang your jewelry on the hooks according to your preference. You easily can organize your jewelry by type, color, size, or style.
- Hang your jewelry holder on the wall using some nails or screws. You can also lean it against the wall or place it on a table or shelf.
Solutions to Common Problems When Making a Jewelry Holder
If you encounter any problems when making your jewelry holder, here are some possible solutions:
- If your frame is too thin or flimsy to support the weight of your jewelry, you can reinforce it with some cardboard or wood strips on the back. You can also use a thicker or stronger frame instead.
- If your hooks are too loose or wobbly on the frame, you can tighten them with some pliers or glue. You can also use larger or longer screws instead.
- If your jewelry is too long or bulky to fit on the hooks, you can shorten them with some clippers or pliers. You can also use smaller or thinner hooks instead.
- If your jewelry is too tangled or messy on the hooks, you can separate them with some dividers or separators. You can also use more hooks or fewer pieces of jewelry instead.
Basics of Making a Jewelry Holder
Making a jewelry holder is a simple and rewarding project that will help you store and display your jewelry in an organized and stylish way. Here are some of the basics of making a jewelry holder:
- Choose a base or frame for your jewelry holder that is sturdy, large, and suitable for your room.
- Choose some hooks or hangers for your jewelry holder that are easy, secure, and appropriate for your jewelry.
- Choose some tools for your jewelry holder that are safe, comfortable, and available for your project.
- Choose some optional materials for your jewelry holder that are attractive, personal, and affordable for your project.
- Follow some basic guidelines for making your jewelry holder that are informative, comprehensive, and helpful for your project.
I hope this article has given you some useful information and inspiration for making your own jewelry holder. DIY Jewelry organizers are a great way to keep your jewelry organized and accessible while adding some charm and flair to your room. With some simple materials and steps, you can create a beautiful and practical jewelry holder that will suit your style and needs.
1. How to Make a Jewelry Organizer
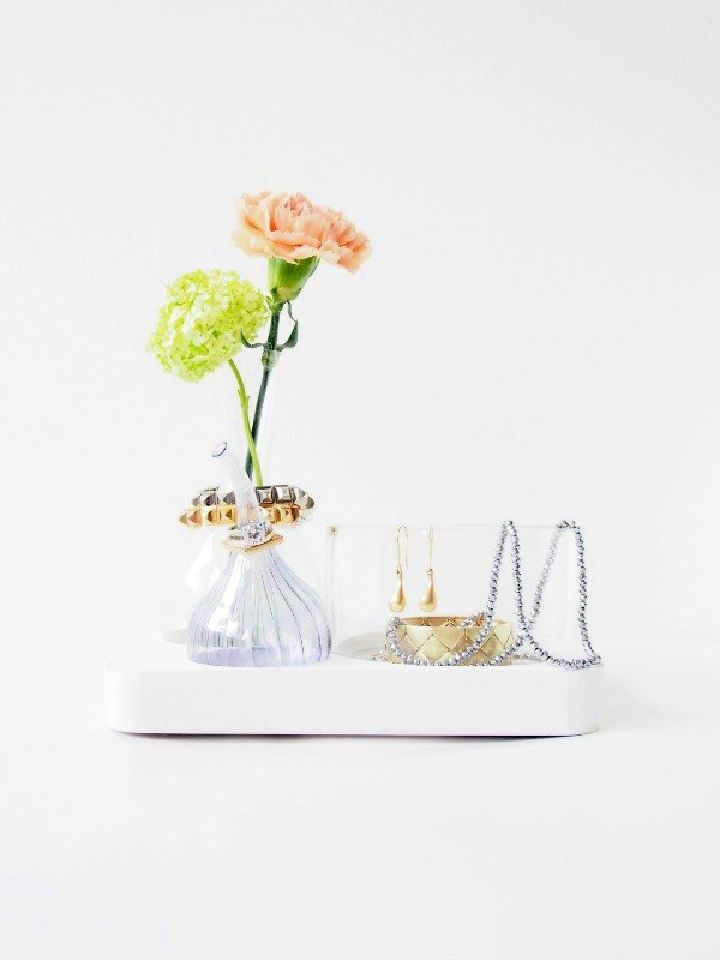
Make a stylish and organized jewelry holder with just a few items you may already have in your home! This simple DIY project requires glass vases or bowls, plastic containers, paint sticks, ceramics or concrete, and plastic cups. In no time, you can declutter your jewelry collection with this easy-to-make organizer.
Get creative by painting the containers for an extra decorative touch. Give yourself the satisfaction of making something beautiful and useful from everyday household items. Follow this tutorial for a fun way to stay organized and use what you already have! tutsplus
2. DIY Wall Mounted Jewelry Organizer
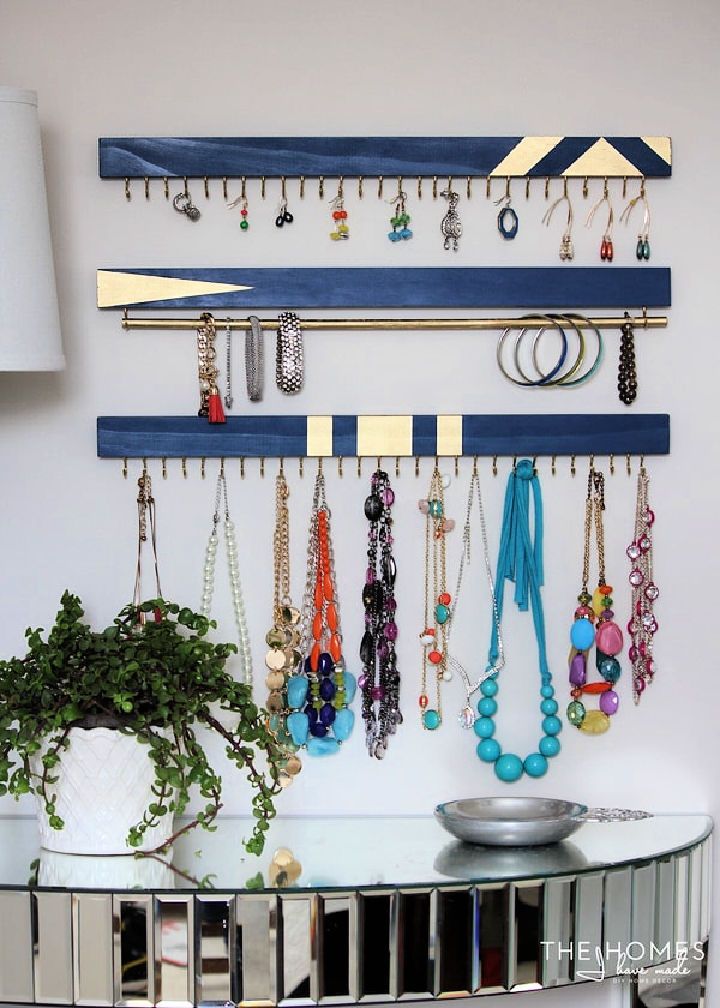
Are you looking for an easy-to-make and stylish way to organize your jewelry? Look no further than this wall-mounted DIY jewelry organizer! With just some common board or plywood 1x2s, cup hooks in a color of your choice, wooden dowel, paint or stain to decorate the wood, this project are fun and easy.
Your jewelry will remain tangle-free and easy to see with this customizable solution that is perfect for your collection. Keep all your favorite pieces accessible with this DIY wall-mounted jewelry organizer – an ideal storage solution that looks great too! thehomesihave
3. Homemade Wood Jewelry Organizer
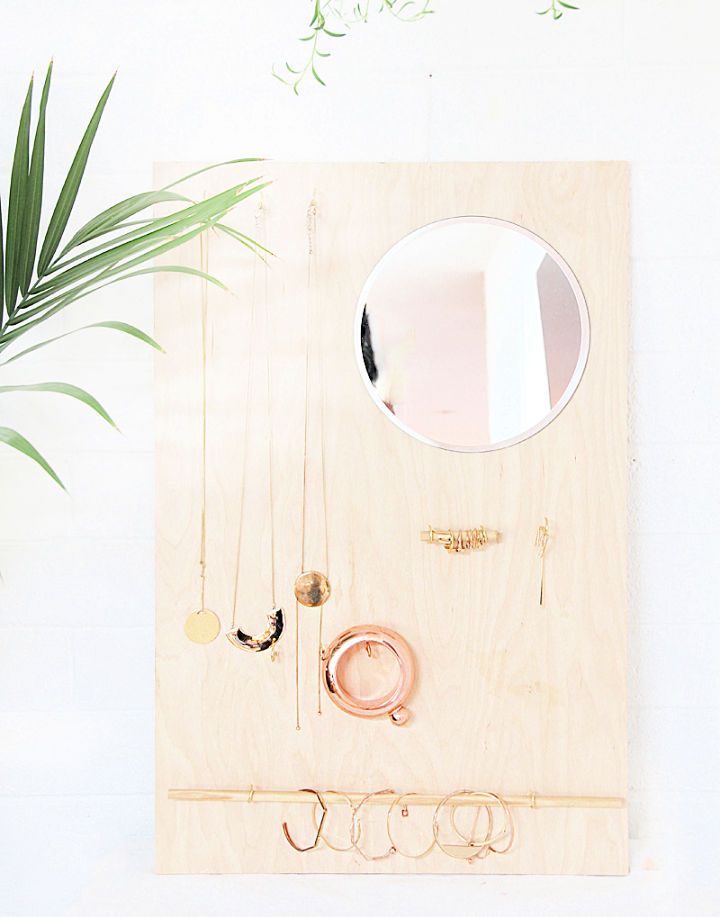
Make stylish and organized jewelry storage with this DIY wood jewelry organizer. This easy-to-make item requires only wood, gold cup hooks, a wood dowel and a mirror to make an attractive wall unit for storing all your valuable accessories in one place. It takes minimal time to assemble the pieces, and you can use plywood as an economical alternative for the wood material if needed. Keep your necklaces, earrings and other items right at home and accessible with this simple yet functional jewelry organizer! abubblylife
4. DIY Copper Wire Jewelry Organizer
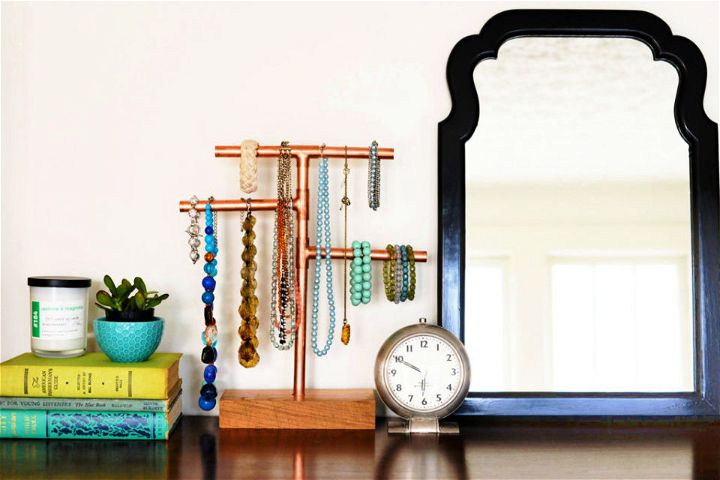
Organize your jewelry with a stylish DIY tree jewelry organizer stand! This stand is made from copper pipes, giving it an elegant yet affordable look. It’s easily customizable – make a large size for lots of bling or a smaller one for minimalist style. You’ll need a ½-inch diameter copper pipe, fittings, and a wood block to get started. See how to make this fun dresser top jewelry display in just a few steps! Get organized with the perfect combination of fashion and function today! homedit
5. Make Your Own Jewelry Holder
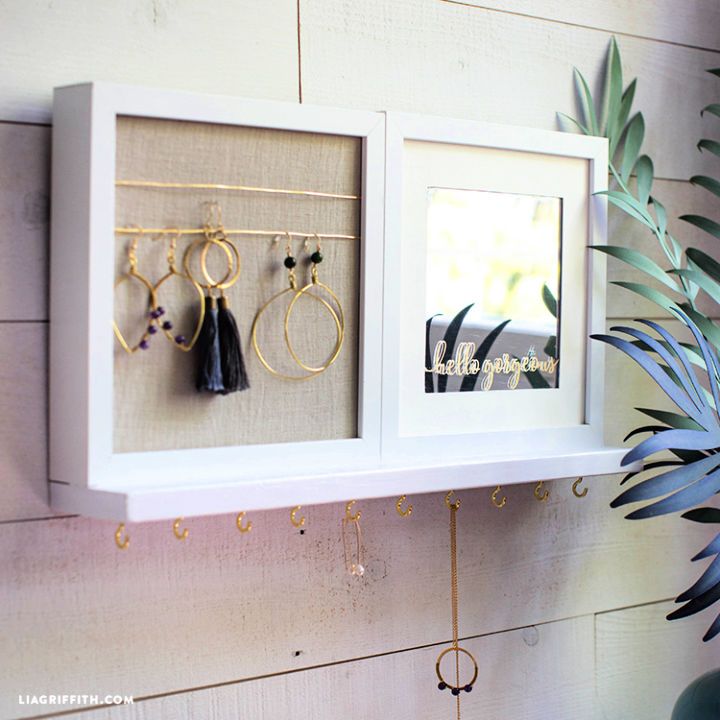
Tired of tangled necklaces ruining your outfit? Get organized with this custom DIY jewelry holder. This project is ready to be customized however you want and comes with everything you need to get started: wood, a mini mirror, gold wire, a hanging kit, cup hooks and more! Plus, the bonus of the mini mirror will have you checking your reflection before taking on the world in style – all without tangles. Start today by making your unique jewelry holder and keeping it tangle-free for good! liagriffith
6. Build a Necklace Holder from Wood Scraps
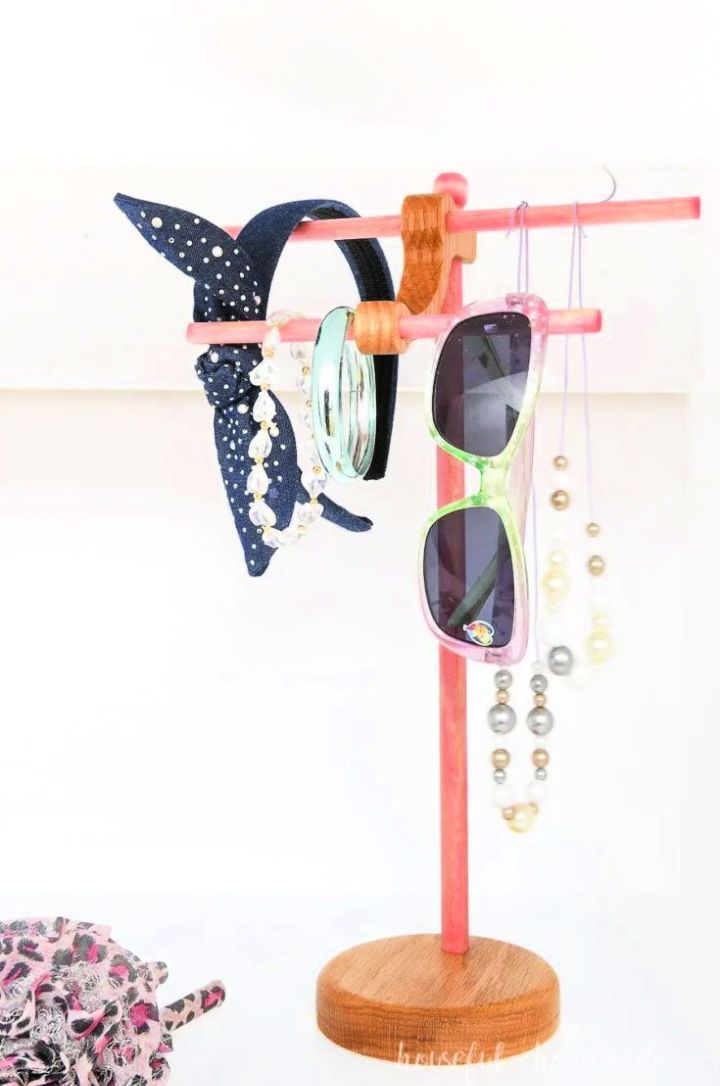
This DIY necklace holder from wood scraps is perfect for displaying all your favorite necklaces and bracelets. It’s quick and easy to make with just a few small pieces of wood, dowels or brass rods, and the stain or paint of your choice. Give any room an instant style upgrade with this elegant piece of jewelry storage.
With its simple yet beautiful design, you can showcase everything from delicate pendants to chunky statement pieces while keeping them organized and tangle-free. Get creative with color combinations and natural materials to make the perfect addition to any bedroom or closet! housefulofhand
7. DIY Wooden Bracelet Holders
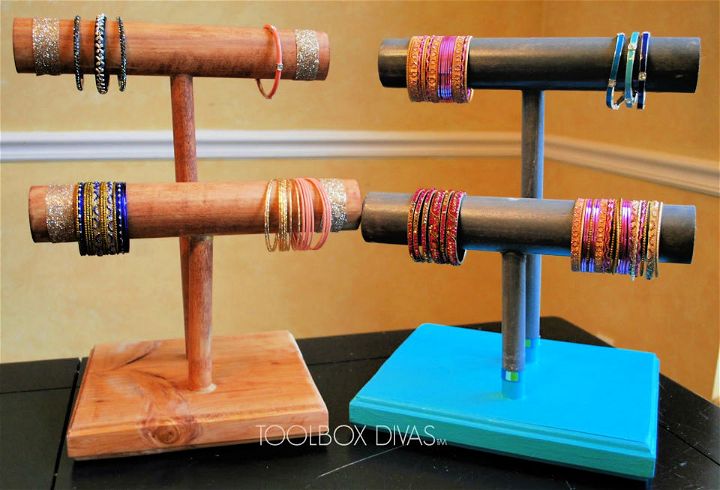
Put together stylish and modern wooden bracelet holders with this easy-to-follow DIY tutorial. You’ll have 4 custom-made bracelets holders for only $14! All you need is wood round dowels, a 2″x6″ or 2″x10″ piece and the paint/stain of your choice. With this simple guide, anyone can make these stunning accessories in no time – perfect for adding a unique touch to any jewelry collection. toolboxdivas
8. Geometric Wall Jewelry Organizer Design
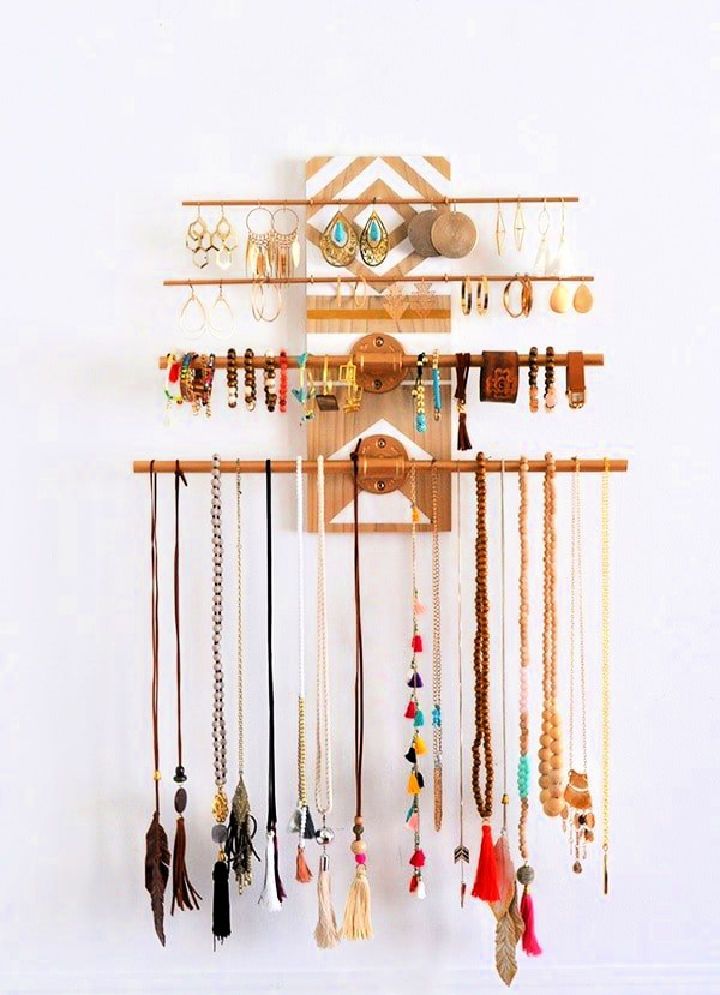
Turn your jewelry into art with these diy jewelry display solutions that are both functional and decorative. This DIY geometric industrial wall jewelry organizer tutorial is perfect for organizing your jewelry collection! You’ll need 7×1 wood plank, white, gold and copper acrylic paint, as well as 2.7 x ½′ nipple plumbing floor flanges; size ½ inch galvanized t’s and steel pipe nipples; screw eye hooks; wood dowels; and a z-clip wall hanger. Make this beautiful piece of decor in no time at all with this easy-to-follow tutorial! Make it now for an original industrial look that will add style to any room. madeinaday
9. Handmade Stud Earring Holder
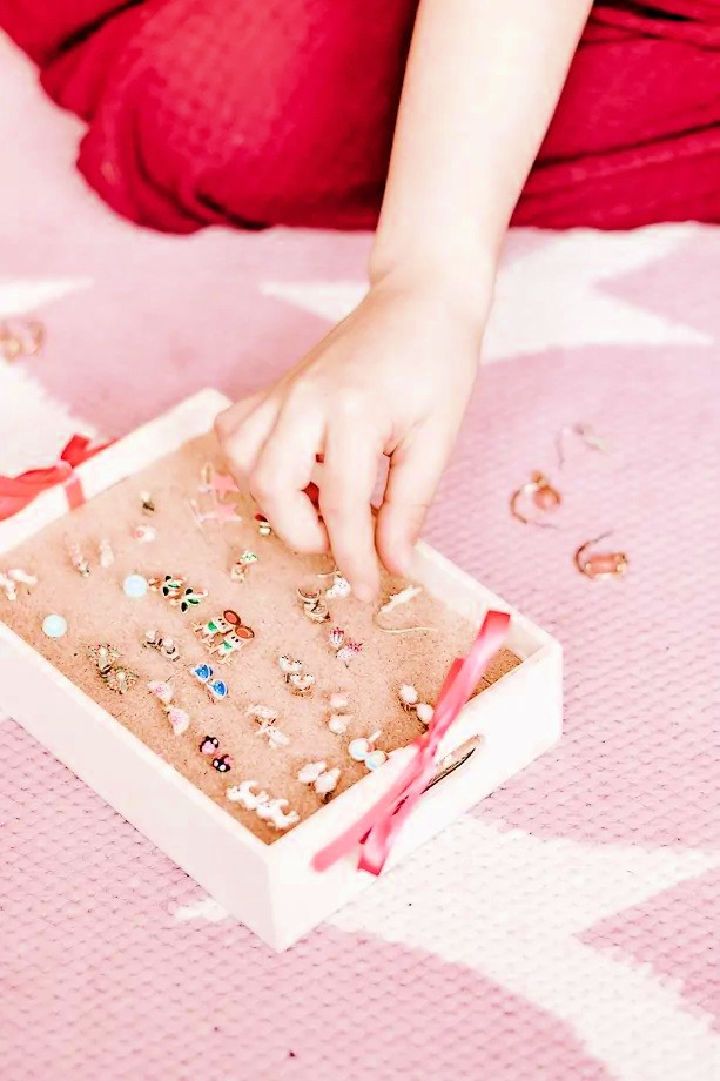
Sparkle and shine – upgrade your jewelry to the next level without breaking the bank! This DIY earring holder lets you organize and store your stud earrings quickly. It’s perfect for anyone, especially those on a budget. The best part is, it only takes 10 minutes to make from start to finish – with items you can easily find at the dollar store: corkboard, small box, and cardboard. Get creative and involve the kids, too – have fun crafting this easy and economic project! decorhint
10. Creative Earring Holder Design
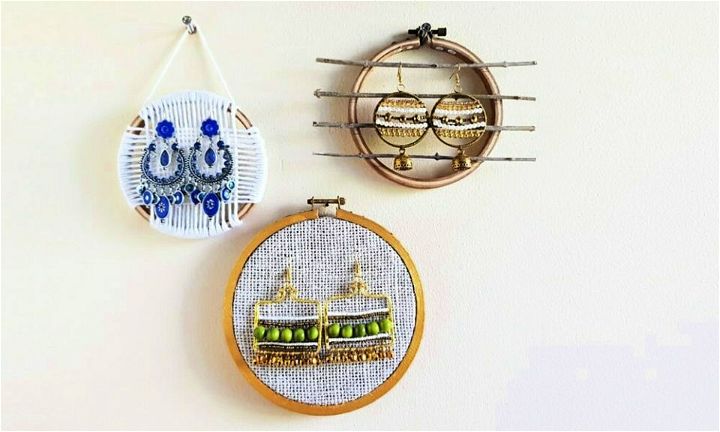
Learn how to make beautiful and functional earring holders with these three easy and creative DIY tutorials using embroidery hoops. Each design is beginner-friendly and requires only a few craft supplies, including burlap fabric, dry twigs, and yarn.
These earring holders are perfect for displaying and organizing your own earring collection or for showcasing your jewelry products in a small business. With an estimated cost of only a dollar or two, these earring holders are a fun and affordable way to show off your creativity. Follow our step-by-step instructions and start crafting today! thecraftaholic
11. How to Make a Rattan Jewelry Organizer
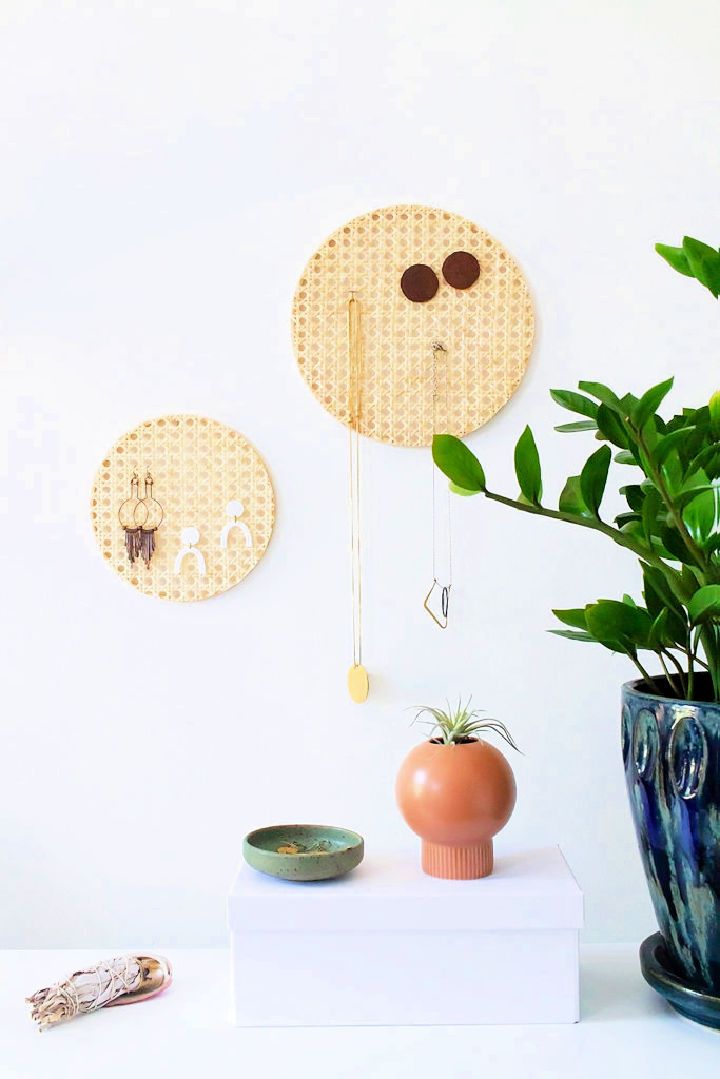
With a search for jewelry storage often ending in disappointment, a rattan organizer is a perfect way to make your custom display for all your earrings and necklaces. Within just a few hours, you can build an aesthetically pleasing organizer with cane webbing, an embroidery hoop and some heavy objects & books. With this modern DIY tutorial, you’ll have the perfect place to hang or display your most worn pieces and still have that scandinavian-bohemian look. Check out this ingenious project today! curbly
12. DIY Jewelry Holder for Your Bedroom
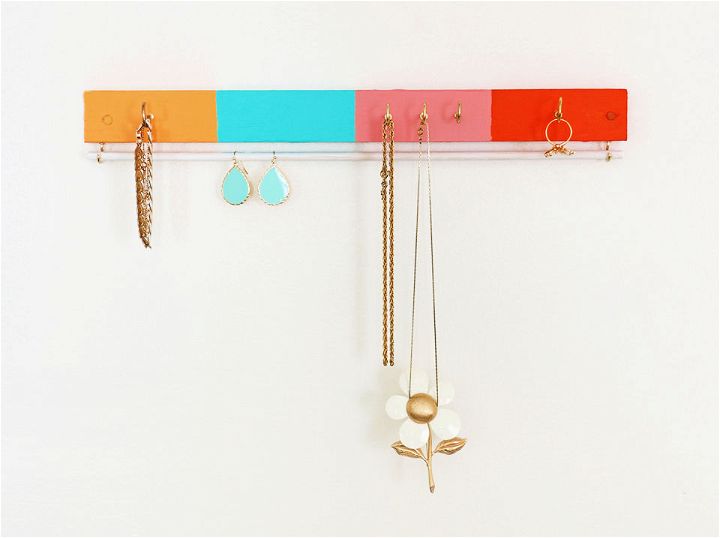
Organizing your jewelry has never been easier with this DIY jewelry holder! Perfect for displaying your favorite sparkles and baubles, the holder is made from a 16-inch-long piece of framing lumber, 16×¼ inch wood dowel, acrylic paint assortment and cup hooks.
Brighten any bedroom by hanging it on the wall in an eye-catching display. The colors are customizable to match perfectly with your style or existing decor. Make room for necklaces, rings, bracelets and earrings – no more digging through cluttered drawers or searching for that special trinket! Get organized today with this fun and easy DIY project. rentacenter
13. DIY Wall Mounted Jewelry Organizer
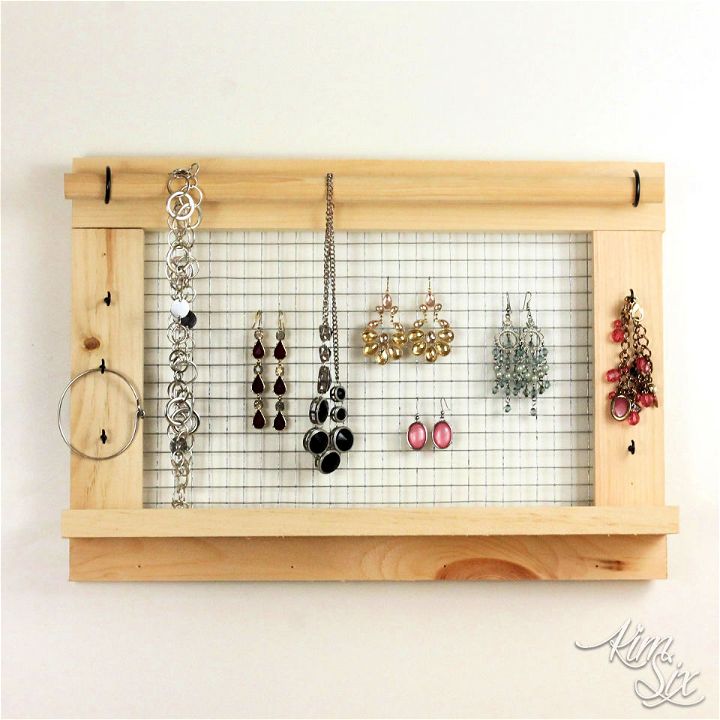
This wall-mounted DIY jewelry organizer is a great project for any level of DIYer. All you need to get started is 12″x17″ chicken wire or wire fencing, 1×2, ¼ inch lattice molding, ¾″ dowel and cup hooks.
This jewelry organizer will help keep your necklaces and bracelets organized while adding a touch of charm to any room in your home. Plus, it’s easy to customize with different colors and finishes – so it’ll be one-of-a-kind! Whether you’re just getting into woodworking or are an experienced craftsman, this DIY jewelry organizer makes a great weekend project. thekimsixfix
14. Making a Resin Jewelry Holder
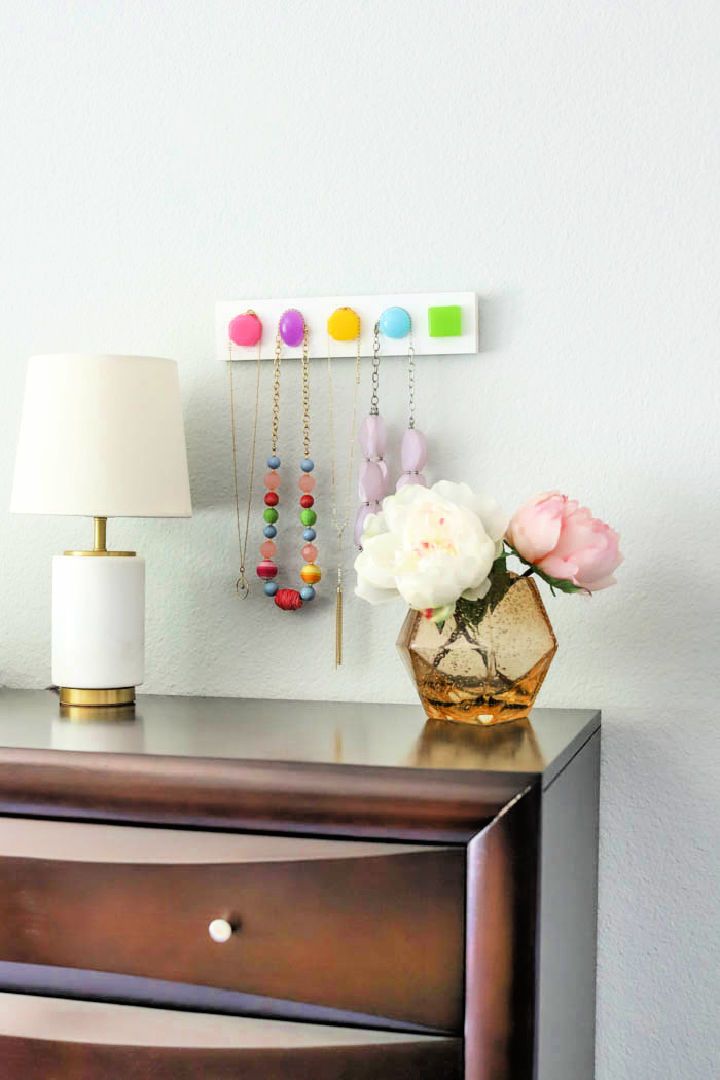
Arrange your jewelry and add a unique touch to your home decor with this DIY resin jewelry holder! Crafted using knob molds, acrylic paint, and easy cast clear-casting epoxy for an easy-to-follow process. The results? A personalized organizer that will store all of your favorite pieces in style.
Get creative and customize the molds with decorative shapes or colors – it’s fun and simple to make! The perfect way to save space while adding a beautiful accent piece to any room. Showcase your accessories in modern fashion with this custom-made DIY resin jewelry holder! resincraftsblog
15. Easy DIY Jewelry Holder
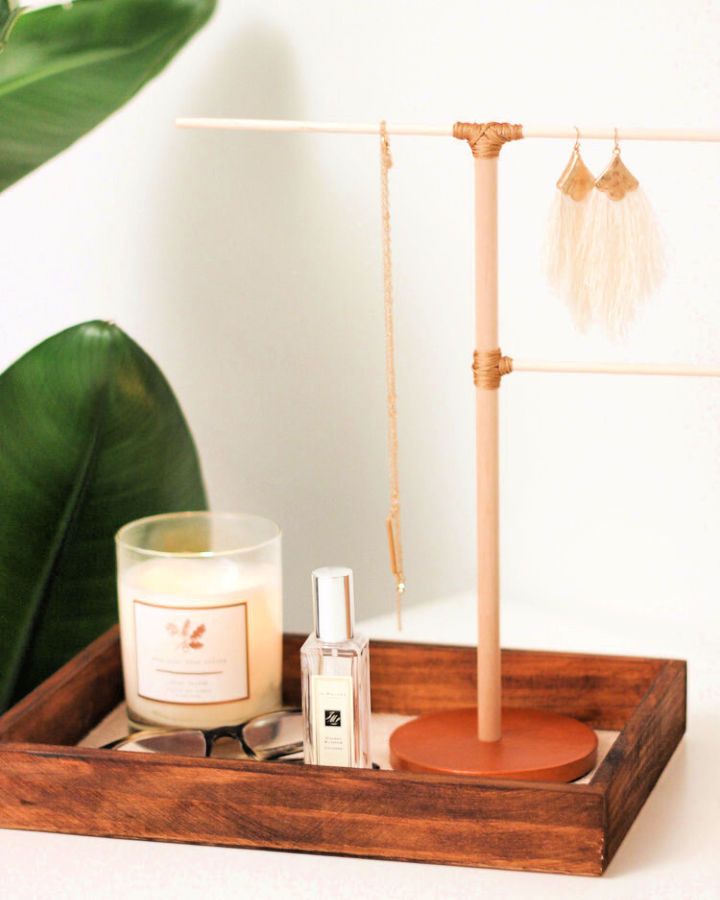
Are you looking for a unique and stylish way to store your jewelry? Look no further than this DIY jewelry holder! To make one, you only need wood dowels, paper mache circular ornament, embroidery thread, and acrylic paint. It only takes a few simple steps, and it’s very affordable. Its chic look is sure to fit in perfectly with any style. Get creative and have fun making the perfect accessory holder today! katiebookser
16. Cheap DIY Jewelry Organizer
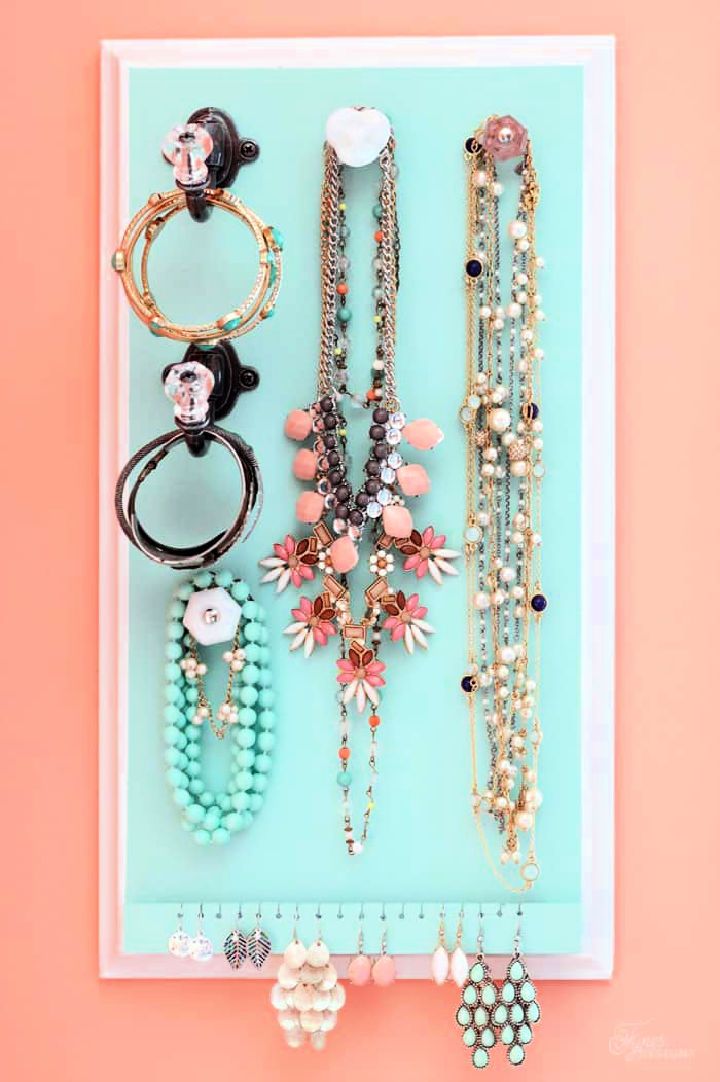
Organize and showcase your jewelry with these beautiful and easy diy jewelry display ideas. If you want an affordable and attractive way to organize your jewelry, here is this DIY jewelry organizer! You’ll only need a few easily found items, making this project easy to build. Plus, it’s perfect to fit the small bathroom space while providing the necessary organization. This simple design will elevate your organization and help keep your windowsill clutter-free. Make sure that your jewelry is stored safely with this diy jewelry organizer! fynesdesigns
17. DIY Cabinet Hardware Jewelry Organizer
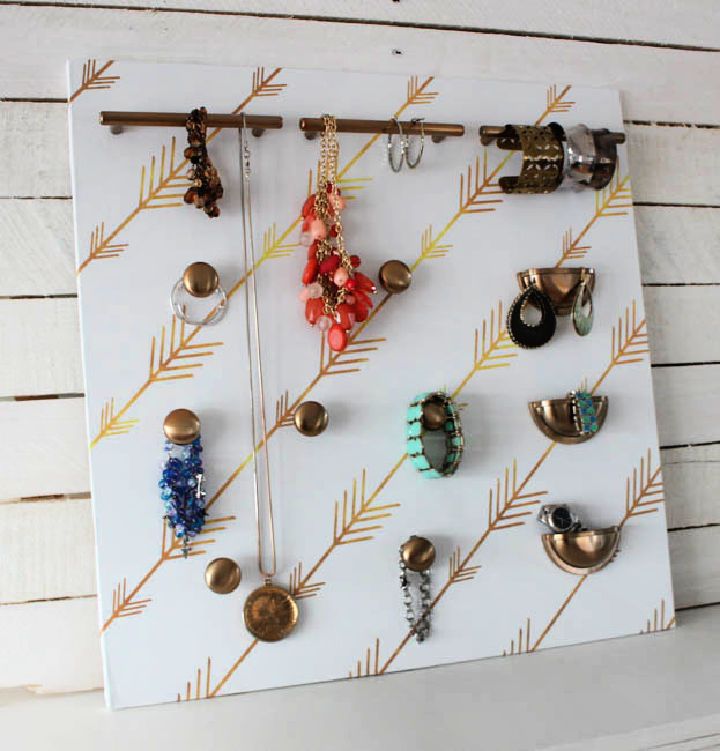
Make a unique and stylish jewelry organizer with just three types of cabinet hardware and a piece of ⅜″ mdf plywood! Use the stunning gold arrows wallpaper to add an extra touch of sophistication. This easy DIY cabinet hardware jewelry organizer is the perfect solution for storing your jewelry in style and ensuring it stays organized. It’s also easy to install – no tools or technical know-how required! This project lets you enjoy an on-trend look that impresses your friends. Get creative and make something special today! thehappyhousie
18. Simple and Easy Framed Earring Organizer
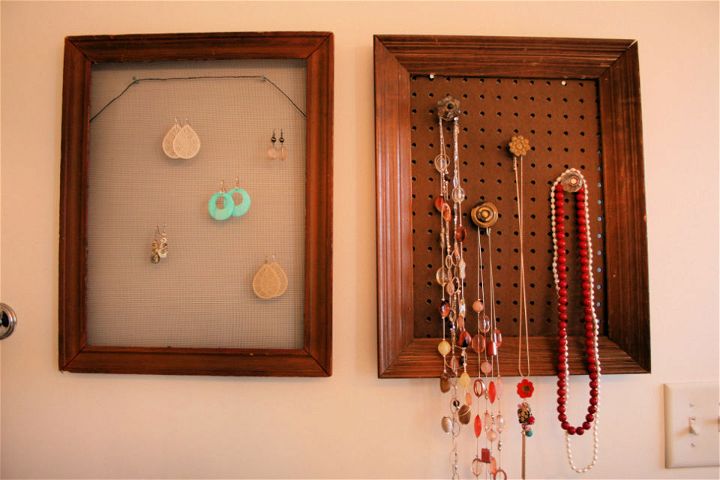
Make the perfect solution to your earring storage and organizing woes with this simple, easy-framed earring organizer! You only need an old, rust-free window screen and a back-less wooden frame. Transform these two thrift store items into a customized organizer that will keep your precious earrings in one place. No more searching for lost pieces or tangled jewelry!
This easy DIY project requires minimal supplies and takes only minutes to complete. Make this simple and easy framed earring organizer today; it will make life a little easier! dreamgreendiy
19. DIY Caticorn Necklace Holder
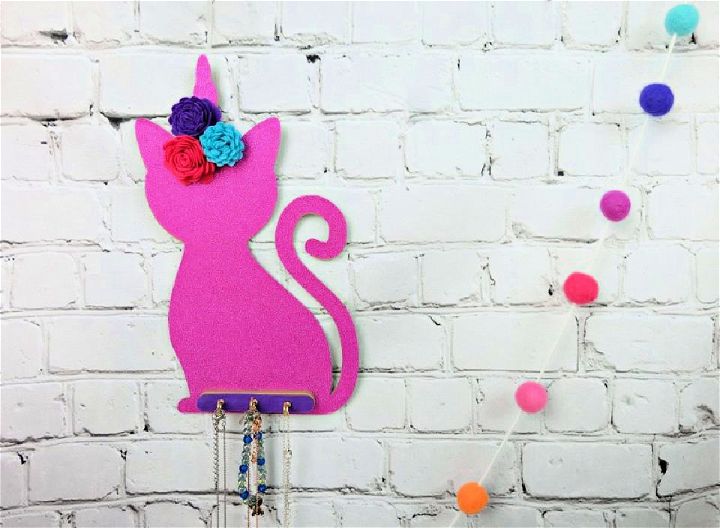
Make a fun and unique DIY caticorn necklace holder using your cricut maker! This creative project is perfect for kids or adults, making an original handmade gift for any occasion. In this easy-to-follow tutorial, learn how to cut chipboard, felt and vinyl with step-by-step instructions. Perfect for the crafty person in your life – make a one-of-a-kind caticorn necklace holder that everyone will love! Get crafting with this memorable DIY project today! hellocreativefamily
20. Clever DIY Earring Holder Ideas
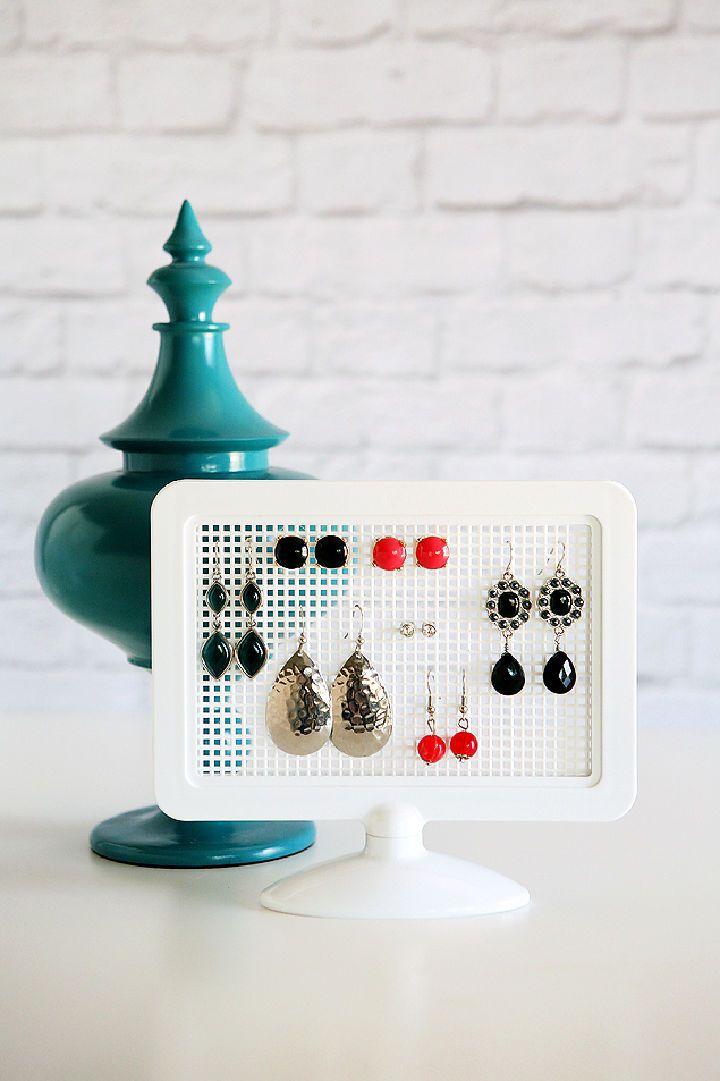
Put together a stylish earring holder in minutes with this easy and inexpensive DIY project! All you need is a plastic frame, canvas, and other craft supplies – all of which cost less than $3. Keep your favorite earrings organized and on display with this unique DIY earring holder.
It’s the perfect solution for jewelry lovers looking for an affordable way to store their bling without breaking the bank! Get creative by customizing it to fit your style – from colorful patterns to fancy lettering – there are endless possibilities when making this one-of-a-kind DIY accessory organizer. eighteen25
21. DIY Earring Organizer in Five Minutes
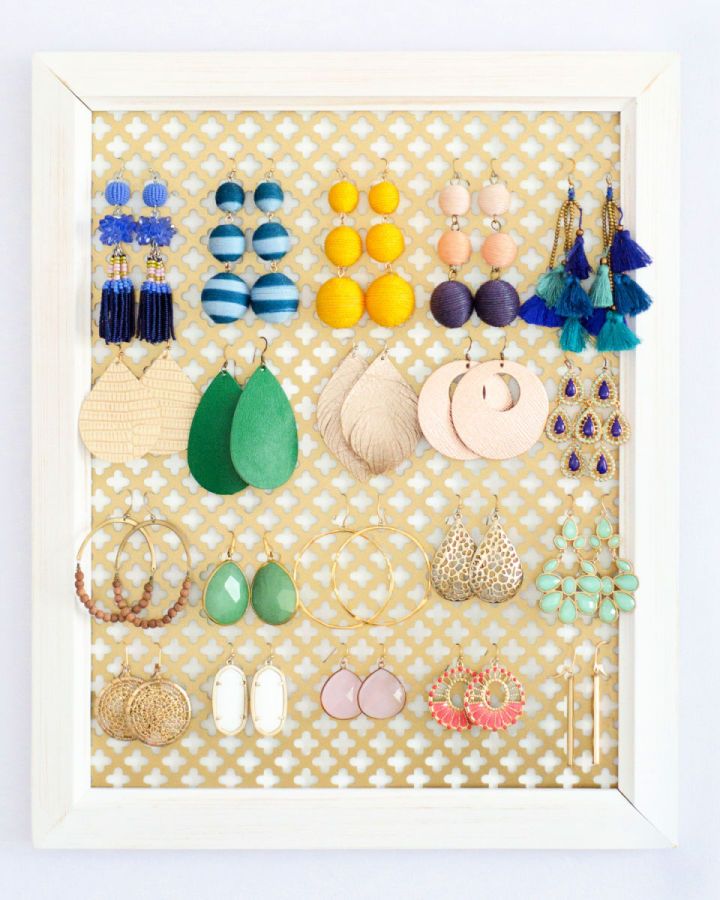
Take the hassle out of storing your earrings and keep them neat and tidy with this DIY earring organizer! All you need is a white picture frame, a cloverleaf aluminum sheet, and heavy-duty scissors – no special skills are required! This five-minute project makes the perfect starter activity for anyone new to DIY projects. The cloverleaf aluminum sheet creates small holes just the right size to hang even the tiniest earrings safely and securely. Make it part of your everyday routine to ensure you’ll never lose another pair of earrings again! thechroniclesofhome
22. How to Make Jewelry Holder
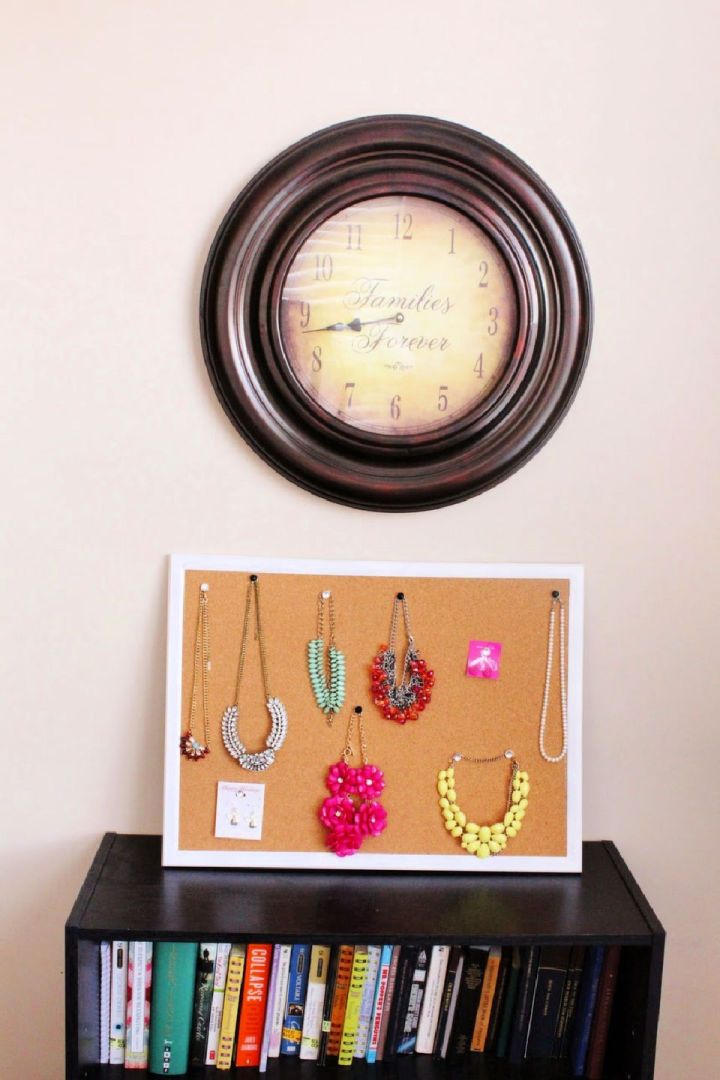
Bring your jewelry dreams to life with a unique and dazzling gem thumb tack jewelry holder crafted from a 23×17 cork board! You only need some computer paper, scrap paper to protect the ground while spray painting and krylon short cuts spray paint for a creative organizational solution. Easily store all your jewelry in one place while showing off your unique style! Get organized today with this crafty DIY project that will save you time and money. thehappyflammily
23. DIY Jewelry Holder from a Branch
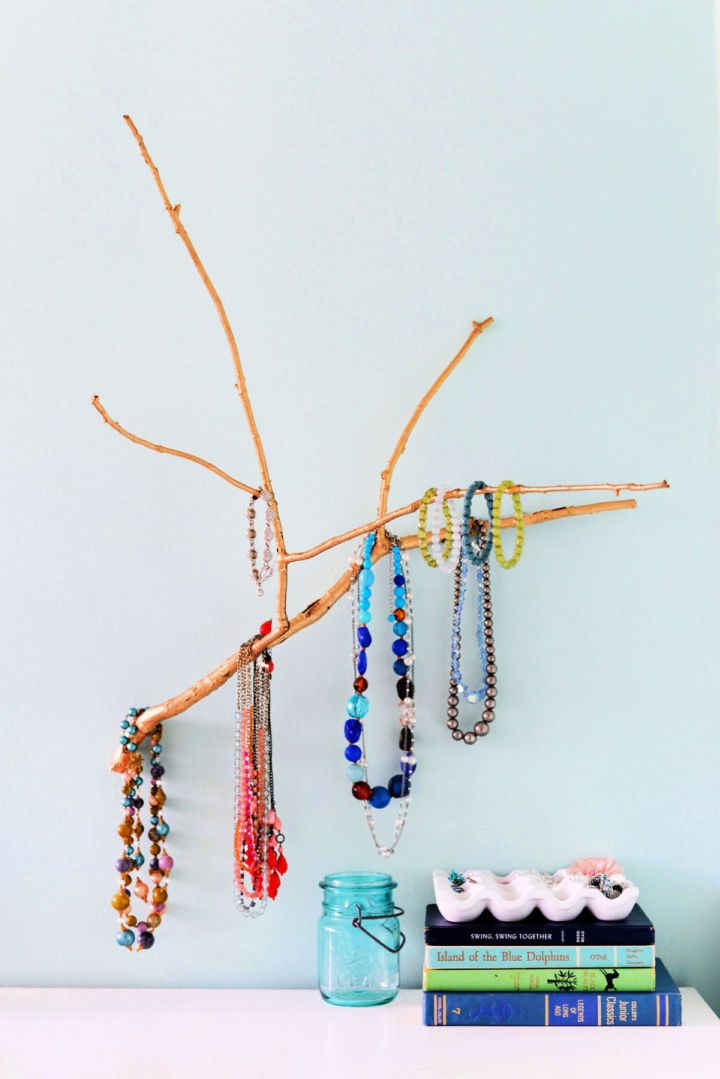
Save space and money with these diy jewelry display hacks that you can make at home. Get a beautiful and functional jewelry holder out of an ordinary branch! It’s easy, inexpensive, and adds extra glam to your space. After a nice hike in the woods, pick up a fallen branch and sand it down before spray painting it according to your style. Hang on the wall as is or customize with other decorative touches – either way, you’ll make one-of-a-kind storage that doubles as wall art. Get creative and make your DIY jewelry holder from a branch today! homedit
24. Make a Jewelry Holder with Knobs
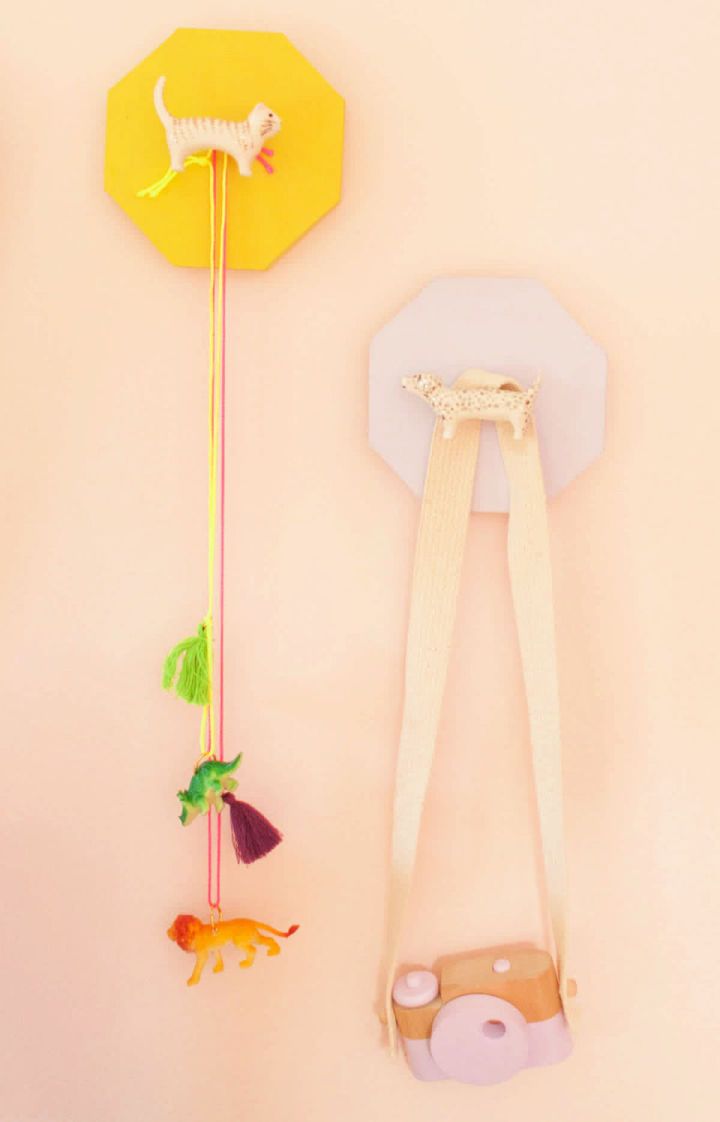
Transform any wall into a stylish jewelry display with this DIY jewelry holder! Crafted from a 1 x 10 pine board, it displays necklaces and other jewelry pieces. To make it even more special, decorate the holder with anthropologie knobs – they come in different shapes and sizes, so you can customize the design to fit your home décor. Use a picture hanging bracket to mount the finished product onto your wall for easy hanging. Get creative and make your unique piece of art today! laybabylay
25. DIY Ring Earring Jewelry Organizer
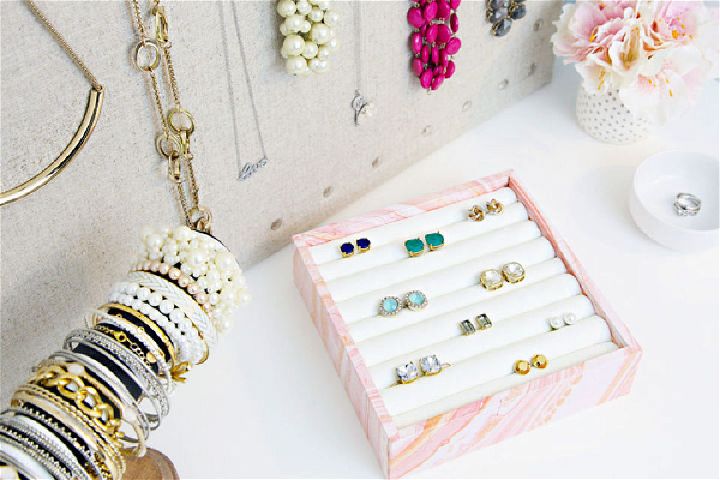
Say goodbye to cluttered jewelry boxes and hello to an effortless organization with this DIY ring and earring jewelry organizer! This easy-to-assemble organizer requires just a few simple supplies such as dowels, felt, an unfinished wood box, gift wrap, and fabric to make the perfect place to store all your earrings in one convenient location. Get organized today with this affordable solution – start crafting now! iheartorganizing
26. Easy DIY Wall Jewelry Organizer
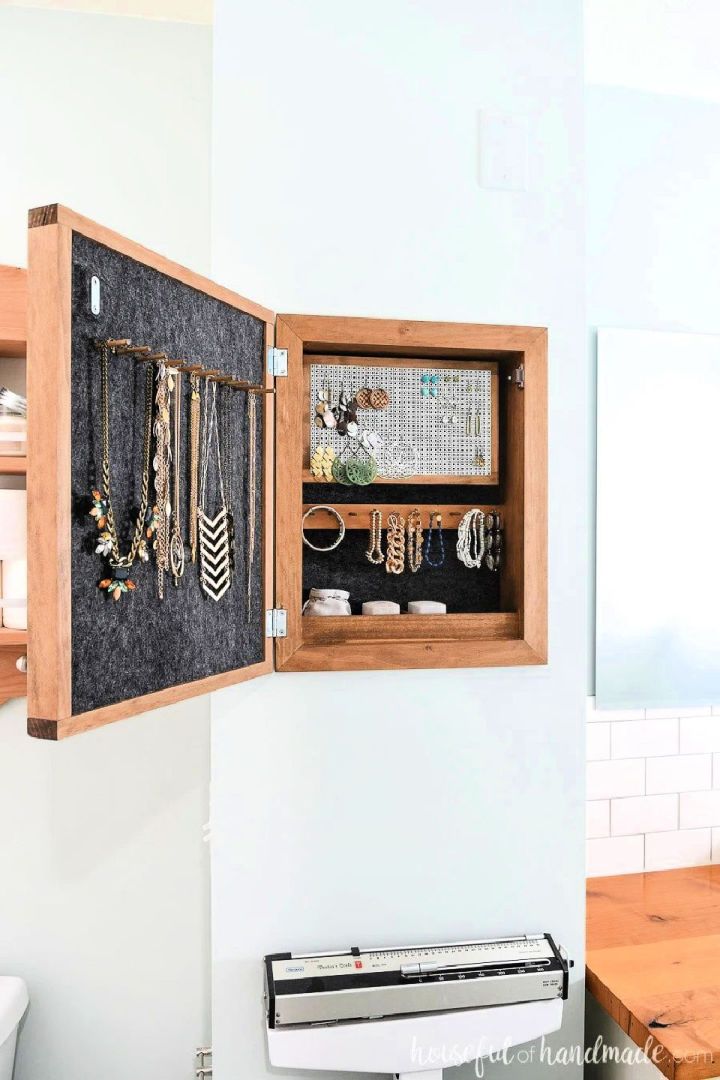
Add style and storage to any room with this one-of-a-kind DIY wall jewelry organizer. Build your beautiful wood sign that can be customized to fit any design or look. This fun weekend project will make a great gift or add the perfect accent piece to your house. Keep your favorite accessories organized and out of sight while showing off your unique style! With simple instructions, anyone can make their own DIY wall jewelry organizer in no time. housefulofhand
27. Building a Jewelry Display
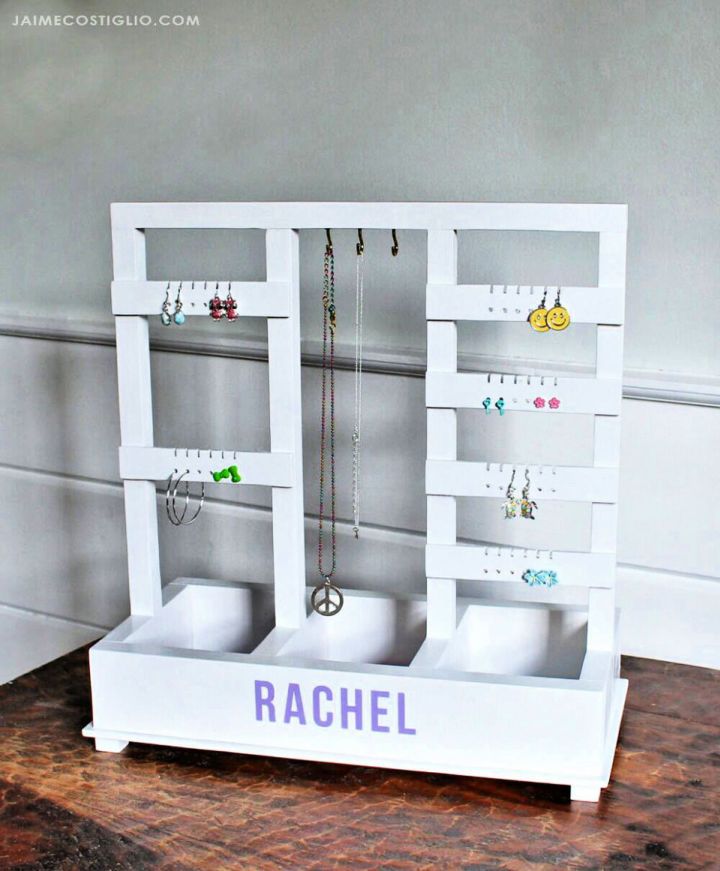
Add some charm and personality to your jewelry collection with this diy jewelry storage. Make your jewelry collection look stylish and organized with this free DIY wood jewelry holder tutorial. Easily created with just a few tools and scrap wood, this stand is perfect for hanging necklaces and earrings, plus it has a tray underneath to hold rings and other accessories. Try this simple but beautiful project today – you won’t regret it! Save money while staying on-trend with this unique jewelry holder. ana white
28. Recycled Silverware Tray Jewelry Organizer
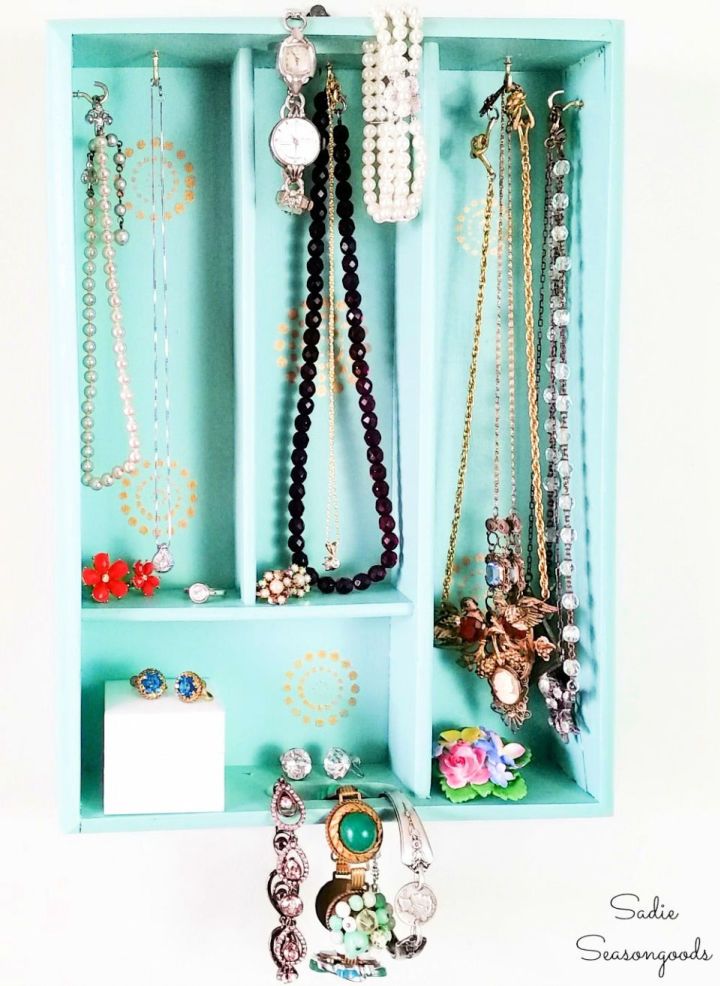
Turn a silverware tray into an eye-catching jewelry organizer with zero cost. This DIY boho storage solution is perfect for keeping your beloved baubles neat and in one place. Plus, it makes a great gift idea for any jewelry lover who appreciates the effort that goes into making something special. Get started today and enjoy this unique way to store all your favorite pieces! sadieseasongoods
29. How to Make Jewelry Organizer – Step by Step
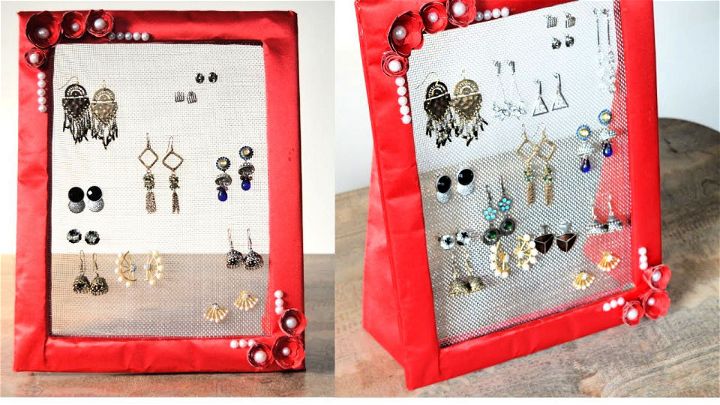
Discover the best way to make a unique and stylish jewelry organizer at home with this DIY jewelry holder tutorial. This easy-to-follow guide will show you how to upcycle some cardboard, fabric, and net into a beautiful earring holder that helps you keep your favorite pieces organized. Learn how to get creative with this do-it-yourself project and make something gorgeous and functional in no time – perfect for decluttering any room while giving it a glorious touch! Get started on your masterpiece today.
30. Making Jewelry Holder at Home
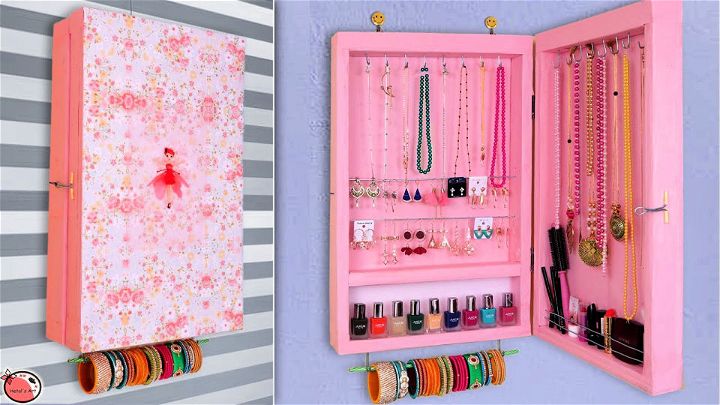
Make your jewelry cabinet and store your favorite pieces in one place with a DIY holder! Save money and craft a thoughtful handmade gift. Quick, easy to make, and satisfying – this project is perfect for anyone looking for a DIY challenge that won’t break the bank. Get creative with colors and materials to make something uniquely you’ll be proud of! Keep your jewelry easily accessible at home with an affordable custom-made jewelry cabinet.
Conclusion:
Making your own jewelry organizer is a fun and creative way to store and display your precious accessories. You can use various materials and techniques to create a unique and personalized holder that suits your style and needs. Whether you need a simple jewelry box, a wall-mounted organizer, or a decorative stand, you can find plenty of DIY jewelry holder ideas above. You can also customize your organizer with paint, paper, fabric, or other embellishments to make it more attractive and functional.
A DIY jewelry organizer is not only a practical solution to keep your jewelry untangled and organized, but also a great way to express your personality and creativity. It can also be a wonderful gift for someone who loves jewelry as much as you do. So, what are you waiting for? Grab your tools and materials and start making your own DIY jewelry holder today! You will be amazed by the results and enjoy your jewelry collection even more.

