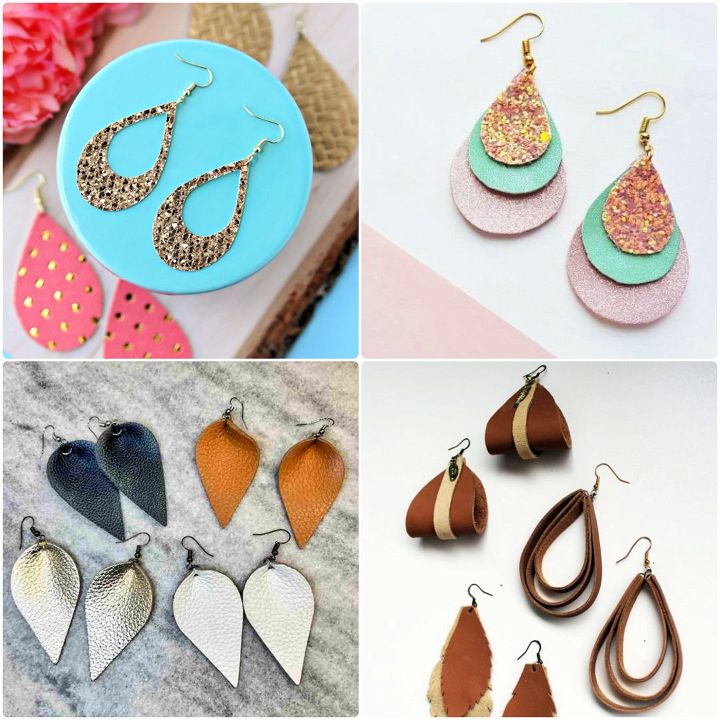
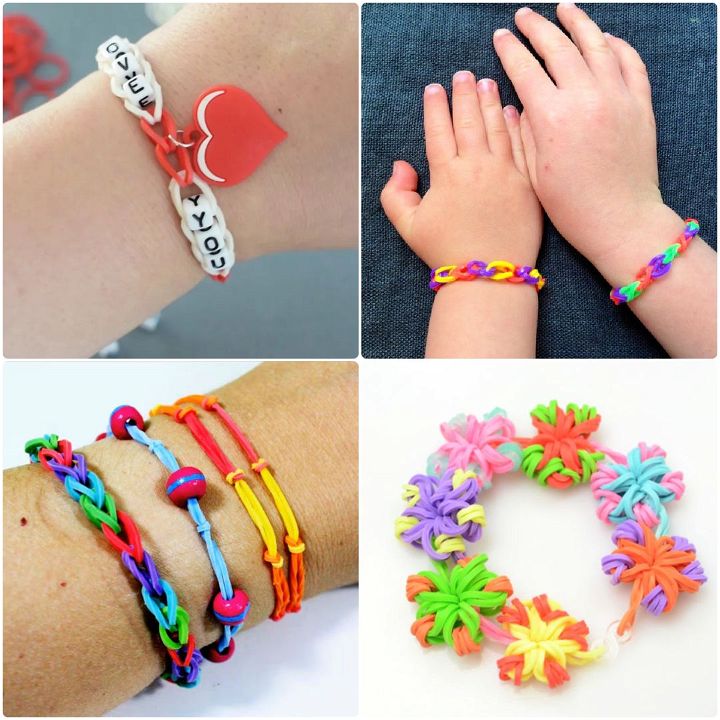
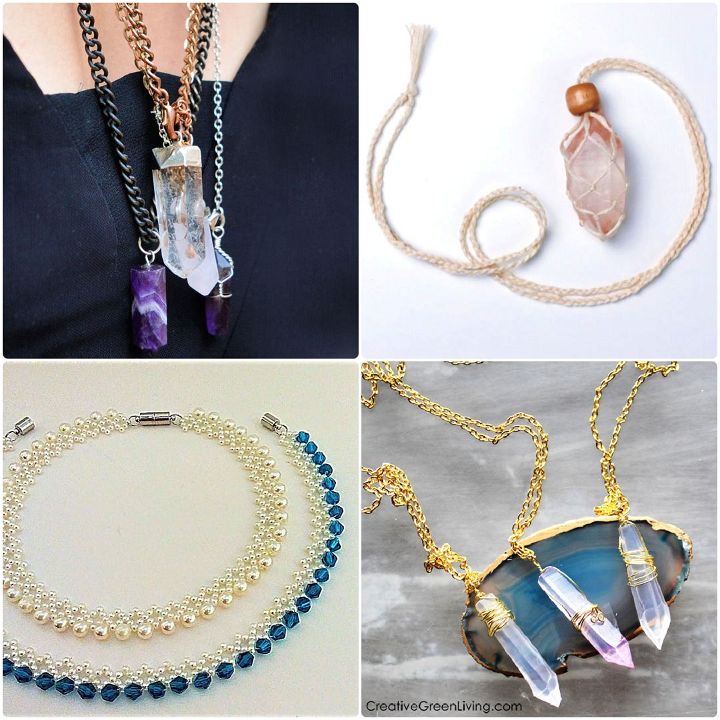
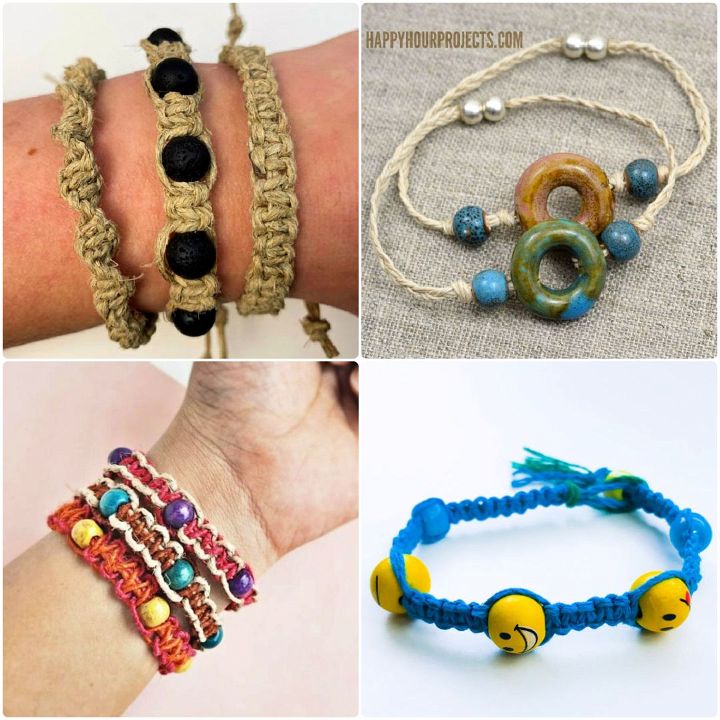
DIY jewelry making is a creative and fun activity. Learn how to make jewelry with these 25 cheap and easy DIY jewelry ideas for beginners. They will show you how to craft stunning accessories at home with simple and clear instructions, as well as the materials and supplies you need for each project.
You can find DIY jewelry ideas for different levels of difficulty and styles in our list. For example, you can make a beautiful DIY paper disk bracelet with ease or challenge yourself with the intricate floral hoop earrings. You can also choose from elegant projects like the glass cabochon bracelet with pearl beads or the handmade geometric tassel earrings, or personalize your jewelry with the DIY crescent moon necklace and embroidered copper bracelet.
Moreover, these DIY jewelry ideas suit various tastes and preferences. If you like the boho vibe, you can try the unique DIY macrame jewelry or the DIY lava stone necklace. Or, you can go for the painted wood bangle bracelets and the wire wrap pearl flower bracelet to complement your bohemian style.
If you prefer minimalistic and Scandinavian designs, you can craft a Scandinavian hoop necklace or wire-wrapped ring. Meanwhile, if you want to make a bold statement, you can create the daisy statement necklace or wire hand necklace jewelry.
From easy tassel earrings tutorial to colorful DIY marbled bangles, each DIY jewelry idea offers a fun and rewarding crafting experience. With these 25 easy DIY jewelry ideas, you can make your own personalized jewelry pieces at home. They will not only enhance your accessory collection, but they will also make thoughtful, handmade gifts for your friends and family. Let these DIY jewelry ideas spark your creativity and motivate you to start making your own unique jewelry pieces today.
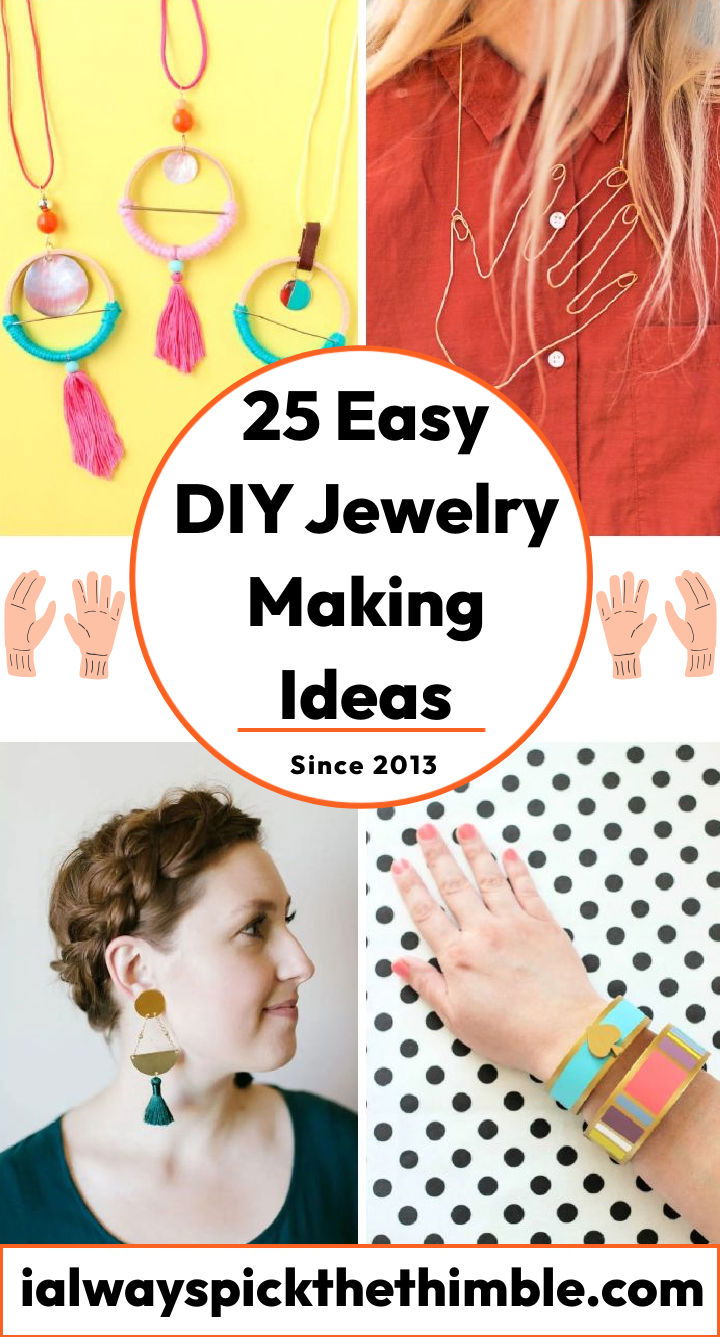
DIY Jewelry Making Ideas for Beginners
DIY jewelry making is a fun and creative hobby that allows you to express your personality and style. You can make your own unique pieces of jewelry using various materials, techniques, and designs. However, DIY jewelry making can also be challenging for beginners who may need help knowing where to start or how to avoid common mistakes. That’s why I have prepared this guide for you, which will cover the following topics:
Basics of DIY Jewelry Making
Discover the must-have tools and materials to kickstart your DIY jewelry making journey. Get ready to make stunning accessories with this essential guide.
- Pliers: These are used to bend, cut, and shape wires and metal components. You will need different types of pliers, such as round nose, chain nose, flat nose, and wire cutters.
- Beading board: This is a flat surface with grooves and measurements that help you lay out your beads and plan your design.
- Beading needle: This is a thin and flexible needle that helps you thread beads onto stringing materials.
- Scissors: These are used to cut stringing materials, such as thread, wire, cord, or chain.
- Jewelry glue: This is used to secure knots, clasps, and other components.
Some of the common materials for jewelry making are:
Discover the most common materials used for making stunning jewelry pieces.
- Beads: These are the main elements of your jewelry. You can choose from a variety of shapes, sizes, colors, and materials, such as glass, wood, metal, stone, or plastic.
- Findings: These are the metal components that connect your beads and form the structure of your jewelry. Some examples are clasps, jump rings, head pins, eye pins, crimps, and ear wires.
- Stringing materials: These are the materials that hold your beads together. Some examples are thread, wire, cord, chain, or elastic.
Choosing the Right Materials for DIY Jewelry
Discover the perfect materials for your DIY jewelry project with our helpful guide. Make homemade jewelry making a breeze! There are a few factors to consider when selecting your materials:
- Style: You should choose materials that match your personal style and the occasion you want to wear your jewelry for. For example, if you want a casual and bohemian look, you can use natural materials like wood or stone beads. If you want a more elegant and sophisticated look, you can use shiny materials like glass or metal beads.
- Color: You should choose colors that complement each other and create a harmonious effect. You can use a color wheel to help you find colors that are analogous (next to each other), complementary (opposite each other), or triadic (equally spaced) on the wheel. You can also use neutral colors like black, white, or gray to balance out bright colors.
- Size: You should choose beads that are proportional to each other and to your body size. For example, if you have a small frame, you can use smaller beads to avoid overwhelming your appearance. If you have a larger frame, you can use larger beads to create more impact. You should also consider the length and width of your jewelry piece and how it will fit your neck, wrist, or ear.
Avoiding Common Mistakes
Learn how to avoid common mistakes when making DIY jewelry as a beginner. Some of the mistakes are:
- Using poor quality materials: You should avoid using cheap or damaged materials that may break easily or cause irritation to your skin. You should also check the quality of your findings and make sure they are not tarnished or bent.
- Using too much glue: You should use glue sparingly and only where necessary. Too much glue can make your jewelry look messy and unprofessional. It can also weaken your knots and cause your beads to slip off.
- Not securing your knots: You should always secure your knots with glue or crimp beads to prevent them from unraveling. You should also trim any excess stringing material close to the knot to avoid snagging or poking.
- Not measuring your jewelry: You should always measure your jewelry before finishing it to make sure it fits you properly. You can use a tape measure or a ruler to measure the length of your necklace or bracelet. You can also try on your jewelry and adjust it as needed.
Understanding Homemade Jewelry-Making Techniques
Discover various techniques for making DIY jewelry with this informative guide. Some of the techniques are:
- Stringing: This is the simplest technique that involves threading beads onto a stringing material and attaching a clasp at both ends. You can create different patterns and designs by varying the type, color, and arrangement of your beads.
- Wire wrapping: This is a technique that involves wrapping wire around beads or other components to create loops, links, or shapes. You can use wire wrapping to create pendants, earrings, rings, or charms.
- Bead weaving: This is a technique that involves weaving beads together using a needle and thread. You can create intricate patterns and shapes by using different stitches and techniques.
- Macrame: This is a technique that involves knotting cords or threads together to create patterns and textures. You can use macramé to create bracelets, necklaces, or earrings.
Training to Guide Beginners Start Making Jewelry
Discover beginner-friendly training programs to master the art of crafting DIY jewelry from scratch. Dive into the basics and unleash your creativity today. Some of the training programs are:
- Online courses: These are courses that you can take online at your own pace and convenience. You can find online courses on various platforms, such as YouTube, Udemy, Skillshare, or Craftsy. You can learn from experts and follow step-by-step instructions and videos.
- Books: These are books that you can buy or borrow from a library or a bookstore. You can find books on different topics and levels of difficulty, such as jewelry making for beginners, jewelry making techniques, or jewelry making projects. You can learn from illustrations and diagrams and practice your skills.
- Workshops: These are workshops that you can attend in person or online. You can find workshops on different websites, such as Eventbrite, Meetup, or Airbnb. You can learn from instructors and interact with other learners. You can also get feedback and tips from others.
DIY Jewelry-Making Tips for Beginners
Discover expert tips for beginners on getting started with DIY jewelry making. Make unique and stunning jewelry with step-by-step guidance and unleash your creativity! Some of the tips are:
- Start with simple projects: You should start with simple projects that require minimal tools and materials and use basic techniques. This will help you build your confidence and skills and avoid frustration and disappointment.
- Experiment with different materials and techniques: You should experiment with different materials and techniques to find what suits you best and what inspires you. You can mix and match different colors, shapes, and textures to create your own style and expression.
- Have fun and be creative: You should have fun and be creative with your DIY jewelry making. You can use your imagination and try new things. You can also personalize your jewelry by adding charms, initials, or symbols that have meaning for you.
Solutions to Common Problems When Making DIY Jewelry
Learn about the common challenges beginners encounter in DIY jewelry making and discover effective solutions. Enhance your skills and make stunning handmade jewelry with ease. Some of the problems are:
- Your beads are falling off your stringing material: This may happen if your stringing material is too thin or too slippery for your beads. You can solve this by using a thicker or rougher stringing material, such as nylon thread or leather cord. You can also use crimp beads or knots to secure your beads in place.
- Your wire is breaking or kinking: This may happen if your wire is too thin or too soft for your project. You can solve this by using a thicker or harder wire, such as 20-gauge or 18-gauge wire. You can also use nylon-coated wire or memory wire to prevent kinking.
- Your jewelry is tarnishing or rusting: This may happen if your jewelry is exposed to moisture, air, or chemicals. You can solve this by storing your jewelry in a dry and cool place, such as a ziplock bag or a jewelry box. You can also use anti-tarnish strips or pads to protect your jewelry. You can also clean your jewelry regularly with a soft cloth or a jewelry cleaner.
What You Need to Know About Jewelry Making
Learn the key things to know before embarking on a DIY jewelry project. Get expert tips and insights to ensure a successful and enjoyable jewelry making experience. Some of the tips are:
- The terminology of jewelry making: You should familiarize yourself with the terminology of jewelry making, such as the names and functions of different tools, materials, findings, and techniques. This will help you understand instructions and communicate with other jewelry makers.
- The safety precautions of jewelry making: You should follow the safety precautions of jewelry making, such as wearing protective gloves, goggles, and apron when working with sharp tools, wires, or chemicals. You should also work in a well-ventilated area and keep children and pets away from your work area.
- The legal aspects of jewelry making: You should be aware of the legal aspects of jewelry making, such as the intellectual property rights, trademarks, and copyrights of your designs and materials. You should also respect the ethical standards and cultural sensitivities of your sources and customers.
Why Make Your Own Jewelry?
Discover the benefits of crafting your own jewelry and unleash your creativity with personalized designs. Dive into the world of DIY jewelry making and explore the satisfaction of wearing unique pieces that reflect your style and personality. Some of the reasons are:
- It is rewarding: Making your own jewelry is satisfying because you can make something unique and beautiful that reflects your personality and taste. You can also feel proud of your accomplishment and enjoy the compliments you receive from others.
- It is relaxing: Making your own jewelry is relaxing because you can focus on the process and forget about your worries and stress. You can also express your emotions and feelings through your creativity and artistry.
- It is economical: Making your own jewelry is economical because you can save money by using materials you already have or buying them at low prices. You can also make gifts for your friends and family that are more meaningful and personal than store-bought ones.
How to Choose the Right DIY Jewelry Design
Learn valuable tips for selecting the perfect design for your DIY jewelry project. Make your personalized accessories stand out with style and creativity. Some of the tips are:
- Find inspiration: You can find inspiration from our list of 25 easy DIY jewelry making ideas below. You can also look at nature, art, architecture, or fashion for ideas. You can use a notebook or a digital tool to collect and organize your inspiration.
- Sketch your design: You can sketch your design on paper or on a computer program to visualize your idea and plan your layout. You can use a pencil, a pen, or a marker to draw your design. You can also use colors, symbols, or notes to add details and annotations.
- Test your design: You can test your design by making a prototype or a mock-up of your jewelry piece. You can use inexpensive materials, such as beads, wire, or thread, to create a sample of your design. You can then try on your prototype and see how it looks and feels. You can also ask for feedback from others and make adjustments as needed.
I hope this guide has helped you learn more about DIY jewelry making and how to get started with your own project. I wish you all the best, and have fun with your creativity! 😊
Explore DIY Jewelry Ideas
Find these 25 amazing DIY jewelry ideas. Get inspired and make stunning homemade jewelry to add a personal touch to your style:
1. Easy DIY Paper Disk Bracelet
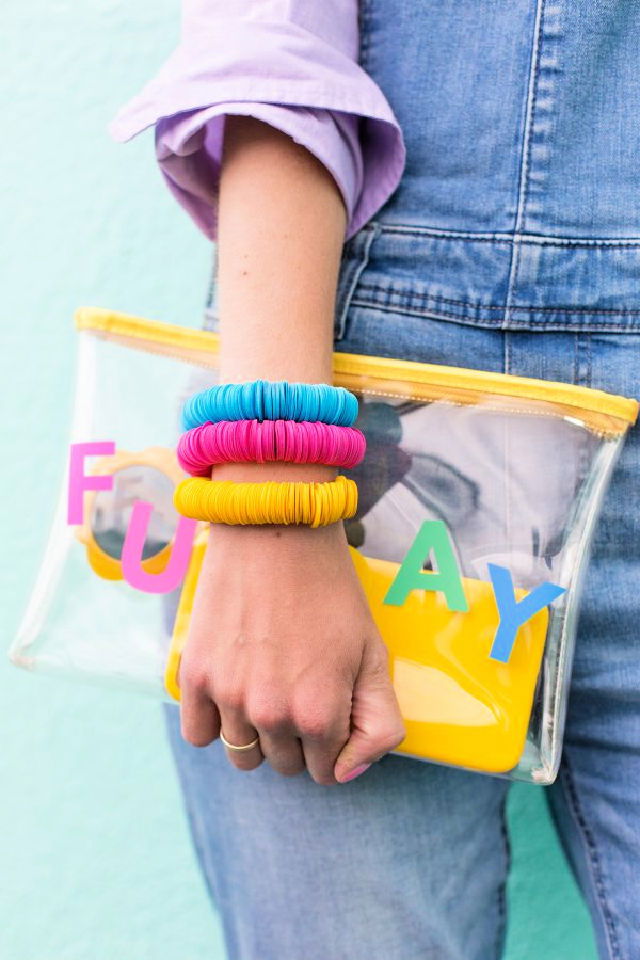
Vibrantly craft stylish and colorful DIY paper disk bracelets with this easy tutorial! You only need cardstock in various colors, a ¾″ circle punch, a mini hole punch or paper-cutting machine, and scissors. In only one hour, fashion these fun accessories that are perfect for adding an exotic flair to your ensemble. Let your creativity shine with the help of this quick but creative DIY jewelry craft project; make unique DIY pieces that will add vibrancy to your wardrobe! studiodiy
2. Floral Hoop Earrings Design
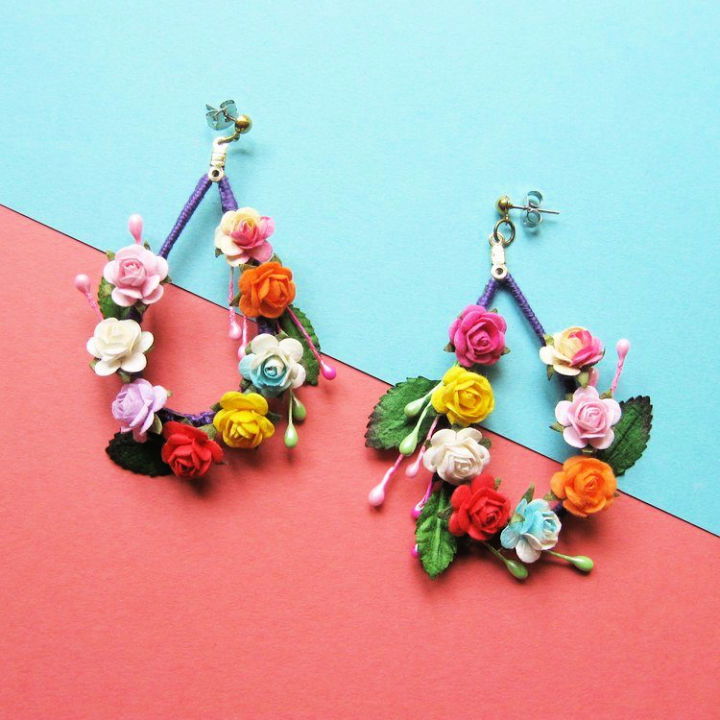
Great DIY hoop earrings are now within reach! With this tutorial, you can craft stunning floral hoop earrings with just a few supplies. Gather #10 crochet thread, mulberry paper flowers and leaves, faux flower stamens, earring hoops (approximately 1×2 inches or 2.5x5cm), ear studs or hooks, jump rings, fray check or clear fabric glue, jewelry pliers and wire cutters for the job. Though putting together may be fiddly, your efforts will be rewarded with stunning results.
Get started by tying the crochet thread around the hoop securely, and then layer on all of your decorative accents to make an artful design. Put in that extra effort for extraordinary bloom-bedecked beauties! howdidyoumake
3. Pretty DIY Tassel Necklace
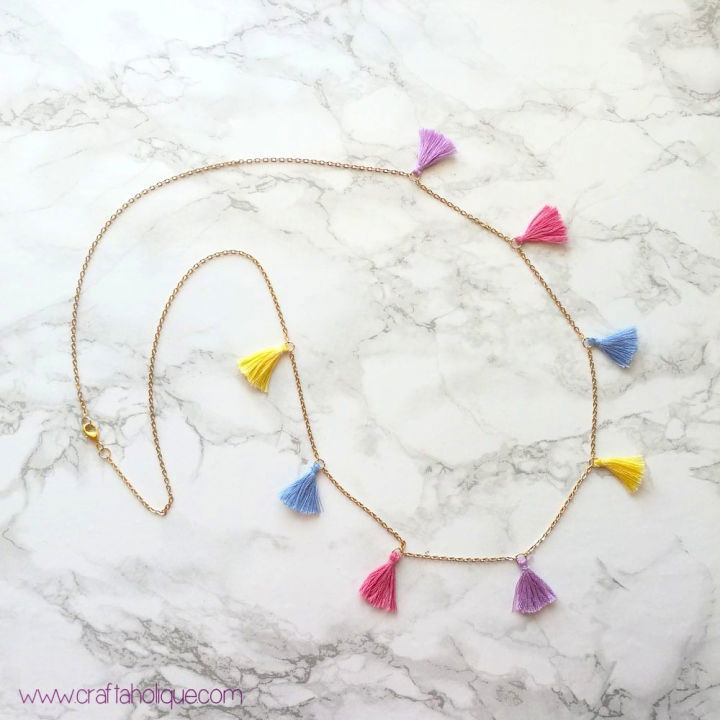
Make a delightful and summery tassel necklace with this easy-to-follow tutorial. Gather the necessary materials, including trace/curb chain, lobster clasp, jump rings (6mm or larger), embroidery thread in mixed colors, and jewelry making tools. Follow the step-by-step instructions to assemble the necklace with colorful mini tassels for your stylish casual look this summer! craftaholique
4. Daisy Earring Making Idea
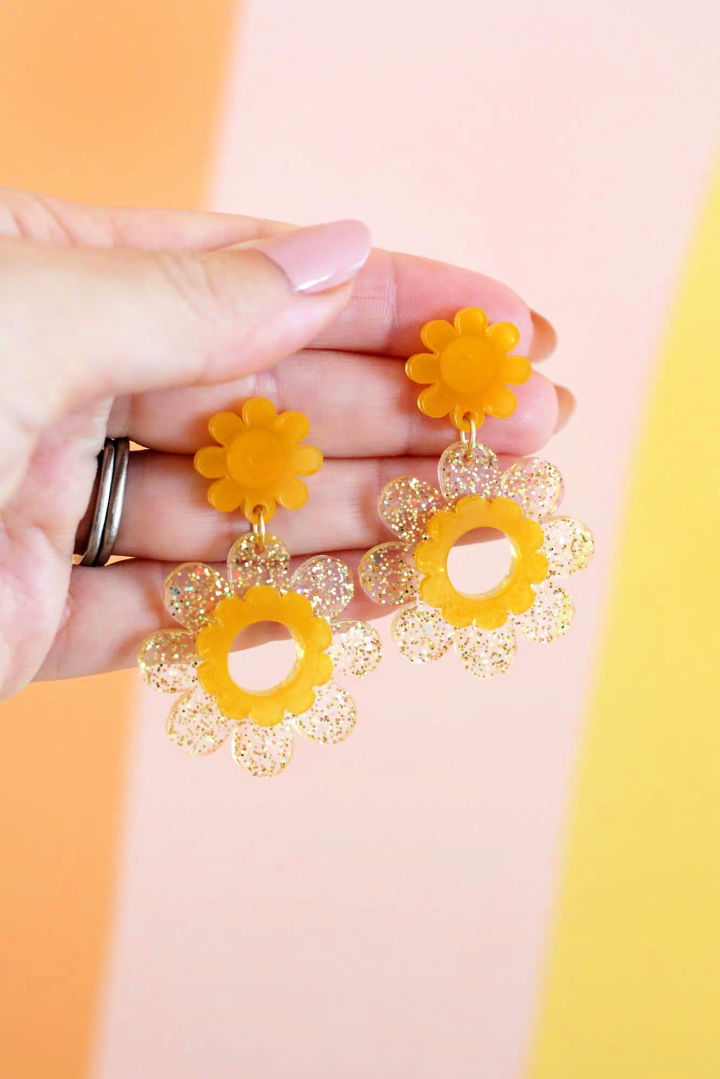
Effortlessly adorn yourself with handmade beauty! Make your unique daisy earrings with this DIY tutorial. Gather all the necessary supplies, including an epoxy resin kit, a daisy mold, acrylic paint in preferred colors, small glitter, jump rings (6mm size), pliers to assemble the pieces, and super glue if needed.
The step-by-step instructions will guide you through mixing and pouring the epoxy before adding paint and sparkle for that extra shine. Finally, attach jump rings and stud posts to complete your customized daisy earrings – perfect for any casual or special occasion. Accessorize with confidence, knowing that you made them! abeautifulmess
5. Glass Cabochon Bracelet With Pearl Beads
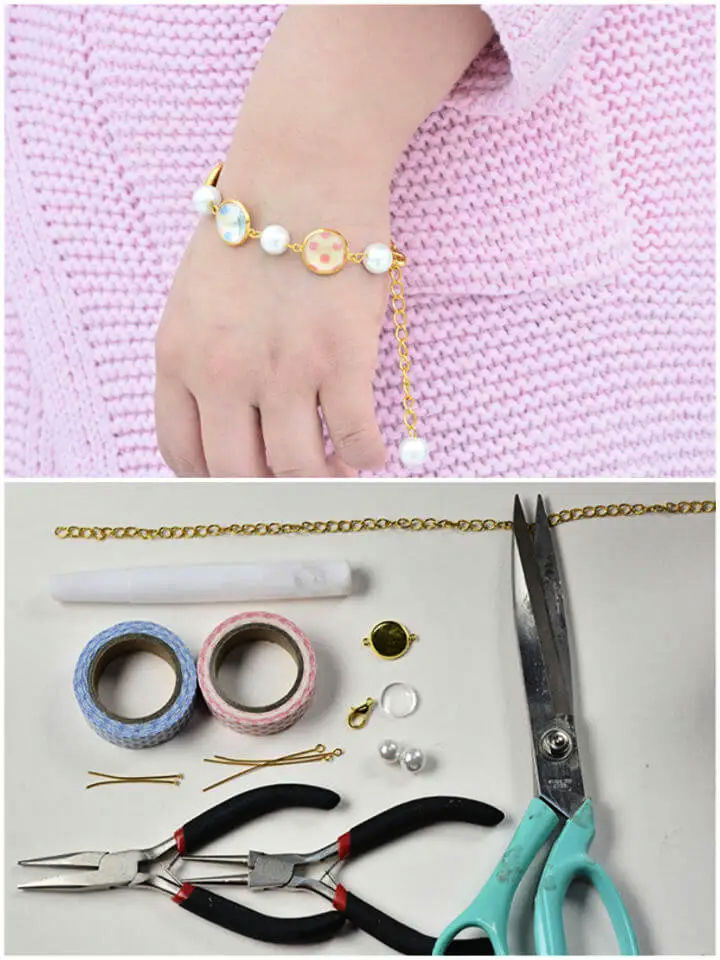
Embark on an extraordinary journey of makinga gorgeous glass cabochon bracelet with pearl beads! Gather all essential materials, including iron twist chain, pink and light blue scrapbook paper adhesive tapes, white round pearl beads, dome clear glass cover and golden brass cabochon sets, headpins, eye pins, chain nose pliers, round nose pliers, white glue gun. Follow the detailed tutorial step-by-step to assemble this elegant handmade jewelry piece. Once completed, you can flaunt your fashionable bracelet with friends or family! lcpandahall
6. Handmade Geometric Tassel Earrings
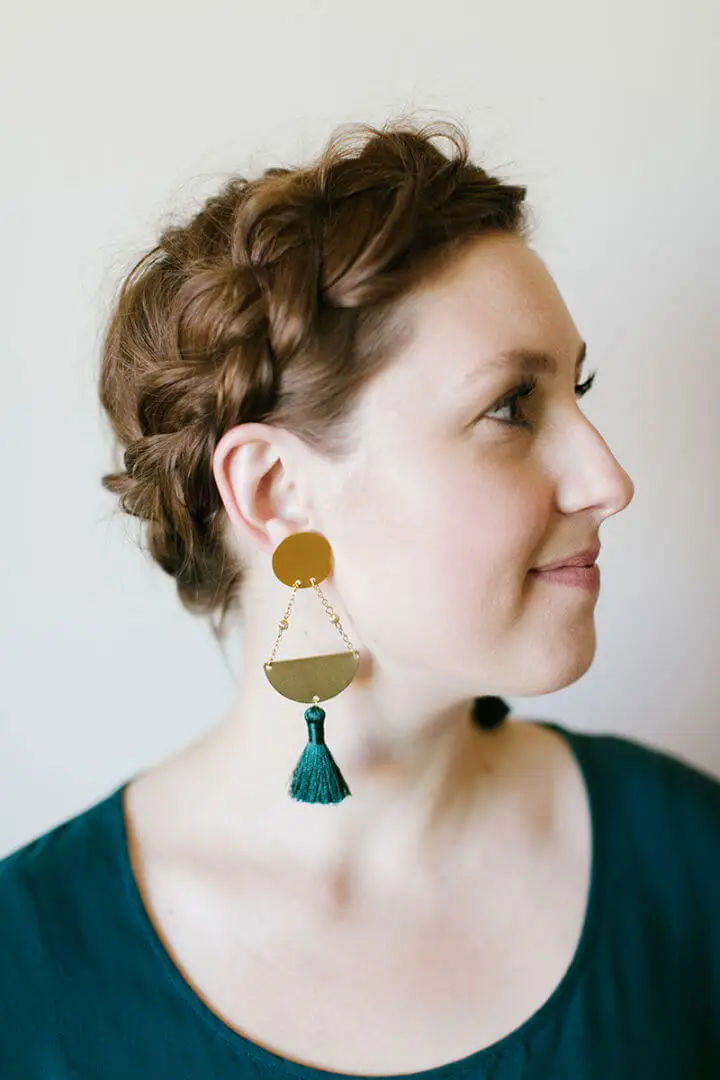
Creative DIYers, unleash your creative prowess and craft stunningly chic tassel earrings with this easy tutorial! All you’ll need is e6000 adhesive, flat-back earring posts with backs, brass circle charms, half-moon charms, jump rings, beads, eye pins, and chains. Plus, some needle-nose pliers and 30 minutes of your time. Follow the step-by-step instructions to assemble your earrings – makingfinished loops and attaching the charms, tassels, and chains. You’ll have a professionally made pair of statement earrings that will turn heads quickly! jojotastic
7. How to Make Braided Jewelry
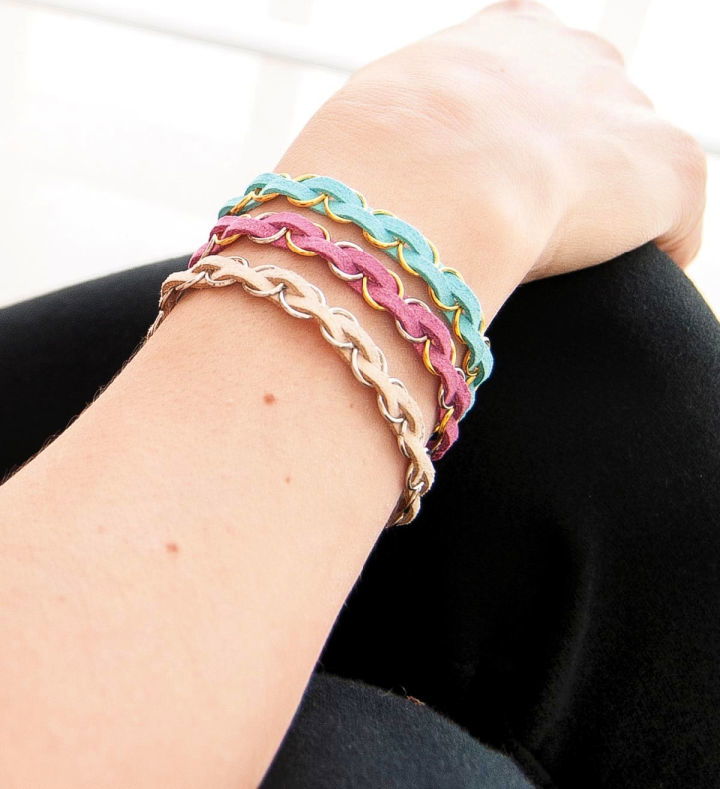
These jewelry making ideas will help you make stunning pieces that you can wear or gift. Put together your own effortless and adaptable braided leather bracelets with this DIY tutorial! Assemble the required supplies, which include strands of leather cord, a lobster clasp, jump rings, and cord crimp ends. These comprehensive step-by-step instructions will guide you through how to braid the cords, attach the jump rings, and secure everything with the clasp closure.
Not only are these bracelets quick to make, but they’re also ideal for crafting with children or makingfriendship bonds. Personalize each piece by using different colors and metallic accents – unleash your creativity while having fun making stylish braided bracelets! thecraftingnook
8. Make Beaded Hoop Earrings
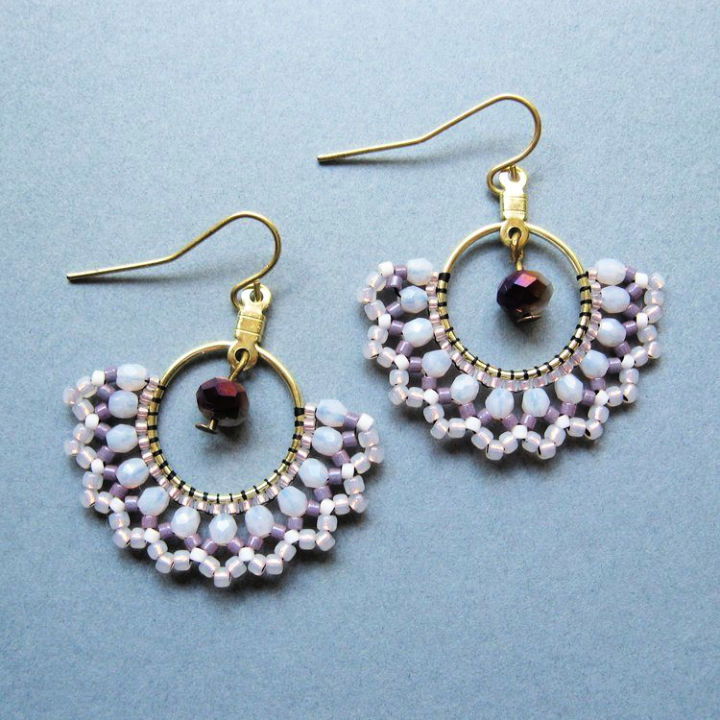
This fast and easy DIY tutorial explores the creative possibilities of makingstylish hoop earrings. To begin, gather all your supplies, including rocaille seed beads, crystals, delicas, feature crystal beads, jewelry hoops, and ear hooks.
Follow the step-by-step instructions for the brick stitch technique to thread the beads onto the hoop and make a beautiful design and an exotic travel souvenir vibe. Utilize leftover beads from other projects, or get creative with colors and styles to make a unique pair that will turn heads!
Finally, finish these wonderful creations by attaching ear hooks for the complete look – enjoy making your beaded hoop earrings today! howdidyoumake
9. Cute DIY Crescent Moon Necklace
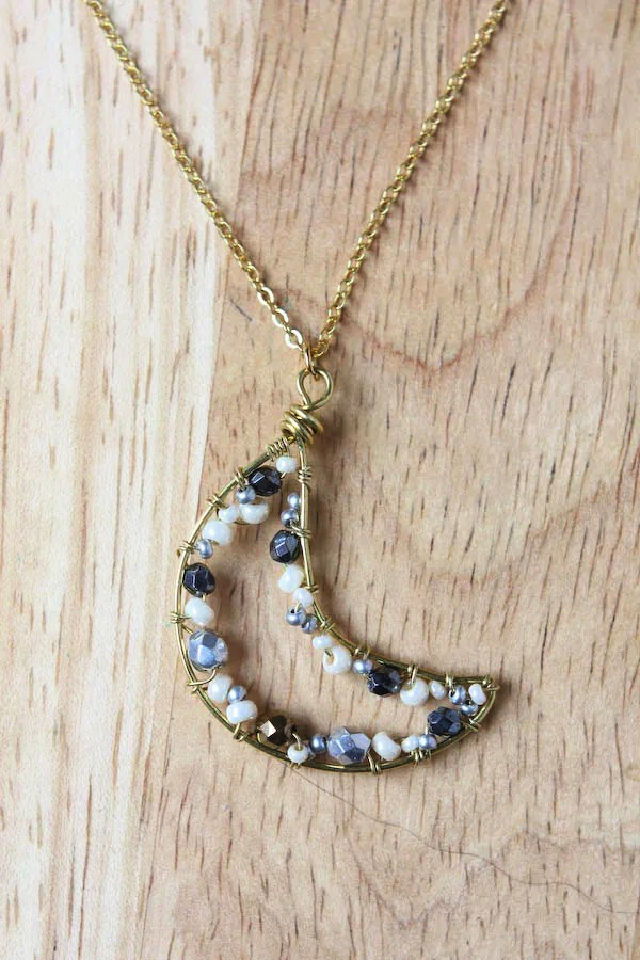
Unlock your creativity and craft a stunning crescent moon necklace with this easy DIY tutorial. All you need is 0.8mm wire for the frame, 0.4mm wire for wrapping the beads, a necklace and jump ring, 3mm and 4mm faceted czech glass beads, and size 11 and 8 seed beads to make this symbolic piece of jewelry. Follow the step-by-step instructions to shape the wire into a crescent moon frame, then wrap colorful beads onto it before adding a necklace and jump ring to complete your unique crescent moon necklace. makeandfable
10. Make Your Own Embroidered Copper Bracelet
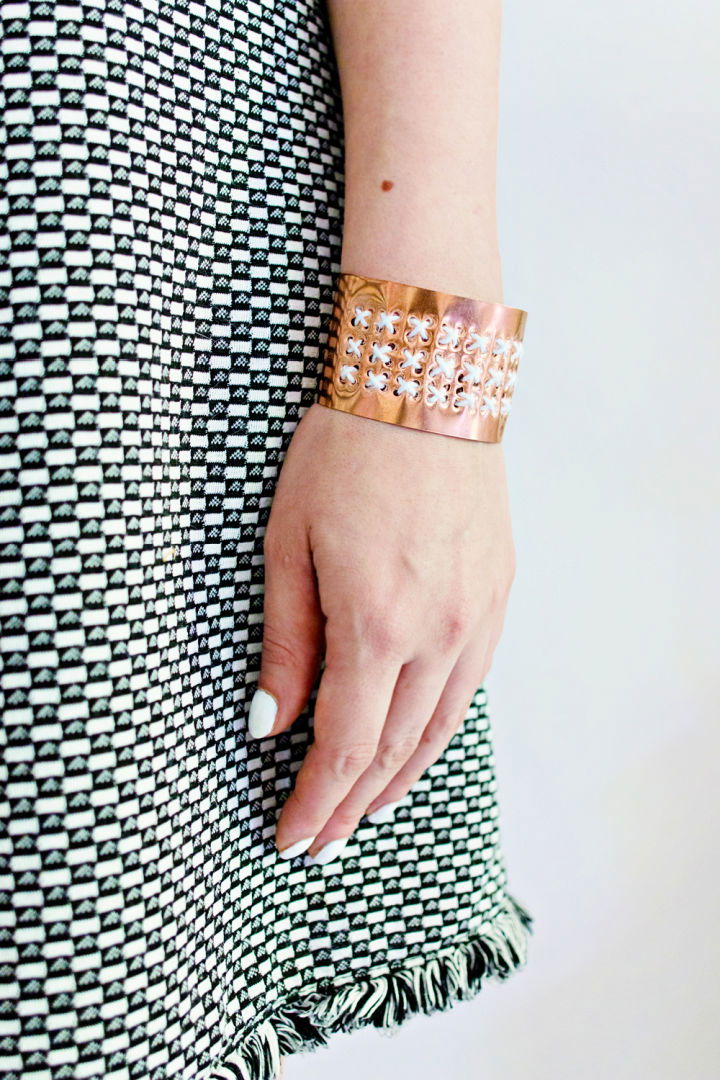
Handcraft a one-of-a-kind accessory with this DIY embroidered copper bracelet tutorial! With just the right supplies – copper foil, measuring tape, pushpin, thread, needle, post-it notes, and round glass – you’ll be crafting your personalized piece of jewelry in no time. Follow the step-by-step instructions to shape the copper into a bangle bracelet, then add embroidery detail for extra flair. Make an accessory that will bring a unique style to any outfit! lanaredstudio
11. Unique DIY Macrame Jewelry
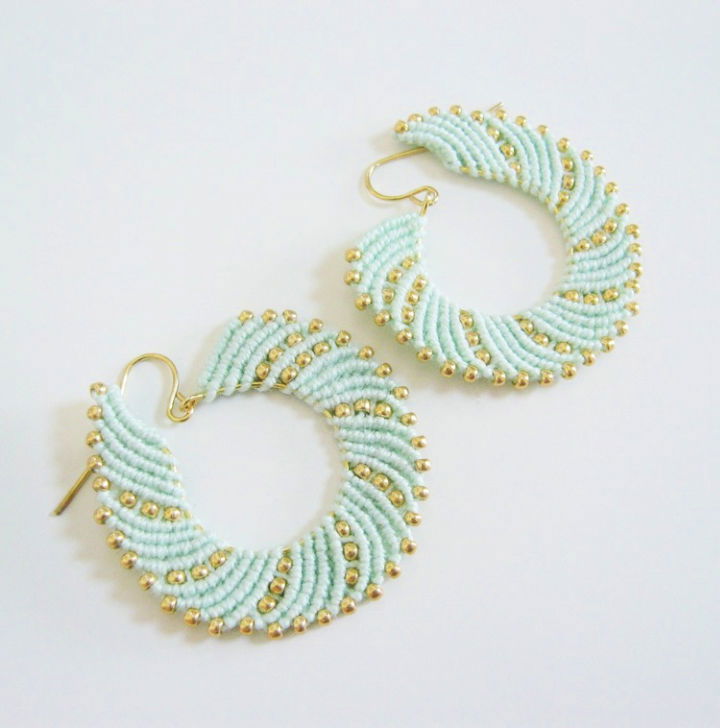
Learn how to make diy jewelry ideas that are elegant, trendy, and fun with these tutorials. Enhance your style with this exquisite DIY project – make your macrame swirl earrings! You only need basic supplies like #10 crochet cotton, 11° seed beads, round earring loops, and ear wires to get started.
The double half hitch knot technique combined with the addition of beads creates a stunningly mesmerizing swirl effect that holds its shape without needing additional support. These step-by-step instructions make crafting a unique pair of stylish macrame earrings easy. Don’t miss out on this fun opportunity to add flair and elegance to your wardrobe today! howdidyoumake
12. DIY Lava Stone Necklace
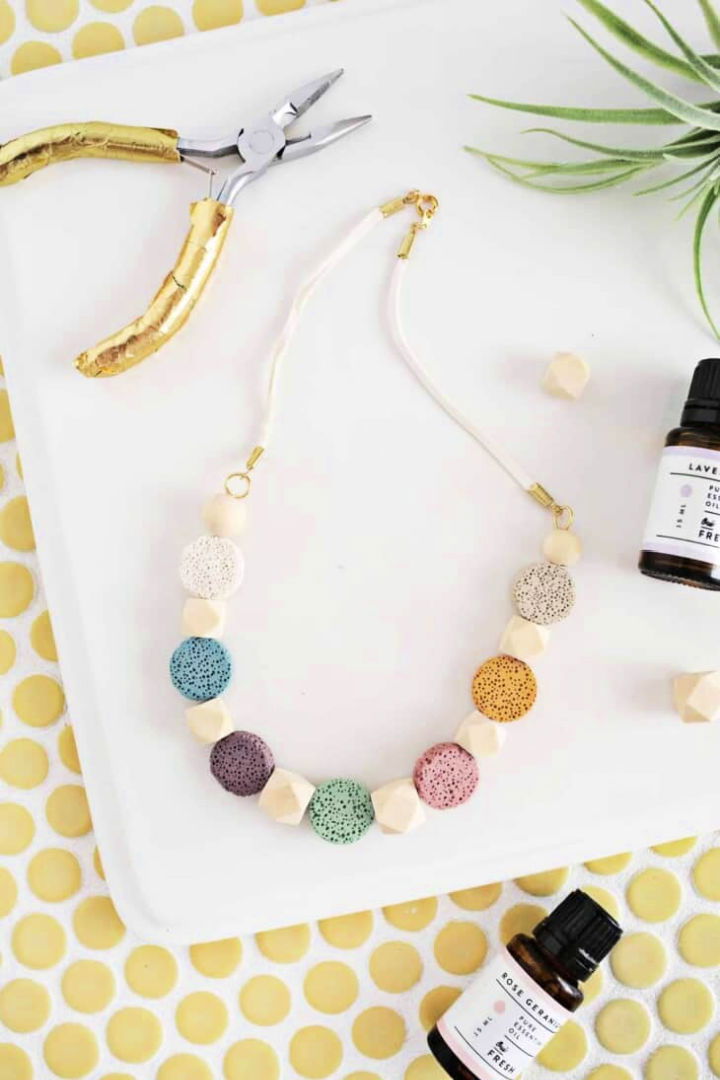
You’ll love these jewelry making ideas that use beads, wire, clay, leather, and more. Put together your lava stone necklace with this DIY project that allows you to savor essential oils’ benefits while on the go!
Gather the necessary items such as lava stone beads, leather or suede flat cord, fold-over cord ends, wooden beads, bead wire, jump rings, jewelry clasp, and scents like essential oil and carrier oil.
The porous lava stones absorb the oils so that you can wear your favorite aroma around your neck. Follow the instructions to craft an exquisite aromatherapeutic necklace that will make a chic addition to any ensemble. abeautifulmess
13. How to Do Painted Wood Bangle Bracelets
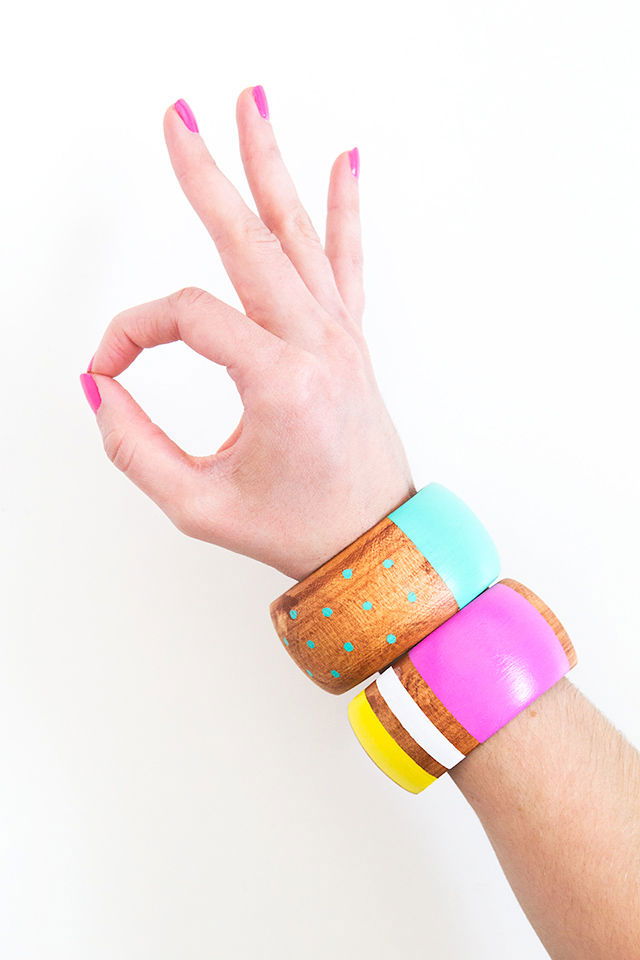
Adorn your style with hues of springtime! In just 30 minutes, craft vibrant and colorful DIY-painted wood bangle bracelets. Gather your supplies – including wood bangle bracelets, wood stain, craft paint, washi tape, gloss finish, and soft paintbrush – to start the creative journey. Using a foam brush, begin by applying the wood stain on the unfinished bangles. Next, unleash your artistic flair as you adorn the bangles with colorful designs using craft paints and small brushes. Lastly, seal it off with a glamorous gloss finish for a polished look. sarahhearts
14. Statement Necklace for Beginners
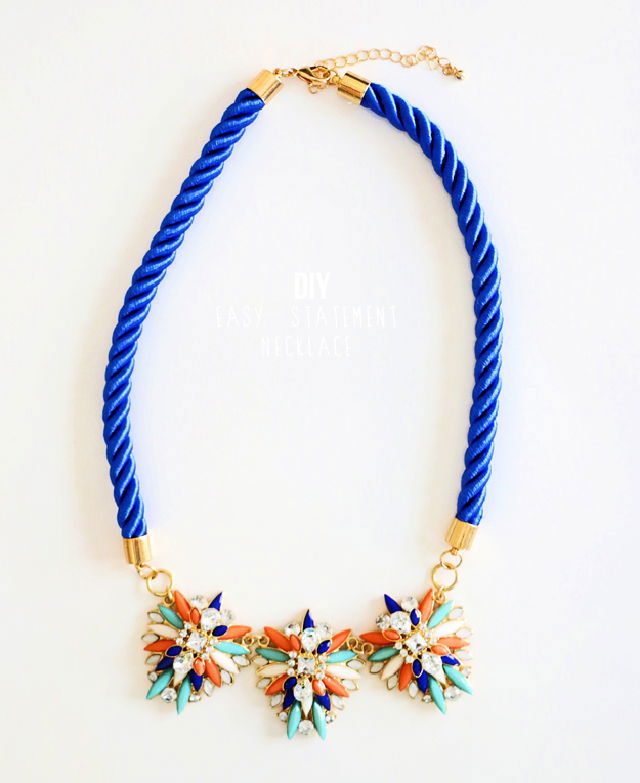
Fabulousness awaits! Make your show-stopping statement necklace with this quick and easy DIY project, perfect for beginners. Gather a few supplies, and you’ll be able to craft a unique piece of jewelry that rivals those from j.crew – but at a fraction of the cost. All you need is darice statement looks chain, darice statement looks statement piece, and jewelry pliers to mix and match pieces for the design that best suits your style. You can have an eye-catching statement necklace in just minutes to make you look and feel great about yourself. happinessiscreating
15. DIY Wire Wrap Pearl Flower Bracelet
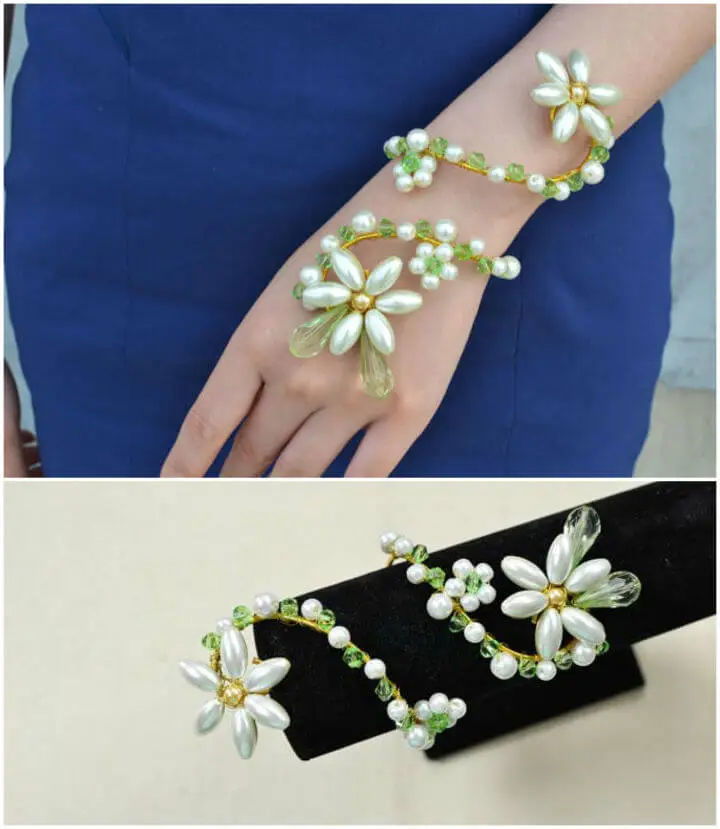
These diy jewelry ideas are perfect for gifts, accessories, or just to treat yourself. Get ready to craft a dazzling wire wrap pearl flower bracelet. Gather the following materials: 4mm yellow, white, and green pearl beads, 6mm white pearl beads, 16x8mm beige glass pearl beads, 4mm green faceted beads, green drop beads, 1.5mm golden aluminum wire, and 0.3mm golden copper wire.
With these supplies and the right tools, you can make a personalized piece of jewelry that will showcase your creativity and style. Impress yourself with this unique bracelet featuring delicate pearl flowers – perfect for any special occasion or everyday look! lcpandahall
16. How to Make Wire Wrapped Ring
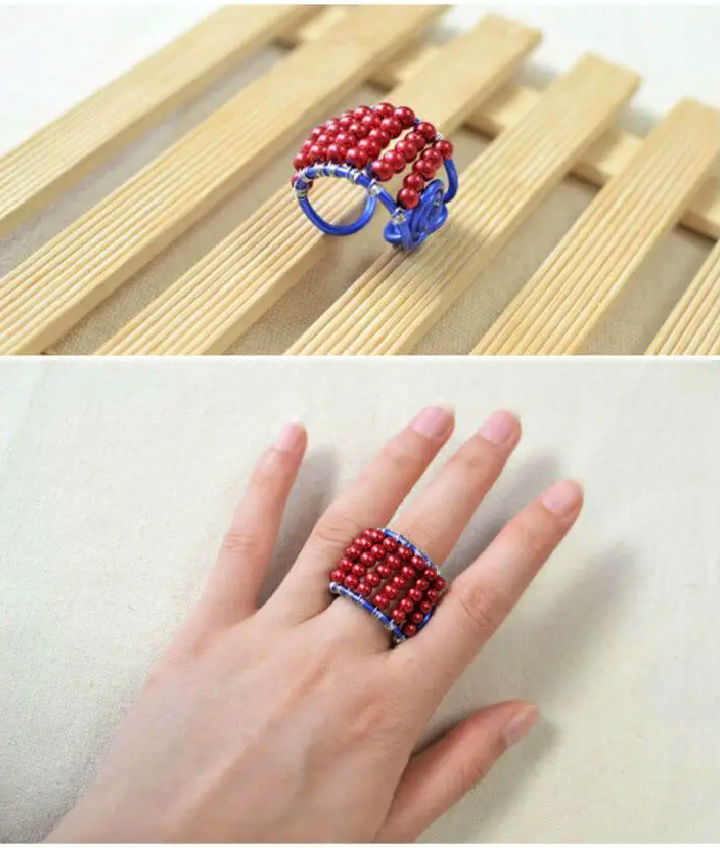
Crafting a personalized family ring is now easy with this wire-wrapping tutorial! Gather some 4mm red pearl beads, navy blue aluminum wire, and 0.3mm copper wire to get started. With these materials and basic techniques, you can make an eye-catching, one-of-a-kind piece of jewelry in just 10 minutes.
Take the step-by-step instructions for makinga beautiful red and blue design, or be inspired to make your unique pattern using different colors and shapes. Unleash your creativity and express yourself with this amazing DIY project – making your personalized family ring at home! lcpandahall
17. Making a Scandinavian Hoop Necklace
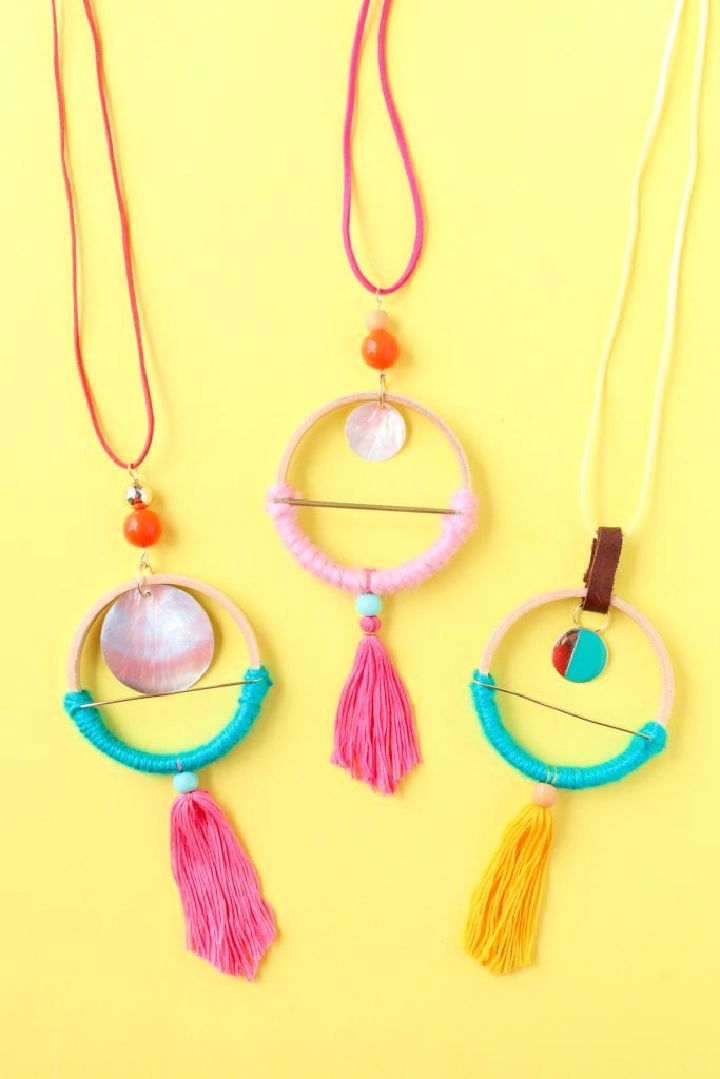
You can create stunning diy jewelry ideas with just a few supplies and your imagination. Gorgeously craft your own chic scandinavian-inspired hoop necklaces with this DIY tutorial! Start by using a 3″ wood embroidery hoop as the base and wrapping brass jewelry wire around it. Next, string up colorful beads and pendant pieces connected by gold 10mm jump rings. For added flair, include an embroidery floss tassel and wrap yarn around the hoop for texture. Finally, finish with faux suede cording to adjust your desired length and make a stylish statement wherever you go! lovelyindeed
18. How to Make Hoop Tassel Earrings
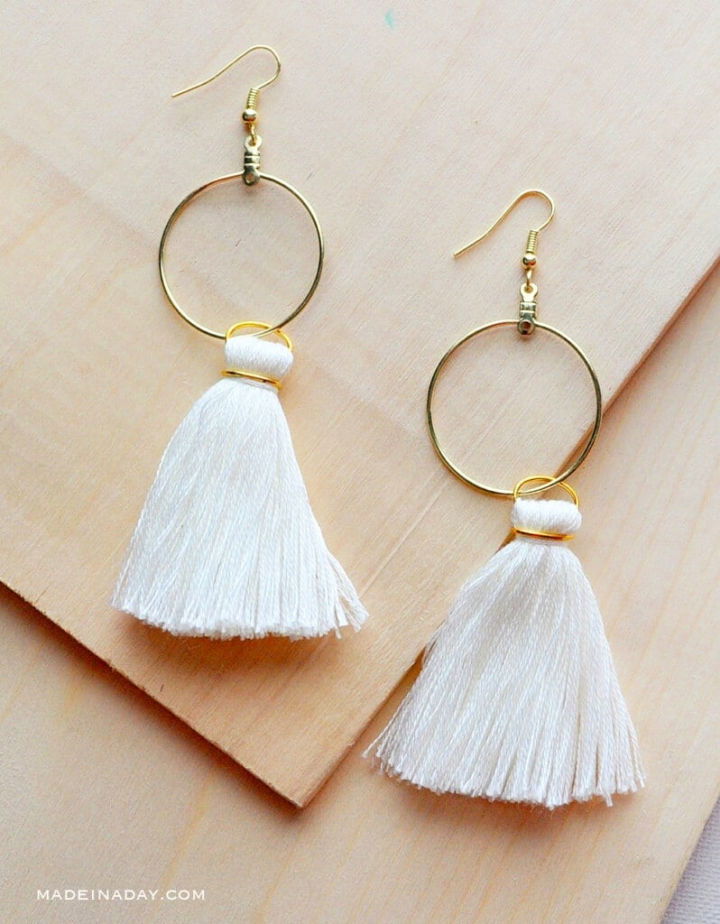
Fashion-forward DIYers, make stunning hoop tassel earrings easily with this step-by-step tutorial. Gather your desired findings, such as hoop earring pieces, hooks, and embroidery floss in white and navy blue colors. Then fold and tie the floss to make stylish tassels secured with hot glue. Attach oval jump rings to the ends of each tassel and attach them to the hoops for a finished look! Show off these fashionable accessories or give them away as a special gift. Get creative today with this simple guide on designing your trendy DIY hoop tassel earrings! madeinaday
19. Daisy Statement Necklace at Home

Mesmerizingly repurpose fabric scraps with this DIY daisy statement necklace project! Compile white crushed velvet and leather/vinyl pieces with stitch witchery, adorning the piece with golden ribbon crimps, lobster clasp, jump rings, and buttons to make a chic accessory. Easily craft your unique statement necklace using these simple steps – perfect for any fashionista’s wardrobe! abeautifulmess
20. DIY Wire Hand Necklace Jewelry
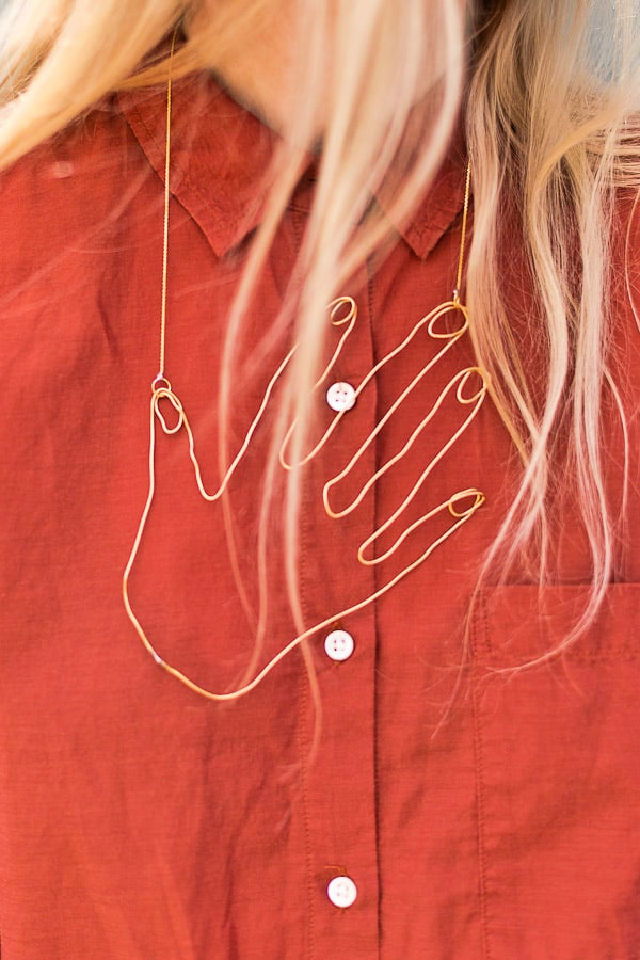
These diy jewelry ideas are so gorgeous, you won’t believe they are made from recycled materials. Impressive and fashion-forward, make a stunning wire hand necklace with this beginner soldering project. Craft your statement piece using gold wire and easy-to-follow soldering techniques.
Gather 18 gauge non-tarnish brass wire, flux soldering paste, a solder iron set, gold jump rings, jewelry making tools, etc., to start crafting this eye-catching accessory. Step-by-step instructions guide you through bending the wire into a unique hand shape before connecting the pieces with the solder. The result is an exquisite necklace that will turn heads wherever you go! papernstitchblog
21. DIY Kate Spade Inspired Bangles
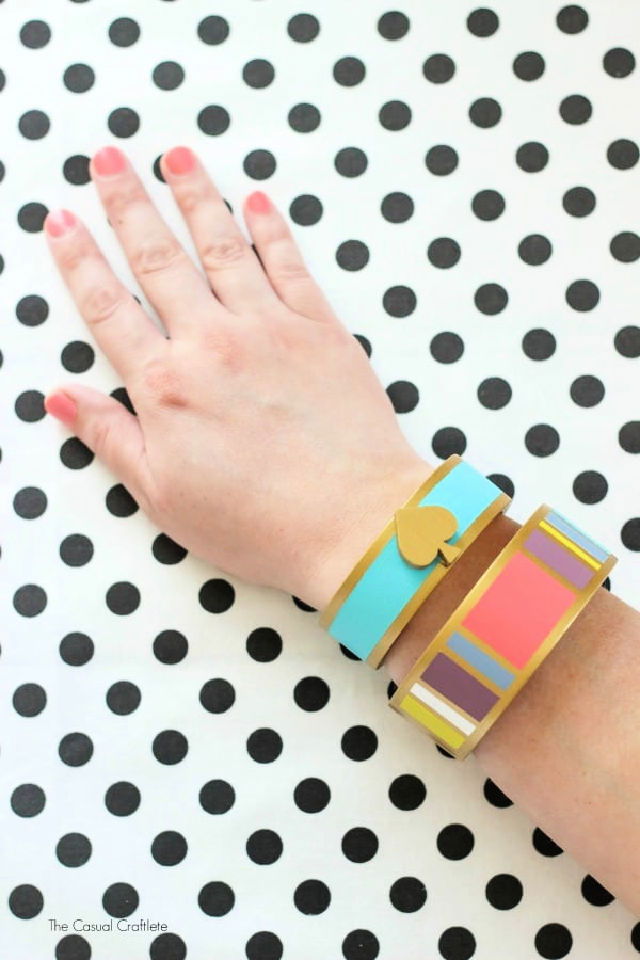
Put together your own fashionably chic and economical DIY kate spade inspired bangles with merely wooden bangle bracelets and acrylic paint! These delightful jewelry crafts are ideal for layering and make excellent gifts. Adorn the bangles with dazzling metallics acrylic paint in glorious gold, then add vibrant splashes of color using americana acrylic paint in multiple shades. Secure a custom wood spade shape with hot glue to acquire the designer look without depleting your wallet. Immerse yourself in creativity and emulate kate spade’s style with this engaging and simple project. purelykatie
22. Wire Wrapped Sea Glass Ring
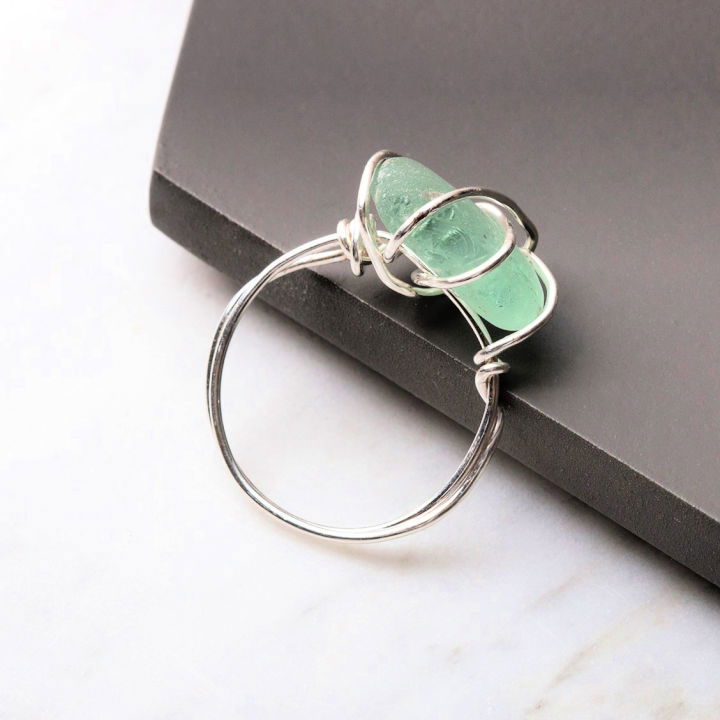
These jewelry making ideas are perfect for beginners, experts, and everyone in between. Make your own gorgeous wire-wrapped sea glass ring by following these simple instructions! Just cut 40cm of wire, loop it around a triblet to size the ring, and wrap the two loose ends under the band. Make more space for the sea glass by flattening out an area and locking it in place using additional loops of wire. Customize your design with even more loops or a thicker band for a unique look before trimming off any excess and tucking in loose ends for a polished finish. Get creative and craft your very own stunning sea glass ring today! kernowcraft
23. Easy Tassel Earrings Tutorial
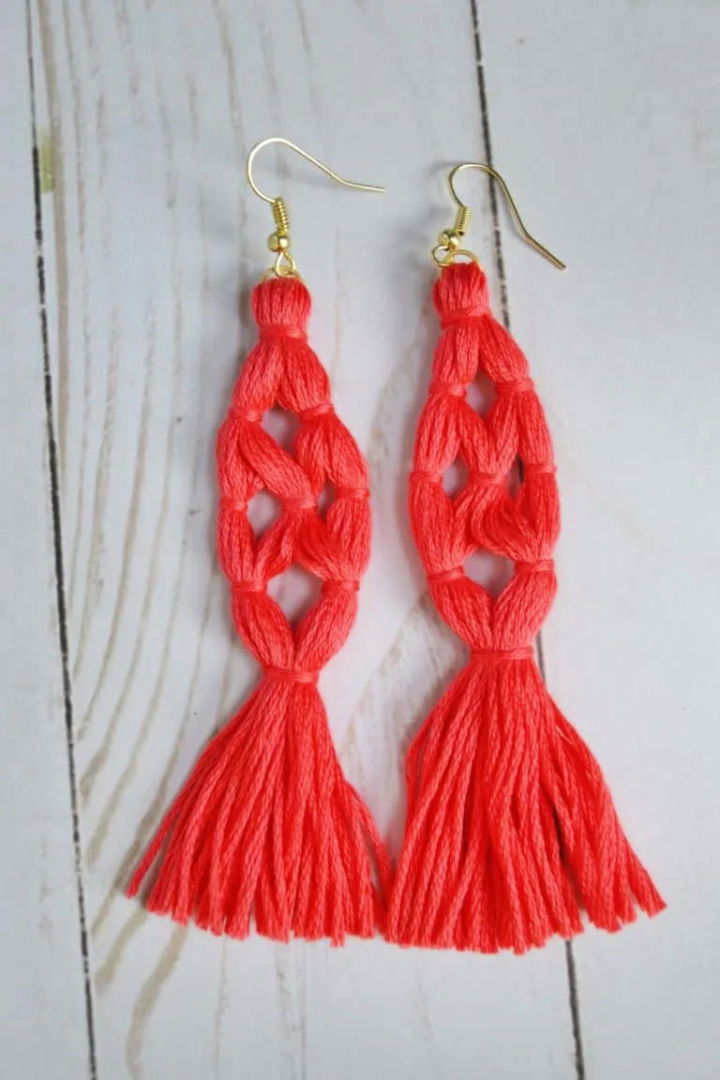
Whip up your own one-of-a-kind stylish DIY tassel earrings with this convenient tutorial! All you’ll need is some embroidery floss, jump rings, and earring wires. First, open a jump ring with pliers and attach it to the top loop of the embroidery floss. Then slide an earring wire onto the jump ring and close it off. Subsequently, tie a knot around the top of the floss, trim both ends, and separate all its bottom loops. Finally, divide each part before tying knots into them – there you have it: trendy tassel earrings for any occasion! marymarthamama
24. Make Beads and Crystals Ring
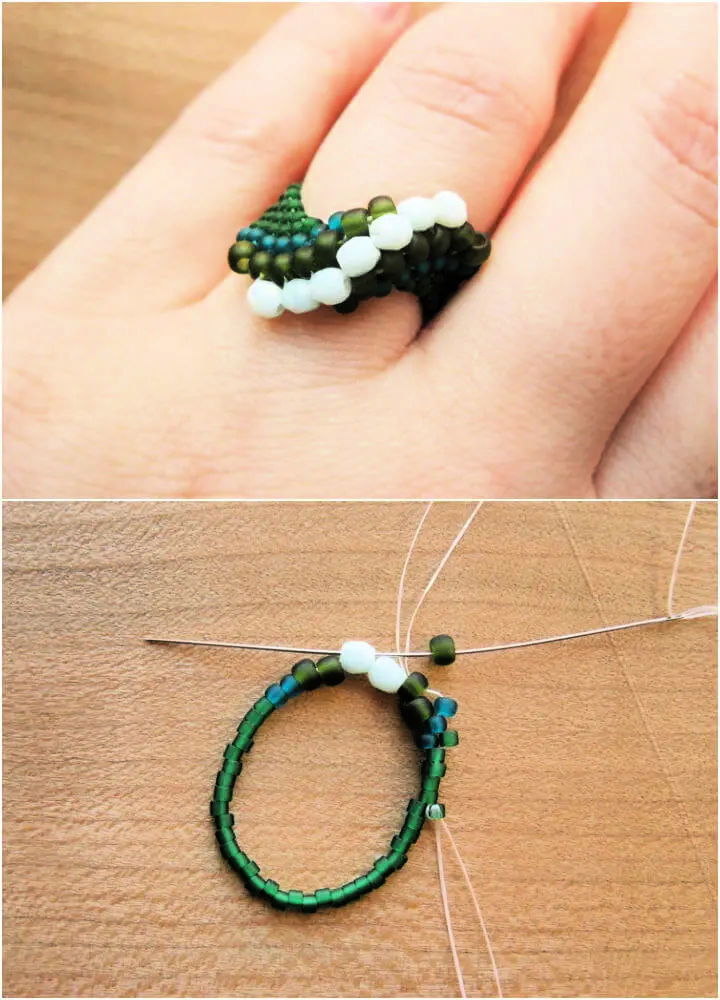
Amazing craftsmanship awaits with this DIY tutorial for a beaded ring! You won’t need much, just 3mm fire-polished czech crystals, 8/0 and 11/0 seed beads, 11/0 cylinder beads, a beading needle, and beading thread. Follow along using the peyote stitch technique to make fascinating bead patterns with the precise instructions provided. For best results, it’s recommended to have some experience working with peyote stitches. Achieve perfect tension for your stunning handmade creation, and enjoy wearing your gorgeous custom-made beaded ring! howdidyoumake
25. Colorful DIY Marbled Bangles
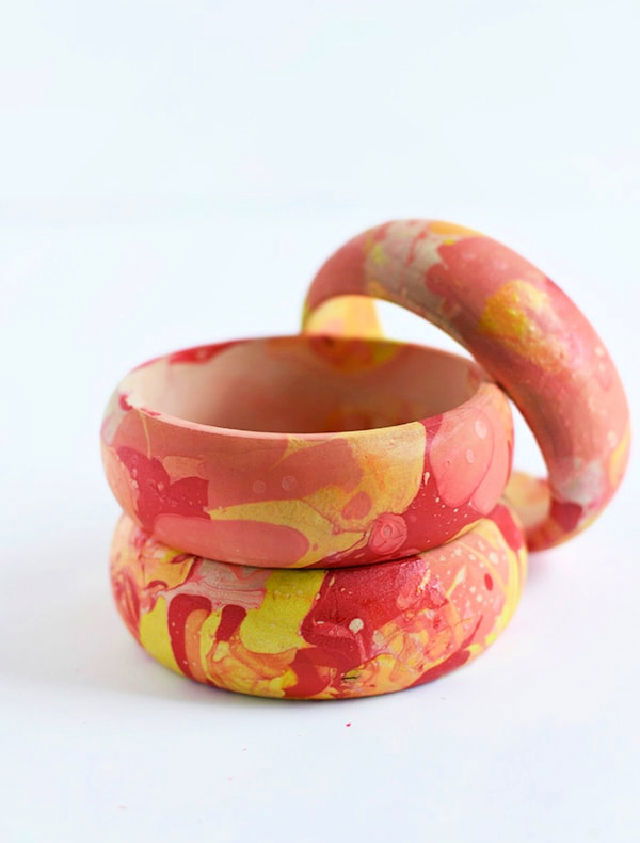
Make your own beautiful and unique diy jewelry ideas with these simple and easy steps. Marvel at the beauty of DIY marbled bangle bracelets! All it takes is a few easy-to-find materials and some creative flair. Gather four vibrant nail polishes, a small disposable tin tray, a wooden skewer for mixing, and wooden bangles to make these colorful accessories. With step-by-step instructions, you can produce stunning results that will feel manageable to the touch. Unleash your inner artist and add color to any outfit with these colorful marbled bangles made from nail polish techniques! delineateyourdwell
Conclusion:
Making your own DIY jewelry at home is a fun way to express your creativity and style. Whether you want to make simple bracelets, elegant earrings, or stunning necklaces, you can find plenty of DIY jewelry ideas to inspire you. You don’t need expensive tools or materials to make beautiful jewelry that you can wear or gift to your loved ones.
All you need is some basic supplies, a little time, and a lot of imagination. You can also learn new skills and techniques along the way, such as wire wrapping, clay molding, or metal etching. DIY jewelry making is not only a hobby, but also an art form that can bring you joy and satisfaction. So why not give it a try? You might be surprised by what you can create with your own hands. To get started, check out these 25 DIY jewelry making ideas. Happy crafting!

