If you love hats, you know how hard it is to store them properly. That’s why we have compiled 25 amazing DIY hat rack ideas that will help you display and store your hats in style. Whether you want a rustic hat rack, a wall hat rack, or a baseball hat rack, we have an idea for you. You can use various materials to make your own DIY hat rack, such as old shutters, wooden pallets, or clothespins. From rustic hat rack ideas to unique wall hat display ideas, all these hat storage ideas are not only functional but also creative and artistic.
Don’t worry if you are not an expert in DIY. We have provided clear and simple instructions for each project. Some of these DIY hat rack ideas even have videos and pictures to guide you along the way. You will be surprised by how easy and fun it is to make your own hat rack. So what are you waiting for? Learn how to display hats with these 25 easy DIY hat rack ideas and find the best one for your hat collection.
DIY hat rack, is a smart and cool way to show off your hats. Our list of DIY hat rack ideas will inspire you to make your own hat storage solution.

Basics of DIY hat rack
A hat rack is a device that is used to store and display hats. It can be made of various materials, such as wood, metal, plastic, or fabric. Hat racks can have different shapes and sizes, depending on the number and type of hats you want to store. Some common types of hat racks are:
- Wall-mounted hat racks: These are attached to the wall and can hold several hats horizontally or vertically. They are ideal for saving space and keeping your hats organized.
- Standing hat racks: These are freestanding structures that have hooks or pegs for hanging hats. They can be placed anywhere in your room and can accommodate more hats than wall-mounted ones.
- Over-the-door hat racks: These are similar to wall-mounted hat racks, but they are hung over the door instead of the wall. They are convenient and easy to install, but they may not be very stable or secure.
- Hanging hat racks: These are made of ropes, chains, or wires that are suspended from the ceiling or a rod. They can create a stylish and whimsical look for your hats, but they may not be very practical or accessible.
Guide beginners to start their DIY hat rack project
If you want to make your own hat rack instead of buying one, you will need some basic skills and tools. Here are some steps to guide you through the process:
- Plan your design: Before you start making your hat rack, you need to have a clear idea of what you want it to look like and how big you want it to be. You can sketch your design on paper or use online tools like [SketchUp] or [Tinkercad] to create a 3D model of your hat rack.
- Gather your materials: Based on your design, you need to gather the materials that you will use to make your hat rack. You may need wood, metal, plastic, or fabric, depending on the type of hat rack you want to make. You also need some hardware, such as screws, nails, hooks, or pegs, to attach the parts together.
- Prepare your tools: You will also need some tools to cut, drill, glue, or sew your materials. Some common tools that you may need are:
- A saw or a cutter to cut your materials into the desired shape and size.
- A drill or a hammer to make holes in your materials or drive nails or screws into them.
- A glue gun or a sewing machine to join your materials together or add some decorations.
- A tape measure or a ruler to measure your materials and ensure accuracy.
- A level or a plumb line to check if your hat rack is straight and balanced.
- A pencil or a marker to mark your materials and guide your cutting or drilling.
- Assemble your hat rack: Once you have all your materials and tools ready, you can start assembling your hat rack according to your design. You may need to follow some instructions or watch some tutorials online if you are not sure how to do it. You can also ask someone for help if you need an extra pair of hands.
- Finish your hat rack: After you have assembled your hat rack, you can add some finishing touches to make it look more attractive and durable. You can paint, stain, varnish, or polish your hat rack to give it some color and protection. You can also add some accessories, such as stickers, ribbons, flowers, or beads, to personalize your hat rack.
What you need to know before starting your DIY hat rack project
Making your own hat rack can be a fun and rewarding project, but it also requires some preparation and caution. Here are some things that you need to know before starting your DIY hat rack project:
- Safety first: Working with tools and materials can be dangerous if you are not careful. You should always wear protective gear, such as gloves, goggles, masks, or aprons, when handling sharp or hot objects. You should also keep children and pets away from your work area and store your tools and materials safely when not in use.
- Budget wisely: Making your own hat rack can save you some money compared to buying one, but it can also cost you more if you are not careful. You should plan your budget ahead and compare the prices of different materials and tools before buying them. You should also look for ways to reuse or recycle old items that you already have at home instead of buying new ones.
- Be creative: Making your own hat rack gives you the opportunity to express your creativity and personality. You can customize your hat rack according to your preferences and needs. You can choose the style, color, shape, size, and decoration of your hat rack. You can also experiment with different materials and techniques to create unique effects.
Why you should make your own hat rack instead of buying one
There are many benefits of making your own hat rack instead of buying one. Here are some of them:
- You can save money: Buying a hat rack can be expensive, especially if you want a high-quality or a large one. Making your own hat rack can help you save some money, as you can use cheaper or recycled materials and avoid paying for shipping or installation fees.
- You can have fun: Making your own hat rack can be a fun and enjoyable activity, especially if you do it with your friends or family. You can learn new skills, challenge yourself, and have a sense of accomplishment when you finish your project.
- You can show your style: Making your own hat rack allows you to show your style and personality. You can design your hat rack according to your taste and preferences. You can also make it match your room decor and theme. You can also display your hats in a way that showcases your collection and passion.
How to choose the right materials for your DIY hat rack project
The materials that you choose for your DIY hat rack project will affect the appearance, durability, and functionality of your hat rack. Therefore, you should choose them carefully and wisely. Here are some factors that you should consider when choosing the right materials for your DIY hat rack project:
- The type of hats that you want to store: Different types of hats may require different types of materials to store them properly. For example, if you want to store straw hats, you may want to use wood or metal materials that are sturdy and breathable. If you want to store wool hats, you may want to use fabric or plastic materials that are soft and flexible.
- The space that you have available: The space that you have available in your room will also affect the type and size of materials that you can use for your hat rack. For example, if you have a small space, you may want to use wall-mounted or over-the-door materials that are compact and space-saving. If you have a large space, you may want to use standing or hanging materials that are more spacious and eye-catching.
- The style that you want to achieve: The style that you want to achieve for your hat rack will also influence the type and color of materials that you can use for your hat rack. For example, if you want a rustic style, you may want to use wood or metal materials that are natural and aged. If you want a modern style, you may want to use plastic or fabric materials that are sleek and colorful.
A beginner’s guide to making a DIY hat rack
If you are a beginner who wants to make a DIY hat rack, here is a simple guide that you can follow:
- Choose a type of hat rack that suits your needs and preferences. You can choose from wall-mounted, standing, over-the-door, or hanging types of hat racks.
- Choose the materials that match the type of hat rack that you have chosen. You can choose from wood, metal, plastic, or fabric materials.
- Gather the tools that you will need to make your hat rack. You may need a saw, a drill, a hammer, a glue gun, a sewing machine, a tape measure, a level, a pencil, and some hardware.
- Follow the instructions or watch the tutorials online on how to make your hat rack. You can find many DIY hat rack ideas below.
- Add some finishing touches to your hat rack. You can paint, stain, varnish, polish, or decorate your hat rack as you wish.
Tips for making a DIY hat rack that looks professional
If you want to make a DIY hat rack that looks professional and impressive, here are some tips that you can follow:
- Use quality materials: Using quality materials will ensure that your hat rack is durable and reliable. It will also make your hat rack look more elegant and refined.
- Use precise measurements: Using precise measurements will ensure that your hat rack is accurate and symmetrical. It will also make your hat rack look more neat and tidy.
- Use proper techniques: Using proper techniques will ensure that your hat rack is secure and stable. It will also make your hat rack look more smooth and polished.
- Use complementary colors: Using complementary colors will ensure that your hat rack is harmonious and attractive. It will also make your hat rack look more stylish and sophisticated.
Common mistakes to avoid when making a DIY hat rack
If you want to avoid making common mistakes when making a DIY hat rack, here are some things that you should avoid:
- Using too many or too few hats: Using too many or too few hats will make your hat rack look cluttered or empty. You should use enough hats to fill up your hat rack without overcrowding it.
- Using mismatched hats: Using mismatched hats will make your hat rack look chaotic or boring. You should use hats that have similar styles, colors, shapes, or sizes.
- Using inappropriate materials: Using inappropriate materials will make your hat rack look cheap or ugly. You should use materials that are suitable for the type of hat rack that you are making and the type of hats that you are storing.
- Using faulty tools: Using faulty tools will make your hat rack look sloppy or unsafe. You should use tools that are in good condition and that work properly.
- Using too much or too little glue: Using too much or too little glue will make your hat rack look messy or weak. You should use enough glue to hold your materials together without spilling or dripping.
How to display your hats easily with your new DIY hat rack
After you have made your DIY hat rack, you can display your hats easily with it. Here are some tips on how to do it:
- Arrange your hats by color, style, shape, or size: Arranging your hats by color, style, shape, or size will make your hat rack look more organized and appealing. You can also create some contrast or harmony by mixing and matching different hats.
- Rotate your hats regularly: Rotating your hats regularly will make your hat rack look more dynamic and fresh. You can also change your hats according to the season, occasion, or mood.
- Accessorize your hats: Accessorizing your hats will make your hat rack look more fun and creative. You can add some pins, badges, patches, or charms to your hats to give them some personality and flair.
1. DIY Baseball Hat Rack
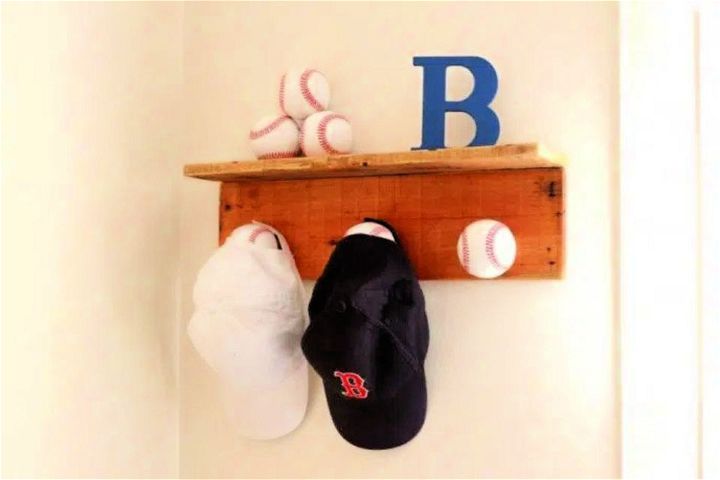
Get ready for baseball season with a DIY baseball cap hat rack! Aside from drying time, this easy project can be completed in just 20 minutes using pallet wood and actual baseballs. Cut, sand, drill, and attach the pallet boards, then add your favorite team’s baseballs as hooks.
Personalize it with your child’s name or team logo. This nostalgic piece is perfect for displaying your favorite baseball caps and adding a rustic touch to your home decor. Follow the step-by-step instructions and make this baseball hat rack to show your love for the game. scrappygeek
2. Homemade Hanging Hat Wall
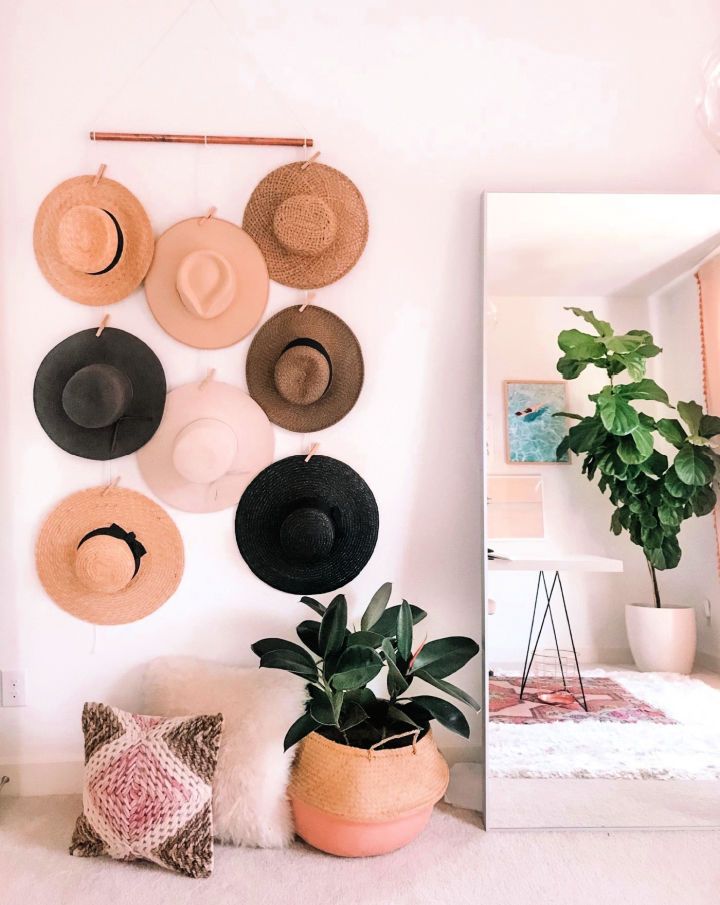
Are you looking for an elegant and practical way to store your hats? This step-by-step tutorial and video guide teach how to make a macrame hat hanger. With just a few knots, you can customize your hanger in endless ways, making it as long or short as you like and using any color of macrame you prefer.
This hanger can hold two hats, but you can easily adapt it to hold more or less. The eco-friendly fiber brand Ganxxet ensures your project is sustainable and chic. Watch the video or follow the guide to make your boho wall accent and organize your hats. gypsytan
3. How to Make Macrame Hangers for Hats
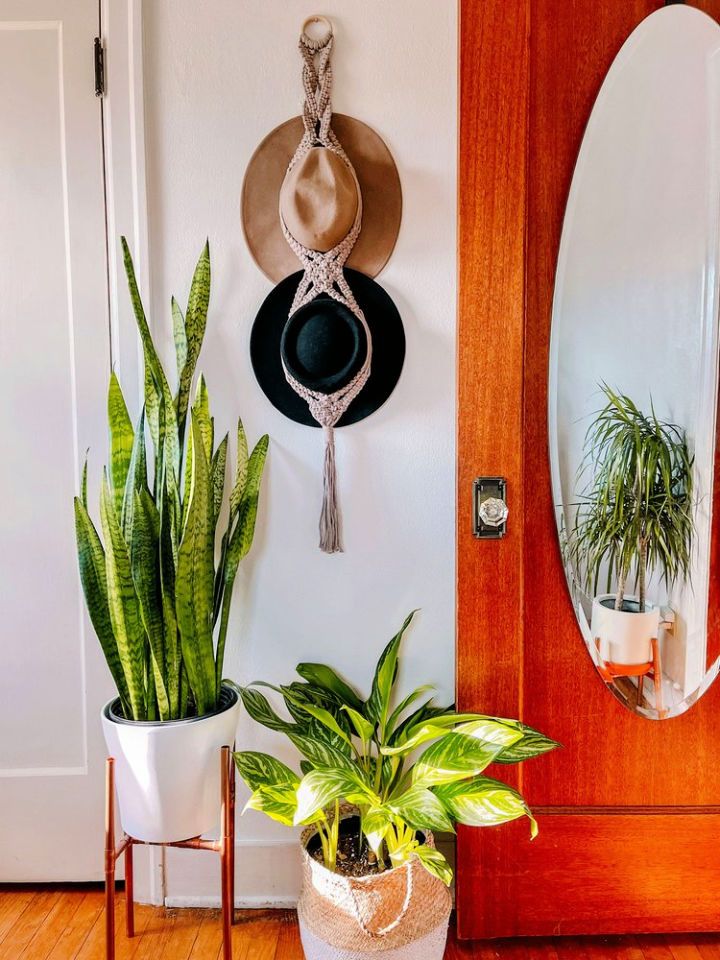
Were you looking for a boho-chic solution to organize your hats? This step-by-step tutorial and video teach how to make your macrame hat hanger. Using just three basic knots, you can customize your hanger to hold as many hats as you want and match any room’s decor.
The guide provides tips and tricks to alter the design and use different macrame thicknesses. Plus, the fiber brand Ganxxet is eco-friendly and comes in beautiful colors without dying. Watch the video or follow the instructions to make a beautiful wall accent and finally give your hats a home. madhouse
4. Handmade Hat Stands
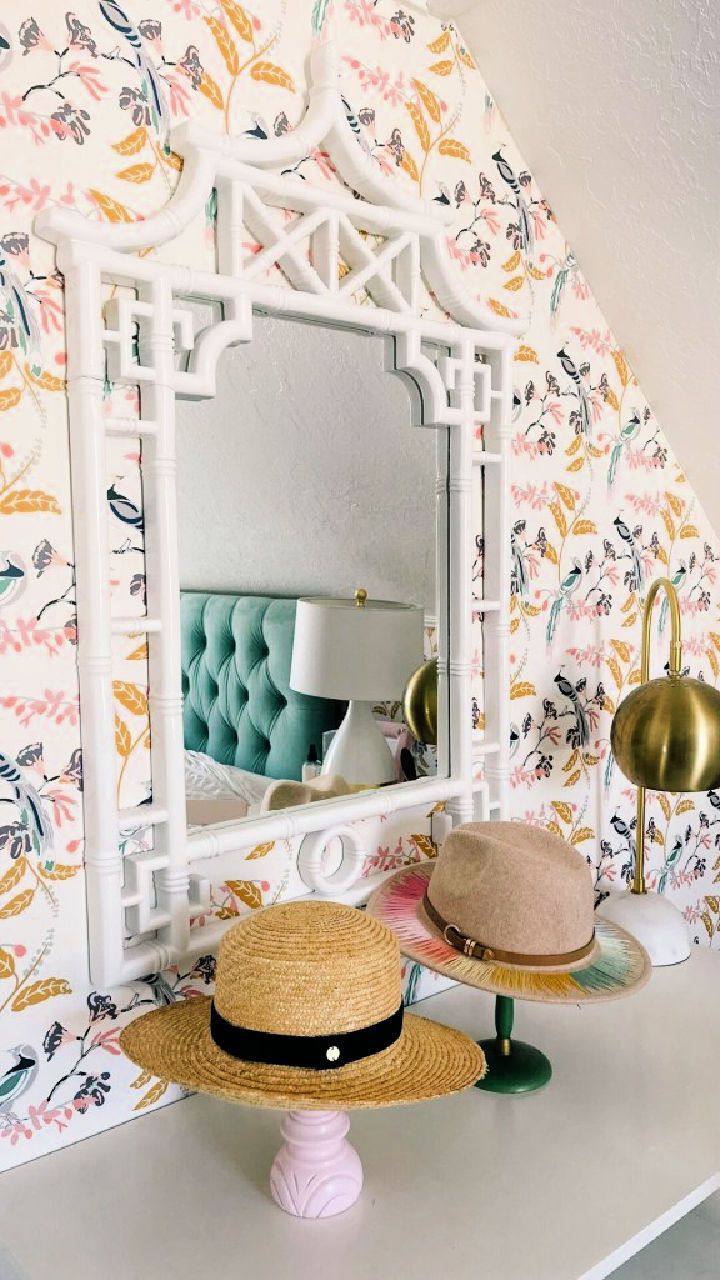
Learn how to make a DIY hat stand with this affordable and simple tutorial using thrifted items. Save money and get creative with this fun project that requires only a few supplies, including a wood candlestick, wood bowl or finial, paint, and wood filler.
With easy-to-follow instructions and step-by-step photos, you can make a unique and stylish hat display stand that adds character to any space. This DIY hat stand is functional and chic, perfect for organizing hats and bags in a new closet or revamping an old one. withashley
5. Make Your Hat Rack
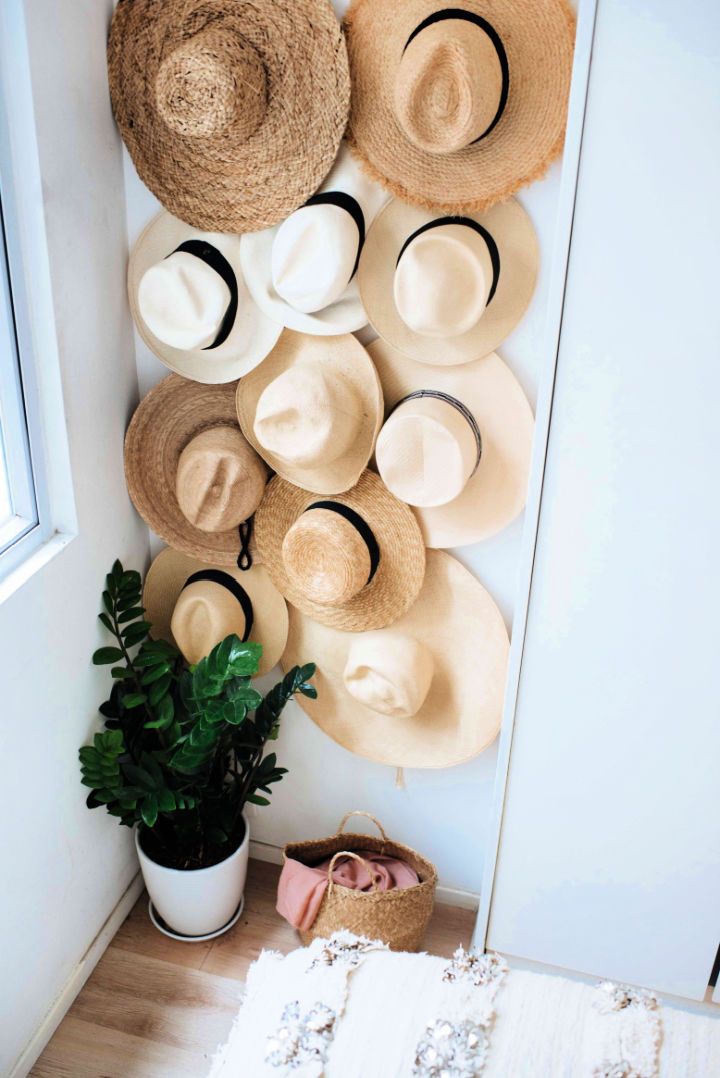
Keep your hats organized and stylish with these diy hat storage ideas for any space and budget. If you’re a hat lover but struggle with hat storage, this DIY hat rack is the perfect solution. This easy-to-follow guide uses only a few materials and can be completed quickly.
Unlike traditional hat racks, this DIY project keeps your hats organized and adds a stylish touch to any space. Learn how to make this minimalist installation and prevent the slow death of your beloved hats with this creative storage solution. collectivegen
6. DIY Trophy Shelf and Hat Rack
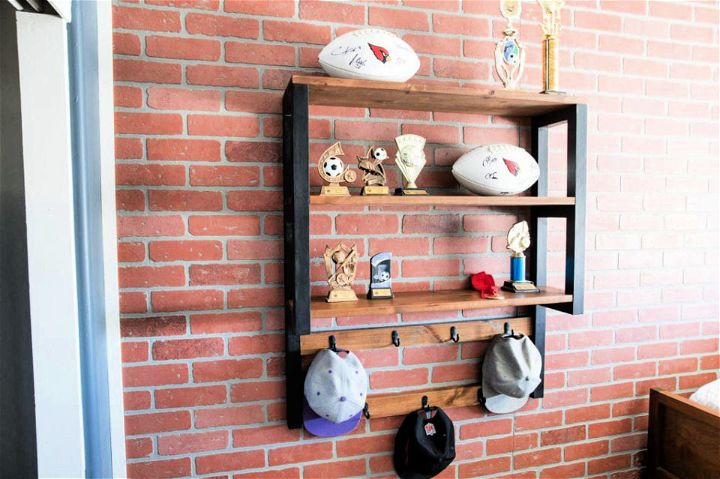
Build a DIY trophy shelf and hat rack with these easy-to-follow plans and tutorials. This project serves a dual purpose and is perfect for maximizing their space and materials.
Get the full materials and cut list, step-by-step diagrams, and instructions on how to build the frames, shelves, and hat rack, fill pocket holes, paint the frames, and hang the shelves on the wall. This multi-purpose project is a great way to display your child’s trophies and provide a place to hang their hats. addicted2diy
7. Cheap DIY Hat Rack
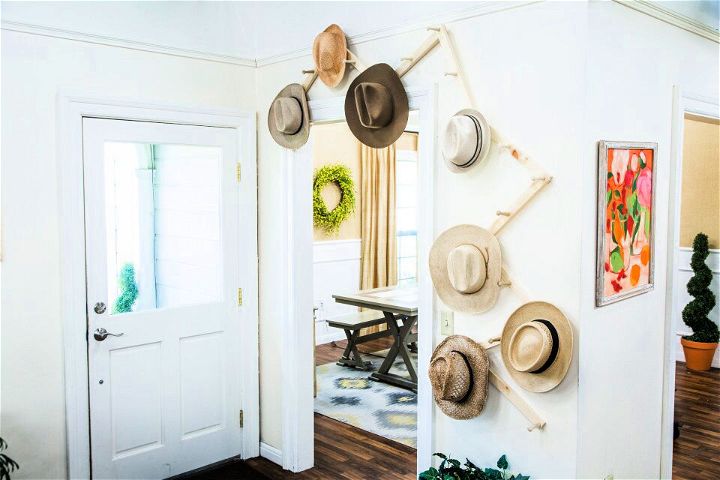
Make a practical and stylish DIY hat rack with this helpful guide from Ken Wingard. Using just seven wood pieces, screws, wood glue, and a drill follow along with the step-by-step instructions to build a unique piece that will keep your hats organized and displayed.
Hang your new hat rack using the picture hangers attached to the back, and enjoy the benefits of this creativity and usefulness in your space. Perfect for any hat lover or organization enthusiast, start making your hat rack today hallmarkchannel
8. Hanging Copper Hat Rack Design
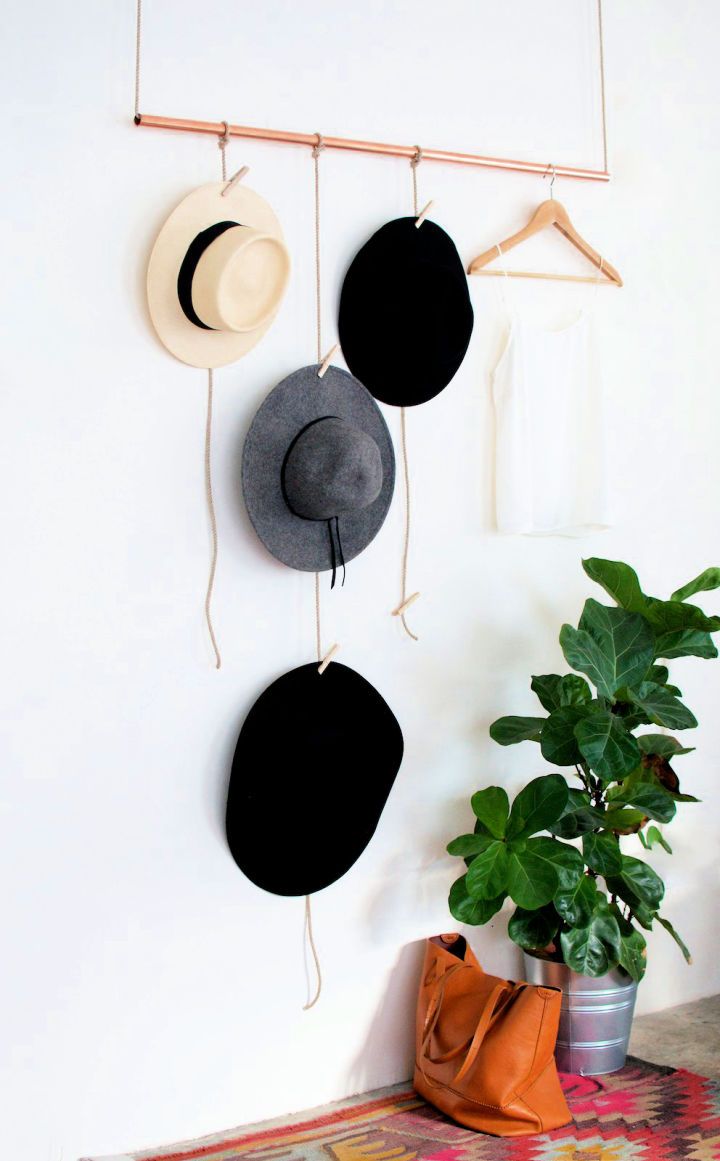
Whether you have a small closet or a large room, you can find the perfect diy hat storage ideas to suit your needs. Make a DIY Hanging Copper Hat Rack using simple materials, including copper pipe, rope, pegs, and scissors. This creative and unique project is perfect for storing hats in a stylish and organized manner while also doubling as a hanging rack for clothes.
With step-by-step instructions and a bit of creativity, you can make a functional and eye-catching addition to any room in your home and keep your hats from getting squashed or collecting dust on the floor. Try it out today and see how easy making your hat rack is! collectivegen
9. Creative Copper Hat Rack
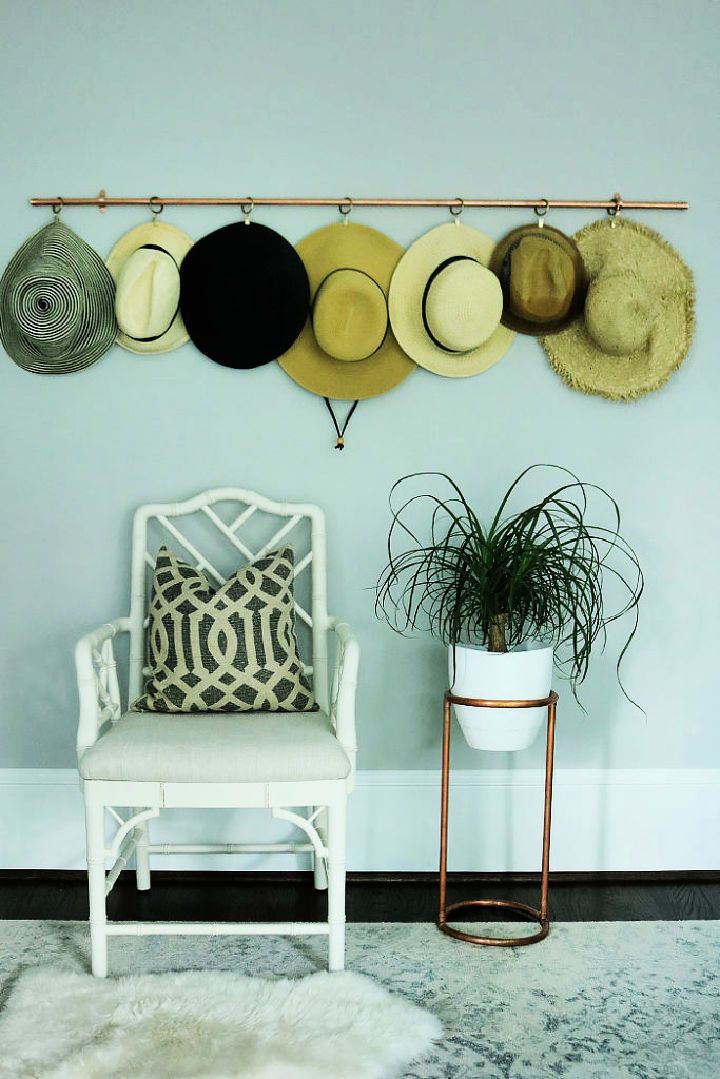
Try making a DIY Copper Hat Rack! With just a few supplies, such as copper pipe, end caps, pipe straps, and curtain rings, you can make a stylish hat rack that can also be used as a decorative display.
The best part? It only takes about five minutes to put together and costs around $15 (excluding the cost of hats). Whether you want to hang your hats in your closet or display them over a headboard or dresser, this DIY project is perfect. Follow the step-by-step instructions and get started today! darlingdarleen
10. DIY Muskie Hat Rack

Elevate your home organization with this DIY hat rack made from a single 2×4! Follow these simple steps to make a modern and functional piece for your entryway or closet using just a few supplies, like wood glue and screws. Cut the 2×4 into two pieces, sand it to a smooth finish, and mark where to attach the hooks. Drill and screw everything together, then add keyhole hangers to mount it to the wall. With a little creativity and DIY spirit, you can have a stylish hat rack at a fraction of the cost.
11. Wall Mounted Hat Rack Plan

This step-by-step guide teaches how to make a simple and stylish hat rack for your cottage. All you need is unfinished 1″ x 1″ lumber, wood pegs, picture hangers, wood glue, a drill, screws, a screwdriver, a ruler, and a pencil. Follow the instructions to make a wooden wall rack perfect for showcasing your hats, scarves, and fedoras collection.
Whether you’re looking for a creative storage solution or a unique way to decorate your space, this cottage-ready hat rack is a must-try. So, build it yourself and enjoy its functional and aesthetic benefits! houseandhome
12. Build a Diamond Hat and Coat Rack

From wall hooks to shoe boxes, there are many creative ways to store your hats with these diy hat storage ideas. Bring a unique and stylish hat and coat rack for your entryway with this easy DIY project. Using just a few materials and tools, including birch boards, mending brackets, polycrylic protectants, white paint, wood filler, and gold knobs, you can build a geometric diamond-shaped rack that measures 30″ in width by 60″ in height.
Hang it flush to the wall using special hangers, and enjoy a practical and pretty solution for storing your daily essentials. Follow this step-by-step guide for a unique and creative addition to your home decor. centsationalstyle
13. The Cutest Hat Rack to Build
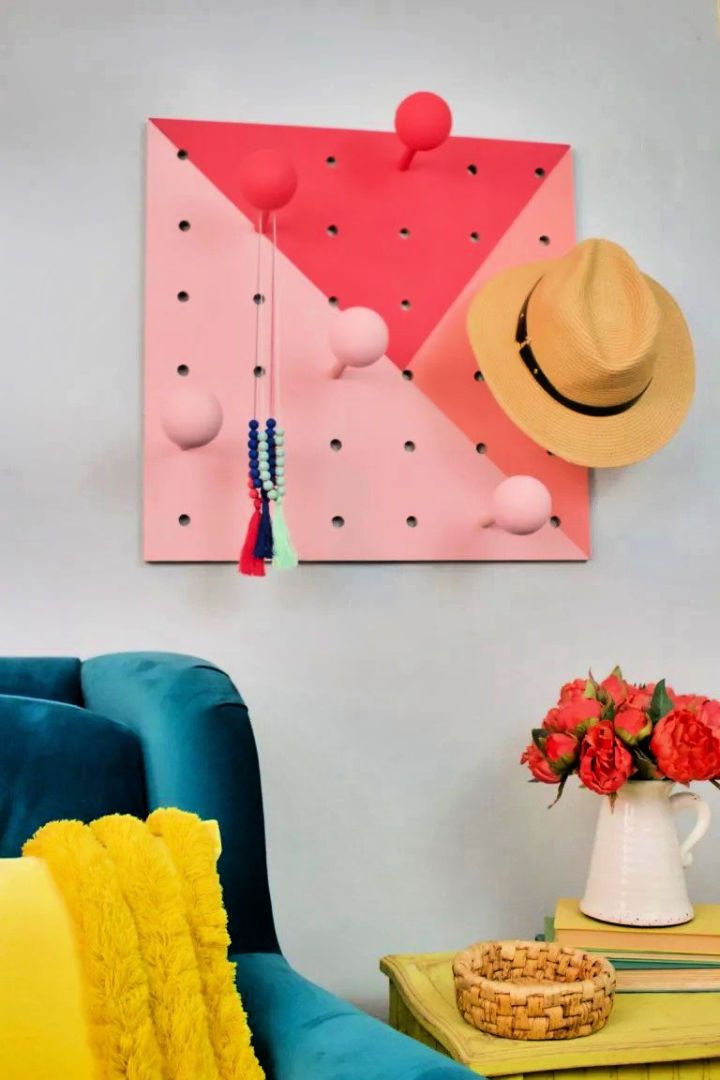
Organizing your hats can be challenging, but this DIY hat rack is here to help! With just a few materials, such as a wood board, drill, dowel rods, foam balls, and paint, you can make a pegboard-inspired hat rack that adjusts to your hat collection.
This DIY project is perfect for displaying fun party hats or keeping your floppy hats from getting wrinkled. Plus, it’s easy to make even if you have not gained experience using power tools. Check out this creative and unique DIY hat rack that will put the fun in functional! asubtlerevelry
14. Make a Hat Rack From an Old Shutter
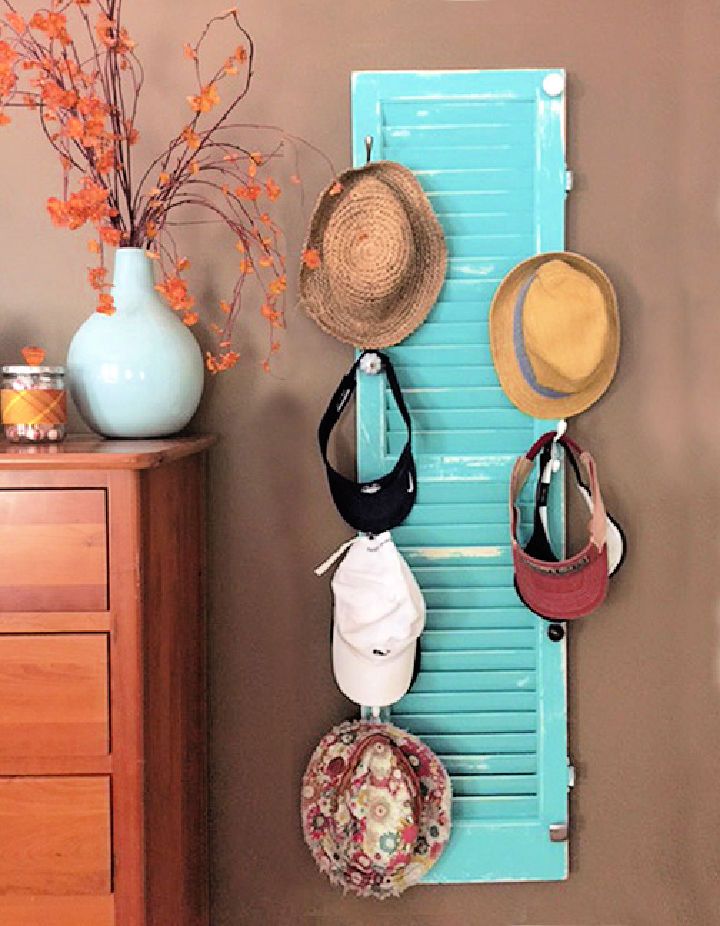
Transform an old shutter into a practical and stylish hat rack with this DIY guide. Start by finding an inexpensive flea market or thrift store shutter measuring 14 x 55″. Then, paint it with coats of your color and sand the edges for a rustic look.
Finish with acrylic polyurethane to seal the paint before adding an odd number of hooks or knobs. Vary the placement and elements to make an eclectic but cohesive look. Hang the hat rack on the wall or lean it against it. This repurposed project adds a touch of creativity and uniqueness to any room while helping you stay organized. grecodesign
15. Simple DIY Hat Rack

Are you looking for a simple DIY hat rack that is chic and contemporary? Look no further! Constructed with just four wooden dowels and leather straps, this minimalist hat rack can be built for no more than $20-$30. This easy-to-follow guide, with clear instructions and minimal materials, is perfect for beginners.
This timeless and unique hat rack adds a touch of creativity to home and interior design. So, get started on this fun and helpful DIY project! froy
16. 3 Easy Steps to Make a Hat Wall
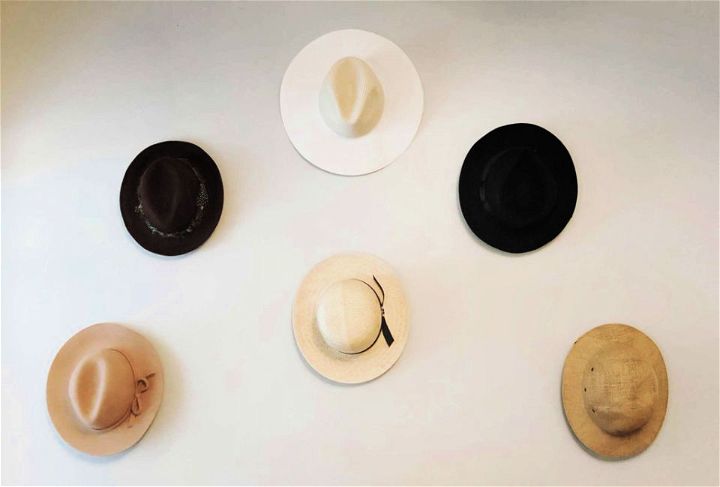
You don’t need to spend much money or time making your own diy hat storage idea. All you need are some basic materials and a bit of imagination. Learn how to make a shame-free zone in your home with this step-by-step guide on making your hat wall. Follow these simple instructions to arrange and hang your hats for a fun and unique wall art display.
Choose delight over perfection and embrace your individuality by making a space that reminds you of what you love and who you are. This easy-to-follow process allows you to express yourself and free yourself from the fear of failure. So, wear your hat delightfully and take another step towards making your shame-free zone. urbansouthern
17. Scrap Wood Pallet Baseball Hat Rack

Are you seeking a fun way to organize your kid’s baseball hat collection? Check out this DIY baseball hat rack made from scrap wood and old baseballs! This project is easy to follow and requires minimal tools and supplies. With step-by-step instructions and helpful tips, you can build your unique hat rack quickly.
Plus, it’s a great way to repurpose old materials and add sporty decor to your child’s room. Follow along with the tutorial and see how simple and budget-friendly this project can be! bowerpower
18. DIY Peg Coat and Hat Rack
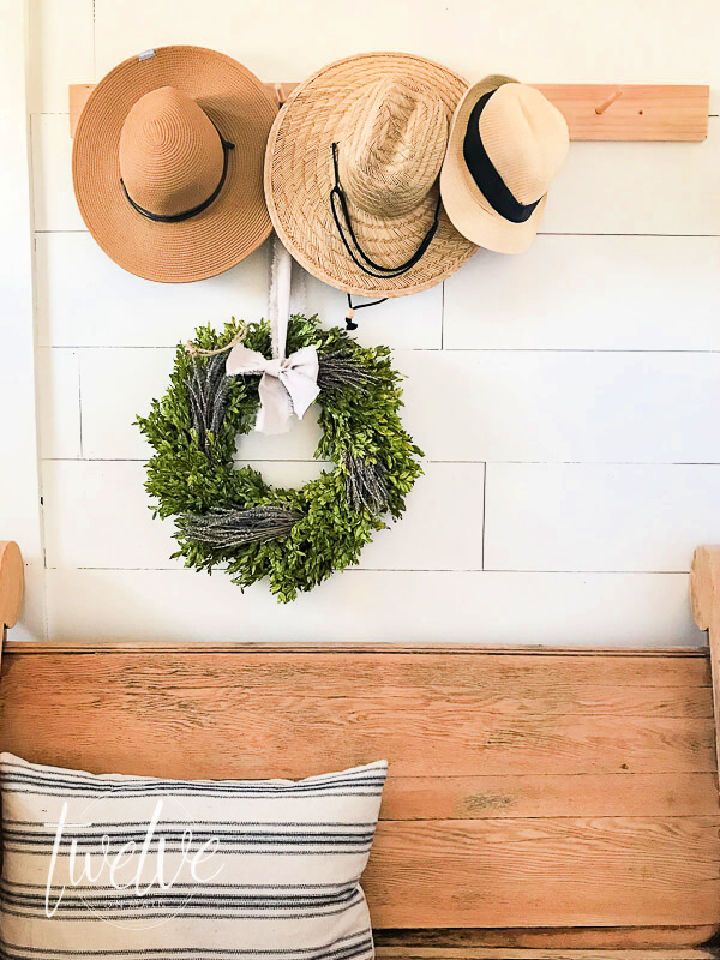
Show off your hat collection with these stylish and practical DIY hat-hanging ideas. This an easy DIY project to make an organic and stylish coat and hat rack for your entryway. This project only requires a few supplies, including wood, wooden dowels, a cordless drill, wood glue, and a hammer.
Following the step-by-step instructions, you can make a beautiful and functional peg coat and hat rack in less than 20 minutes. With a cost of under $10, this project is best for those on a budget who still want to add a touch of creativity and uniqueness to their home decor. twelveonmain
19. DIY Clothes Pin Hat Rack
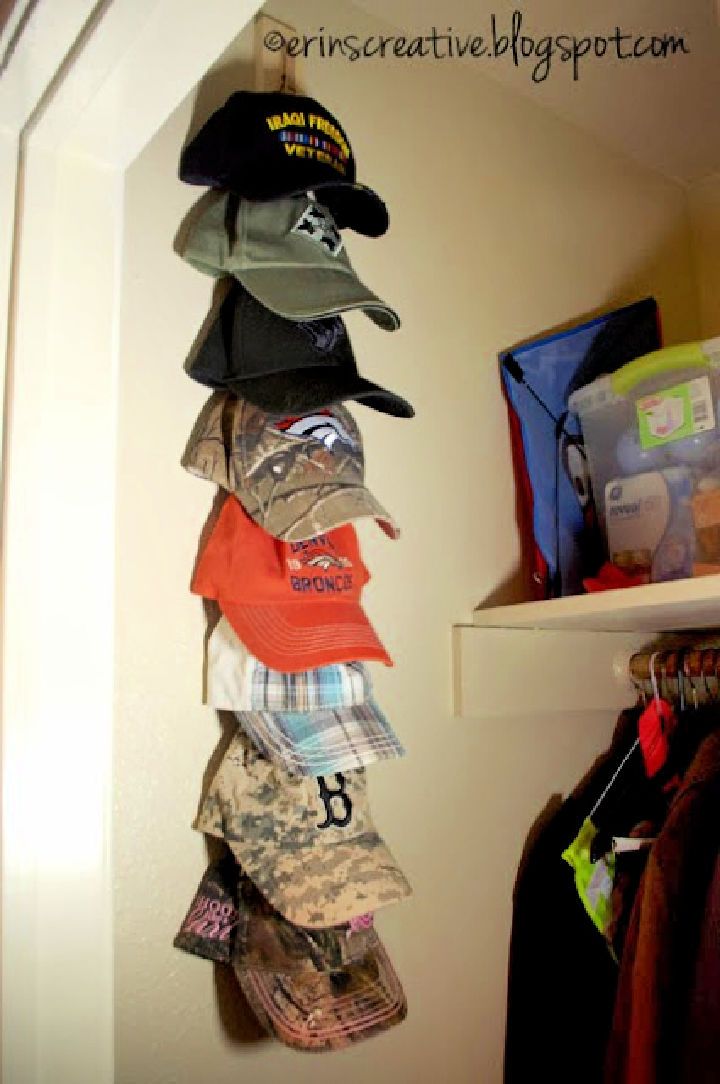
Organize your home with a simple and free DIY project to clear up clutter and keep your hats in order. Follow the step-by-step guide using materials you likely already have on hand, such as a board, wooden clothespins, and wood glue.
Perfect for any beginner DIY enthusiast, this project can be customized to fit your needs. Give it a try, and use those different hats lying around. erinscreative
20. Hanging Hat Organizer Ideas
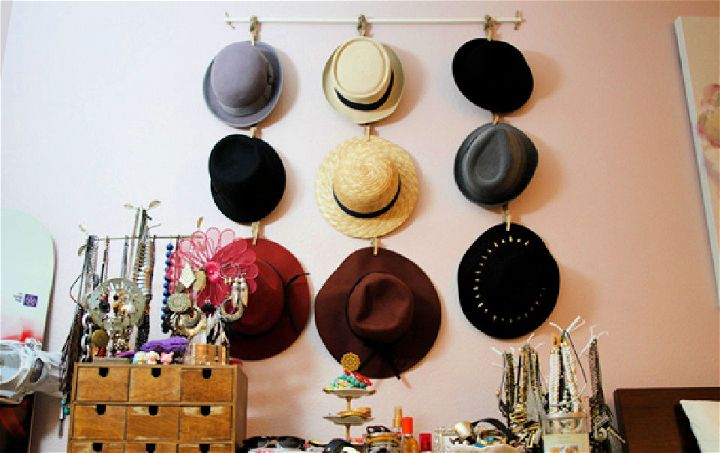
Transform your empty wall into a hat gallery with these clever and unique DIY hat-hanging ideas. Discover an easy and creative way to organize your hats with this DIY hanging hat organizer tutorial. This tutorial provides step-by-step instructions on making your hat organizer using inexpensive and easy-to-find materials such as jute twine, wooden clothespins, and bar pins.
The process is customizable and can accommodate wide-brim hats without needing multiple holes in the wall for hooks. The result is a functional and aesthetically pleasing display that showcases your hat collection. beautybitten
21. Simple DIY Industrial Hat Rack
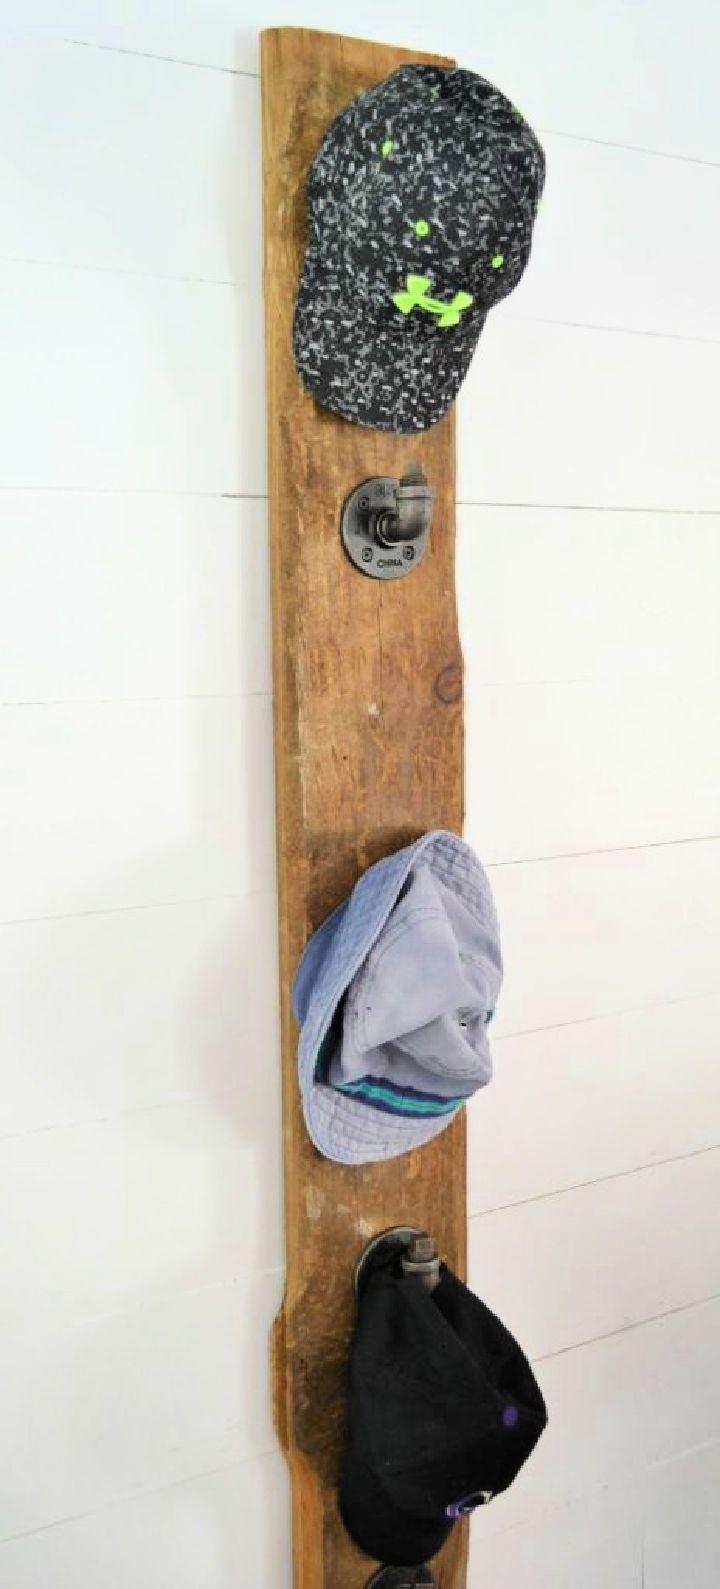
Organize your hat collection with this DIY industrial hat rack made from iron pipes and a wooden board. The unique industrial touch comes from plumbing materials, and with the option to adjust the length and placement of the flanges, you can customize the hat rack to your liking.
You can hang vertically or horizontally, and it is not limited to just hats, making it a versatile and creative organizational solution. Follow this tutorial to make your industrial hat rack today. prettyhandygirl
22. Easy Hat Rack Woodworking Plan
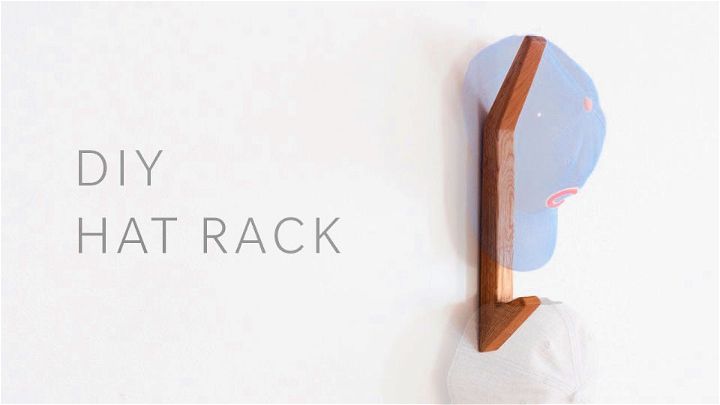
This DIY woodworking project guides you on making a hat rack using the bent lamination technique as the main ingredient. The video tutorial includes a backup plan, tools, and materials like Arm R Seal Urethane Top Coat, Incra T-Rule, and Gorilla Gripper for carrying plywood.
Follow along with the step-by-step instructions provided in this project and build your own functional and stylish hat rack. With the help of this DIY hat rack, you can declutter your space and add a unique touch to your home decor. youtube
23. DIY Wooden Hat Rack
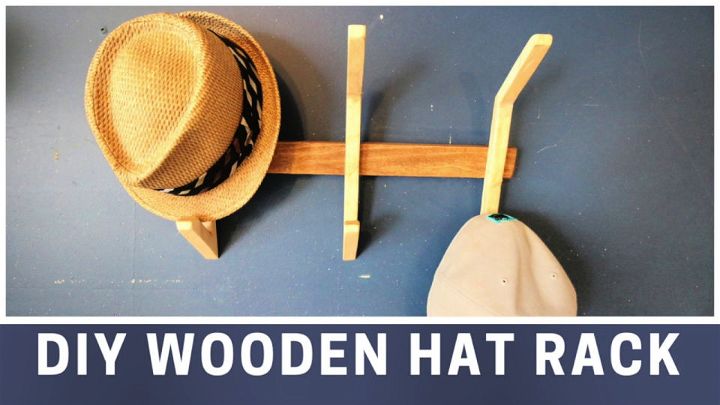
This easy-to-follow guide teaches how to make your own DIY wooden hat rack. Using just 1 “x4” lumber, tools and equipment, you can make a unique and practical storage solution for your hats that won’t break the bank. The tutorial provides a step-by-step process; you can even download a hat rack template to simplify the project.
Whether you’re looking for a creative way to organize your hats or enjoy DIY projects, this hat rack is a fun and useful addition to any home.
24. How to Make a Hat Rack – Step by Step

Are you looking for an easy but useful DIY woodworking project? Check out this beginner-friendly hat rack build! You can make a customizable rack with just a few materials and tools to fit your needs.
Plus, the optional golf ball accents add a fun touch. Follow the step-by-step instructions and get creative with your finishing touches to make a unique and practical addition to your home. Start building now and enjoy the satisfaction of a successful project!
25. Dinosaur Hat Rack Tutorial
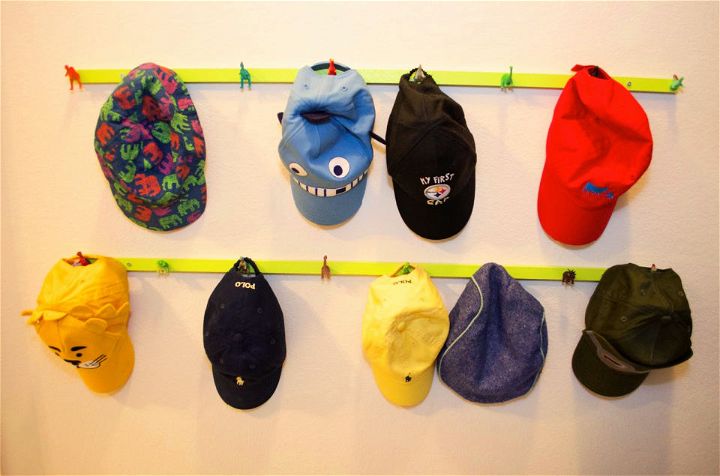
Display your hats on the wall with these easy and creative DIY hat hanging ideas. Make a fun and functional DIY project with this guide on making a dinosaur hat rack for your child’s closet. You can make a unique and cost-effective hat storage solution using poplar wood strips, screws, spray paint, and adorable dinosaur figurines.
With easy-to-follow instructions and basic tools like a bandsaw and screw gun, this project is perfect for beginners and experienced DIYers. This fun and helpful addition makes your child’s closet more organized and creative. crazycozads
Conclusion:
Hats are not only functional accessories that protect us from the sun, cold, or rain, but also stylish items that can express our personality and mood. However, storing and displaying hats can be a challenge, especially if we have a large collection of different types and sizes. That’s why we have compiled 25 cool DIY hat rack ideas that you can make at home with little effort and cost.
These hat rack and storage ideas will help you organize your hats in a neat and creative way, while also adding some charm and character to your space. Whether you want a rustic, modern, or whimsical hat rack, you will find the perfect one for your style and needs. So don’t let your hats get dusty or damaged in a closet or drawer, make your own DIY hat rack today and show off your hat collection with pride!

