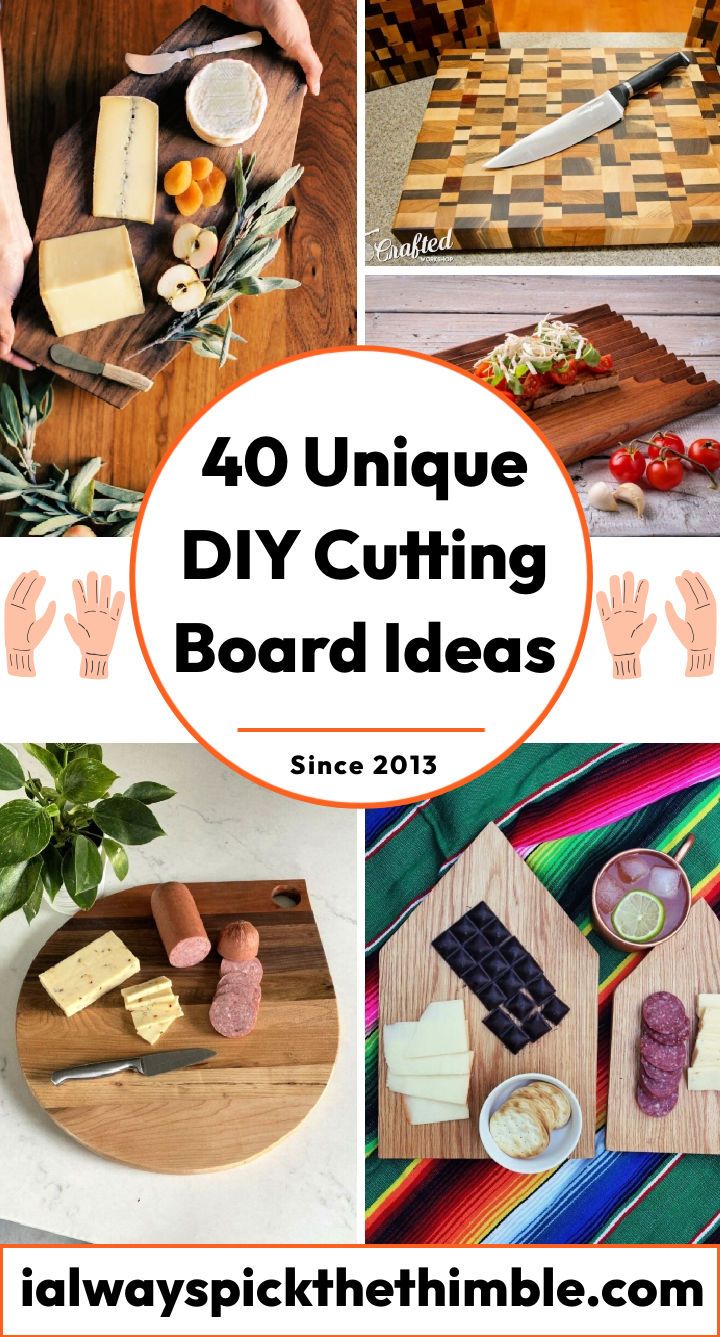
Making your own homemade cutting boards is a rewarding woodworking project. Learn how to make a cutting board with these 40 free DIY cutting board ideas and plans to add a useful tool to your kitchen. Whether you want a simple striped board or a more intricate cactus-shaped one, you can find a project that matches your skill level and style.
Some DIY cutting board plans are easy and perfect for beginners, such as a basic end grain board or a two-tone wooden board. Others are more challenging and require some woodworking knowledge, such as a knife block cutting board or a walnut board with brass inlay. But don’t worry, each DIY cutting board plan has clear instructions and sometimes videos to help you complete your project successfully, no matter how experienced you are.
Another important thing to know when making a cutting board is how thick it should be and how to seal it properly to make it last longer and safer for food use. With our helpful guides, you can learn how to make a cutting board from scratch, choose the best wood, apply the right sealant, and maintain your homemade cutting board to keep it in good shape for years.
Making your own cutting board is not only practical; it’s also a way to express your personality in your kitchen. You can go for a simple look with a solid maple board or a more rustic look with a pallet wood board, depending on your preference. These DIY cutting board ideas and plans can inspire you to create something truly special. So why not grab your tools today and start your DIY cutting board project?
Learn About Homemade Cutting Boards
A cutting board is a flat surface that you use to cut, chop, slice, or dice food ingredients. It protects your countertop from damage and prevents cross-contamination of food. It also makes your food preparation easier and faster.
There are many types of cutting boards available in the market, such as wood, plastic, bamboo, glass, or metal. However, making your own cutting board can be a fun and rewarding experience. You can customize your homemade cutting boards according to your taste, style, and budget. You can also use different materials, shapes, sizes, and patterns to create unique and beautiful cutting boards.
Choosing the Right Material for Your Homemade Cutting Board
The first step in making a cutting board is choosing the right material. The material you select will affect the durability, appearance, and performance of your cutting board. Here are some factors to consider when choosing a material:
- Hardness: The hardness of the material determines how well it resists scratches, dents, and cuts. A harder material will last longer and require less maintenance, but it may also dull your knives faster. A softer material will be gentler on your knives, but it may also wear out quicker and harbor more bacteria. A good balance between hardness and softness is ideal for a cutting board.
- Grain: The grain of the material refers to the direction and pattern of the wood fibers or plastic strands. A straight grain is easier to work with and produces a smooth and even surface. A cross-grain or end-grain is more difficult to work with and produces a rougher and uneven surface. However, a cross-grain or end-grain is also more resistant to warping, cracking, and splitting than a straight grain.
- Color: The color of the material affects the aesthetic appeal of your cutting board. You can choose a color that matches your kitchen decor or contrasts with your food ingredients. You can also mix and match different colors to create interesting designs and patterns.
- Cost: The cost of the material depends on its quality, availability, and demand. Generally, wood is more expensive than plastic, and hardwood is more expensive than softwood. However, the cost of the material is not the only factor that determines the value of your cutting board. You should also consider the craftsmanship, durability, and functionality of your cutting board.
Some of the most popular materials for making cutting boards are:
- Wood: Wood is a natural and renewable material that has been used for centuries to make cutting boards. Wood has a warm and rustic charm that adds character to your kitchen. Wood also has antibacterial properties that inhibit the growth of harmful microbes on its surface. However, wood also has some drawbacks. Wood is porous and absorbs moisture, which can cause it to warp, crack, or rot over time. Wood also requires regular oiling and waxing to prevent drying and staining.
- Plastic: Plastic is a synthetic and non-porous material that is easy to clean and sanitize. Plastic is lightweight and flexible, which makes it convenient to use and store. Plastic also comes in various colors and shapes that can suit any preference or purpose. However, plastic also has some disadvantages. Plastic is prone to scratches and cuts that can harbor bacteria and odors. Plastic also degrades over time due to exposure to heat, light, and chemicals.
- Bamboo: Bamboo is a grass that grows fast and abundantly in many parts of the world. Bamboo is eco-friendly and sustainable because it does not require pesticides or fertilizers to grow. Bamboo is also hard and dense, which makes it durable and resistant to scratches and cuts. However, bamboo also has some limitations. Bamboo is not very absorbent, which means it can retain water on its surface and cause mold or mildew growth. Bamboo also requires special care to prevent splitting or cracking.
Avoiding Common Mistakes When Making Cutting Boards
Making a cutting board may seem simple, but it can also be tricky if you don’t know what you’re doing. Here are some common mistakes that beginners make when making cutting boards and how to avoid them:
- Using the wrong material: As mentioned above, choosing the right material for your cutting board is crucial for its quality and performance. You should avoid using materials that are too soft (such as pine), too hard (such as marble), or too toxic (such as treated wood) for your cutting board.
- Using the wrong tools: Using the wrong tools can damage your material or result in poor craftsmanship. You should use sharp knives, saws, drills, sanders, clamps, glue, oil, and wax that are suitable for your material and project. You should also wear protective gloves, goggles, and masks when working with your tools.
- Using the wrong measurements: Using the wrong measurements can lead to uneven or inaccurate cuts, gaps, or overlaps in your cutting board. You should use a ruler, a tape measure, a pencil, and a square to mark and measure your material before cutting it. You should also double-check your measurements and make adjustments if necessary.
- Using the wrong technique: Using the wrong technique can cause your cutting board to warp, crack, or split. You should follow the instructions and tips provided in the cutting board plans and guides that you use. You should also practice your technique on scrap pieces of material before working on your final product.
Tools and Equipment Needed to Make Cutting Boards
To make a cutting board, you need some basic tools and equipment that are commonly found in most workshops or hardware stores. Here are some examples:
- Knives: You need knives to cut your material into smaller pieces or shapes. You can use different types of knives depending on your material and project, such as utility knives, carving knives, paring knives, etc.
- Saws: You need saws to cut your material into larger pieces or shapes. You can use different types of saws depending on your material and project, such as hand saws, circular saws, jigsaws, band saws, etc.
- Drills: You need drills to make holes in your material for screws, dowels, handles, etc. You can use different types of drills depending on your material and project, such as hand drills, electric drills, cordless drills, drill presses, etc.
- Sanders: You need sanders to smooth and polish the surface of your material. You can use different types of sanders depending on your material and project, such as hand sanders, orbital sanders, belt sanders, etc.
- Clamps: You need clamps to hold your material in place while you work on it. You can use different types of clamps depending on your material and project, such as C-clamps, bar clamps, spring clamps, etc.
- Glue: You need glue to join two or more pieces of material together. You can use different types of glue depending on your material and project, such as wood glue, plastic glue, epoxy glue, etc.
- Oil: You need oil to protect and enhance the appearance of your material. You can use different types of oil depending on your material and project, such as mineral oil, linseed oil, tung oil, etc.
- Wax: You need wax to seal and shine the surface of your material. You can use different types of wax depending on your material and project, such as beeswax, carnauba wax, paraffin wax, etc.
Step-by-Step Guide to Making a Cutting Board
Now that you have chosen your material, tools, and equipment, you are ready to make your cutting board. Here is a general step-by-step guide to making a cutting board:
- Cut your material: Using your knives and saws, cut your material into the pieces that you need for your cutting board. Follow the measurements and directions given in your cutting board plan. Make sure to cut your material accurately and smoothly.
- Glue your pieces: Using your glue and clamps, glue your pieces together to form the shape of your cutting board. Follow the order and alignment given in your cutting board plan. Make sure to apply enough glue and pressure to create a strong and tight joint.
- Sand your surface: Using your sanders and sandpaper, sand your surface to remove any rough edges, splinters, or excess glue. Start with a coarse grit sandpaper and gradually move to a finer grit sandpaper. Make sure to sand your surface evenly and smoothly.
- Drill your holes: Using your drills and drill bits, drill any holes that you need for your cutting board. For example, you may want to drill holes for screws, dowels, handles, or hanging hooks. Follow the location and size given in your cutting board plan. Make sure to drill your holes carefully and cleanly.
- Oil your surface: Using your oil and a clean cloth, oil your surface to protect and enhance the appearance of your material. Follow the type and amount of oil given in your cutting board plan. Make sure to apply the oil evenly and generously on all sides of your cutting board.
- Wax your surface: Using your wax and a clean cloth, wax your surface to seal and shine the surface of your material. Follow the type and amount of wax given in your cutting board plan. Make sure to apply the wax evenly and lightly on all sides of your cutting board.
How to Seal a Wood Cutting Board
There are different methods and products that you can use to seal a wood cutting board. Here is a step by step guide to seal your DIY wood cutting board perfectly:
- Choose a product that is suitable for your wood type and preference. Some of the most common products are mineral oil, beeswax, coconut oil, carnauba wax, tung oil, and linseed oil. You can also mix different products to create your own blend.
- Apply the product on the surface of the wood with a cloth or paper towel. Make sure to cover all sides and edges of the cutting board. Let the product soak into the wood for the recommended time, usually between 15 minutes to an hour.
- Wipe off the excess product with a clean cloth or paper towel. Buff the surface of the wood with a clean cloth to create a smooth and shiny finish. You may need to repeat this step several times until the wood stops absorbing the product.
- Clean, dry, and store your cutting board properly after each use. Reapply the product every few months or as needed to maintain the seal and appearance of your cutting board.
Finishing Your Cutting Board
Congratulations! You have made your own cutting board at home. Now you can enjoy using it for your food preparation or give it as a gift to someone special.
However, before you use or store your cutting board, there are some things that you need to do to finish it properly:
- Clean your cutting board: After each use, you should clean your cutting board with hot water and mild soap. Do not soak or submerge your cutting board in water, as this can cause it to warp or crack. Do not use bleach or harsh chemicals on your cutting board, as this can damage or discolor it.
- Dry your cutting board: After cleaning, you should dry your cutting board with a clean towel or paper towel. Do not leave your cutting board wet or damp, as this can cause mold or mildew growth. Do not dry your cutting board in direct sunlight or near heat sources, as this can cause it to warp or crack.
- Store your cutting board: After drying, you should store your cutting board in a cool and dry place. Do not stack or pile other items on top of your cutting board, as this can cause it to warp or crack. Do not store your cutting board in a plastic bag or wrap, as this can trap moisture and cause mold or mildew growth.
- Maintain your cutting board: Every few months, you should oil and wax your cutting board again to keep it in good condition. You should also check for any cracks, splits, or loose joints on your cutting board and repair them if necessary.
Understanding Free DIY Cutting Board Plans
Our free DIY Cutting board plans include detailed diagrams or instructions that show you how to make a cutting board. They usually include the following information:
- Material list: This is a list of the materials that you need to make your cutting board, such as wood, plastic, glue, oil, etc. It also specifies the quantity, size, and type of each material.
- Tool list: This is a list of the tools that you need to make your cutting board, such as knives, saws, drills, sanders, clamps, etc. It also specifies the function and setting of each tool.
- Cut list: This is a list of the cuts that you need to make on your material to create the pieces of your cutting board. It also specifies the length, width, thickness, angle, and direction of each cut.
- Assembly diagram: This is a diagram that shows you how to assemble the pieces of your cutting board. It also specifies the order, position, orientation, and alignment of each piece.
- Finishing instructions: This is a set of instructions that show you how to finish your cutting board. It also specifies the type and amount of oil, wax, or other products that you need to apply on your cutting board.
To understand cutting board plans, you need to be familiar with some basic terms and symbols that are used in them. Here are some examples:
- Grain: This is the direction and pattern of the wood fibers or plastic strands in your material. It is usually indicated by parallel lines or arrows on the plan.
- Edge: This is the side or end of a piece of material that is perpendicular to its grain. It is usually indicated by a solid line on the plan.
- Face: This is the surface of a piece of material that is parallel to its grain. It is usually indicated by a dotted line on the plan.
- Joint: This is the point where two or more pieces of material are joined together. It is usually indicated by a circle or a letter on the plan.
- Glue line: This is the line where glue is applied to join two or more pieces of material. It is usually indicated by a dashed line on the plan.
Explore DIY Cutting Board Ideas
Discover 40 creative and practical DIY cutting board ideas for your kitchen with our comprehensive guide. Get inspired to make your own unique and functional cutting boards:
1. How to Make a Chevron Cutting Board
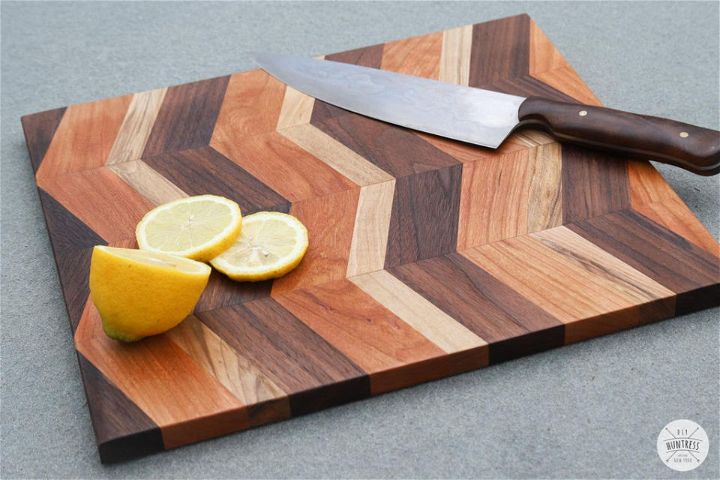
Make your kitchen stand out with this stylish DIY cutting board! Using walnut, maple and padauk boards, wood glue, and cutting board oil, you can easily make a chevron cutting board that is both functional and eye-catching. Cut the boards to the desired width and thickness using a table saw, cut at 25-degree angles using miter saws or table saws, and glue in an alternating pattern for an interesting chevron look. Sand and finish off with some cutting board oil for a beautiful design.
Perfect for gifting or just keeping within your kitchen, follow the step-by-step instructions to make it happen quickly yet effectively! Give your kitchen the modern upgrade it deserves; try making this stylish DIY chevron cutting board today! instructables
2. DIY Wooden Cutting Boards With Resin
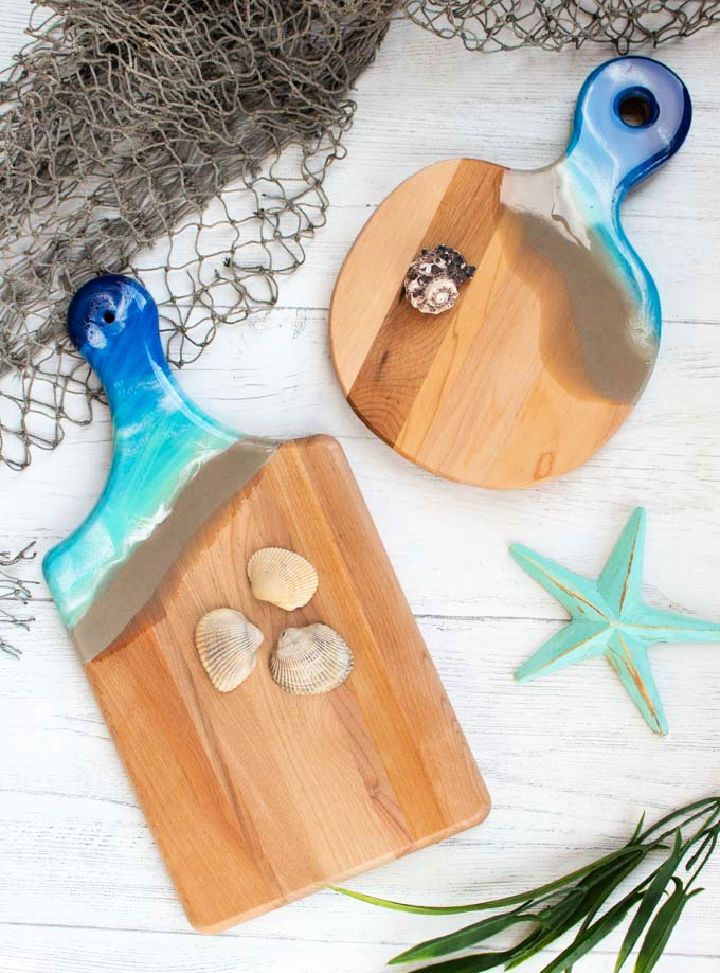
Make a beachy home feel with these DIY coastal-inspired wooden cutting boards! With envirotex lite pour-on, acrylic paints and castin’ craft pigment, you can make a high gloss resin surface that resembles water. The resin also protects your painted design from wear and tear. Add the detail to one side for functionality as an eye-catching addition to your kitchen – perfect for weddings, bridal showers or birthdays.
Get creative with all the materials needed: envirotex lite pour-on, wooden cutting boards, painter’s tape, acrylic paints, castin’ craft pigment, alcohol and dropper and more! Transform any kitchen into a beach paradise with these DIY coastal-inspired wooden cutting boards! resincrafts
3. Serving Cutting Board Out of Elm Wood
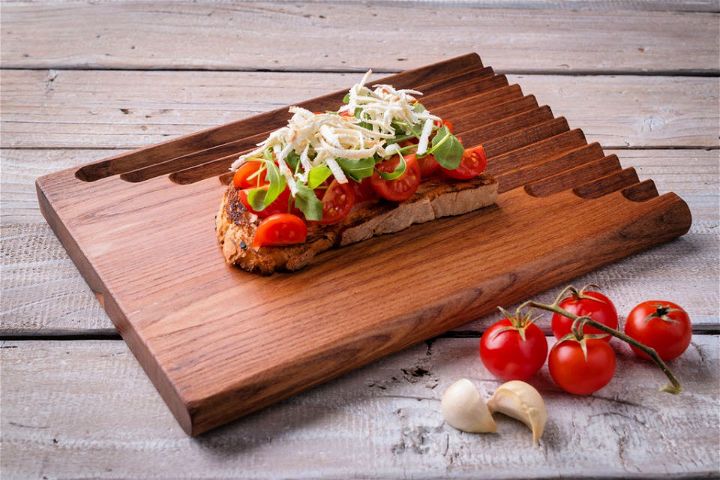
Craft a unique and beautiful cutting board with your own hands using this DIY tutorial! Make precision cuts with a router, plane and cut boards made from durable elm wood, then join the two together using the strong groove and spline system. Start with a sketch to plan your design, select the perfect wood for the job, and plane it down to size. Cut grooves on each side of both boards using a router table. Finish by applying waterproof glue plus inserting wooden splines – clamp tight for an invisible joint when done! Get creative with this easy DIY project – make a functional serving/cutting board today! instructables
4. DIY Two Tone Wooden Cutting Board
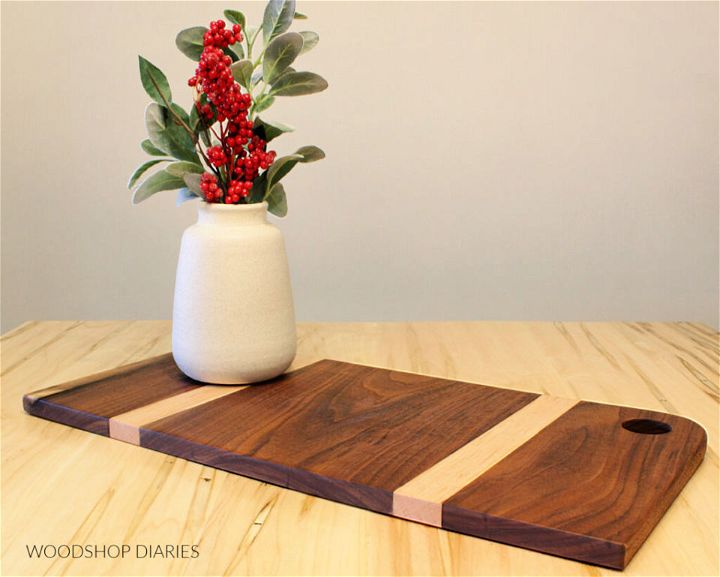
Looking for creative DIY cutting board ideas? Get creative and make your unique cutting or charcuterie board with this DIY project! You can make a board to match any style using hardwood scraps, wood glue, and a few basic tools. Choose the size, type of wood, and color and add decorative edging for extra flair. For added durability, use a wood finish. Get started today and make something functional and stylish – perfect for entertaining guests or everyday use in your kitchen! woodshopdiaries
5. Edge Grain Cutting Board for Beginners
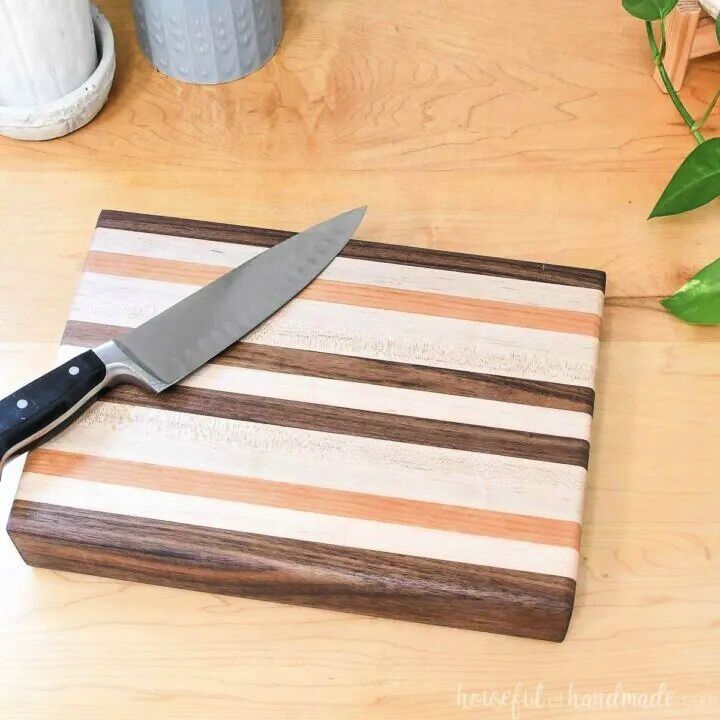
Discover how to craft a beautiful, durable edge-grain cutting board with minimal tools! Choose from several hardwoods like cherry, walnut, or pecan for an easy-to-clean surface. Avoid softwoods like pine and opt for tight-grained hardwood varieties instead. Get creative by using different woods to make striped boards, or keep it simple with one color. With a miter saw, clamps and a sander, you can easily make your own 1 ½″ thick cutting board that will last for years—a great DIY gift idea! housefulofhand
6. Personalized Cactus Cutting Board
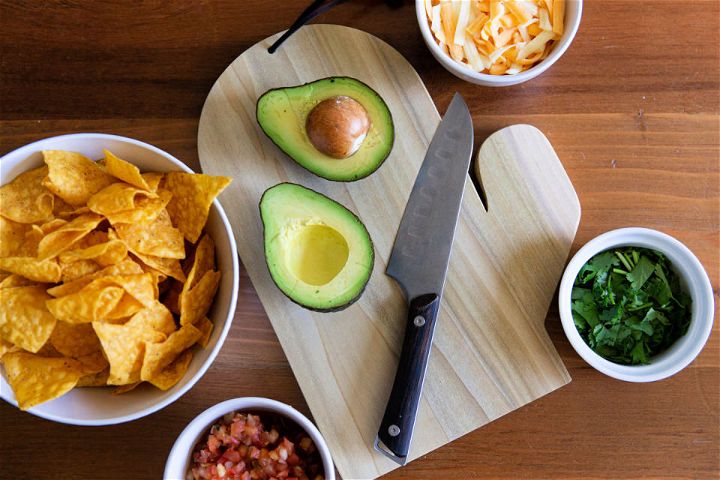
Show your love of Cinco de Mayo with a personalized cactus cutting board! This DIY project is easy to make with just a 1×12 2′ poplar, mineral oil & leather strap. Perfect for any party host, the unique design will add a festive touch and look great in your kitchen all year round. Estimate 1-3 hrs & moderate difficulty – great gift for home cooks! Get creative & make it yourself today – a fun way to serve fresh guacamole at celebrations. Celebrate Cinco de Mayo with style while adding a special fun touch by making this one-of-a-kind cactus cutting board! dunnlumber
7. Solid Maple Cutting Board Plans
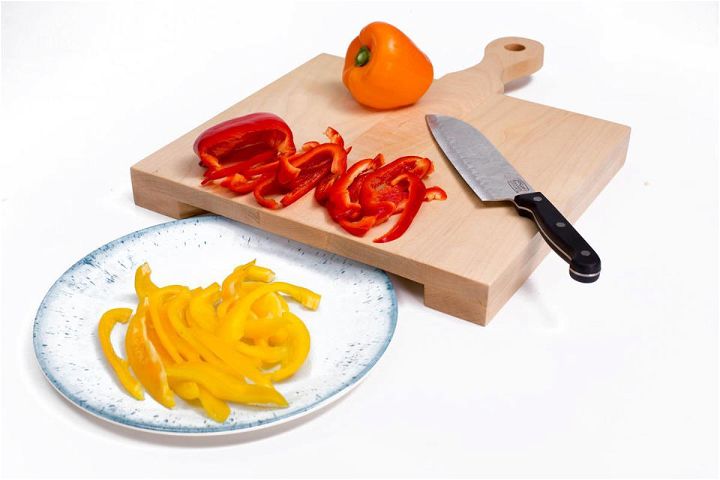
This attractive solid-maple cutting board is one of a kind with its convenient cutout for transferring food items onto a plate without spilling. Crafted from 1×6 maple sides, secured with pocket holes, a 1×3 maple handle, and a bottom center, this durable cutting board will last a lifetime. The top panel is attached to the handle and sides, while the bottom panel consists of two sides and the bottom center. After gluing up both panels, each piece is sanded down for safety before receiving a food-safe finish like butcher block oil that needs to be reapplied over time. Keep your environment safe by only using tight, closed-grain woods such as maple when looking for cutting surfaces. kregtool
8. Walnut Cutting Board With Brass Inlay
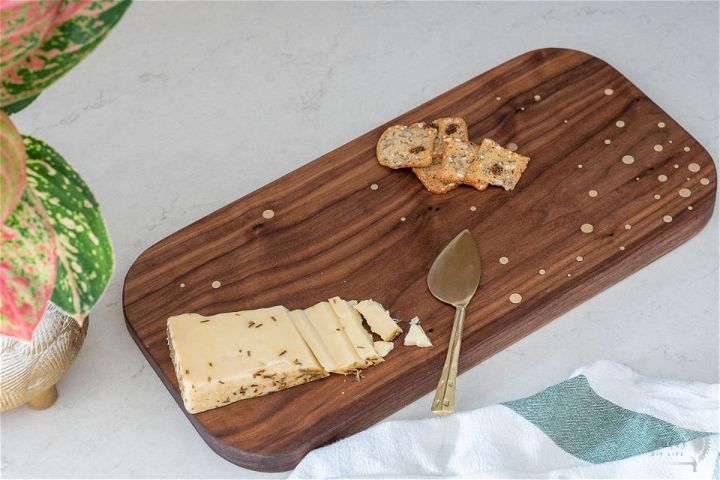
Discover how to make your own custom cutting boards with these DIY ideas, adding a personal touch to your cooking space. Carve out your kitchen masterpiece with this easy-to-follow guide! With only a few hours of active work, walnut boards, brass rods, jigsaw blades, sanding discs, drill bits and food-safe epoxy can make an amazing cutting board perfect for gifting. You can customize the size by gluing up multiple pieces of walnut – resulting in an exquisite combination of wood and metal that will last for years! Make your one-of-a-kind piece now using these easy steps and materials. anikasdiylife
9. Cool DIY Wooden Cutting Board
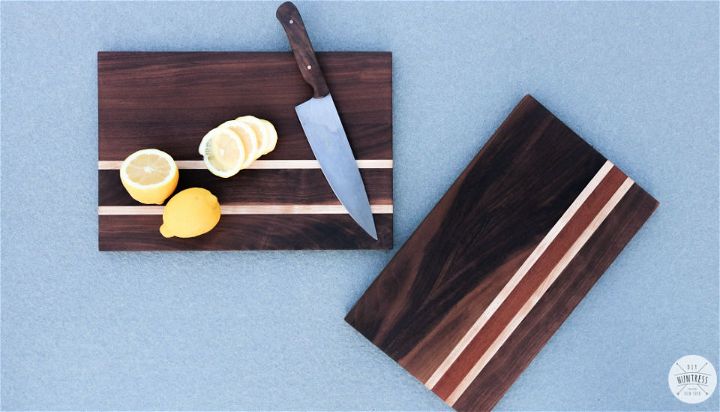
Whip up two beautiful hardwood cutting boards with just 3 power tools and no planer! This easy DIY project is perfect for woodworking beginners. All you need are precise cutters & sanders, clamps, glue, and hardwoods like maple, padauk & walnut. Remember the sanding discs/sandpaper and cutting board oil too!
Follow this step-by-step instruction to make a cutting board in no time – it’s an achievable task even for those without professional skills or knowledge! With this tutorial, you can make functional and stylish woodcutting boards that will last for years. diyhuntress
10. Ultimate Cutting Board With Knife Storage
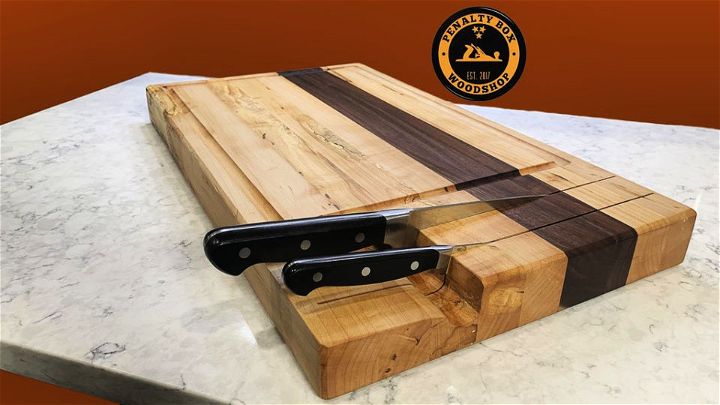
Get busy with your beginner woodworking skills and make your cutting board with integrated knife storage by following this easy DIY tutorial. The given instructions take you step-by-step through milling, edge jointing and gluing boards of maple and walnut to make a 22″ x 13″ x 2″ cutting board that is perfect for all your slicing needs. Use a miter saw to cut the boards into a square shape and then use a cordless track saw set at ¼″ depth from the bottom of the board to craft the knife slots. Utilize these detailed yet simple instructions to make your own customized cutting board! instructables
11. How Do You Make a Wooden Cutting Board
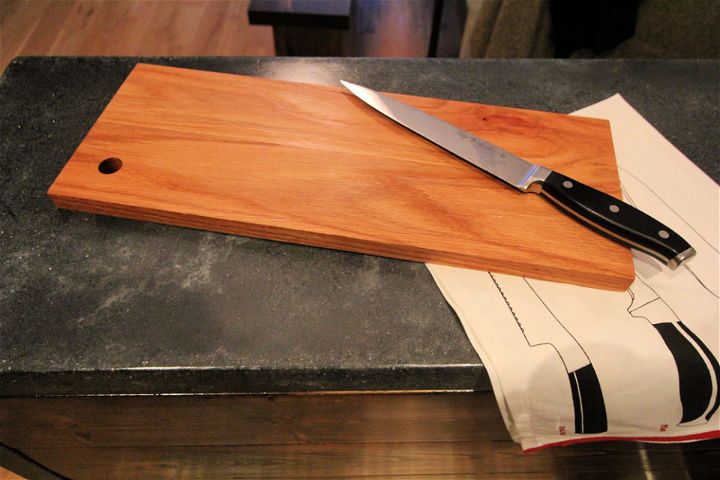
Design an affordable kitchen solution with a custom hardwood cutting board! Choose maple or ash for a tight grain or oak for an open pore option. Gather the necessary materials like saws, drills, safety equipment, clamps and more. With simple steps, you can make a perfect cutting board ideal for everyday use – no matter the meal. Start your DIY journey now with this easy project that will have you enjoying freshly cut veggies in no time! storefrontlife
12. Making an Ombre Cutting Board
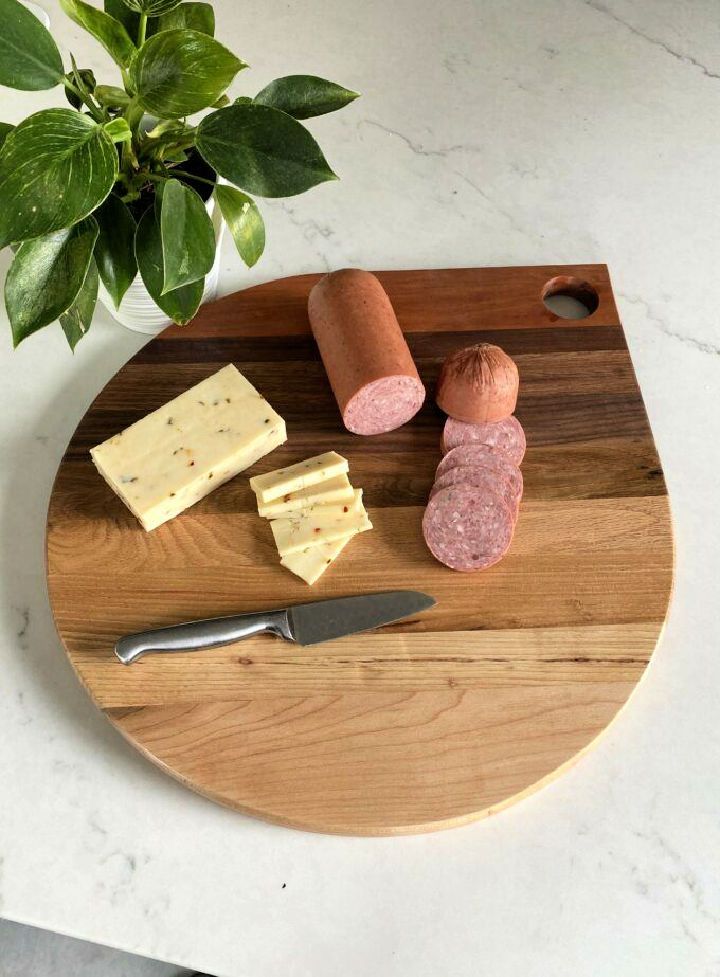
Do you love the look of an ombré cutting board but don’t think you have the skills to make one? Don’t worry – this easy DIY project is perfect even for beginners! With a few scraps of hardwood and some basic woodworking tools, you can make your own unique ombré cutting board in no time. Follow our simple step-by-step instructions to learn how to arrange the boards into ombré order and sand them together until they fit perfectly. Before you know it, you’ll have created a beautiful wooden work of art that will last for years! realitydaydream
13. Building a Wooden Cutting Board
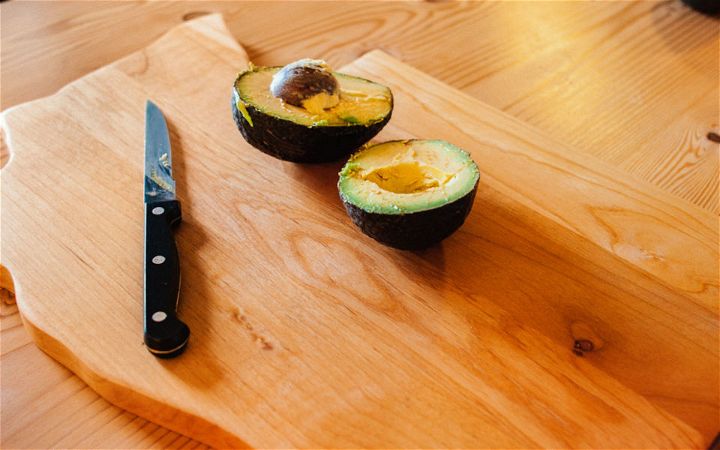
Learn how to make a DIY cutting board in the shape of Washington State! With a hardwood plank, jig saw power sander and wood treatment. You can craft your unique cutting board. Trace the desired shape onto your plank and cut it out with the jig saw. Sand both sides until smooth before finishing off with food-safe wood treatment. Always wash it with soap and water after use but avoid using it for cutting meat. Make an eye-catching, one-of-a-kind piece today! dunnlumber
14. How to Make a Cutting Board Out of Wood
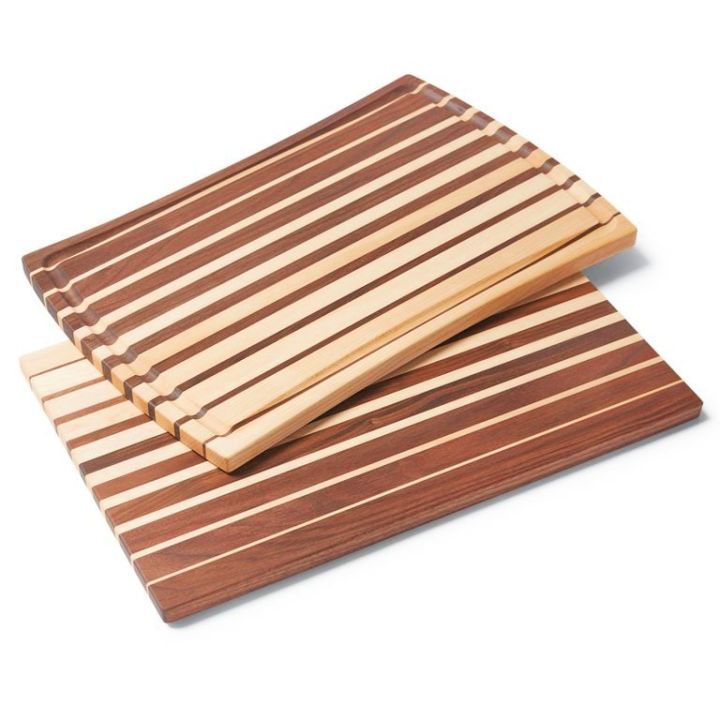
Craft out a stunning cutting board with wood scraps! This intermediate-level project takes a few hours and costs around $20-$50, with MDF, pine, and ¾-in.-thick boards in various species (walnut and maple), you can make your unique design. Glue the strips together using waterproof wood glue for maximum strength and reinforce them with double-sided tape for extra durability. Finish it with mineral oil to give it a polished look that will last for years. Make your beautiful cutting board today – perfect for any kitchen or workspace! familyhandyman
15. DIY End Grain Cutting Board – Free Plan
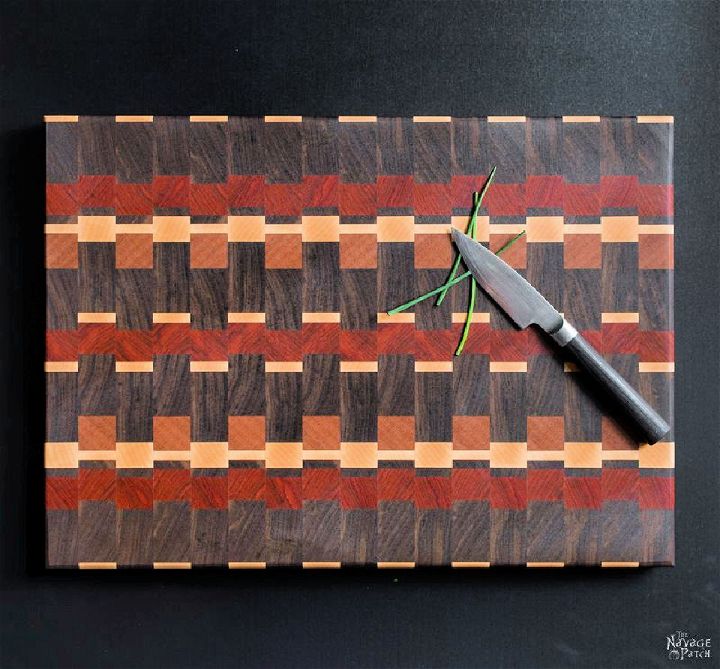
Fabricate a one-of-a-kind end-grain cutting board and be the envy of your kitchen with this DIY tutorial! With 4 contrasting species of wood, you can design an aesthetic cutting board that will last for years. Get step-by-step instructions, plus all the materials you need – like salad bowl finish, beeswax and walnut oil – to do your food-safe DIY project. Impress in the kitchen by making your own handmade end-grain cutting board that offers longevity and beauty today! thenavagepatch
16. Making Your Own Cutting Board From Scrap Wood
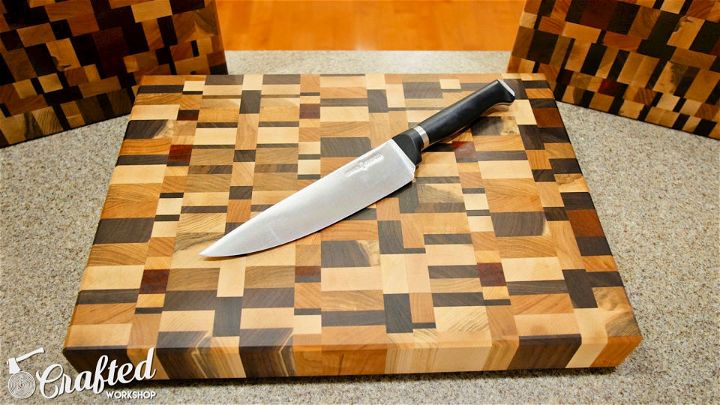
Creating your end grain cutting board is easy to do with this tutorial. This guide will help you make a beautiful piece you proudly display in your kitchen. With the use of wood sanders and other tools, build an eye-catching chaotic-style cutting board perfect for gifting or adding a unique touch to your kitchen décor.
Follow the step-by-step guide to make your masterpiece and finish it with wood glue, mineral oil and rubber feet! Add something special to your woodworking repertoire this holiday season – start building today! craftedworkshop
17. Homemade Wooden Cutting Board
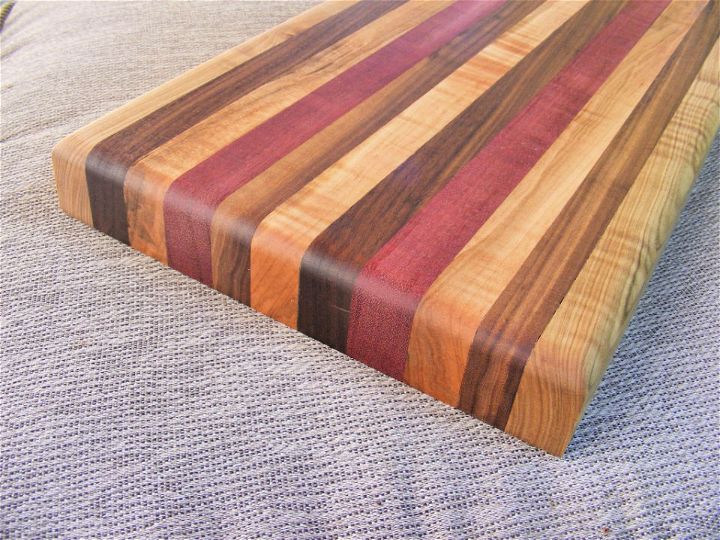
Achieve culinary excellence with this 11-step tutorial to make a stunning wooden cutting board! With only basic tools, use popular woods such as maple, walnut, and cherry to make a thoughtful gift or addition to your own home. This guide uses curly maple, walnut, and purpleheart wood along with titebond iii glue for strength & waterproofing properties. Optional rubber feet can be added for stability – get started on your first cutting board today! Learn how easy it is to craft something amazing! fouroakscrafts
18. Simple DIY Cutting Board Design
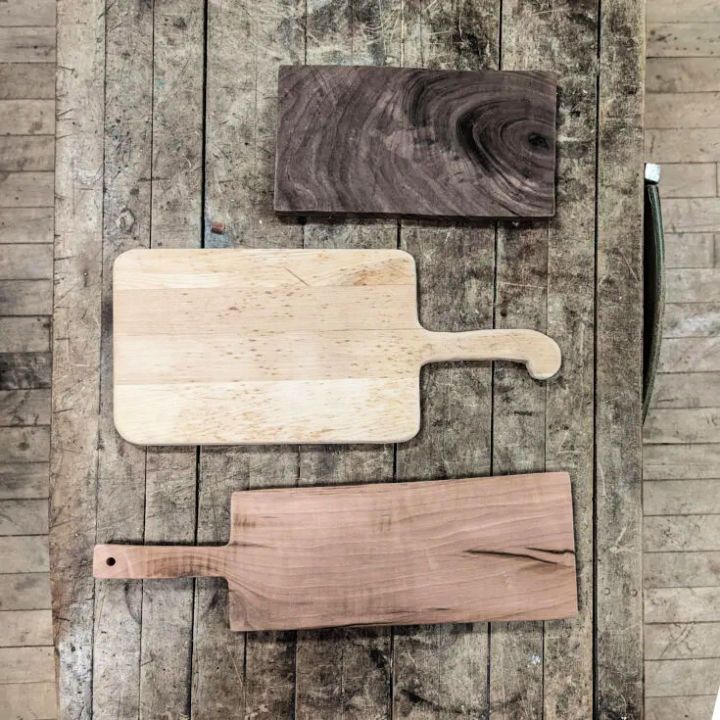
Turn discarded wood into stylish, functional cutting and cheese boards for your next charcuterie night! With this DIY project, you will learn why homemade is better than commercial and how to make them with basic tools in a community workshop. You will get tips on caring for your handmade cutting boards to protect your family’s health by avoiding chemicals in food. Make a decorative and functional addition to any kitchen with this DIY homemade cutting board made from flat planks of wood and oiled for food safety. Get started today! hawk hill
19. DIY Giant Cutting Board for Kitchen Decor
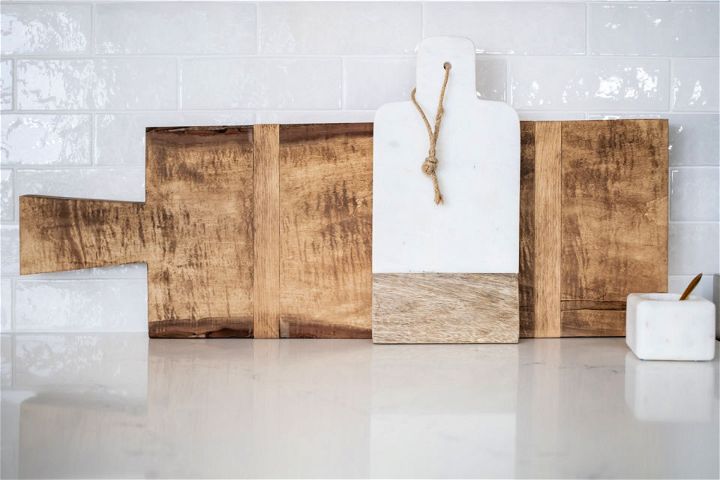
Transform your kitchen with a personalized, oversized cutting board – it’s easier than you think to make for less with this DIY guide! Skip the high price tag of pre-made boards and find a beautiful piece of wood at a local sawmill.
You need two strips of wood, a few basic tools, and some wood glue, and you’re ready to go. Use thick maple as the main material to give your extra kitchen durability. Add pine cross pieces for color contrast, or paint them if desired! With this project, you can save money while making something perfectly tailored to your preferences – try it today and enjoy your new custom cutting board! creeklinehouse
20. Handmade Log Cabin Style Cutting Board
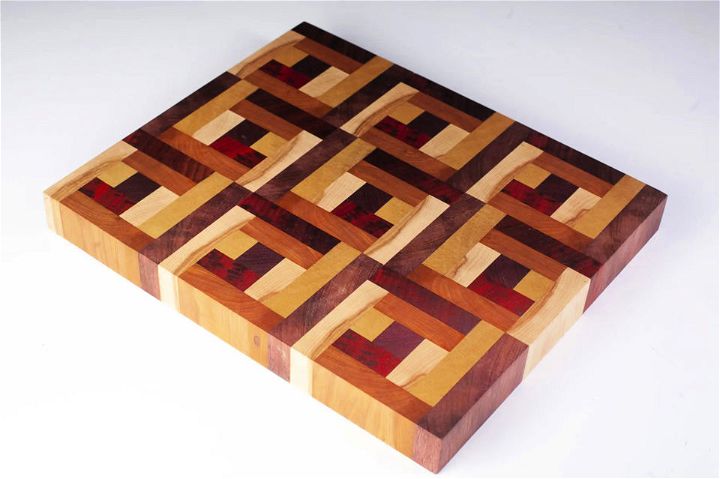
Explore a variety of DIY cutting board ideas that will elevate your culinary experience and impress your dinner guests. Let the journey of crafting your perfect kitchen accessory begin! This DIY log cabin-style tutorial creates a stunning and unique cutting board! This step-by-step guide will take you through making beautiful, functional art using a mix of colorful woods. With only $50, you can have your one-of-a-kind masterpiece in no time – perfect for enriching your kitchen or as an unforgettable gift to your loved ones. Make your cutting board dreams come true today! celebrationgeneration
21. How to Make a Wooden Cutting Board
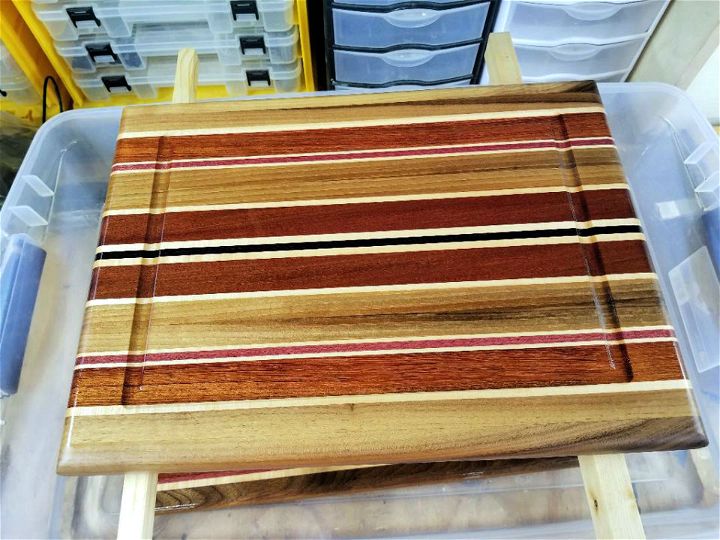
This Mother’s Day, show your loved one how much you care by making a beautiful and unique cutting board! Start with a 1″-1 ¼″ thick board, 16″ long by 12″ wide. Choose from domestic hardwoods such as walnut, maple, cherry or ash for the base wood and add an exotic hardwood for extra color and pattern. Avoid red oak due to its porousness.
Gather all the materials needed, such as mineral oil, waterproof glue, sanding pads up to 220 grit and the right combination of woods; then follow this step-by-step instruction for stunning results! Give your special someone this one-of-a-kind gift that will last a lifetime! toolsinaction
22. DIY Edge Grain Butcher Block Cutting Board
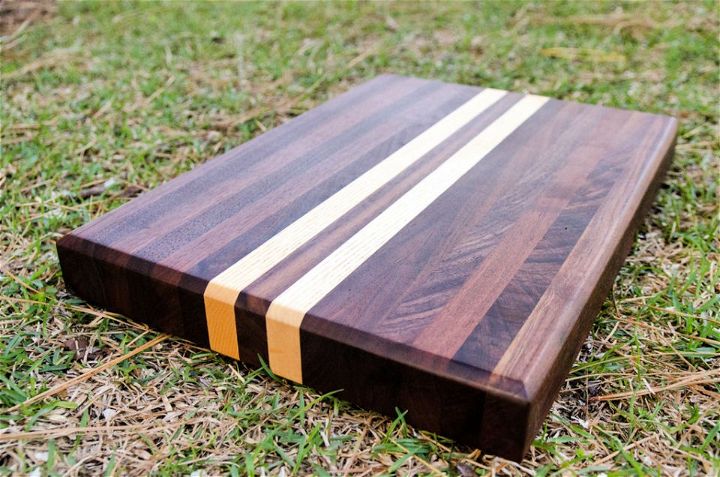
With this DIY tutorial, you can craft a useful and attractive edge-grain butcher block! Learn how to properly laminate multiple strips of wood together to build a classic cutting board. Select the best wood for your project, cut it to length, rip it to desired thickness, arrange it in a pattern and glue it up using an adhesive. Secure during drying with clamps, and then enjoy your custom-made cutting board! Check out the full tutorial and video for more information on the tools used for this project. instructables
23. Building a Curved Cutting Board
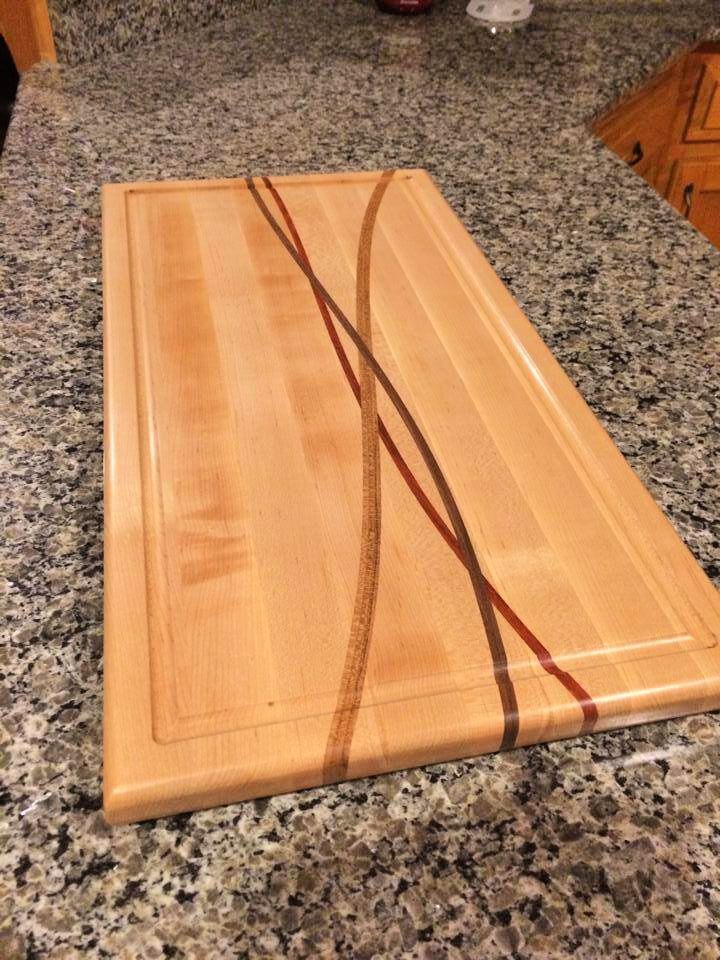
Upgrade your kitchen with these DIY cutting board designs that combine functionality and style, perfect for any home chef. Construct a practical and aesthetically pleasing cutting board using just eight sections of 1.5-inch wide and 1.25-inch thick rough-sawn timber! Glue, router, band saw, and various inlay strips are the tools & materials you’ll need to define a curve, clean up with a flush trim bit, plane to desired thickness & soften edges. Make sure to finish your masterpiece with food-safe options like mineral oil, butcher block oil or salad bowl finish for superior protection. Get creative with woodworking today! althoffwoodshop
24. Cool DIY Wooden Cutting Board Designs
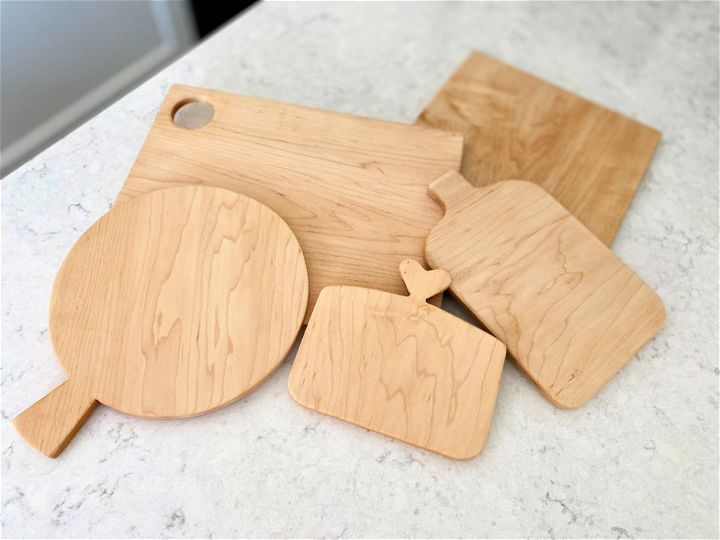
Make your cutting board in 3 easy steps! Get creative with this DIY project and save money while you’re at it. Hardwood, oil, and standard tools are all you need – estimated cost: $2-3 and time required: 30-45 minutes. Perfect for leftover wood, a fun weekend activity, or impressing your guests with a handmade cutting board. With just $2-3 of supplies and minimal effort, make your cutting board today for an affordable yet exquisite addition to any kitchen! thebrainandtheb
25. Build a Pallet Wood Cutting Board
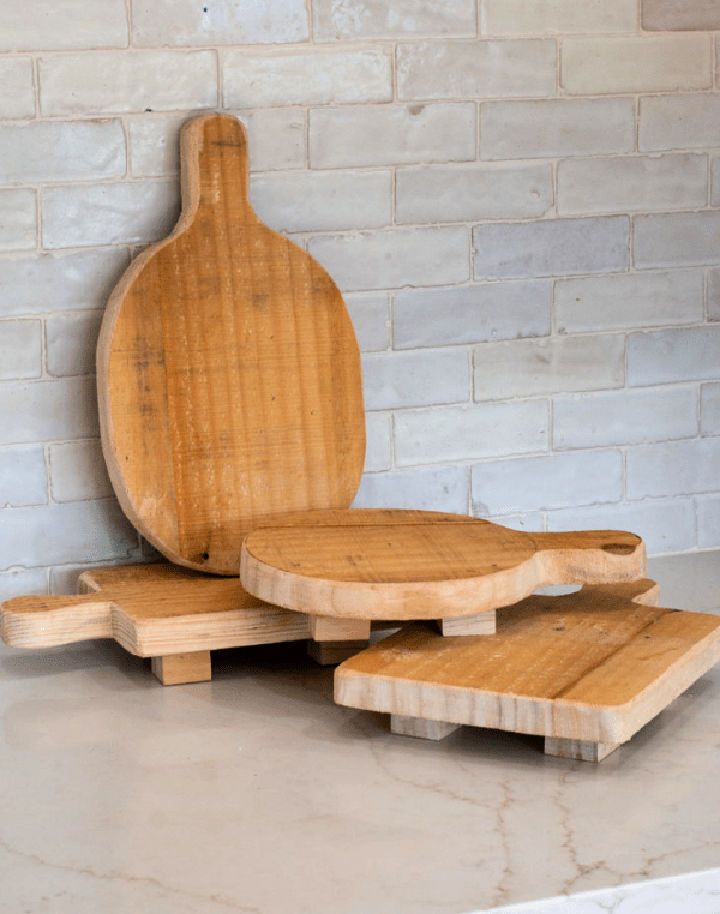
Transform your interior decor with DIY cutting board risers to get a unique rustic-style look. These pieces will offer an instant stylish boost to your living space. These easy-to-make wooden risers are perfect for entertaining, displaying mementos or as charcuterie boards. Using scrap lumber or pallet wood, you can easily make these beautiful cutting board risers for free! Optional wax, paint or stain allows you to customize the look of your project. Get creative and bring a farmhouse touch to your kitchen – make these stunning DIY cutting board risers today! farmlifediy
26. Making Your Own Cutting Board
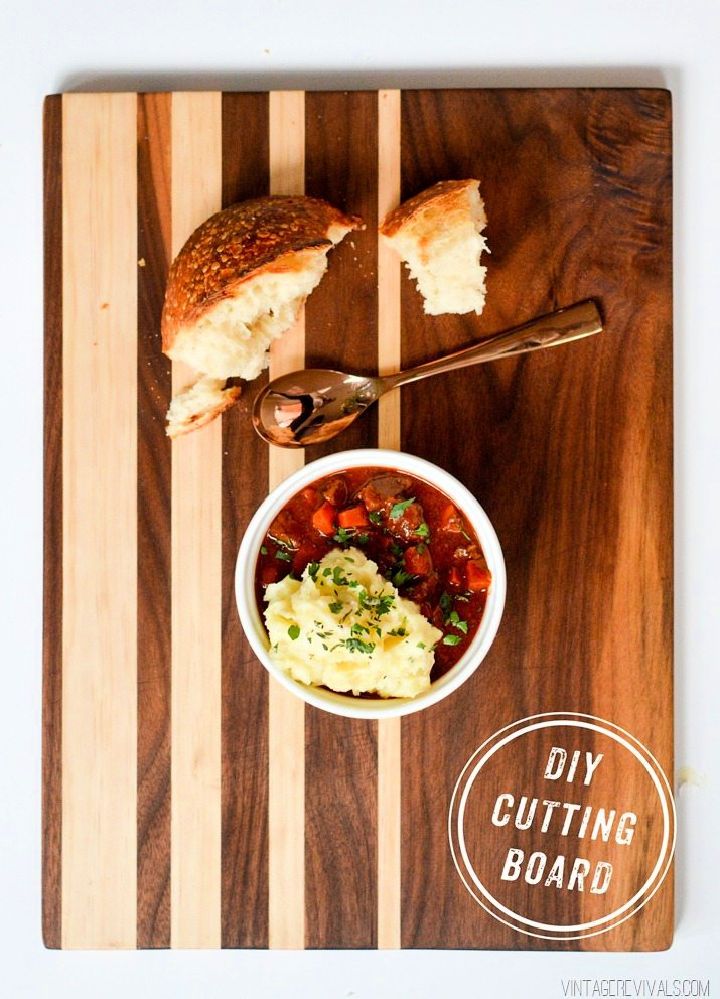
Design a stylish and practical cutting board made of walnut and pine by following this DIY tutorial. Cut the strips into different sizes, alternate them, then glue them together using wood glue. Clamp for 24 hours to reinforce it, sand until smooth, then trim the edges to even them out. Finally, season with cutting board oil for a finished product you’ll be proud of! Perfect for cooking projects or as an artisanal gift – this DIY cutting board is sure to impress! vintagerevivals
27. Make a Two-Toned Cutting Board at Home
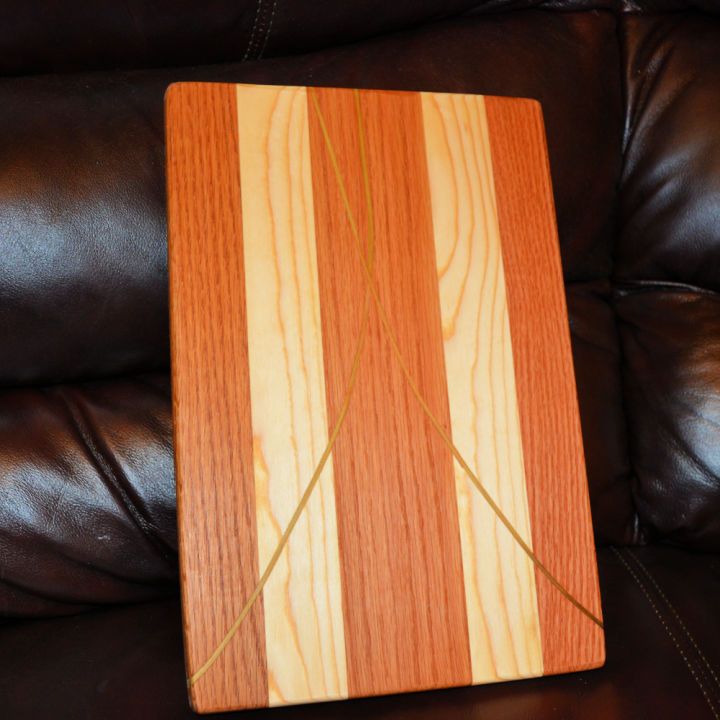
Put together a distinctive and attractive cutting board for your kitchen using red oak and poplar wood! This DIY weekend project is simple, and the results are stunning. You need red oak, poplar, wood glue & mineral oil to make this fabulous cutting board! Perfect for slicing veggies & meats or serving cheeses & charcuterie boards, this one-of-a-kind cutting board will have your friends asking where you got it! Start making yours today and add a touch of style to your kitchen. realestnature
28. Simple DIY Cutting Boards From Scrap Wood
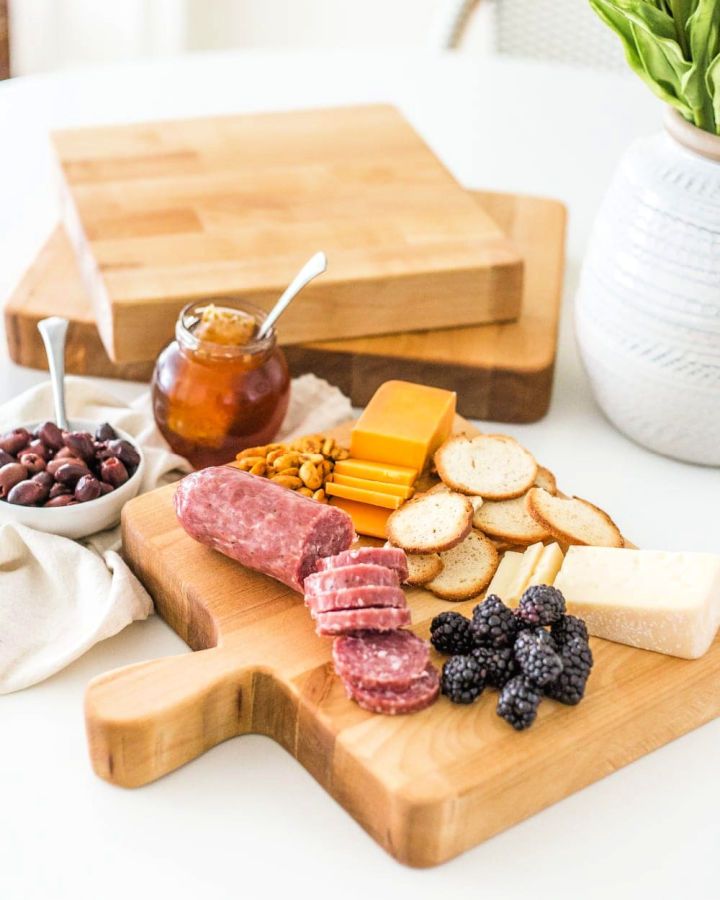
Get smartly with scrap wood and make one-of-a-kind cutting boards for your kitchen or craft projects! With simple tools and sandpaper, you can make unique cutting boards of any size and shape using materials you already have in your stash. Plus, these homemade cutting boards make great gifts for family members or friends. Learn how to repurpose scrap wood into beautiful customized works of art that will last for years without breaking the bank. Get creative today and start crafting your one-of-a-kind cutting boards! blesserhouse
29. Farmhouse Style Cutting Board Woodworking Plans
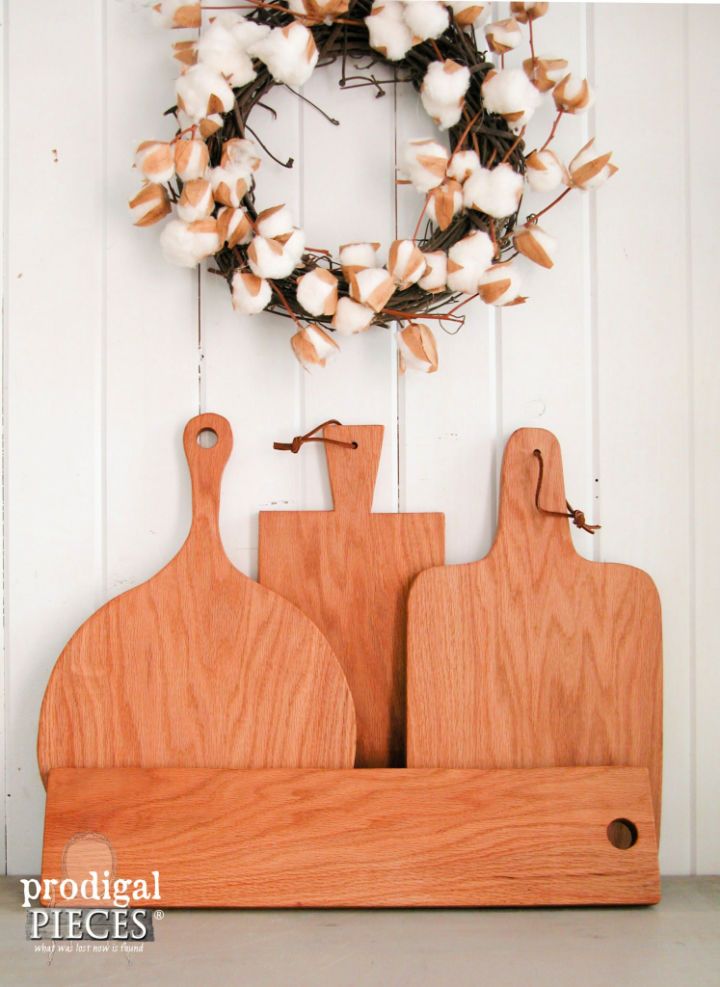
From rustic to modern, find the perfect DIY cutting board designs to enhance your cooking experience and impress guests. Design the ideal complement to your country home, cottage, or vintage-inspired decor with this self-crafted farmhouse cutting board & cheese board. You’ll need 1″ x 12″ x 16¼” oak or other hardwood board, oil and beeswax for wood protection and a 12-inch piece of leather lacing or twine (optional). These cutting boards will tell a story of days gone by, remind you of Grandma’s kitchen and serve an important purpose. Make your own charming vintage-style cutting board with just some simple materials and effort! prodigalpieces
30. Face Grain Cutting Board With a Juice Groove
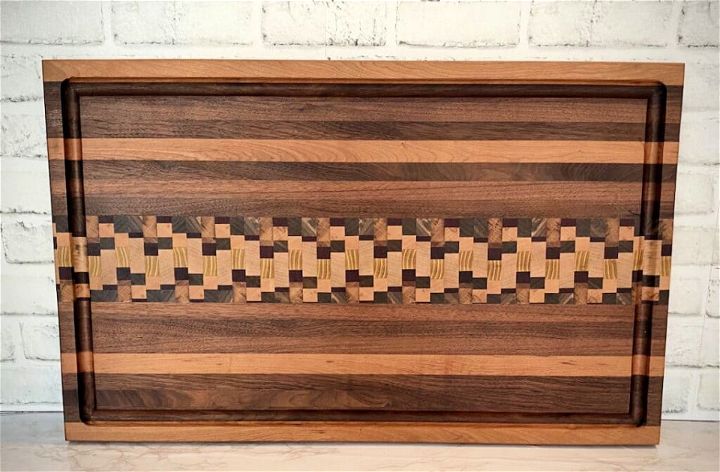
Put your scrap wood to good use with this DIY tutorial! You can make a cutting board measuring 17×27 inches by following the steps. The 1-inch thick board has a unique design, combining end grain and traditional wood slats for a one-of-a-kind look. This cutting board is perfect for daily use in the kitchen – it’s made to last and looks great on any countertop. Repurpose scrap wood into something special today! theaccentpiece
31. Easy DIY Peasy Cutting Board
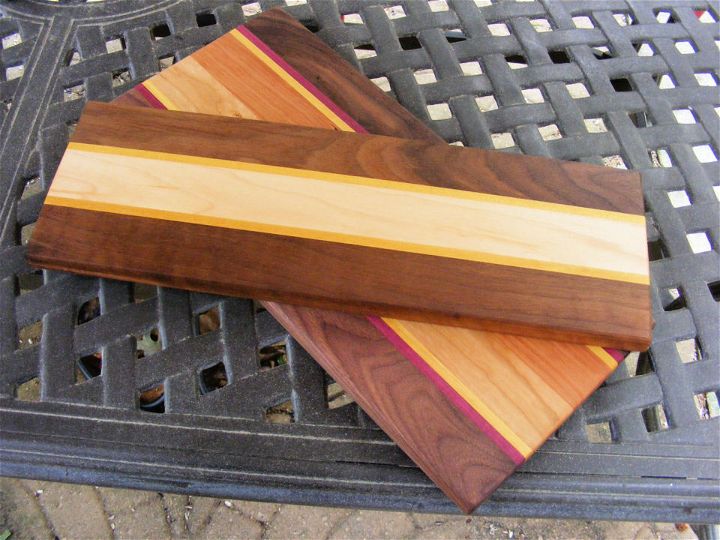
Craft a one-of-a-kind cutting board for your kitchen using this straightforward guide! You don’t need complicated tools; you only need a cutting board kit, wood sanders, glue, and clamps. Follow the instructions to make a beautiful cutting board in no time at all. In only a few steps, you can have an amazing-looking cutting board that measures ¾ inch x 7 inches x 15 inches – perfect for prepping food or display. After assembly, adding cutting board oil will help protect the wood and keep it looking great. Try out this tutorial today to make your hand-crafted masterpiece! fouroakscrafts
32. Gorgeous Wooden Cutting Boards Pattern
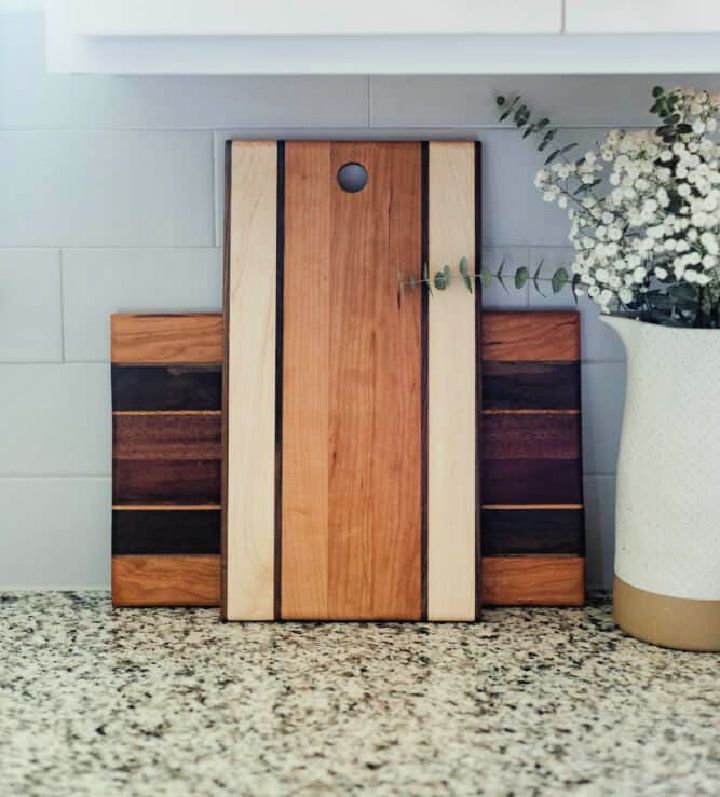
Whip up beautiful, easy-to-make cutting boards with this DIY gift idea! With the 8.5″ x 16″ and 9.75″ x 16″ cutting board kits, you can make two stunningly unique designs that impress your friends and family. This project is perfect for crafters of any skill level – all it takes is a few simple materials, such as wood glue and sandpaper, for a truly eye-catching piece of handmade artistry. Get creative with these delightful creations today! loveandrenova
33. Make an Antique Cutting Board at Home
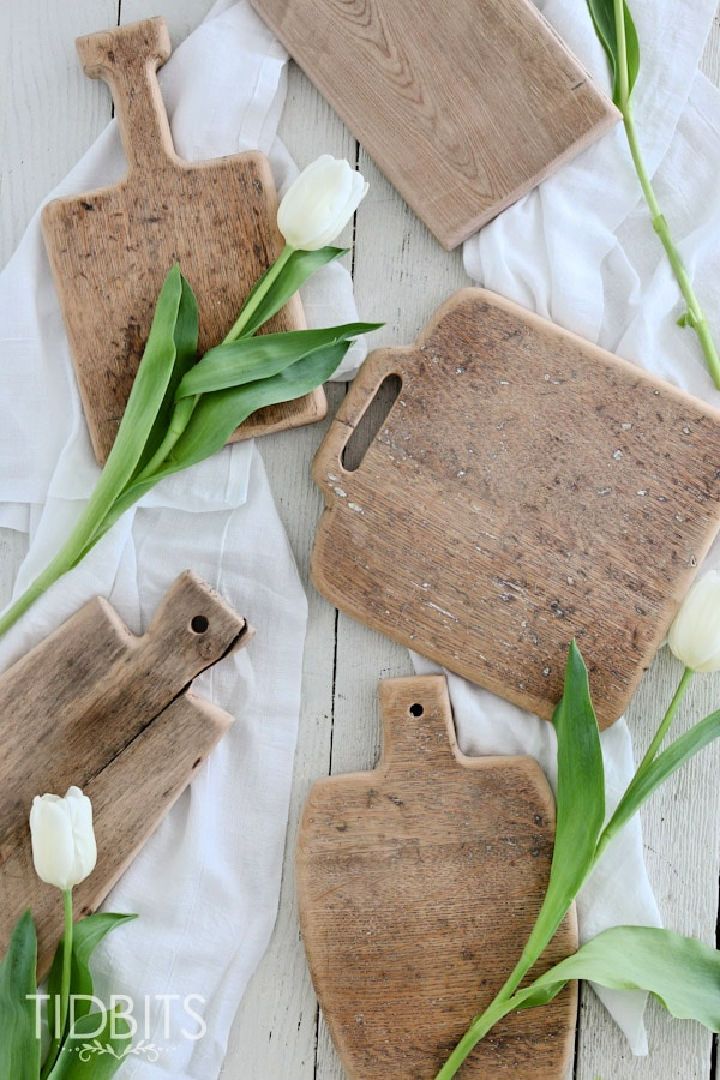
Discover unique and creative DIY cutting board designs that will add style and functionality to your kitchen. With this DIY tutorial, you can easily craft an attractive, vintage-cutting board from a piece of older wood. Let your creativity shine and make a showpiece that will be the envy of all your friends!
Choose durable hardwoods such as maple, birch, oak, walnut or mahogany for actual use. Wash and seal with food-safe mineral oil to ensure safety when preparing meals. For a decorative touch, leave the wood in its raw state and trace a pattern onto it using a pencil. Cut out the shape using a scroll or jigsaw, and let your creativity flow! Enjoy the process of turning that once-forgotten piece of wood into something special! craftberrybush
34. Handmade Rooftop Cutting Board
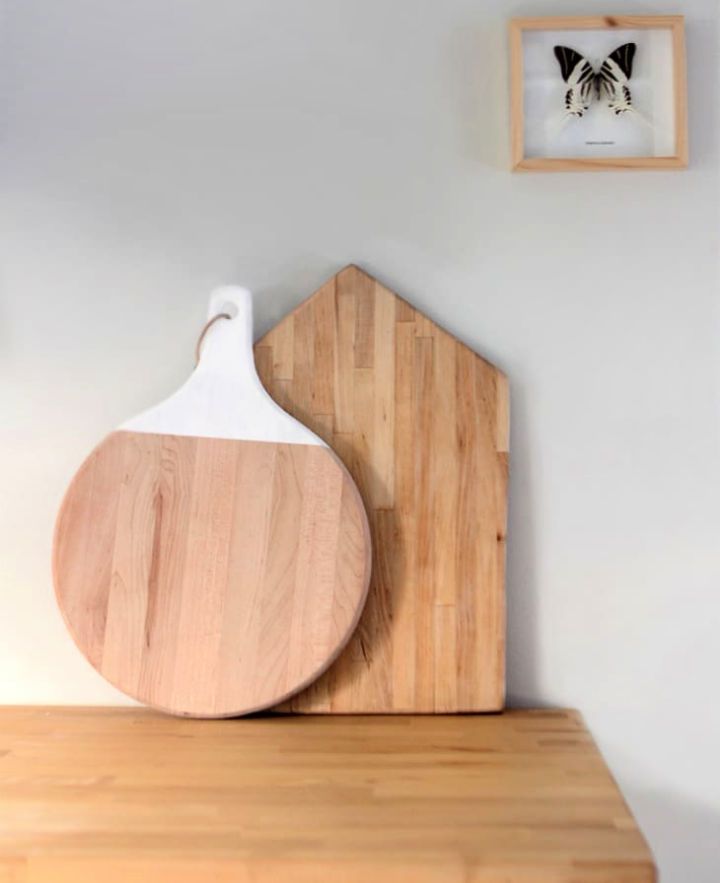
Introduce a unique rooftop cutting board to your kitchen and enjoy the sophistication of Danish design with this DIY project! Crafted from untreated hardwoods like maple and ash for daily use or oak for vegetables or serving as a tray – this cutting board will be an eye-catching statement piece. Make it extra special by finishing with mineral oil to keep its natural look. Get creative and make your rooftop cutting board today! With easy care instructions included, you can enjoy its beauty for years to come. apartmenttherapy
35. DIY Cutting Board With Wood and Marble
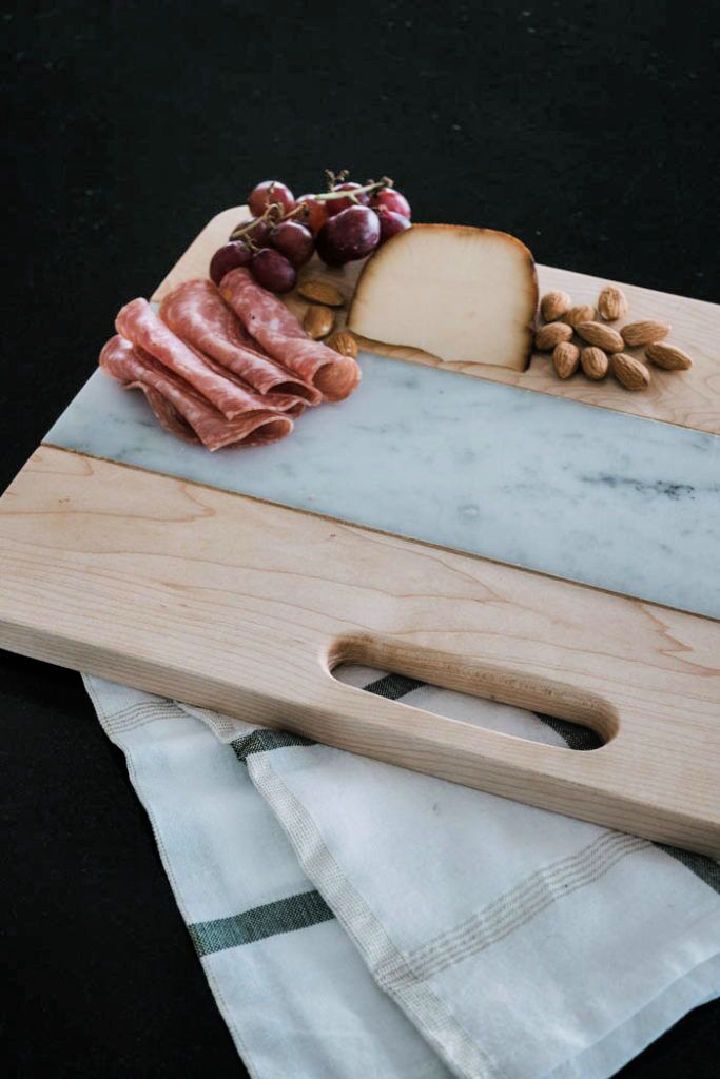
You can craft a one-of-a-kind kitchen cutting board with leftover tile and maple wood. This would be a great way to update your cooking area. With this DIY wood & marble cutting board project, you will need 1×6 maple board and Italian Carrara marble tile to make an impressive conversation piece. The instructions are easy-to-follow so that anyone can complete this stylish home decor project – perfect for any kitchen! Get creative and make something beautiful with these materials that you already have! lovecreatecelebrate
36. Building Your Own Wooden Cutting Board
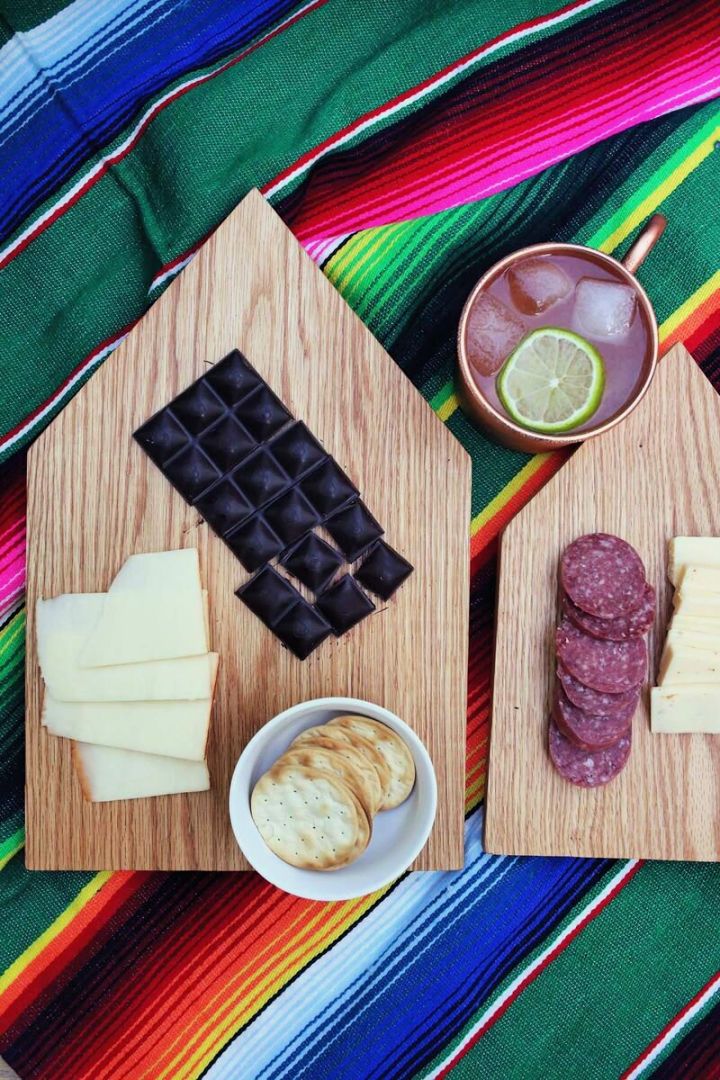
If you want to make a beautiful and food-safe cutting board, this tutorial will give you the guidance you need. It is simple. Make unique designs like a banner or set of houses with straight lines using untreated hardwood (like oak). Get the right tools to get started – a circular saw, table saw, sandpaper, food-grade mineral oil and a clean cloth. Keep your kitchen hygienic with food-grade mineral oil or butcher block oil for maintenance. Start your woodworking project today! abeautifulmess
37. How to Make an Owl Chopping Board
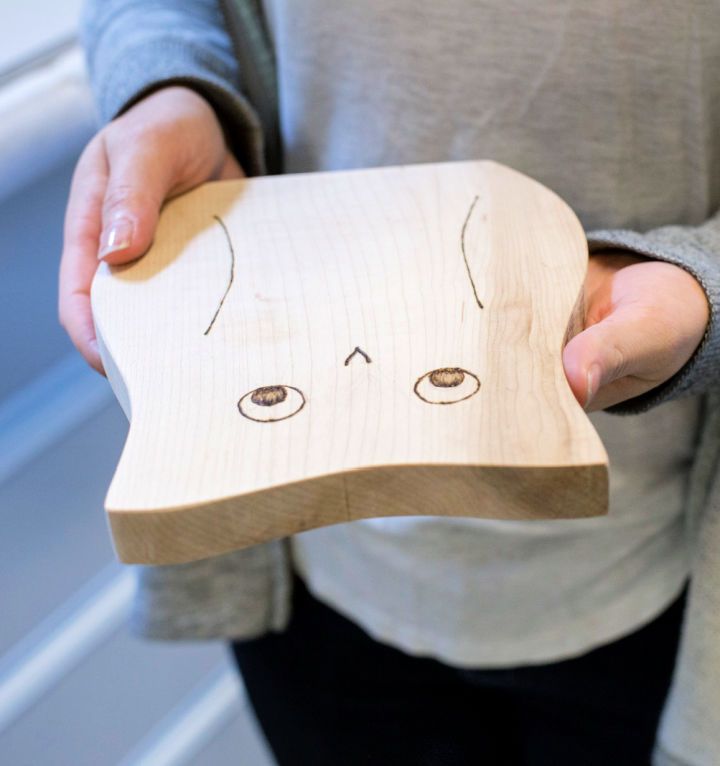
Want to do a quick but lovely woodworking project? Make a unique and functional cutting board with an owl design using 1×8 Maple hardwood! Daly’s kitchen wood treatment and an owl template make this DIY project easy to do in 1-2 hours – perfect for gifting or using yourself. Get creative and try new designs – you can use leftovers from the board or purchase one whole board to make multiple beautiful cutting boards. Add this special piece to your kitchen decor today with this DIY owl cutting board! dunnlumber
38. Making an Olive Wood Cutting Board With Hand Tools
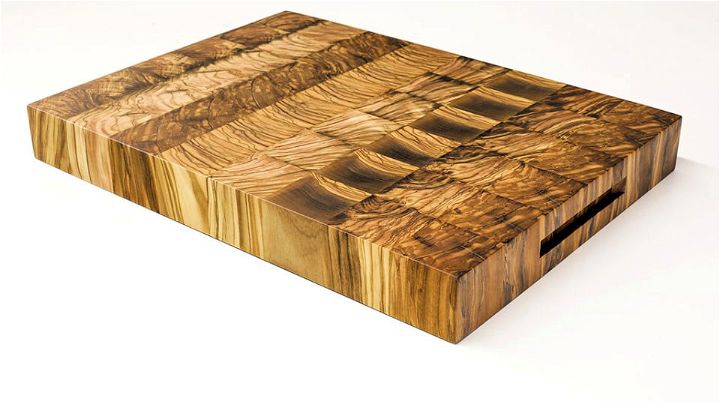
Willing to add something beautiful to your cooking space? Craft a beautiful, reliable olive wood cutting board for your kitchen with end-grain construction. Build it from 8 salvaged blocks of 50x50x300mm olive wood. Fit the pieces together perfectly and apply glue and salt to secure them against movement. Flatten surfaces using clamps and a hand plane, even out edges with a table saw, then sand to perfection with p80/p120 grit sandpaper before finishing with pure linseed oil. Make handles by routing bits onto the board for added style – admire its unique end-grain pattern as you work in the kitchen! paoson
39. DIY 2×4 End Grain Cutting Board
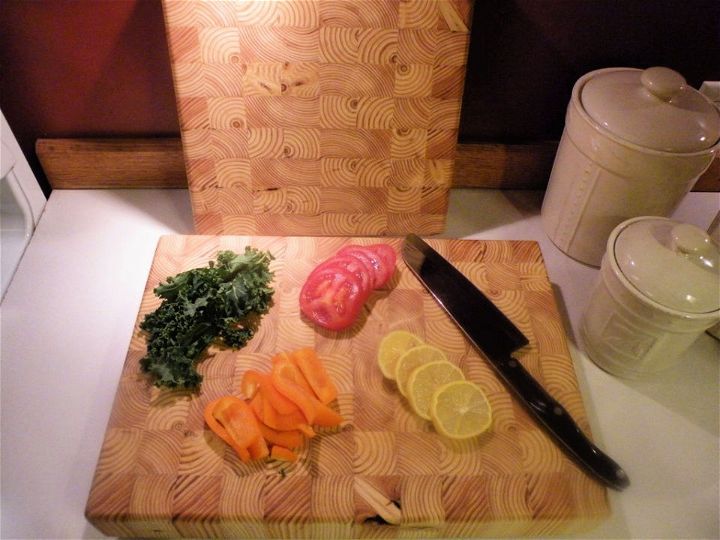
This 2×4 end grain cutting board/butcher block is a must-have for any home chef. Crafted from untreated wood, this board offers a durable and long-lasting base for food preparation. For added protection, use mineral oil and gulf wax and finish with anti-skid pads! The large surface area of the board makes it perfect for slicing vegetables or carving meats with ease. Get ready to take your culinary skills to the next level with this top-of-the-line cutting board! instructables
40. Free Maple Cutting Board Plans
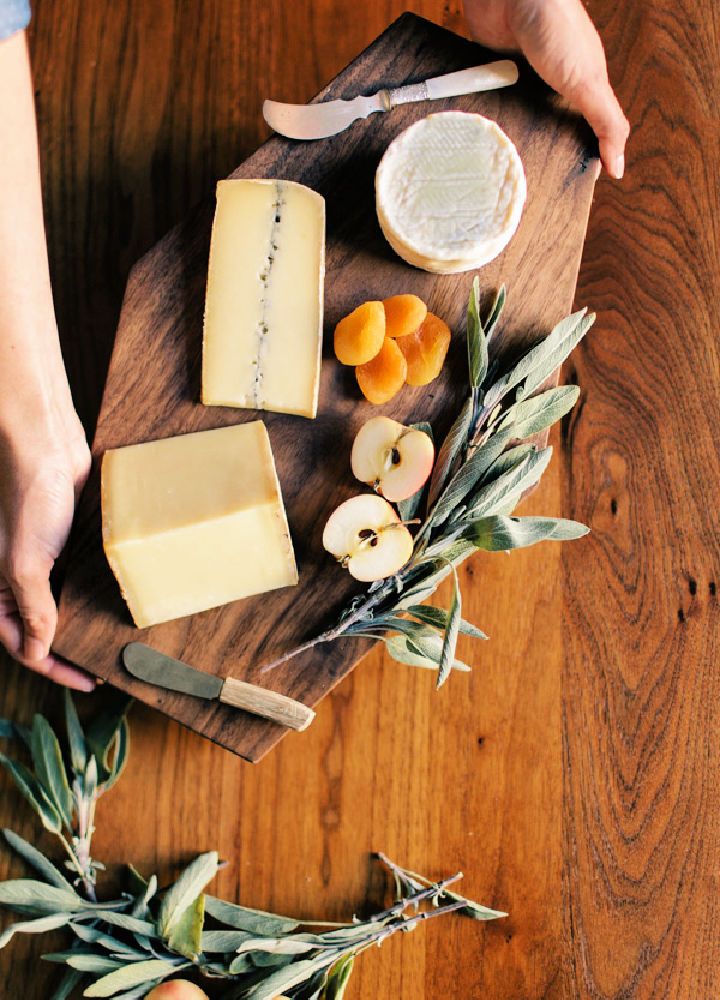
Get ready to make a stylish and resilient cutting board with this straightforward DIY guide! With just a few simple tools, some scrap hardwoods, and food-safe wood treatment, you can make a stunning geometric cutting board that won’t absorb liquids. Perfect for gifts or at-home entertaining, this cost-effective project is sure to highlight any kitchen. Get your materials from local dealers today and start making your gorgeous cutting board! ohhappyday
41. Handmade Plywood Cutting Board
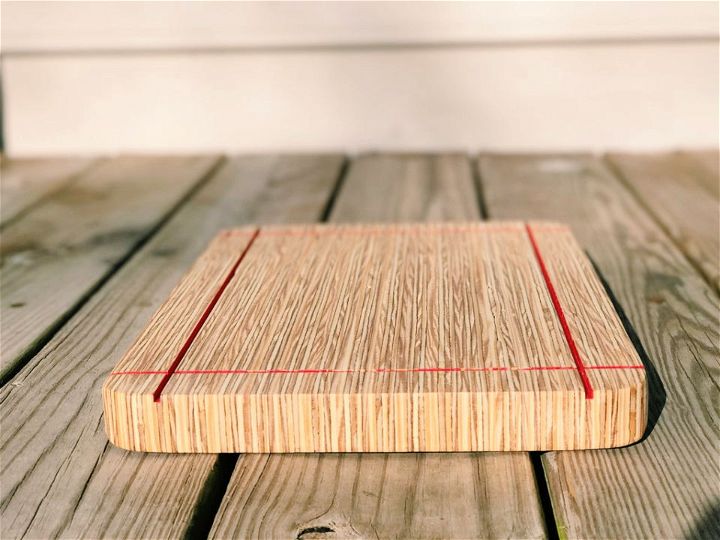
Beautifully crafted with high-quality ½″ plywood, this cutting board is sure to bring a touch of elegance and functionality to any kitchen. With precise cuts made from setting the table saw at 1 ¼″, this unique design features 18 strips that provide an eye-catching look while providing plenty of space for all your slicing and dicing needs. Whether prepping meals for your family or hosting a dinner party, this highly durable cutting board lets you work in style! instructables
Conclusion:
In conclusion, making your own cutting board is a fun and creative way to personalize your kitchen. You can choose from a variety of materials, shapes, sizes, and designs to suit your style and needs. Whether you want a simple wooden board, a colorful resin board, a mosaic tile board, or a quirky animal-shaped board, there is a DIY project for you. With these 40 unique DIY cutting board ideas and plans, you can easily create a custom cutting board that will impress your guests and make your cooking more enjoyable.

