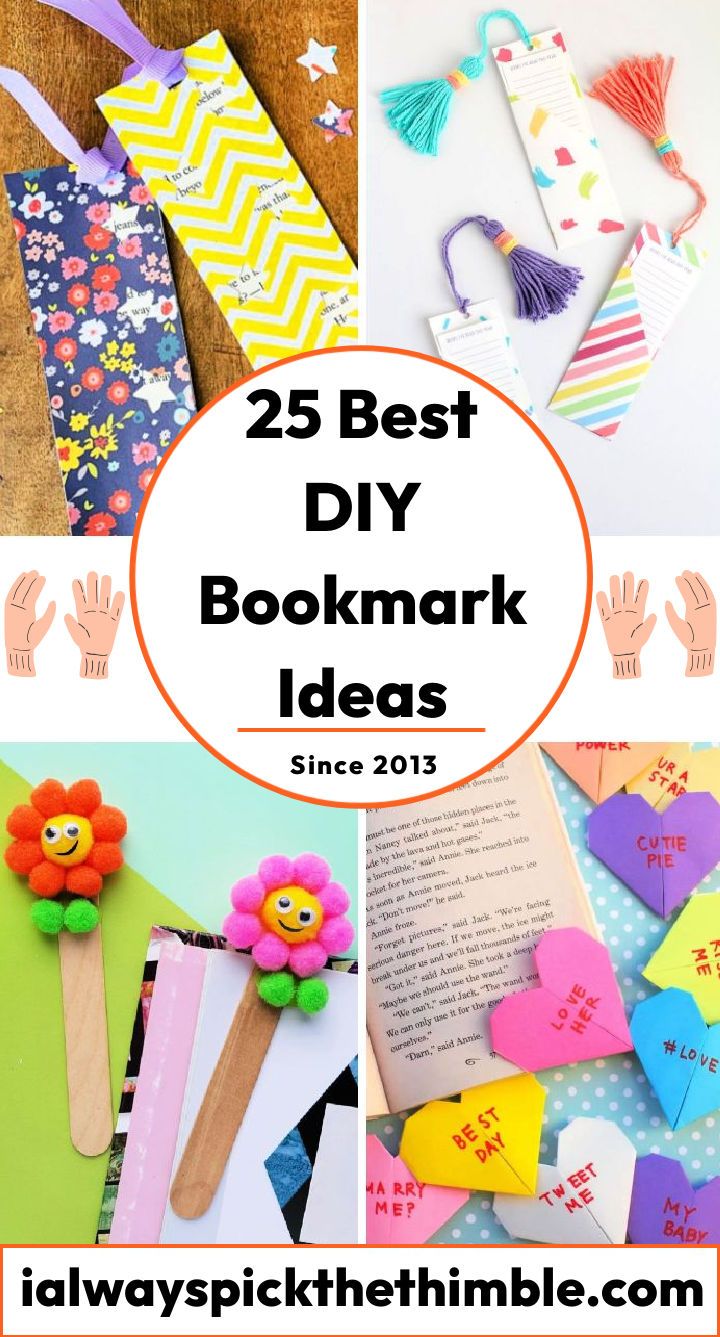
DIY bookmarks will make your reading experience more fun and personal. Learn how to make bookmarks with these 25 cute DIY bookmark ideas that will spice up your books. Whether you like simple paint chip flowers or fabric scraps bookmarks, you’ll find something that suits your taste and style.
All you need is some basic materials and a bit of imagination to make your own bookmark. You’ll learn how to make amazing bookmarks like the simple shooting star bookmark or the craft-stick pencil bookmark. You’ll also discover unique DIY bookmark ideas like the confetti shaker bookmarks, the pom-pom flower bookmarks, or the no-sew fabric bookmarks. The DIY bookmark adventure is as enjoyable as the books you’ll use them for. The fun of making bookmarks, like the big bow bookmark, chunky tassel bookmarks, or the fabric scraps bookmark, is just a click away.
Ready to make your own bookmarks? From paint chip cute cat bookmarks to origami heart bookmarks, we have plenty of options for you. Our guides and instructions are clear and simple, so anyone can make bookmarks with ease. You can even print some, like the fox bookmarks, at home. Each DIY bookmark idea will teach you a new skill, a different technique, and the satisfaction of making something by hand.
Start your DIY bookmark project today and add some flair to your books. You’ll also make memories along the way. Don’t hesitate, your book is waiting for its handmade friend. Happy crafting and happy reading with your new DIY bookmarks!
Why DIY Bookmarks? The Joy and Benefits of Crafting Your Own Bookmark
Bookmarks are essential tools for avid readers, as they help you keep track of where you left off in your books. But bookmarks can also be more than just functional items. They can be expressions of your personality, creativity, and style. DIY bookmarks are a fun and easy way to make your own personalized bookmarks using materials you have at home or can easily find at a craft store. By making your own bookmarks, you can enjoy the following benefits:
- You can save money by using recycled or inexpensive materials, such as paper, cardboard, fabric, ribbon, beads, buttons, etc.
- You can customize your bookmarks to match your preferences, such as the size, shape, color, design, and theme of your bookmarks.
- You can unleash your creativity and experiment with different techniques, such as cutting, folding, gluing, stitching, painting, stamping, etc.
- You can have fun and relax while engaging in a rewarding and satisfying hobby that stimulates your brain and improves your mood.
- You can share your bookmarks with others as gifts or tokens of appreciation or exchange them with fellow book lovers.
Making your own bookmarks is a great way to add some joy and beauty to your reading experience. Learn the basics of DIY bookmark crafting and show you how to make your first cute DIY bookmark.
Understanding the Basics: What You Need to Know Before Starting Your DIY Bookmarks
Before you start making your own bookmarks, there are some basic things you need to know and prepare. Here are some tips to help you get started:
- Decide on the type of bookmark you want to make. There are many types of bookmarks you can choose from, such as paper clips, tassels, magnets, corner bookmarks, etc. Each type has its own advantages and disadvantages, depending on the materials used and the level of difficulty involved. For beginners, we recommend starting with simple paper or cardboard bookmarks that are easy to make and customize.
- Gather the materials and tools you need. Depending on the type of bookmark you choose, you will need different materials and tools. Some common materials you will need are paper or cardboard (preferably thick and sturdy), scissors or a paper cutter, glue or tape, a ruler or a pencil, and a hole puncher. Some optional materials you can use to decorate your bookmarks are markers or pens, stickers or stamps, ribbons or yarns, beads or charms, etc. You can also use recycled materials, such as old magazines, newspapers, books, maps, etc., to give your bookmarks a unique look.
- Choose a design or theme for your bookmark. This is where you can let your imagination run wild and make a bookmark that reflects your personality or interests. You can choose a design or theme based on the book you are reading, the genre you like, the season or occasion you are celebrating, the message or quote you want to convey, etc. You can also browse online for inspiration or follow tutorials from other DIY bookmark crafters.
Once you have decided on the type, materials, and design of your bookmark, you are ready to start making it.
How to Choose the Right Materials for Your DIY Bookmarks
One of the most important steps in making your own bookmarks is choosing the right materials. The materials you use will affect the look, feel, and durability of your bookmarks. You want to use materials that are easy to work with, affordable, and suitable for your desired style.
There are many types of materials that you can use to make your bookmarks, such as paper, fabric, felt, ribbon, beads, etc. You can also mix and match different materials to make more variety and interest. Here are some tips on how to choose the best materials for your DIY bookmarks:
- Paper: Paper is one of the most common and versatile materials for making bookmarks. You can use any kind of paper, such as cardstock, scrapbook paper, magazine pages, wrapping paper, etc. Paper is easy to cut, fold, glue, and decorate. You can also use different shapes and sizes of paper to make different effects. For example, you can use a long strip of paper to make a simple bookmark, or you can use a square of paper to make an origami bookmark.
- Fabric: Fabric is another popular material for making bookmarks. You can use any kind of fabric, such as cotton, silk, denim, lace, etc. Fabric is soft, flexible, and durable. You can also use different patterns and colors of fabric to make different styles. For example, you can use a floral fabric to make a romantic bookmark, or you can use a plaid fabric to make a cozy bookmark.
- Felt: Felt is a type of fabric that is made from wool or synthetic fibers. Felt is thick, fuzzy, and easy to cut. You can use felt to make cute and colorful bookmarks that have a nice texture. You can also use felt to make shapes and figures that you can attach to your bookmarks. For example, you can use felt to make a heart-shaped bookmark, or you can use felt to make a cat-shaped bookmark.
- Ribbon: Ribbon is a type of fabric that is narrow and long. The ribbon is smooth, shiny, and elegant. You can use ribbon to make simple and classy bookmarks that have a nice finish. You can also use ribbon to make bows and knots that you can attach to your bookmarks. For example, you can use ribbon to make a tassel bookmark, or you can use ribbon to make a bow bookmark.
- Beads: Beads are small pieces of glass, plastic, metal, wood, or other materials that have holes in them. Beads are shiny, colorful, and fun. You can use beads to make sparkly and playful bookmarks that have a nice weight. You can also use beads to make charms and pendants that you can attach to your bookmarks. For example, you can use beads to make a pearl bookmark, or you can use beads to make a star bookmark.
You don’t have to limit yourself to these materials. You can also use other materials that you have at home or that you can find at your local craft store. For example, you can use buttons, stickers, feathers, flowers, etc. The possibilities are endless!
How to Make Your First Cute DIY Bookmark
Paper bookmarks are one of the easiest and most popular types of DIY bookmarks. They are simple to make and require only a few basic tools and supplies. You can also customize them with your own designs and decorations.
Here are the basic steps of making paper bookmarks:
- Step 1: Gather your materials. You will need paper (any kind), scissors (or a paper cutter), glue (or tape), markers (or other coloring tools), stickers (or other embellishments), and a hole punch (optional).
- Step 2: Cut your paper. You will need a long strip of paper that is about 2 inches wide and 6 inches long (or any size that fits your book). You can also cut out different shapes from your paper if you want.
- Step 3: Decorate your paper. You can use markers (or other coloring tools) to draw or write anything you want on your paper. You can also use stickers (or other embellishments) to add some flair to your paper.
- Step 4: Glue your paper (optional). If you want to make your bookmark more sturdy or double-sided, you can glue two pieces of paper together with the same or different designs.
- Step 5: Punch a hole (optional). If you want to add a ribbon or a tassel to your bookmark, you can punch a hole at the top of your paper with a hole punch.
- Step 6: Add a ribbon or a tassel (optional). If you punched a hole in your paper, you can thread a ribbon or a tassel through it and tie a knot at the end.
You have just made your own paper bookmark! You can repeat these steps as many times as you want with different materials and designs. Also, you can experiment with different techniques and styles to make your paper bookmarks more unique and creative.
How to Avoid Common Mistakes and Problems When Making DIY Bookmarks
Making your own bookmarks is a fun and rewarding activity, but it can also come with some challenges and issues. Sometimes, things might not go as planned or as expected when you are making your bookmarks. You might encounter some problems, such as wrinkling, tearing, fading, or losing your bookmarks.
But don’t worry; these problems are not impossible to fix or prevent. Here are some tips on how to avoid common mistakes and problems when making DIY bookmarks:
- Wrinkling: Wrinkling is when your paper or fabric bookmark gets creased or crumpled due to folding, bending, or storing. To avoid wrinkling, you should store your bookmarks flat in a book or in a folder. You should also avoid folding or bending your bookmarks when you are using them or carrying them around. If your bookmark does get wrinkled, you can try to smooth it out by placing it under a heavy book or by ironing it gently (if it is made of paper or fabric).
- Tearing: Tearing is when your paper or fabric bookmark gets ripped or damaged due to cutting, gluing, or handling. To avoid tearing, you should use sharp scissors or a paper cutter to cut your paper or fabric neatly and evenly. You should also use enough glue (but not too much) to secure your paper or fabric pieces together without leaving any gaps or excess glue. If your bookmark does get torn, you can try to repair it by gluing another piece of paper or fabric over the tear or by using tape (if it is made of paper).
- Fading: Fading is when your paper or fabric bookmark loses its color or brightness due to exposure to light, heat, or moisture. To avoid fading, you should use high-quality paper or fabric that is resistant to fading. You should also avoid exposing your bookmarks to direct sunlight, high temperatures, or water. If your bookmark does fade, you can try to restore its color by coloring over it with markers (if it is made of paper) or by dyeing it with fabric dye (if it is made of fabric).
- Losing: Losing is when you misplace or forget where you put your bookmark due to carelessness or distraction. To avoid losing your bookmark, you should always keep it in your book when you are not reading it. You should also label your bookmark with your name and contact information in case you lose it somewhere else. If you do lose your bookmark, you can try to retrace your steps and look for it in places where you might have left it.
These straightforward tips will help you avoid common mistakes and problems when making DIY bookmarks. However, if you do encounter them, don’t let them discourage you from enjoying your creative hobby. You can always try to fix them or make new bookmarks with different materials and designs. Remember, the most important thing is to have fun and express yourself with your DIY bookmarks!
How to Personalize and Gift Your DIY Bookmarks
One of the best things about making your own bookmarks is that you can personalize them with your own touch. You can make your bookmarks more unique and special by adding your own name, initials, quotes, pictures, etc. You can also gift your bookmarks to your friends and family who love reading books.
Here are some tips on how to personalize and gift your DIY bookmarks:
- Name or initials: You can add your name or initials to your bookmarks by writing them with markers (if it is made of paper or fabric) or by stitching them with thread (if it is made of felt or fabric). You can also use stickers, stamps, or cut-out letters to spell out your name or initials. This will make your bookmarks more personal and identifiable.
- Quotes: You can add quotes to your bookmarks by writing them with markers (if it is made of paper or fabric) or by printing them out and gluing them on (if it is made of paper). You can choose quotes that inspire you, motivate you, make you laugh, or relate to the book you are reading. You can also use quotes from your favorite authors, characters, celebrities, etc. This will make your bookmarks more meaningful and memorable.
- Pictures: You can add pictures to your bookmarks by drawing them with markers (if it is made of paper or fabric) or by printing them out and gluing them on (if it is made of paper). You can use pictures of yourself, your friends, your family, your pets, etc. You can also use pictures of your favorite places, things, hobbies, etc. This will make your bookmarks more fun and colorful.
- Occasions: You can gift your bookmarks to your friends and family on different occasions, such as birthdays, holidays, anniversaries, graduations, etc. You can customize your bookmarks according to the occasion by using appropriate colors, themes, messages, etc. For example, you can use red and green for Christmas, pink and purple for Valentine’s Day, blue and yellow for graduation, etc. You can also write a note or a card to go along with your bookmark gift.
- Ways: You can gift your bookmarks to your friends and family in different ways, such as wrapping them in a gift box or a bag, attaching them to a book or a card, placing them in a bookmark holder or a jar, etc. You can also make a set of bookmarks with different designs and materials and gift them as a collection. You can also surprise your friends and family by hiding your bookmark gifts in their books or their rooms.
You have just learned how to personalize and gift your DIY bookmarks! Use these tips to make your bookmarks more special and thoughtful for yourself and for others. You can also experiment with different ideas and techniques to make your bookmarks more unique and creative.
Helpful Tips and Tricks to Enhance Your DIY Bookmark Crafting Skill
Making your own bookmarks is not only fun and easy but also rewarding and satisfying. You can enhance your DIY bookmark crafting skill by following these helpful tips and tricks:
- Experiment with different materials and techniques. You can try using different types of paper, cardboard, fabric, ribbon, yarn, beads, charms, etc., to make your bookmarks more unique and diverse. You can also try using different techniques, such as cutting, folding, gluing, stitching, painting, stamping, etc., to make your bookmarks more creative and interesting.
- Use templates or stencils to make your bookmarks more consistent and symmetrical. You can use templates or stencils to cut out specific shapes, such as circles, stars, flowers, etc., for your bookmarks. You can also use templates or stencils to draw, write, or color on your bookmarks. You can find templates or stencils online or make your own using cardboard or plastic.
- Use bookmarks as gifts or tokens of appreciation. You can make bookmarks for yourself or for others as gifts or tokens of appreciation. You can personalize your bookmarks by adding names, initials, messages, quotes, etc., on them. You can also make bookmarks based on the preferences, interests, hobbies, etc., of the recipients. You can also package your bookmarks in cute envelopes, bags, boxes, etc., to make them more presentable and appealing.
- Use bookmarks as learning tools or memory aids. You can make bookmarks that can help you learn new things or remember important information. For example, you can make bookmarks that have math formulas, vocabulary words, historical dates, etc., on them. You can also make bookmarks that have motivational quotes, inspirational messages, affirmations, etc., on them.
- Have fun and enjoy the process. The most important tip is to have fun and enjoy the process of making your own bookmarks. You can make bookmarks as a hobby, a stress reliever, a creative outlet, etc. You can also make bookmarks with others as a bonding activity, a social event, a collaborative project, etc.
Making your own bookmarks is a wonderful way to express yourself, enhance your reading experience, and share your love of books with others.
Exploring 25 Cute DIY Bookmark Ideas and Designs for Beginners
If you are looking for some creative ideas for making your own bookmarks, here are 25 cute DIY bookmark ideas for beginners that you can try:
1. Easy Spring Flower Paint Chip Bookmarks
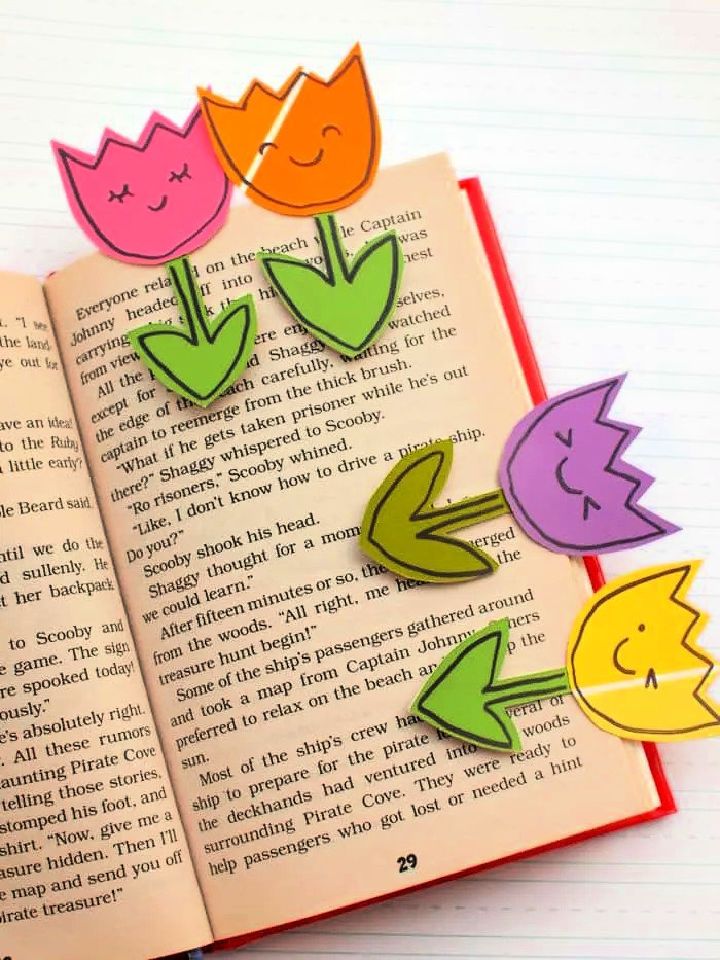
Express your personality and style with these diy bookmark ideas that you can customize and personalize. Welcome spring with these easy yet beautiful DIY flower paint chip bookmarks! They look just like tulips and are perfect for children of all ages. It’s a great craft to do with your kids – no skills required, plus you won’t need to buy supplies as old paint chips can be used! You will need scissors, a pen, tape, a craft knife, a cutting mat and a Sharpie marker. With very little effort, you’ll have lovely-looking bookmarks that will last throughout the season. Get creative with different colors and shapes to make them even more special! diycandy
2. Simple DIY Shooting Star Bookmark
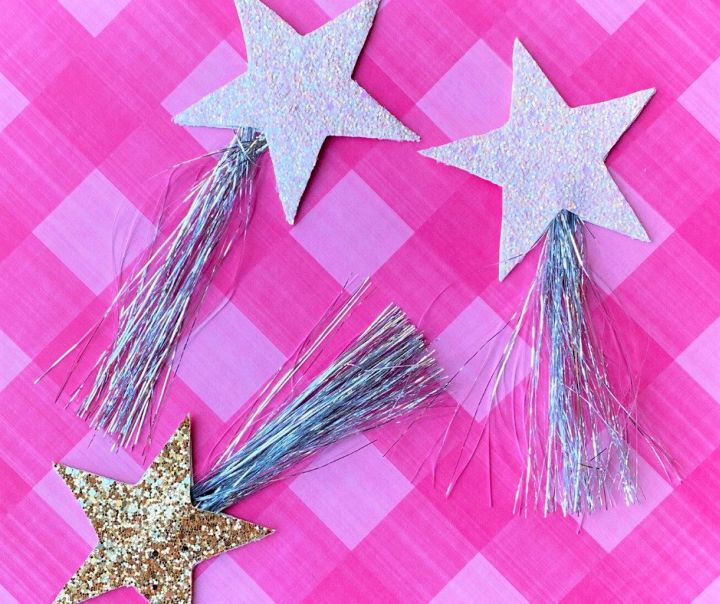
This easy project turns a plain and boring bookmark into an exciting DIY shooting star bookmark! Perfect for book lovers, this simple yet cute craft is the perfect gift to give on Valentine’s day – no candy required!
With only a few materials needed such as glitter canvas sheets, tinsel, a hot glue gun and scissors – you can easily make this practical craft in no time. Make it your own by personalizing it with different foil colors or other embellishments for a unique look. Get creative and have some fun making this adorable bookmark today! lostmom
3. Make Confetti Shaker Bookmarks
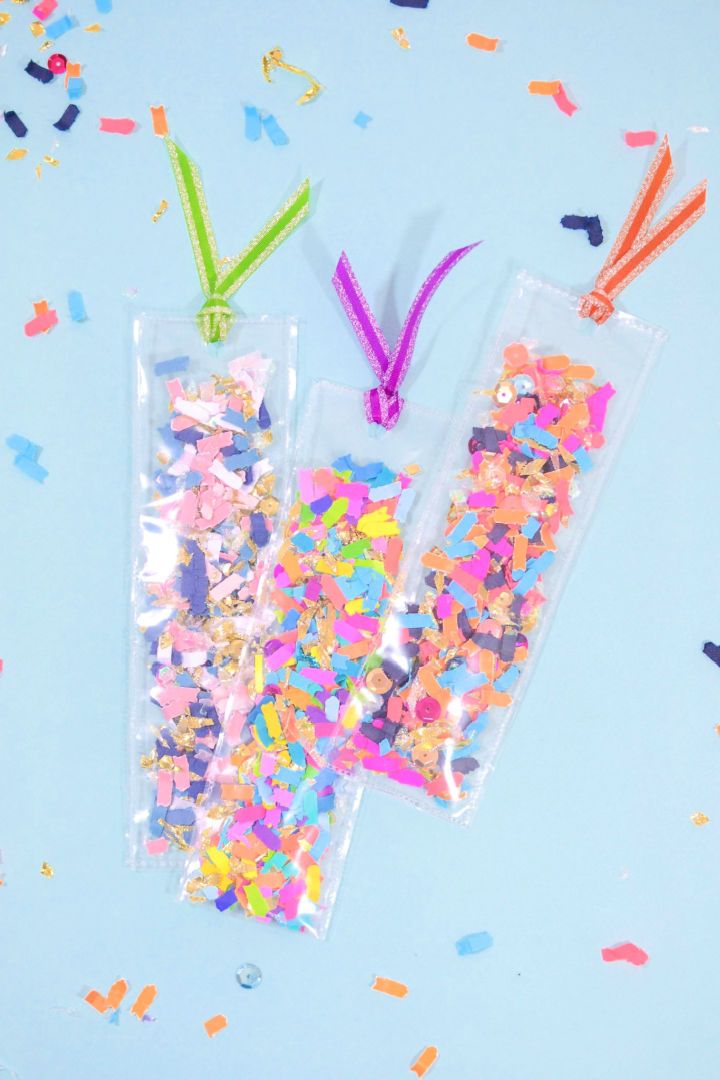
Book lovers, get ready to Craft! These DIY confetti shaker bookmarks are not only addictively fun to make, but they also make great gifts. With two different ways to craft them, it’s an easy and simple way of adding life and color to your bookshelves. Get creative with clear sheet protectors, colorful confetti and a fuse tool or hole punch plus embellishment ribbon- the endless possibilities! So grab your supplies now and start making special memories today. theconfettibar
4. Simple Craft-Stick Pencil Bookmarks
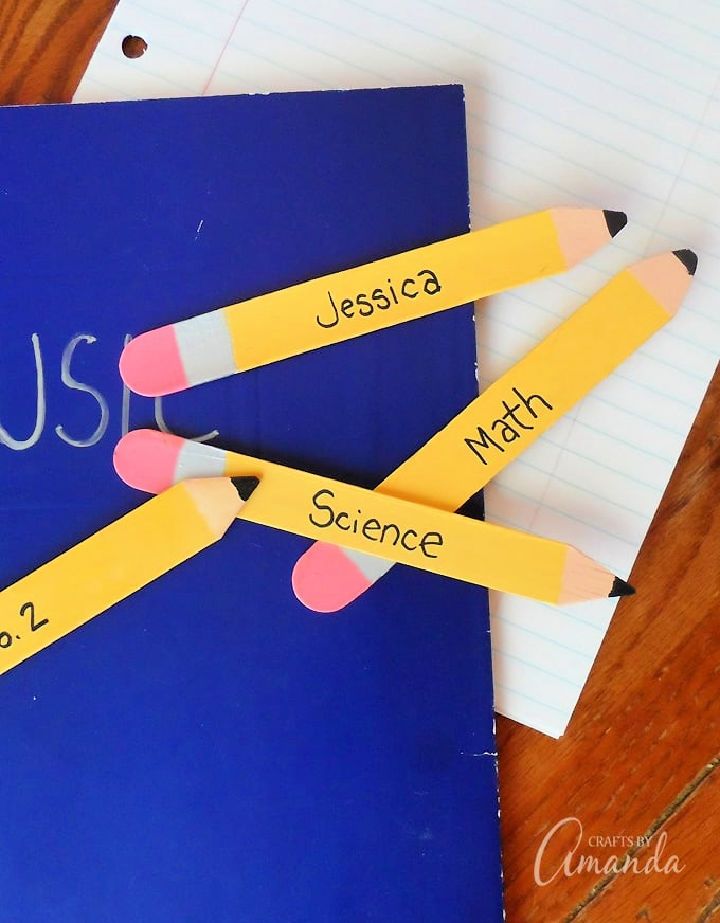
Spice your back-to-school reading and homework with these fun and easy DIY craft-stick pencil bookmarks. It is a fantastic craft for kids of all ages. With just a few simple items, make creative pencil bookmarks that will make reading more enjoyable!
These colorful crafts use craft sticks and a few handy craft supplies – they’re so easy to make you’ll have plenty of time to do schoolwork. Kids will love the festive decorations these bookmarks bring to the page – making everything from English assignments to math problems much more exciting! craftsbyamanda
5. DIY Popsicle-Stick Flower Bookmark
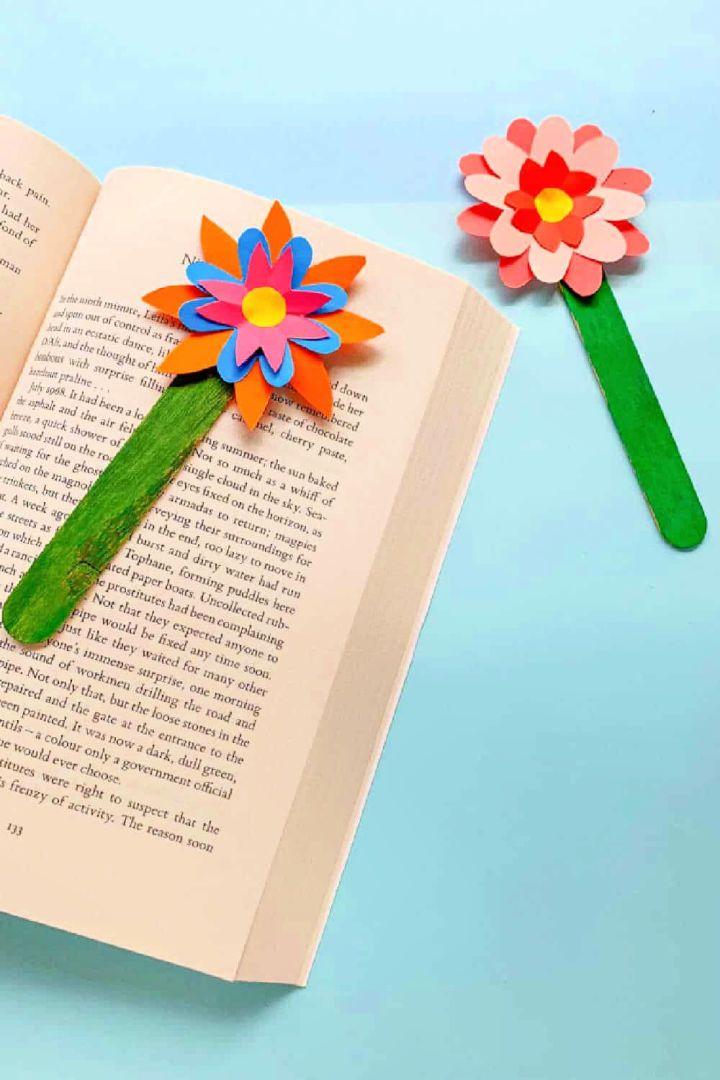
Bring a splash of color to your reading experience with this DIY popsicle-stick flower bookmark! This craft is easy to make and perfect for kids and adults alike. It requires only basic supplies such as popsicle sticks, paper flowers, glue, and handy craft supplies. The step-by-step instructions in the tutorial will take you through each step so that it’s hassle-free and fun!
Not only will the finished product look beautiful, but it also makes a great gift idea for any book lover. Perfect for Spring or Summer, the cheerful colors will bring smiles while encouraging even more reading enjoyment. Get creative today with this delightful DIY bookmark! madewithhappy
6. Handmade Fruit Slice Corner Bookmarks
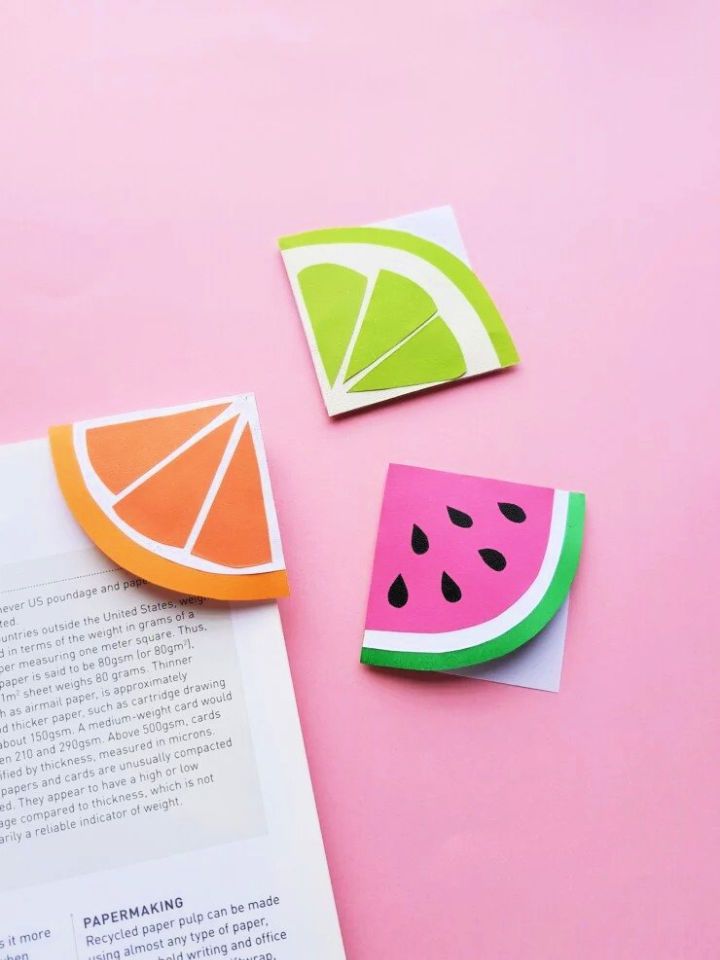
Tired of regular bookmarks? Brighten up your reading with these handmade fruit slice corner bookmarks! They are so cute and perfect for the summer season. Crafted from colorful paper, these sweet DIY bookmarks feature a lovely fruit slice shape that will fit right over the corner of your page. So much fun to make; all you need is just a square of paper and a little origami. Get creative with vibrant color combinations or stick to classic tones – either way; it’s sure to bring some life into your bookshelf this summer! frugalmomeh
7. Make Your Own Paper Bookmarks
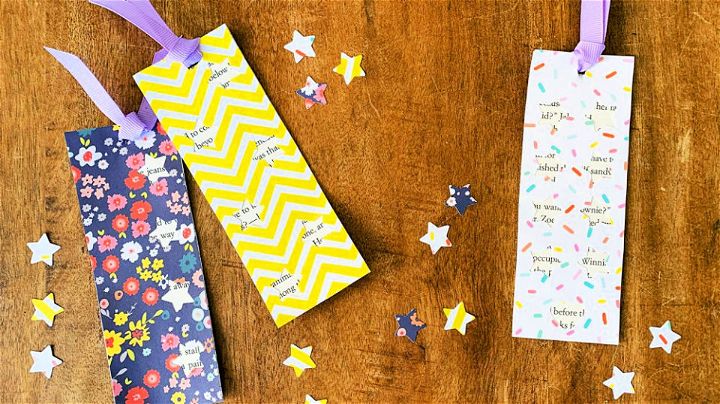
Make reading even more special with DIY paper bookmarks! With supplies you have at home, you can make a fun and easy signature design. Personalize them with a ribbon or other unique embellishments for a quick craft project that doesn’t require tons of materials or clean-up afterward. Make something special for yourself or encourage kids to open that new book with a custom bookmark they helped design. Get creative today – every book deserves its bookmark! mayasmart
8. Unique DIY Ribbon Bookmarks
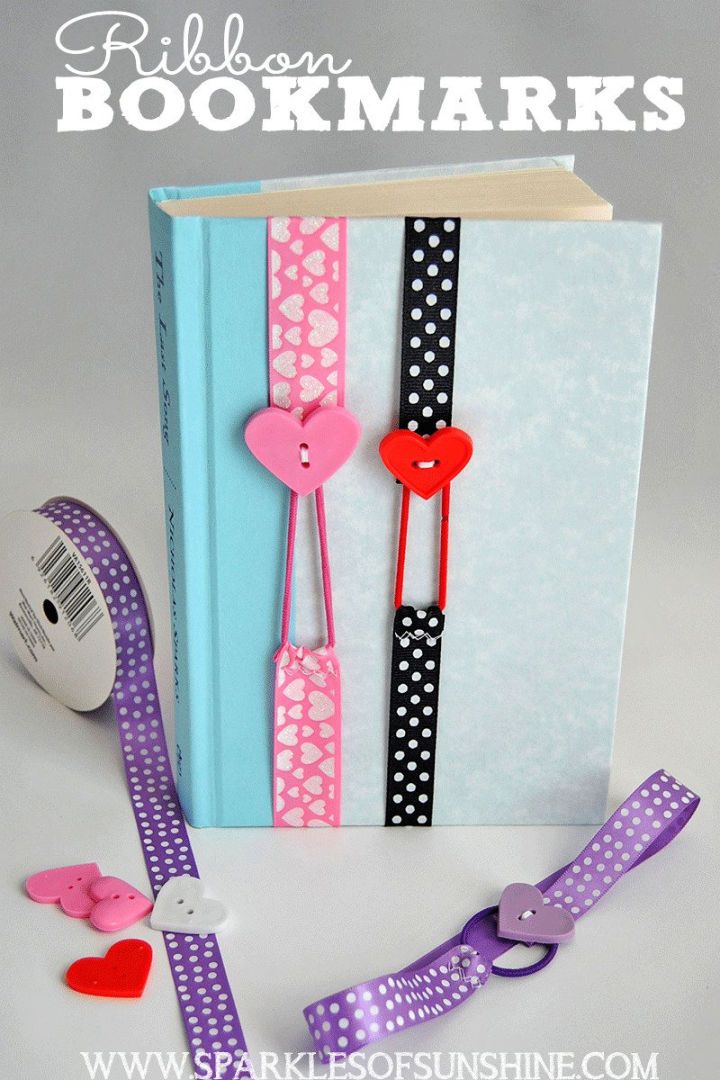
These fun DIY ribbon bookmarks will make reading fun – the perfect gift idea for Valentine’s Day or any holiday! They are easy to make and super cute. Whip up a bunch in minutes – all you need is a decorative ribbon, elastic hair bands, buttons, scissors and a needle & thread or a sewing machine! These bookmarks have some stretch to fit different-sized books- it’s an easy way to add extra cuteness to any present! So get creative and make something special today! sparklesofsunshine
9. How to Make a No-Sew Fabric Bookmark
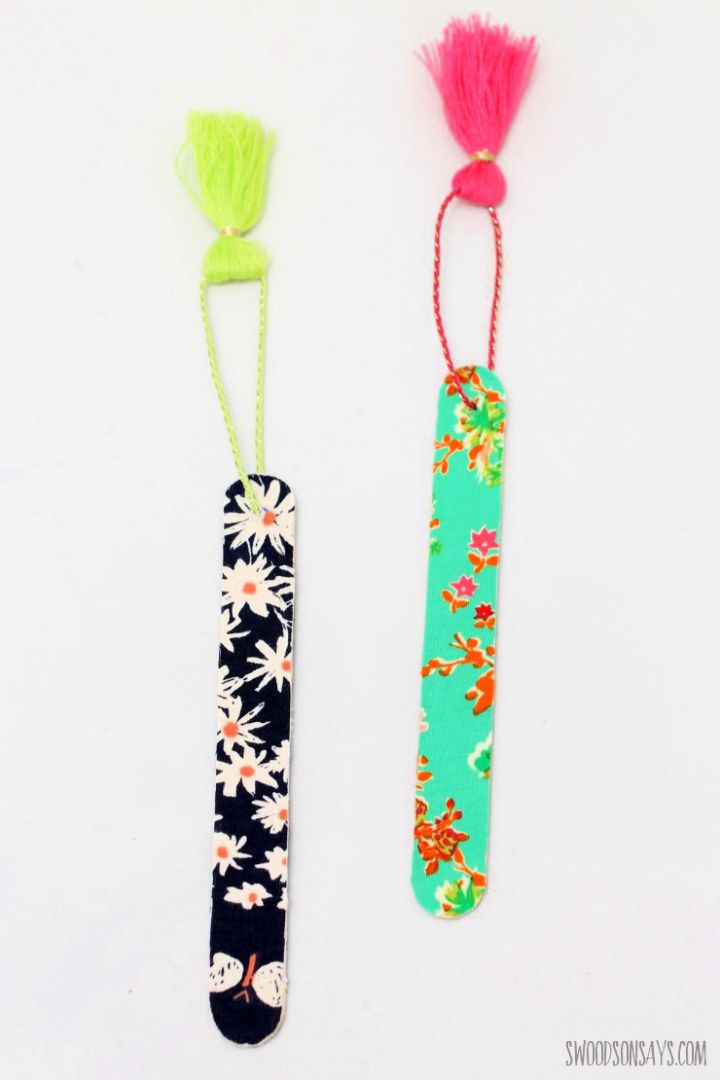
Bring a smile and make someone else’s day with this easy DIY, no-sew fabric bookmark! This fast and simple craft requires minimal supplies, is perfect for using up all those weird long strips of fabric left over from cutting out clothes, and will make a lovely, thrifty handmade gift for an adult. With some bright, cheery colors, this bookmark can be made in no time – it’s the perfect way to show someone you care. So what are you waiting for? Get creative and start making it today! swoodsonsays
10. Pom Pom Flower Bookmark Craft
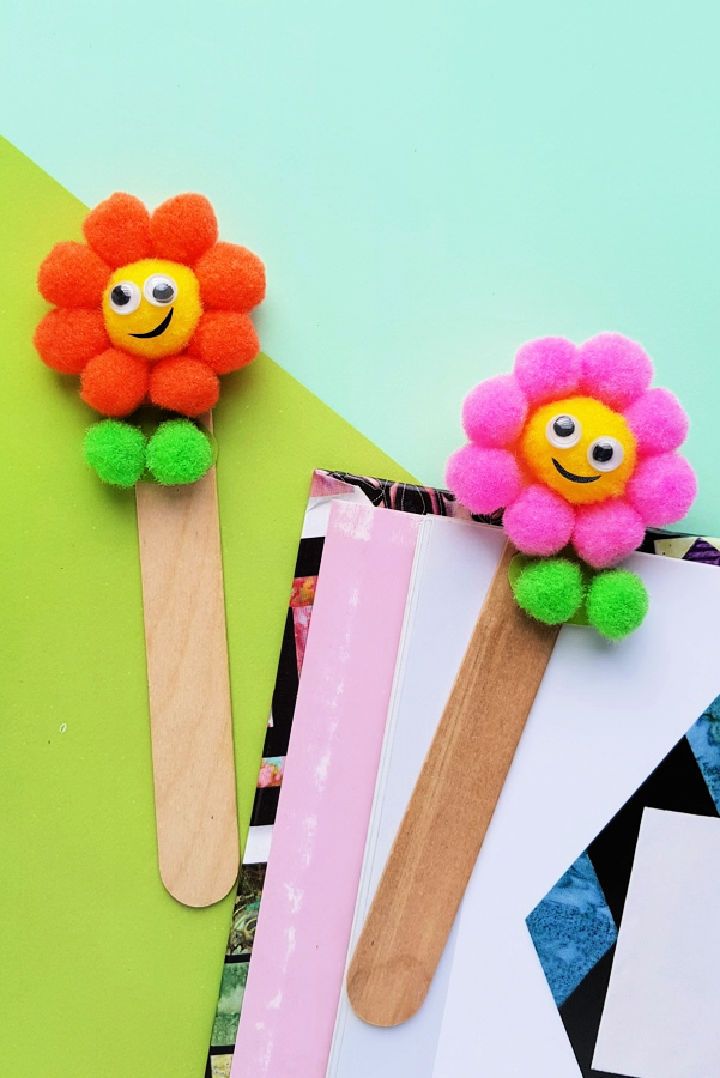
Let your kids make the cutest DIY pompom flower bookmark craft! This ultra-adorable and fun craft is perfect for making the most adorable little bookmarks. Your kids will love how cute they turn out; it’s easy to make!
All you need are colorful pompoms in small and medium-size, popsicle sticks, googly eyes, craft paper, craft glue and scissors – then you’re ready to get started.
Let your children unleash their creativity with this simple yet beautiful project that can be used as a decorative element or even given away as gifts. It’s easy enough for any age group – so join in on the fun today! mommymadethat
11. Adorable DIY Ladybug Bookmarks
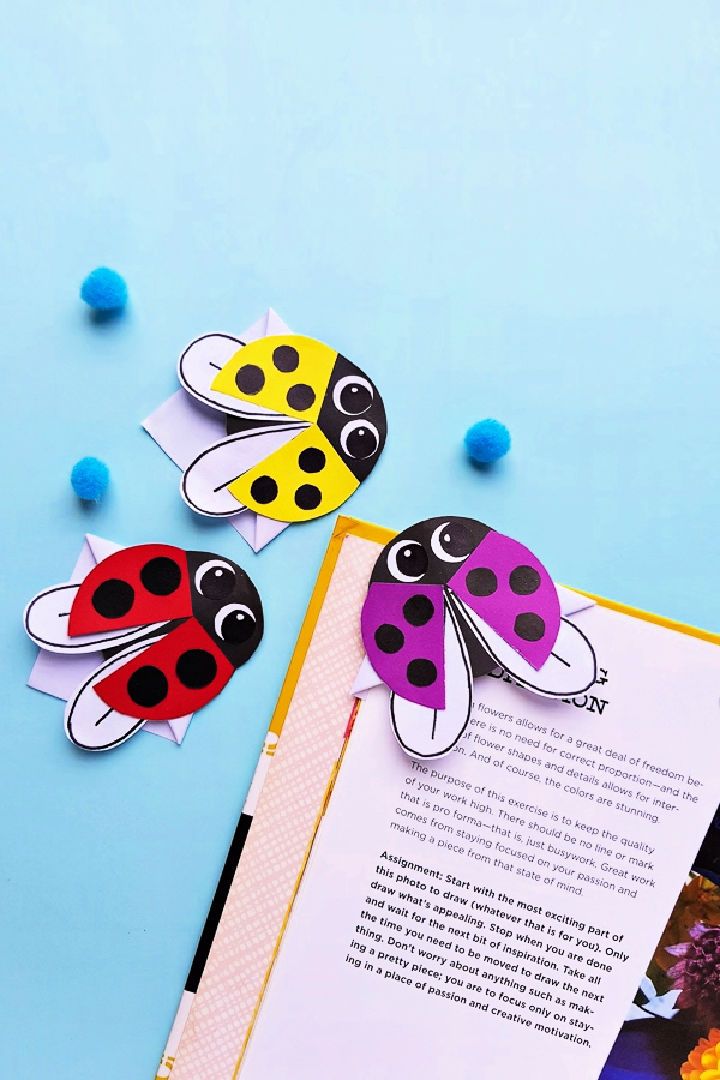
Nothing beats a handmade gift, especially these diy bookmark ideas that are perfect for book lovers. Bring your summer reading to life with these adorable DIY ladybug bookmarks! Crafted from colored craft papers, these lively corner ladybug bookmarks with double-layered wings will surely bring a smile. With this step-by-step tutorial, you can make your own in no time using just pencils, scissors, and a black Sharpie. These fabulous summer crafts will be an excellent addition to any book – so assemble the supplies and get crafting! mommymadethat
12. Sew a Big Bow Bookmark
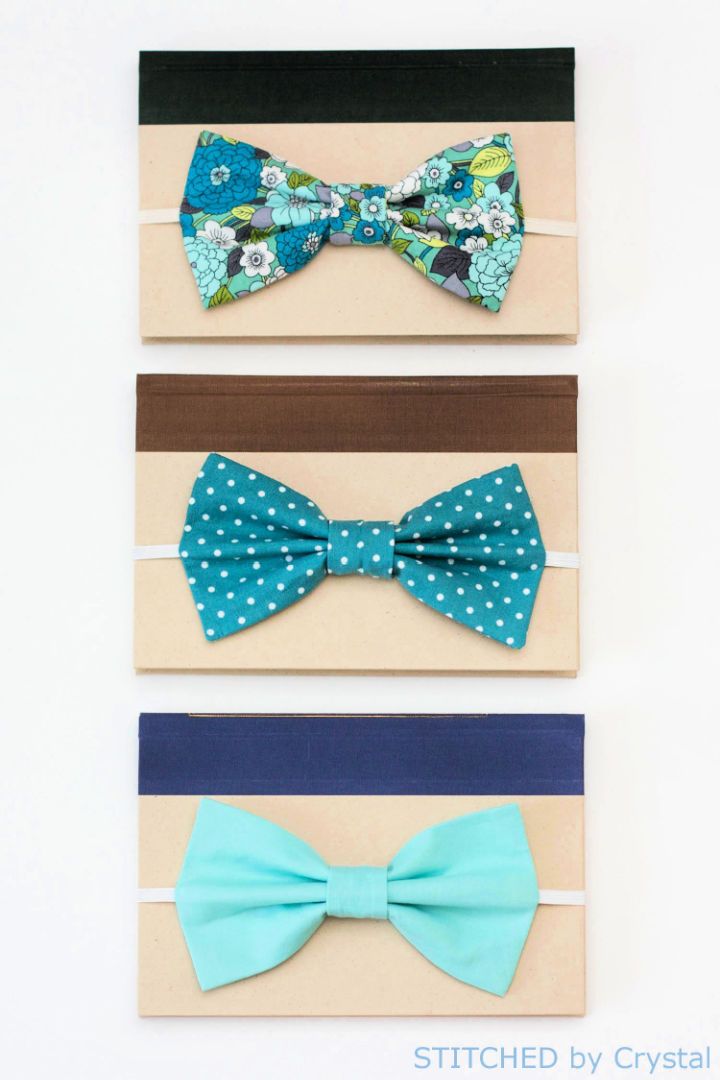
This quick sewing project brings a cute and stylish touch to your summer reading – sew a big bow bookmark! Perfect for any book lover, these adorable bows are great gifts for teachers.
Also, it can be used as an end-of-summer gift idea to help your older kid finish up their sewing before school starts. All you need is some fabric, elastic, and scissors – no specialized skill is required!
With its bright colors and playful design, the oversized fabric bow with a small piece of elastic attached will bring a summer feel wherever it goes. Get creative with different prints to make unique gifts everyone will love! makeit-loveit
13. Pretty DIY Chunky Tassel Bookmarks
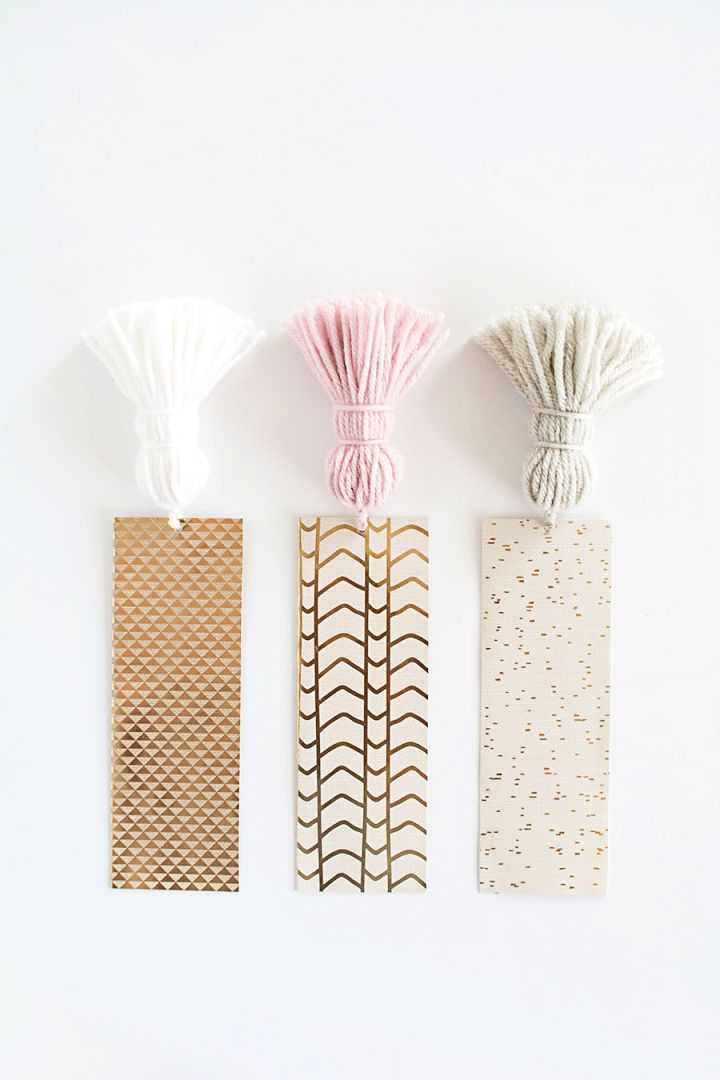
Level up your reading experience with this fun and pretty DIY chunky tassel bookmark! Ditch the mundane receipt or magazine renewal postcard as a bookmark, do away with dog-eared pages and forget about going electronic – make something cute and cool.
You don’t need too much of your time to craft this one-of-a-kind accessory either; all you need are some common materials like yarn, scissors, cardboard, ruler, pencil, cardstock paper and Mod Podge. With this easy step-by-step guide using a hole puncher and a paintbrush for added convenience, keep track of where you left off in style! homeyohmy
14. How to Make a Wooden Bookmark
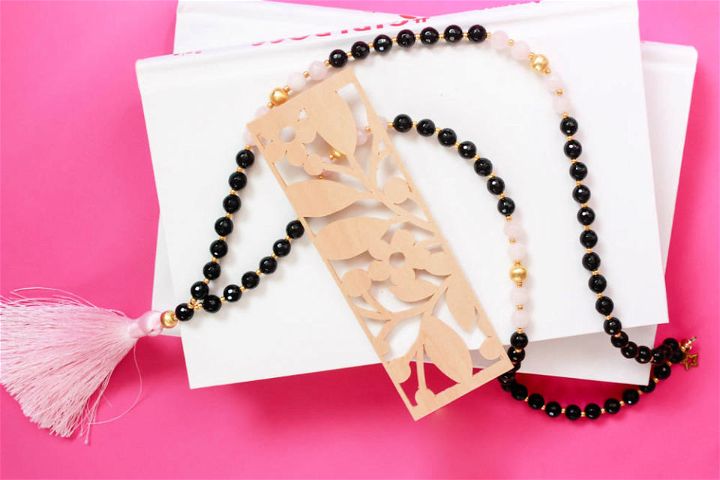
Make your own stunning DIY wooden bookmarks for a gorgeous gift in only 1 hour and 15 minutes! Learn how to use the Cricut Maker and its knife blade to cut wood quickly and easily. All you need is some 1/16 Basswood, Painter’s Tape, a Wooden Bookmark Design Space file, a Purple Strong Grip Mat and a Cricut Maker machine – everything for just $10! Make these beautiful wooden bookmarks today with easy-to-follow instructions. amber-oliver
15. Making Craft-sticks Bookmark For kids
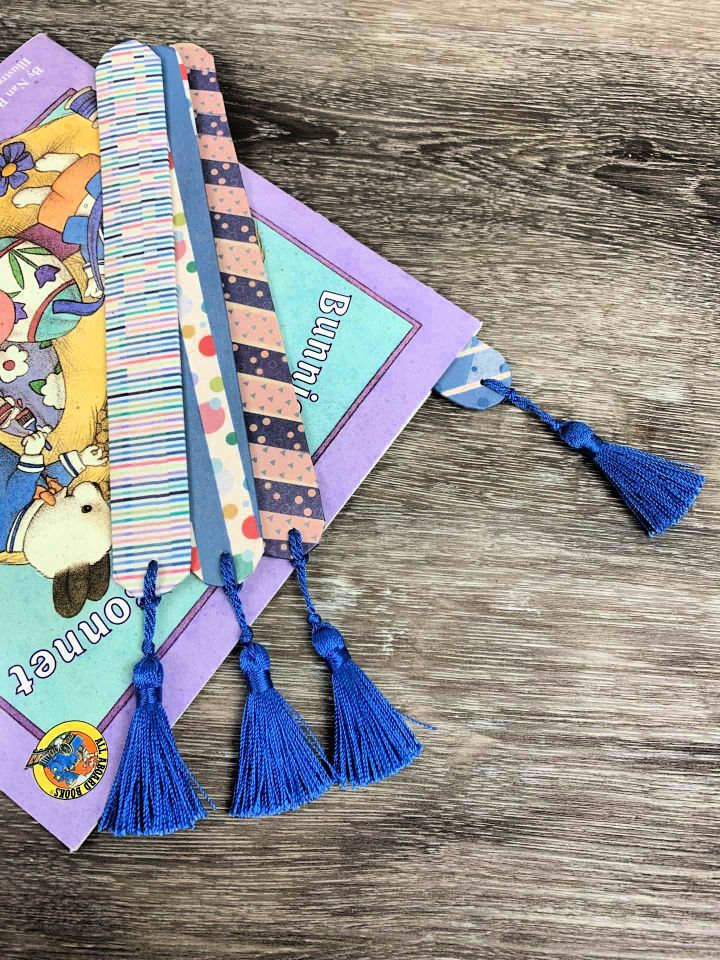
Discover an enjoyable and easy project perfect for kids who love reading! This DIY craft-sticks bookmark is a lovely, creative way to keep track of your page while having fun with the family. All you need are the following:
- Jumbo Craft Sticks
- A Drill With a Drill Bit
- Washi Tape
- A Tassel (Optional)
- Some Creativity
Get your supplies ready and have fun crafting this creative bookmark that can be used by children or adults alike. Try it today – let’s make learning more exciting with this craft sticks bookmark! themomtrotter
16. Creative Washi Tape Bookmarks
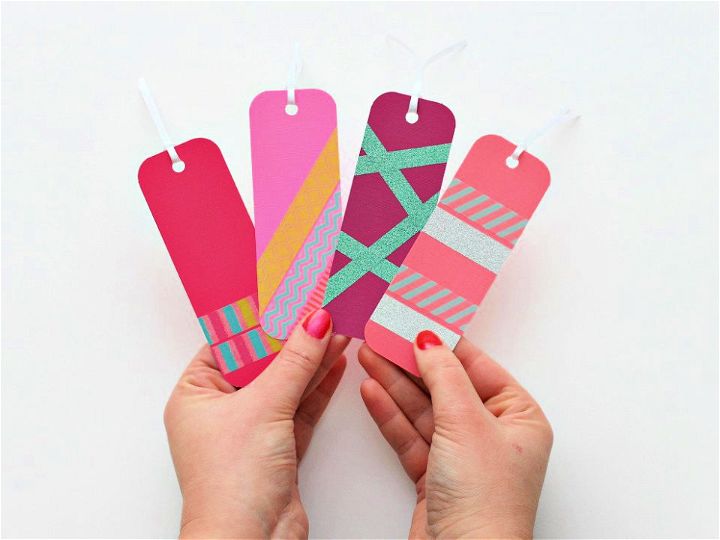
Looking for a fun and frugal way to brighten up your books? DIY creative washi tape bookmarks are great for any bookworm! They are cute, easy, and colorful – anyone can make them. Perfect for kids’ crafts or loot bag gifts. Or perhaps you’re looking for something special to give your teacher as a gift? Washi tape bookmarks are sure to bring a smile! With endless possibilities of designs, this is one craft that will keep everyone entertained. Get creative and have some fun with these lovely handmade bookmarks today! whitehousecrafts
17. Easy DIY Bookmark With Book List Pocket
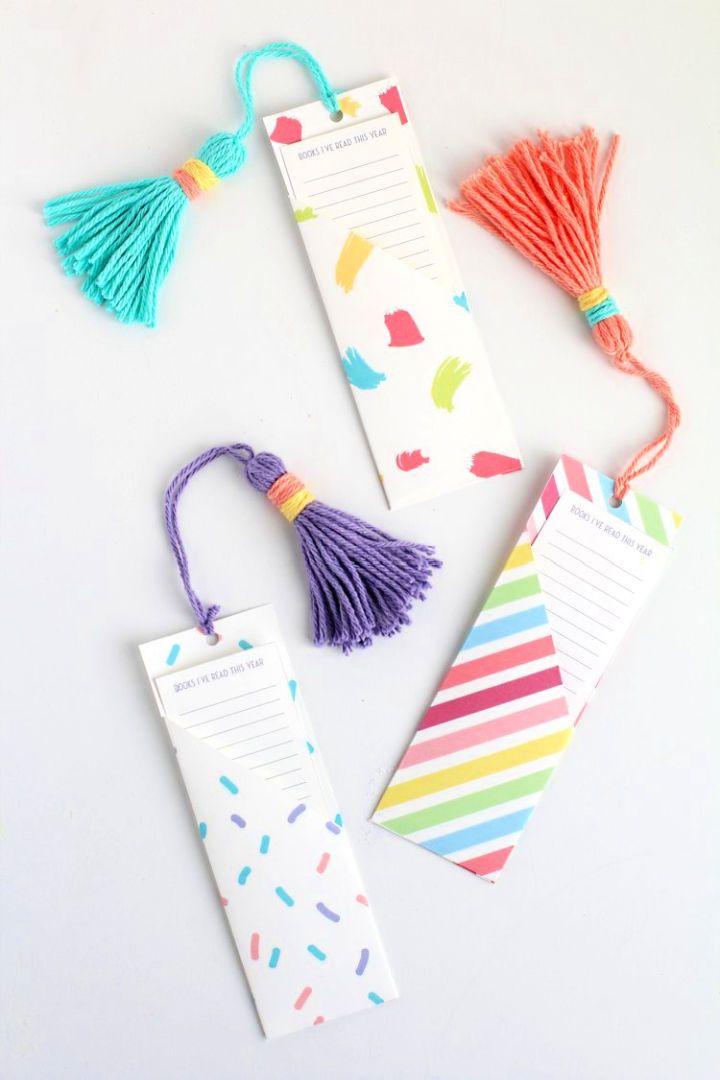
From paper clips to pom poms, these diy bookmark ideas are simple, cute, and budget-friendly. Say goodbye to losing your place in a book, and hello to this easy DIY bookmark with a book list pocket! Return to reading quickly; fold it in half and then fold in the flaps and glue. And best of all, you don’t need any special skills or tools. This tutorial includes a free template to get started with. Not only is this fun, but also very pretty and self-explanatory. So why not try out something new today? Make beautiful bookmarks for yourself or give them away as gifts – it’s up to you! tealnotes
18. Beautiful Tweety Felt Bird Bookmarks
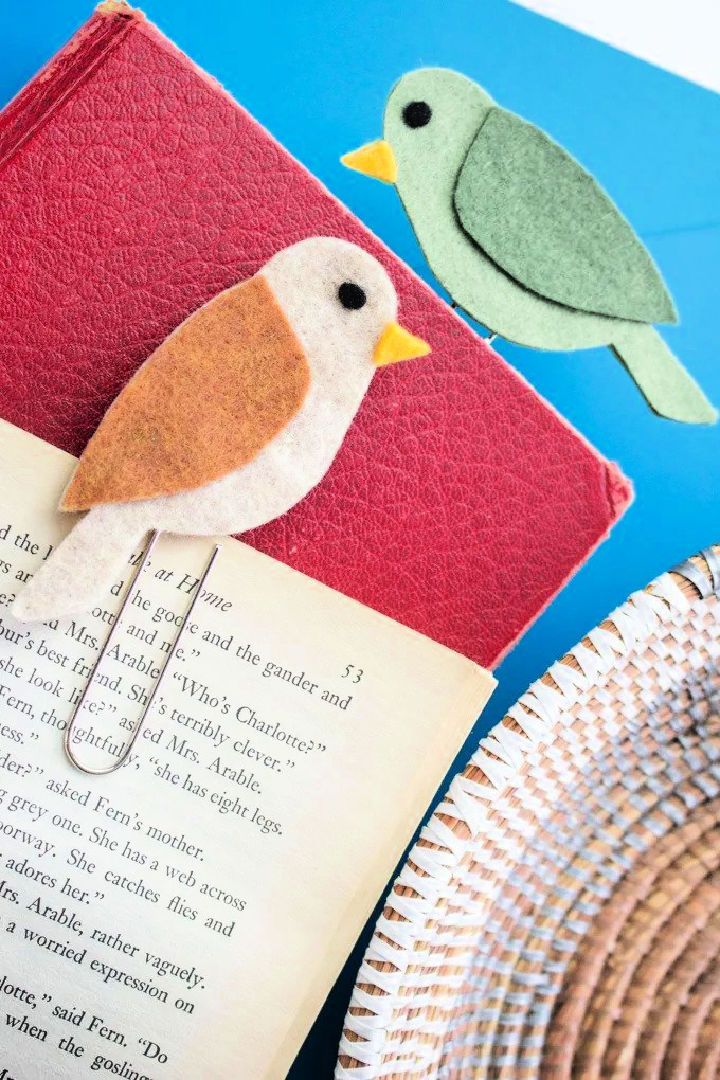
Make reading a breeze with these beautiful and practical felt bird bookmarks! These hand-crafted birds are the perfect accessory to add charm to any book, making them an ideal teacher’s gift. With their cute design, easy construction, and free printable bird template, you won’t have trouble making your own. Grab your leftover stash and get crafting! Make sure that readers never lose their place again with these delightful little feathered friends. sustainmycraft
19. Wonderful Lightsaber Bookmarks
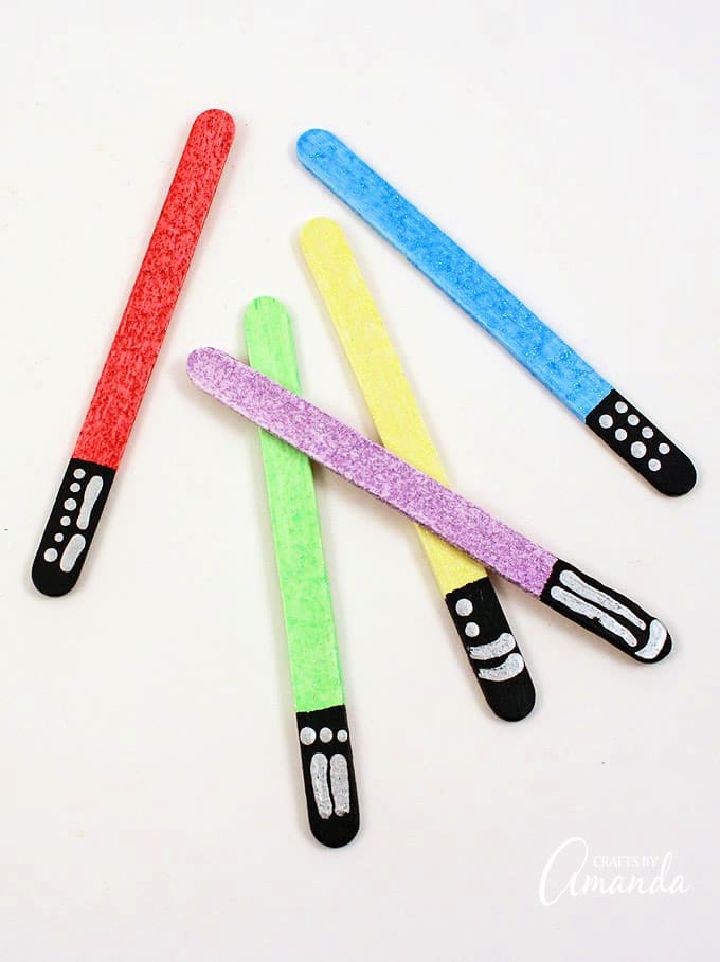
Bring some intergalactic sparkle to your reading experience with these wonderful lightsaber bookmarks! This easy DIY craft only requires a handful of supplies, perfect for home or school and great for Star Wars lovers. Get crafty with white, black, and silver craft paint and glittery colors of your choice, plus a few craft sticks and a toothpick. Make the perfect bookmark that expresses your love for the force!
Show off your unique creation to friends or join in on any Star Wars-themed book club with ease. Unleash creativity while keeping track of those favorite stories with these fun lightsaber bookmarks! craftsbyamanda
20. Cute Cat Bookmarks From Paint Chips
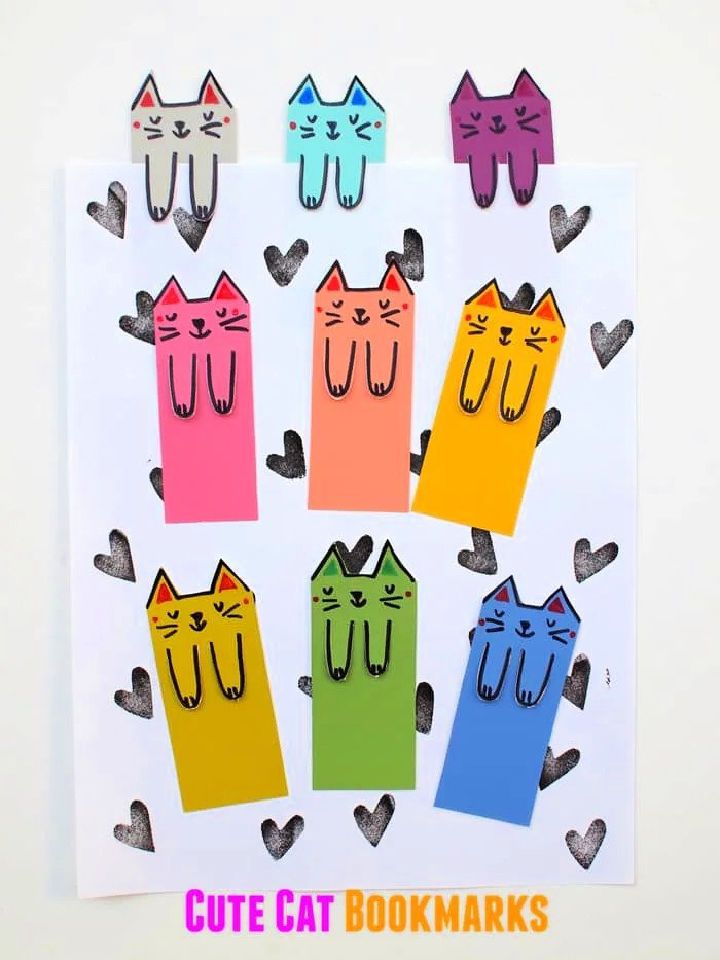
It’s time to get creative and make something unique with this DIY cute cat bookmarks tutorial! Colorful, feline-themed bookmark out of ordinary paint chips are both easy enough for kids to make and adorable.
All it takes is a bit of drawing, cutting and gluing – no special skills are required. Great for all ages, this project is easy for kids to make independently (with a little help cutting. Let older children express their creativity as they draw and cut out these colorful and cute feline-themed bookmark shapes. So simple, yet so incredibly adorable – get crafting now! diycandy
21. Simple DIY We Bare Bear Bookmarks
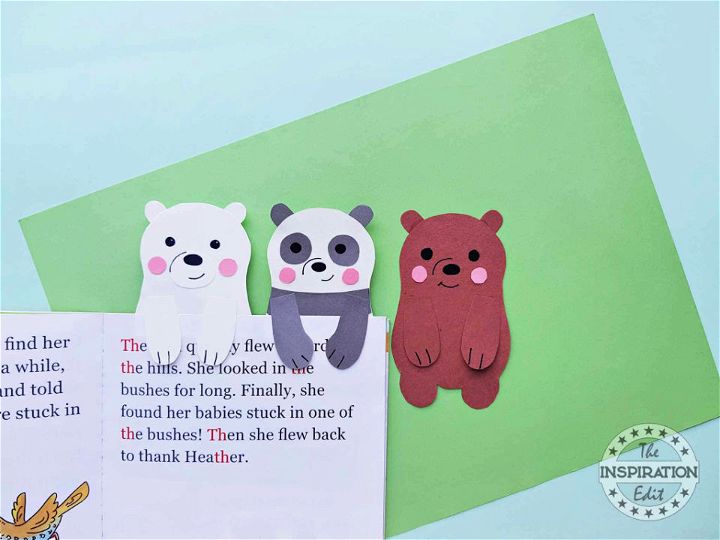
Spice up your reading with these creative and fun diy bookmark ideas for all ages. Let your kids get creative with these adorable “we bare bear bookmarks”! This simple DIY craft is perfect for encouraging reading and literacy.
With a free bear template, they’ll love making their super cute bear bookmarks using colored craft papers – black, white, grey, brown and pink – pencils, gel pens, scissors and glue. Making this fun bookmark idea couldn’t be easier – it’s the perfect activity for little ones on rainy days or to keep them entertained during the holidays. Get creative with this awesome kids’ craft today! theinspirationedit
22. Homemade Origami Heart Bookmark
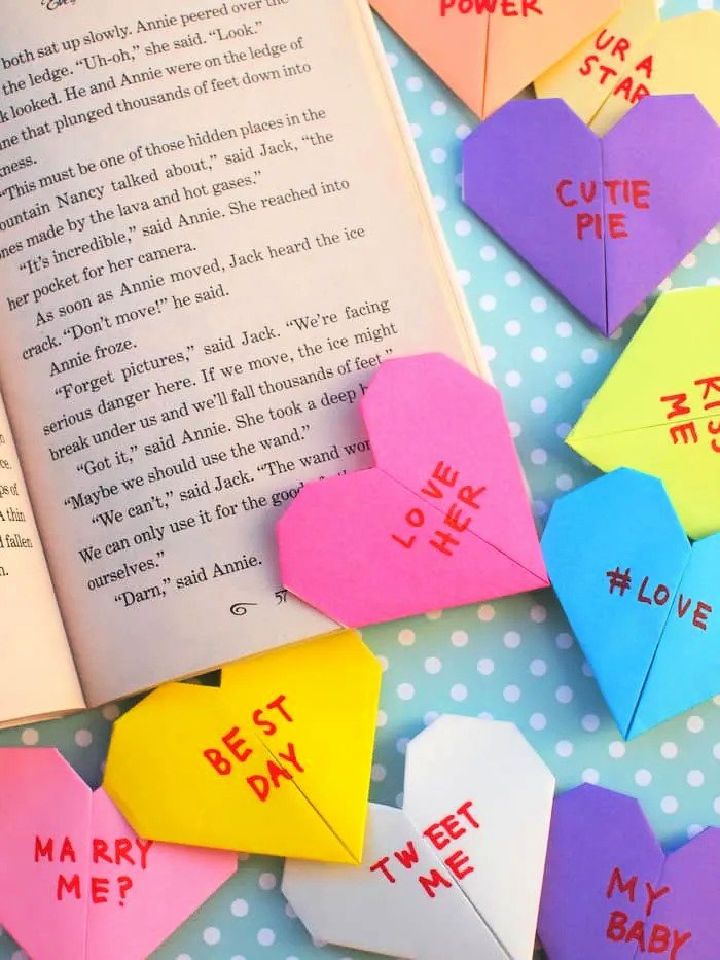
Love something handmade and don’t have a lot of time? Check out this fun and easy DIY origami heart bookmark! Perfect for kids and adults alike, it looks just like a conversation heart with its personality.
You don’t need any skills to make this—just folding paper, scissors, permanent markers, and tape. Once you’ve crafted your personalized bookmark, it will perfectly fit on the corner of any book page!
Get creative by using different colors and messages on each one. This is an excellent low-stress project that can be completed in minutes – find all the supplies you’ll need today at your local craft store! diycandy
23. Gorgeous DIY Bookmark With Fabric Scraps
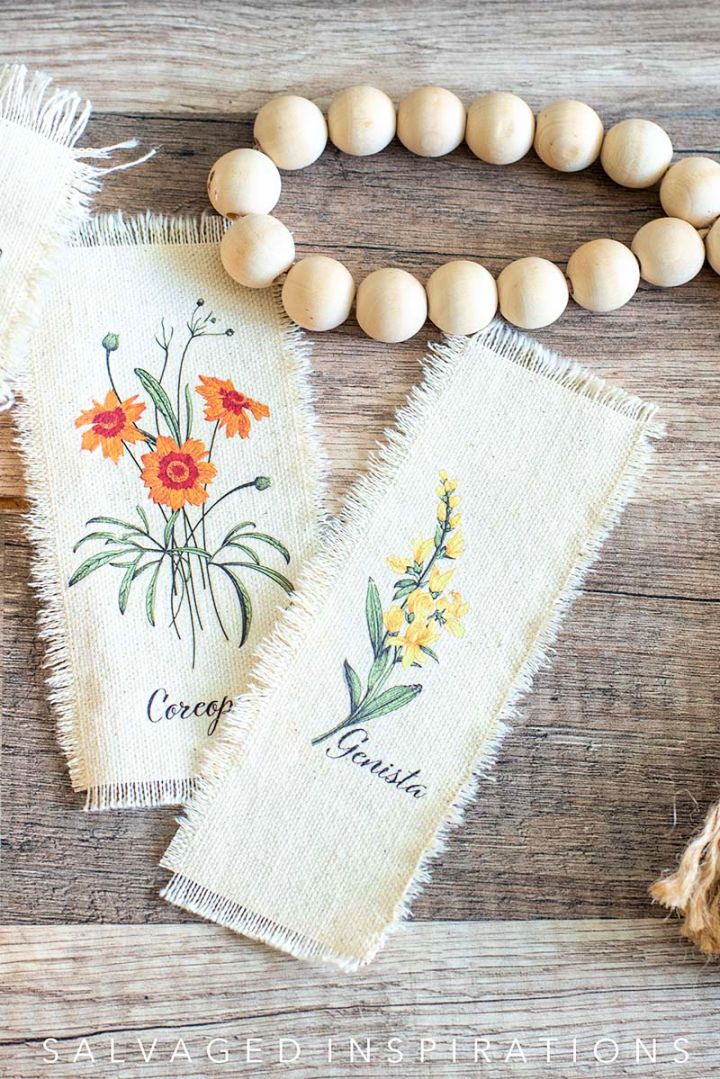
Craft a unique and beautiful gift for someone special with this DIY bookmark made from fabric scraps! Get creative, have fun and turn plain pieces of fabric plus leftover floral or botanical transfers into these gorgeous bookmarks. This bookmark’s fabulous look will make it a cute addition to any library. Plus, it is easy to make, so you can whip up several in no time – perfect as a gift or to enjoy yourself! salvagedinspirations
24. Printable Fox Bookmarks – Step-By-Step Instructions
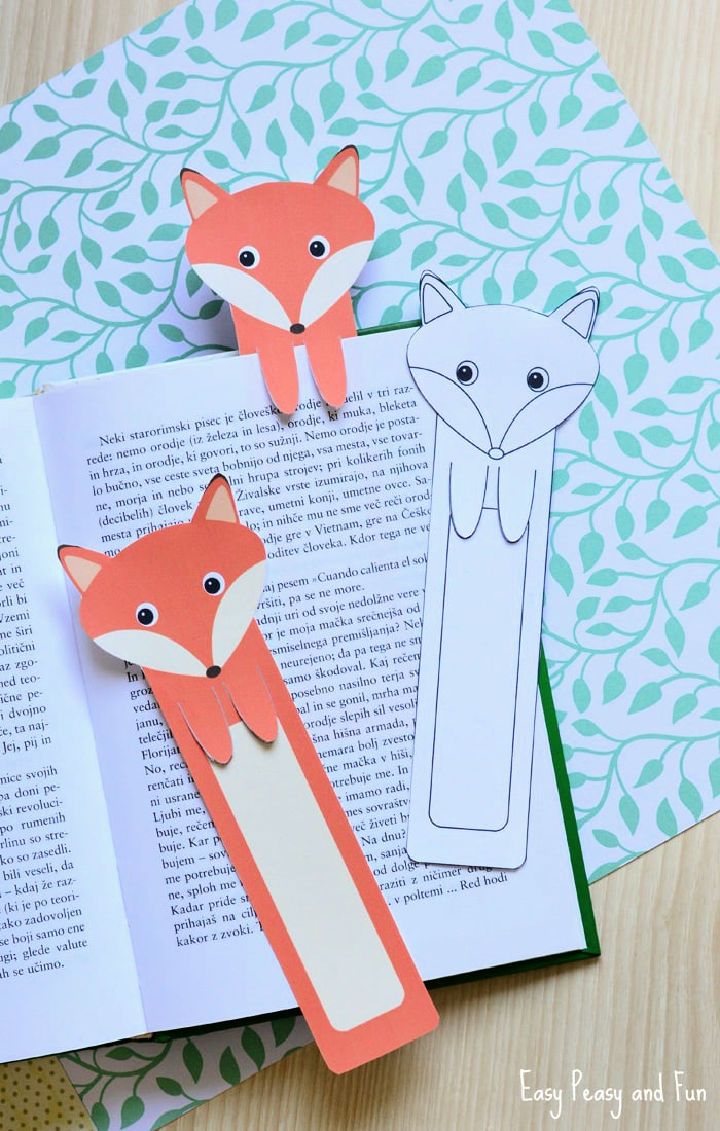
Are you looking for something cute yet practical as a gift? Look no further than these adorable printable fox bookmarks. Not only are they fun, but they also make keeping track of your reading progress easier. With step-by-step instructions, you can easily make these special gifts for friends and family in no time! Bring brightness into someone’s day – get a set of these playful fox bookmarks! Show them how much you care with these charmingly printed fox bookmarks—they’ll love them! easypeasy
25. How to Make a Bookmark Tutorial
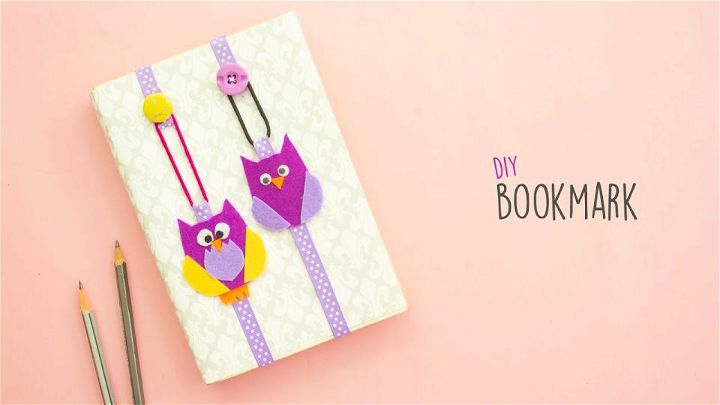
Looking for a thoughtful, easy-to-make gift for the bookworm in your life? Stop looking around! This easy tutorial will direct you to make a bookmark featuring an adorable owl that will surely have them smiling from ear to ear. All you need is felt sheets, buttons, ribbons, scissors, eyes, a sewing needle (or glue gun), glue, and an elastic band.
This cute little gift requires minimal effort and resources but will surely bring joy to any witty book lover. Who said DIY is difficult? No more with this easy tutorial! This lovely handmade bookmark is a fabulous way to show your loved ones how much you care.
Conclusion:
In conclusion, making your own bookmarks is a fun and easy way to add some personality and creativity to your reading experience. You can use different materials, techniques, and designs to make bookmarks that suit your style, mood, or interests. You can also make bookmarks as gifts, tokens, or learning tools for yourself or others. Whether you want to use paper, fabric, yarn, or magnets, you can find plenty of ideas and inspiration from this post. We hope you enjoyed these 25 cute DIY bookmark ideas and learned how to make bookmarks easy. Happy reading and happy crafting! 📚🎨

