Discover the joy of creativity with DIY bookends, a fun and easy way to add beauty and order to your shelves. Learn how to make homemade bookends with these 25 creative and easy DIY bookend ideas that combine creativity, simplicity, and functionality. These DIY bookends include colorful and artistic designs like stripes and splatters, as well as innovative ones like organizers, neon letters, or geometric shapes.
Making your own bookends not only personalizes your decor, but it also helps you organize your books. For craft lovers, making bookends is a chance to reuse materials like old toys, scrap wood, and even cardboard, making it an eco-friendly project. If you like a more natural look, options like amethyst or terrazzo concrete bookends will match your preference.
Each DIY bookend idea includes a detailed guide, easy instructions, and a material list. This makes it simple for anyone to make their own unique bookends, no matter their crafting skill level. Plus, you can find 25 stunning DIY booksend ideas for making bookends using a Cricut maker, which adds more creativity to this project. So don’t wait! Check out this curated collection of DIY bookend ideas today, and give your bookshelf a touch of your personal charm!
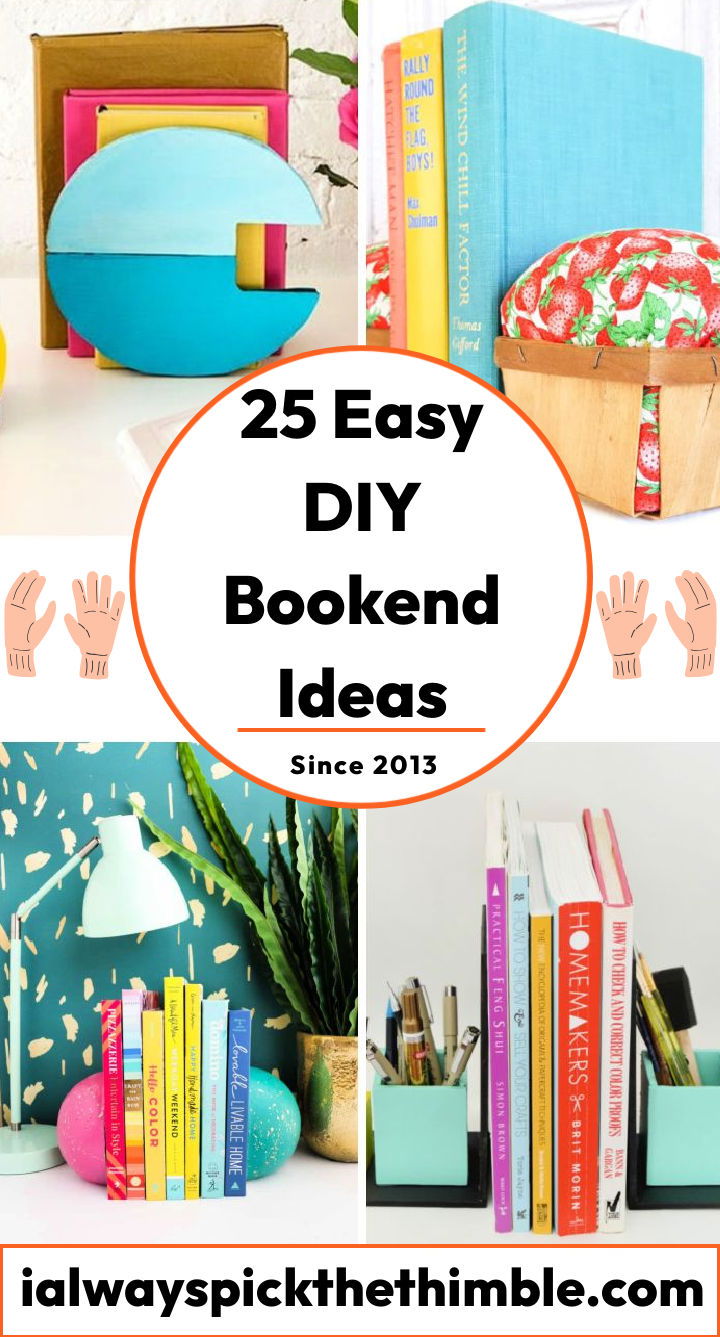
Why Bookends Are Useful and Fun to Make?
If you love reading books, you probably have many of them on your shelves, desk, or table. But how do you keep them organized and neat? One way is to use bookends, which are objects that hold your books upright and prevent them from falling over. Bookends can also add some personality and style to your space, especially if you make them yourself.
In this post, you will learn how to make 25 DIY bookends using different materials, tools, and techniques. You will also get some creative ideas for designing your bookends and making them look unique and attractive. Whether you want to make bookends for yourself or as a gift for someone else, you will find something that suits your taste and skill level in this post. So, let’s get started!
How to Choose the Right Material for Your Bookends
One of the first things you need to decide when making bookends is what material you want to use. There are many options available, such as wood, metal, clay, plastic, and more. Each material has its own advantages and disadvantages, so you need to consider some factors before choosing one. Here are some of them:
- Durability: You want your bookends to be strong and sturdy enough to hold your books without breaking or bending. Some materials are more durable than others, such as metal or wood. However, you can also reinforce weaker materials with glue, nails, screws, or other methods.
- Weight: You also want your bookends to be heavy enough to resist the pressure of your books without sliding or tipping over. Some materials are heavier than others, such as metal or stone. However, you can also add some weight to lighter materials by filling them with sand, pebbles, coins, or other items.
- Availability: You want your bookends to be easy and cheap to find and buy. Some materials are more common and affordable than others, such as wood or plastic. However, you can also recycle or reuse old or unwanted items as bookends, such as toys, cans, bottles, or bricks.
- Workability: You want your bookends to be easy and fun to work with. Some materials are more flexible and versatile than others, such as clay or foam. However, you can also shape and decorate any material with the right tools and techniques.
How to Design Your Bookends
Another thing you need to decide when making bookends is what design you want to use. There are endless possibilities for making bookends that reflect your personality and interests. You can make bookends that match the theme or genre of your books, such as animals, plants, letters, numbers, symbols, etc. You can also make bookends that express your hobbies or passions, such as music, sports, art, etc. Here are some tips and tricks on how to come up with creative and original ideas for your bookends:
- Brainstorm: The first step is to brainstorm some ideas for your bookends. You can use a pen and paper, a computer, or a smartphone to jot down some words or phrases that inspire you. You can also look at some examples of bookends online or in stores for inspiration.
- Sketch: The next step is to sketch out some rough drawings of your bookends. You don’t have to be an artist or a designer to do this. You just need to have a basic idea of how your bookends will look like in terms of shape, size, color, and detail. You can use a pencil and paper, a computer program, or an app to do this.
- Refine: The final step is to refine your sketches and make them more realistic and detailed. You can use a ruler, a compass, a protractor, or other tools to measure and mark the dimensions of your bookends. You can also use a color palette, a paintbrush, a marker, or other tools to add some color and texture to your bookends.
How to Make Your Bookends Step by Step
Once you have chosen your material and design for your bookends, you are ready to make them. The exact steps will vary depending on the material and design you have chosen, but here are some general steps that apply to most cases:
- Cut: The first step is to cut your material into the shape and size of your bookends. You can use a saw, a knife, scissors, or other tools to do this. You can also use a template, a stencil, a cookie cutter, or other tools to guide you.
- Shape: The next step is to shape your material into the form of your bookends. You can use a hammer, a pliers, a file, or other tools to do this. You can also use a mold, a cookie press, a clay extruder, or other tools to help you.
- Glue: The third step is to glue your material together or to a base to make your bookends. You can use a glue gun, super glue, wood glue, or other types of glue to do this. You can also use nails, screws, pins, or other fasteners to secure your material.
- Paint: The fourth step is to paint your material to give it some color and style. You can use acrylic paint, spray paint, watercolor paint, or other types of paint to do this. You can also use stickers, decals, washi tape, or other embellishments to decorate your material.
- Finish: The final step is to finish your bookends by applying some protective coating or sealant to make them last longer and look better. You can use varnish, wax, mod podge, or other types of finish to do this. You can also use felt pads, rubber feet, cork sheets, or other materials to add some grip and stability to your bookends.
How to Avoid Common Mistakes and Problems When Making Bookends
Making bookends can be a fun and rewarding experience, but it can also be frustrating and disappointing if you encounter some problems or make some mistakes along the way. Here are some common pitfalls and challenges that you might face when making bookends and how to solve them or prevent them from happening:
- Your bookends are too light or too heavy: If your bookends are too light, they might slide or tip over when holding your books. If your bookends are too heavy, they might damage your books or your shelf. To avoid this, you need to balance the weight of your bookends with the weight of your books. You can add some weight to lighter bookends by filling them with sand, pebbles, coins, or other items. You can also reduce the weight of heavier bookends by hollowing them out, cutting them smaller, or using lighter materials.
- Your bookends are too big or too small: If your bookends are too big, they might take up too much space on your shelf or look out of proportion with your books. If your bookends are too small, they might not hold your books properly or look insignificant. To avoid this, you need to measure the size of your bookends with the size of your books and your shelf. You can adjust the size of your bookends by cutting them bigger or smaller, scaling them up or down, or using different materials.
- Your bookends are not stable or sturdy: If your bookends are not stable or sturdy, they might fall apart or break easily when holding your books. To avoid this, you need to make sure that your bookends are well glued, nailed, screwed, or fastened together. You also need to make sure that your bookends have a flat and solid base that can support the weight and pressure of your books. You can add some stability and sturdiness to your bookends by using stronger materials, thicker glue, more nails, screws, or pins, or adding some support structures such as brackets, rods, or wires.
How to Display and Use Your Bookends
After you have made your bookends, you might want to show them off and use them to organize and beautify your books. Here are some suggestions on how to arrange your books and bookends on your shelves, desk, or table and how to make them stand out and look attractive:
- Group your books by theme, genre, color, size, or alphabetically: You can group your books by theme (such as fantasy, romance, history, etc.), genre (such as fiction, non-fiction, poetry, etc.), color (such as rainbow, monochrome, pastel, etc.), size (such as large, medium, small, etc.), or alphabetically (by author’s name, title, etc.). This will help you find your books easily and make some visual harmony and contrast.
- Mix and match different types of bookends: You can mix and match different types of bookends that complement each other in terms of shape, color, style, or theme. For example, you can use animal-shaped bookends for animal-themed books, letter-shaped bookends for alphabetically arranged books, or geometric-shaped bookends for modern-looking books. This will add some variety and interest to your display.
- Place some accessories or decorations around your bookends: You can place some accessories or decorations around your bookends that enhance their appearance or function. For example, you can place some plants, flowers, candles, lamps, clocks, frames, figurines, or other items around your bookends that match their theme or color. This will make some ambiance and mood for your space.
Making bookends is a great way to express your creativity and personality and organize and beautify your books. You can also make bookends as gifts for your friends and family or as a way to recycle or reuse some old or unwanted items. The ideas are endless, so don’t be afraid to experiment. Let’s explore our list of 25 creative DIY bookends:
1. How to Make Striped Bookends
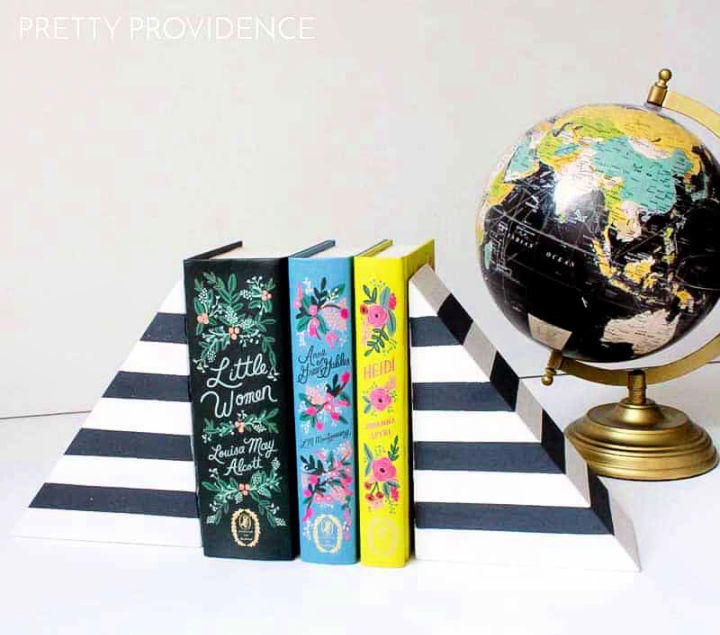
Make a stylish and functional addition to your home library with these DIY striped bookends! You can quickly make this an easy project with just a few supplies from your garage.
Start by cutting two pieces of wood from the 1×5 board. Then use wood glue to attach them. Spread bondo or wood filler over any seams for a smooth finish. Next, mask off alternating stripes on both sides of the bookend using painter’s tape and cover everything with white paint.
Finally, remove the tape and fill each stripe with black paint for an eye-catching contrast. Your new striped bookends will keep your books safe while adding a touch of style to any room! prettyprovidence
2. Splatter Painted Concrete Sphere Bookends
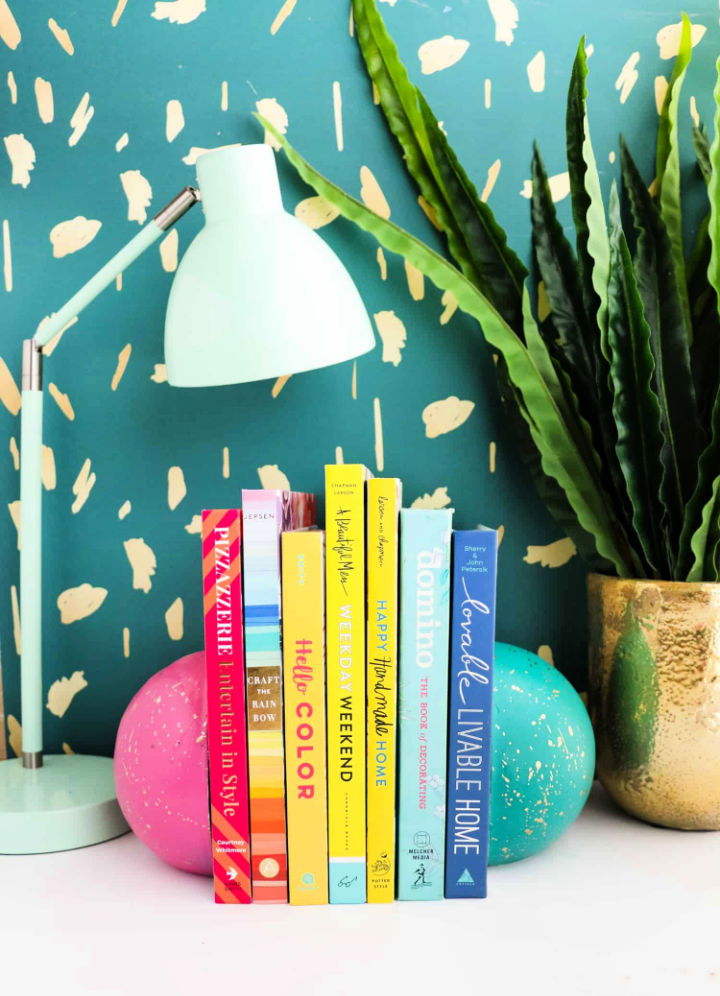
These DIY splatter-painted concrete sphere bookends can be created easily with a few basic materials. All you need is some cement mix, a large mixing bowl, sphere cake pans, vegetable oil, sanding brick and spray paint. After the spheres have cooled and dried for 24 hours, use spray paint to give them a unique look by lightly spraying one with white paint and the other with gold. Finally, add some details using a gold paint pen that brought it all together. Now bookends are ready to decorate any bookshelf! abeautifulmess
3. DIY Bookends With Organizers
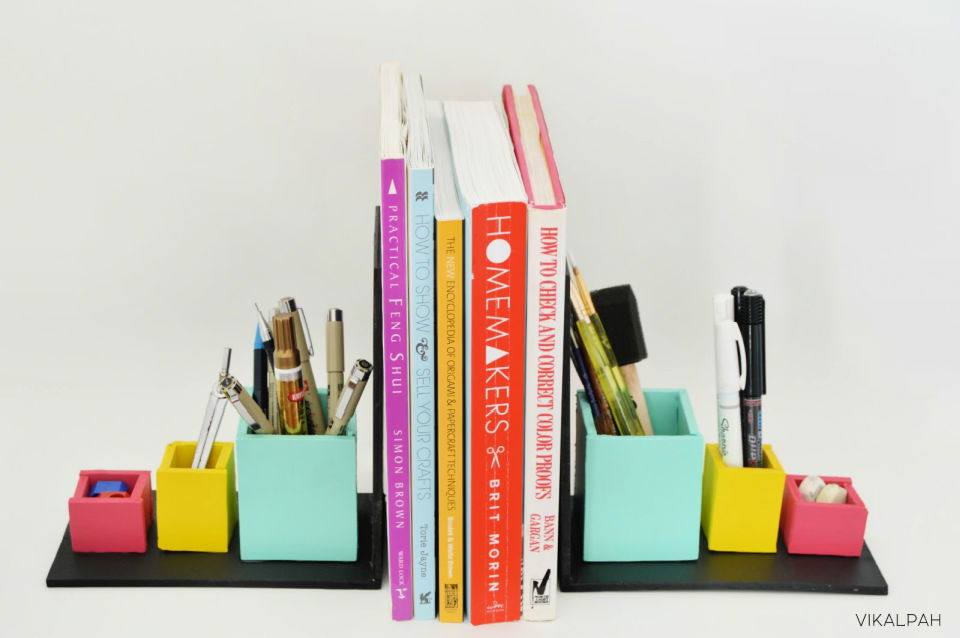
Make your shelves tidier with this unique DIY project! You can make your own beautiful bookends with organizers with just some basic supplies like ¼″ thick wood planks, acrylic paint, and any varnish or clear spray paint. These bookends are perfect for organizing school supplies or books on your shelf – all while having a decorative touch in the room. Try out this fun project today to give an extra flare to your shelves! vikalpah
4. Make Your Own Neon Letter Bookends
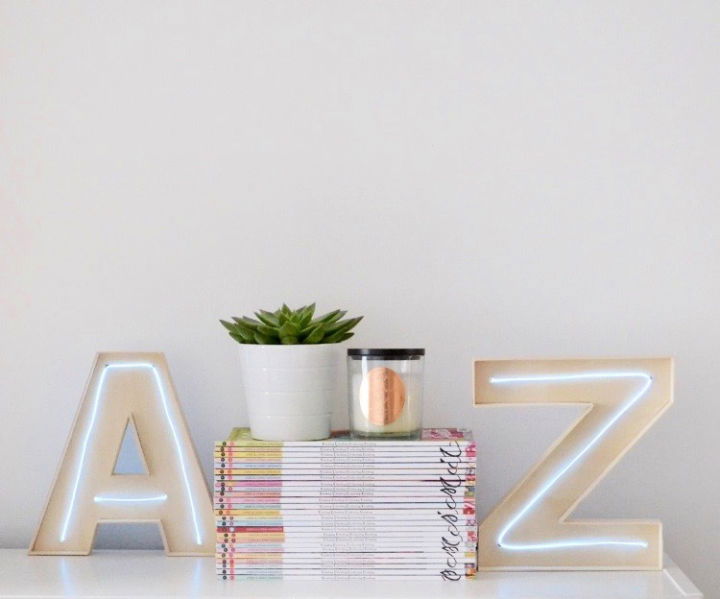
Add a unique touch to your home with these glowing neon letter bookends! All you need is some neon wire, wooden letters and a drill. First, cut the neon wire to the desired length using the wire cutters. Then attach it to each letter with tape. Finally, use a drill to make small holes in each corner of each letter and string the neon through them. It’s that simple! Your one-of-a-kind bookends will be sure to make your living space look oh-so-trendy! thethingsshemakes
5. DIY Wood Triangle Bookends
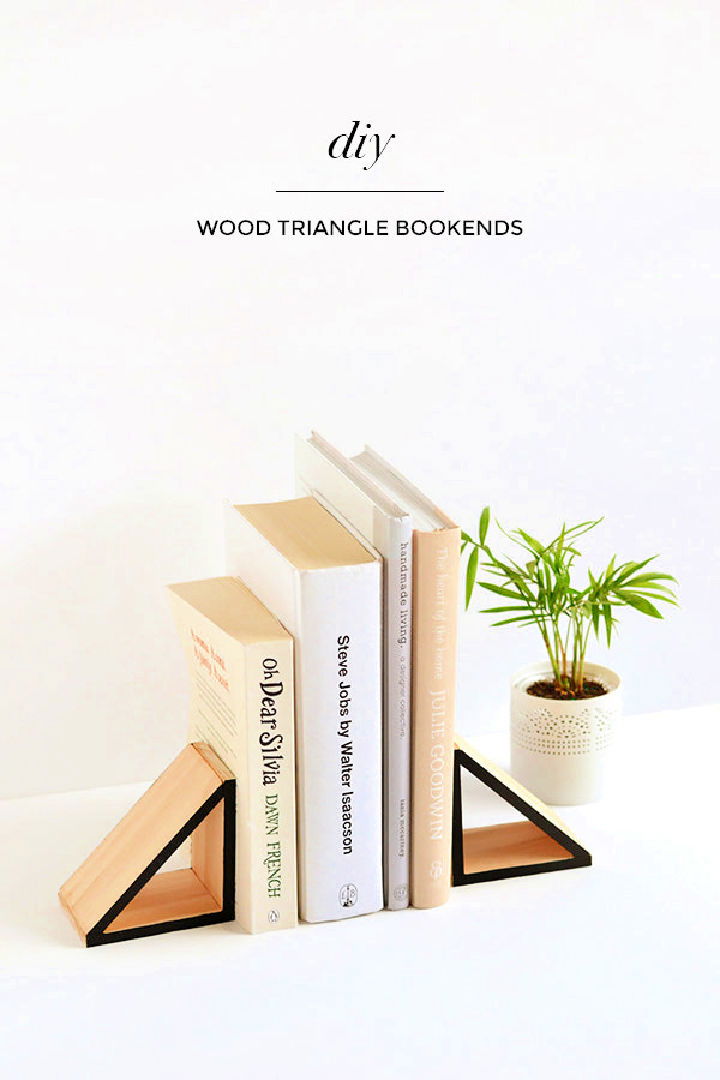
Organize your library in a modern and fashionable way with this simple geometry bookend design! All you need is some spare bits of wood, wood glue, and black acrylic paint. With just a few simple steps, you can craft beautiful wooden triangle bookends that will make your shelf look amazing! Start crafting today and give your books the support they deserve! makeandtell
6. DIY Kids Toy Bookends
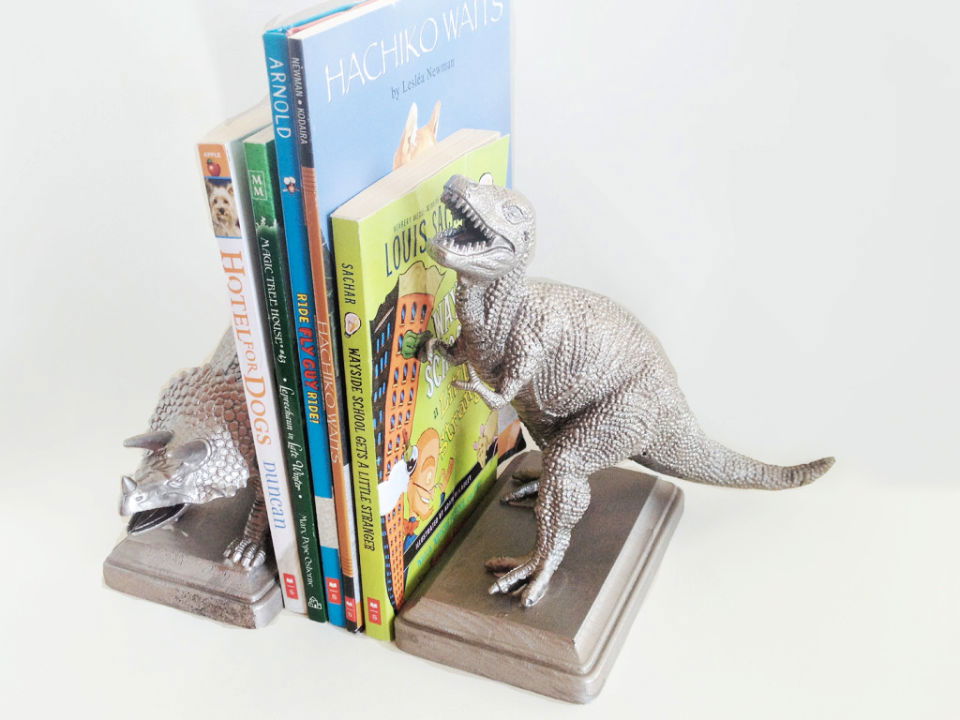
Unlock the transformative power of your children’s outgrown toys with this unique DIY project that makes stunning bookends! Transform those treasured memories into something useful and special for their bookshelf. All you need is an unused toy, wood, epoxy glue, and spray paint to make these unique DIY kids toy bookends.
With just a few simple steps, you can make a functional yet sentimental display that your child will cherish for years. Get creative and upcycle those beloved childhood toys into keepsake bookends they’ll always remember! juliemeasures
7. Fun and Easy DIY Bird Bookends
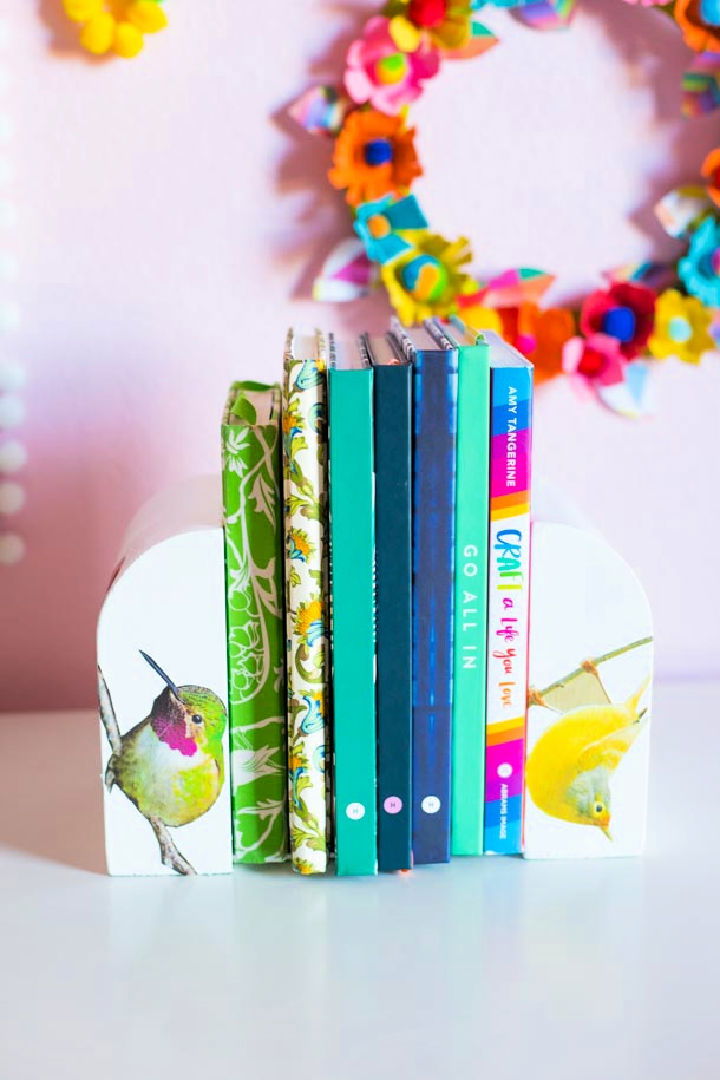
Put together a unique and stylish home decor piece with these DIY bird bookends. Featuring plain wood bookends, bird images of your choice, white acrylic paint and mod podge to seal the birds for lasting beauty. Use this easy decoupage craft to personalize your bookcase in no time! Simply choose the bird images you like best, then use mod podge to firmly adhere them to the wood bookend base. Make a fun statement piece that will bring charm and character into any room! designimprovised
8. Handmade Berry Baskets Bookend
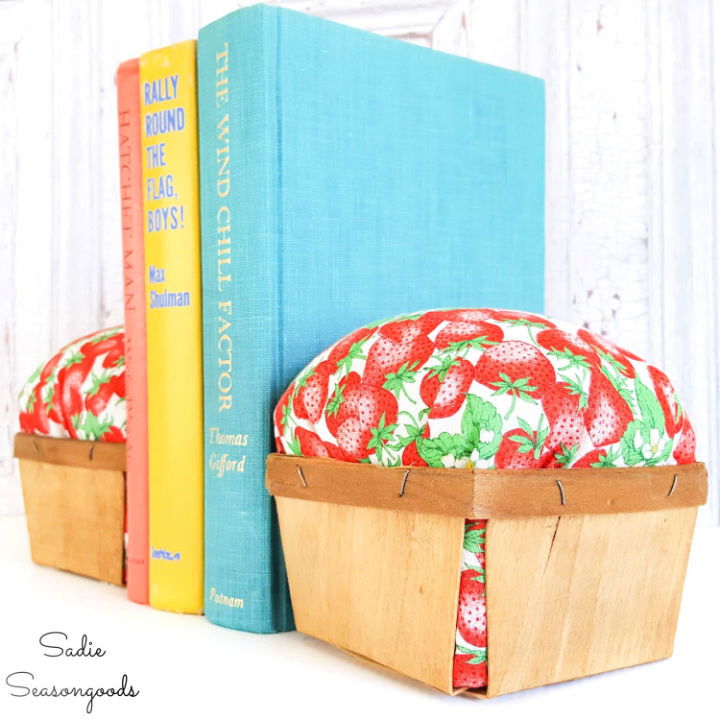
Give your shelves a unique and stylish look with berry baskets as bookends and strawberry decor! These eye-catching bookends are perfect for any home — they mimic the look of a full basket of berries while hiding the weights inside to ensure your books stay in place. Plus, their non-slip base means that you won’t have to worry about them sliding around on whatever surface they’re placed on. Add some freshness to your décor today — choose berry baskets as bookends and strawberry decor! sadieseasongoods
9. DIY Dollar Store Bookends
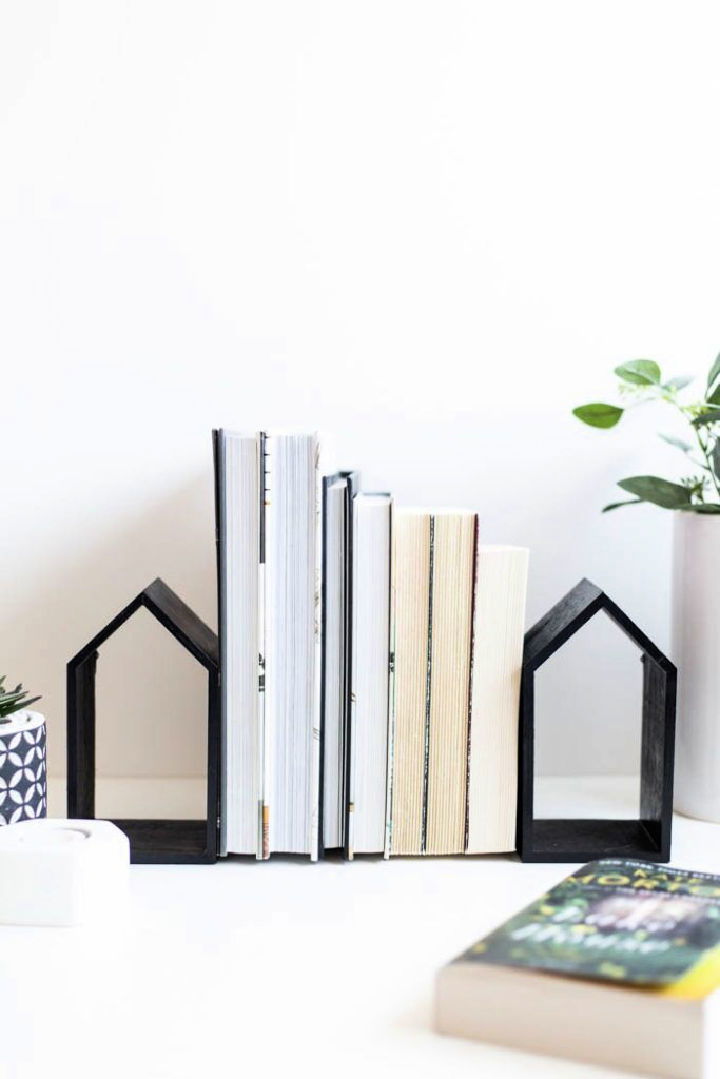
Assemble a unique, stylish set of bookends for your home with this easy DIY project! All you need are dollar storehouses, brackets, black spray paint, pl premium adhesive and some clamps to put together.
First, spray the houses with black paint and wait for them to dry. Then attach each house onto one bracket with pl premium adhesive. Wait for it to dry completely before attaching the second house onto another bracket using the same method, then clamp both sides together tightly until they are firmly in place. Now your beautiful new bookends will look great while keeping your books neatly organized! lovecreatecelebrate
10. Homemade Color Block Bookends
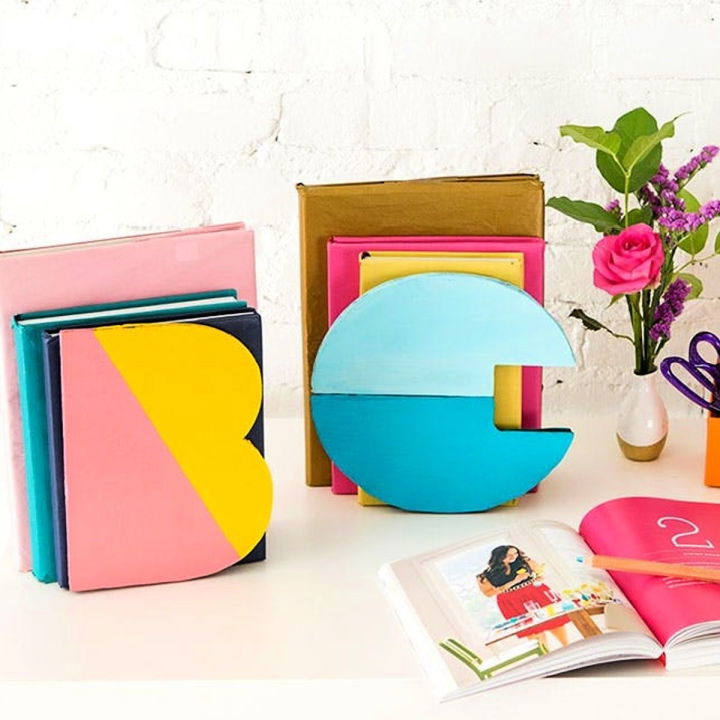
Transform your bookshelf into a beautiful addition to any room with color block bookends. These bookends are made from wood and are easy to paint and stencil with your favorite colors. You can make a unique design that stands out on your shelf while keeping it organized. Choose any color combination you want or even use a letter stencil to spell out the name of a special someone! With these stylish bookends, keep everything neatly tucked away without sacrificing style! brit
11. DIY Spotted Horse Bookends
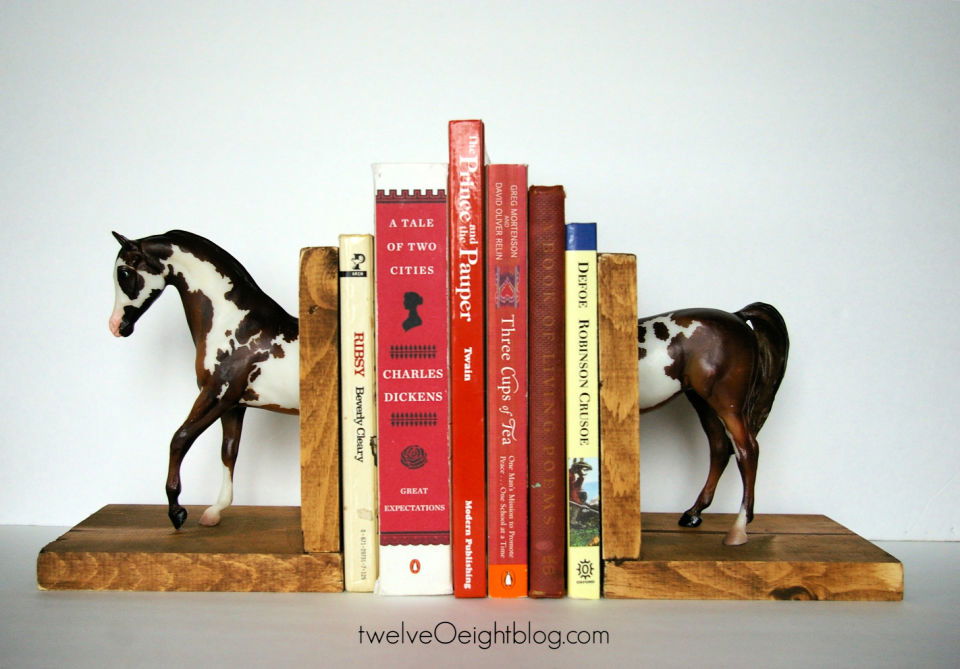
Make a one-of-a-kind home décor piece with this DIY spotted horse bookends! You can make an eye-catching display for your bookshelf with just four pieces of scrap wood or pine board, some wood stain or antiquing polish, a plastic horse, and paper towels. Whether you paint it brightly colored, distress it in white and gray tones, or mix the two – this project is perfect for any skill level. Give your book collection the stylish finish they deserve with this adorable DIY spotted horse bookends. twelveoeightblog
12. How to Make Amethyst Bookends
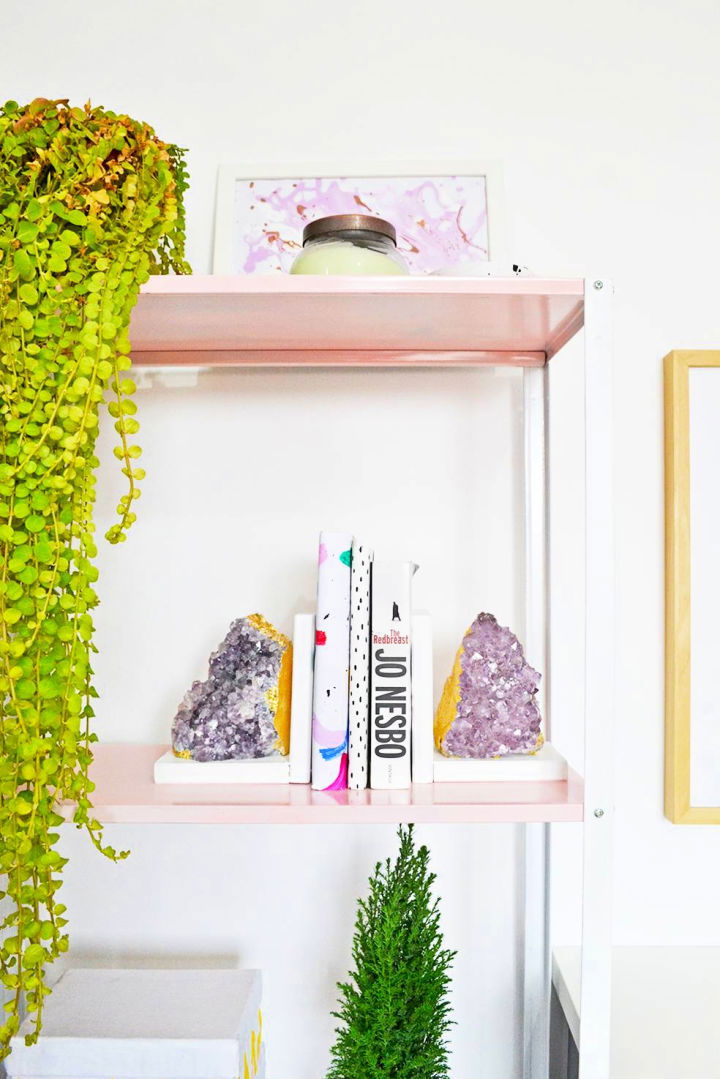
Bring some sparkle to your life with a bit of crystal-encrusted craftiness! Craft your own set of beautiful amethyst bookends in a few hours. Perfect for adding style to any bookshelf, these bookends are made from amethyst stone in size and weight, 1×4″ pine lumber, gold leaf, and white acrylic paint – bring some sparkle into your home or give them away as the perfect holiday gift. Learn how to make it step by step and start enjoying the beauty of these one-of-a-kind bookends! curbly
13. DIY Terrazzo Concrete Book Ends
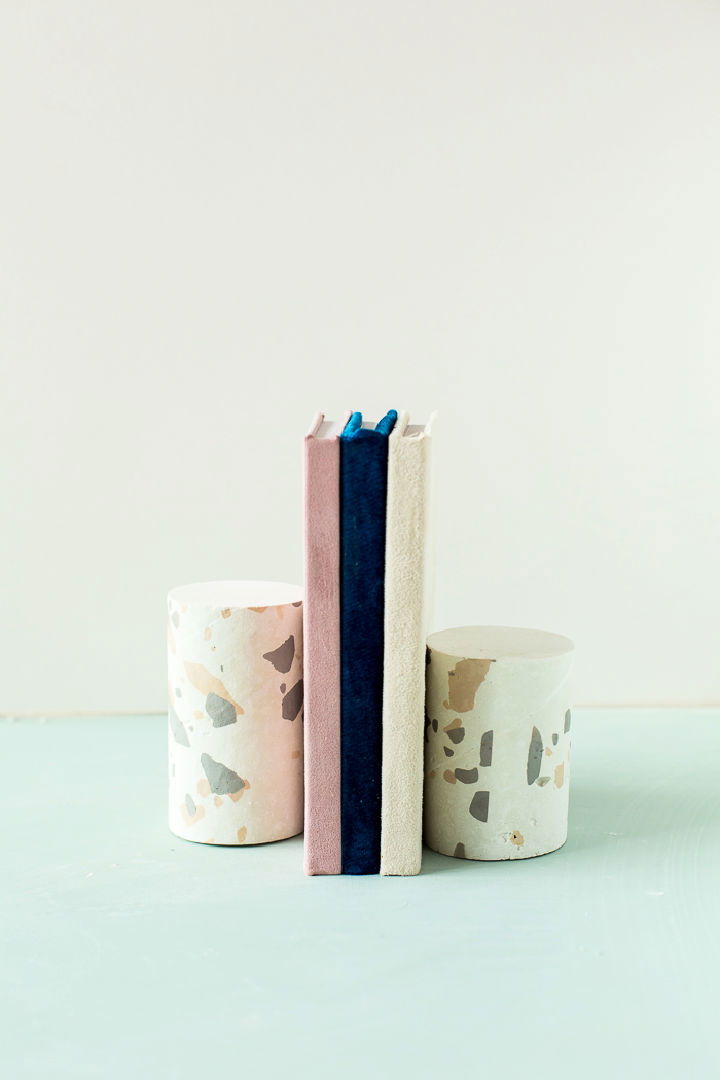
Enhance your interior design with the unique beauty of terrazzo concrete book ends. Learn how to make a terrazzo print on almost anything using rust-oleum painters touch multi-purpose spray paints. Making your own book ends is easy when you start with postal tubes, concrete and just a few supplies from the hardware store. Follow the instructions and transform any room in your home with this unique craft project that will stand out in style! Get creative and make something special today! fallfordiy
14. Make Rainbow Bookends With Cricut Maker
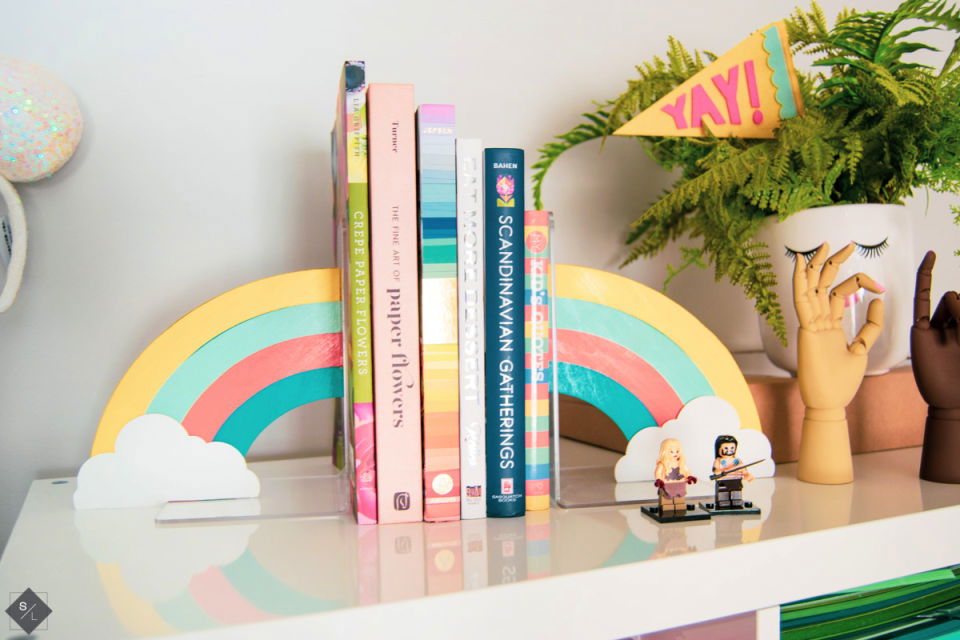
Make stunning rainbow bookends with your cricut maker and knife blade. These DIY bookends will add a touch of visual appeal to any room, easily crafted from acrylic, basswood, and either Canson artboard or cricut chipboard. All you need is the design space file provided, your knife blade and some patience while waiting for the glue to dry! Great as an addition to any bookshelf or home décor project – order yours today and start crafting these beautiful decorative pieces quickly! seelindsay
15. Amazing DIY Unicorn Bookend
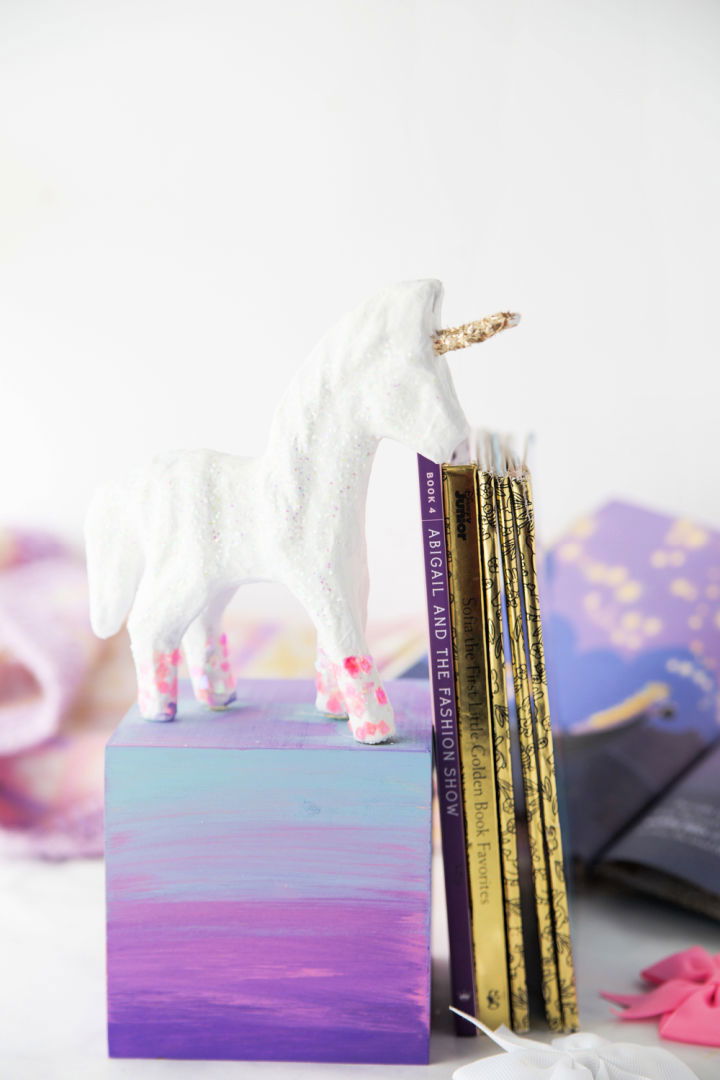
Let your child’s imagination soar with this majestic DIY unicorn bookend! Perfect for any unicorn-lover, this simple and sparkly project uses paper mache, acrylic paint, glitter and a wooden block – everything you need will be right at home. Transform these basic materials into a mystical creature to help hold up their favorite books in style! With just 4 easy steps, your little one will have the perfect gift they’ll never forget. So grab some art supplies and crafts today with this fun DIY unicorn bookend! madetobeamomma
16. DIY Guitar Scrap Wood Bookends
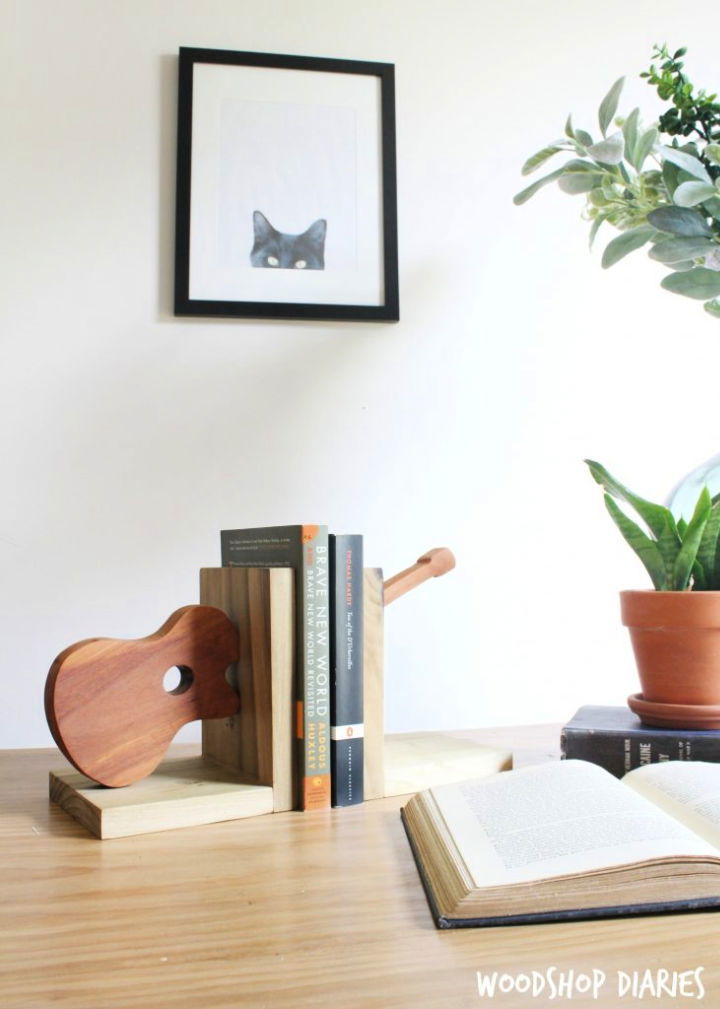
String a little style into your bookshelf with these DIY guitar scrapwood bookends! Using just a few tools like a jig saw, wood glue and your favorite scraps of wood you can craft these fun and functional book ends in no time. Not only are they the ideal way to store your favorite books, but they also add an artistic touch to any room! Add some music-inspired style by crafting this simple project today – it’s the perfect way to show off your DIY skills! woodshopdiaries
17. Succulent Supply Holder Bookends
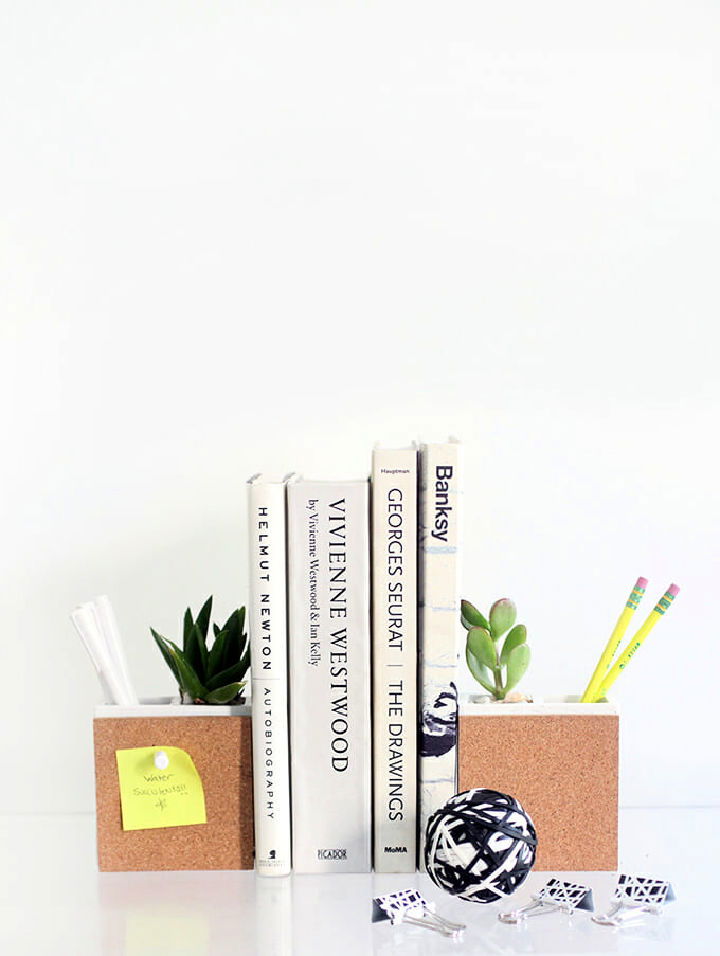
Grow your succulents in style! This succulent & supply holder bookend set is perfect for organizing and displaying your favorite plants.
It includes a toothbrush holder, cork coasters, e6000 adhesive and white gravel – all the essentials to help you make an attractive succulent display. The bookends are made from sturdy material that won’t easily tip over, allowing you to rest assured that your beloved plants will stay upright even when bumped or moved around.
Add some personality to any room by making an eye-catching succulent display with this succulent & supply-holder bookend set! ispydiy
18. Handmade Triangle Bookends
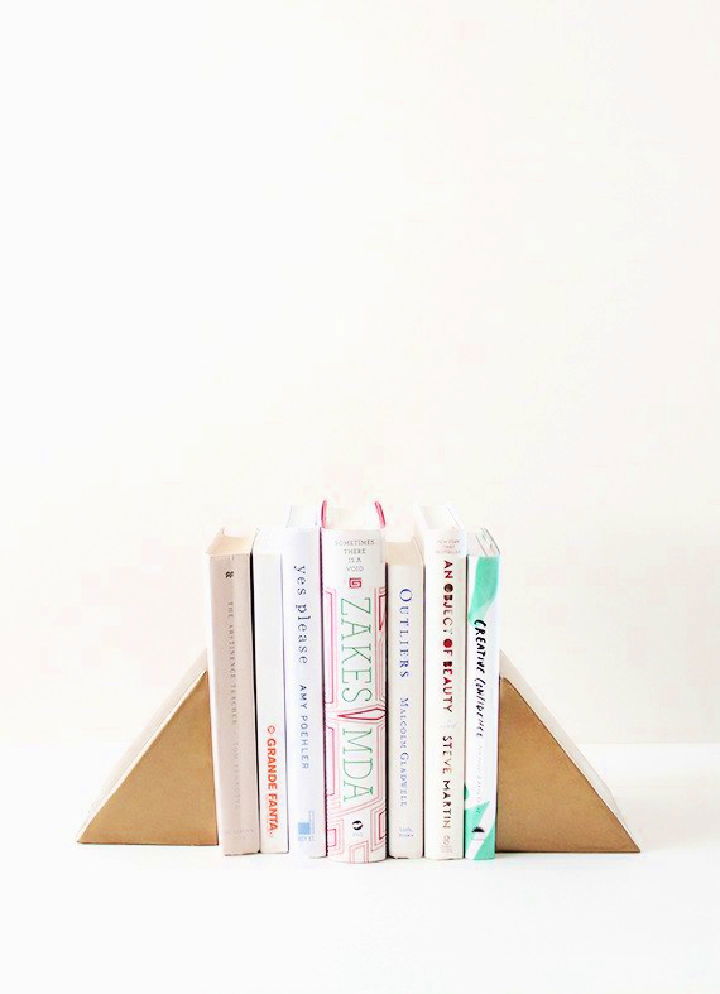
Change your book collections into works of art with these sleek and modern triangle bookends! This simple project requires a few materials like contact paper, cardboard, cardstock paper and some sand or rocks for weight. It’s surprisingly easy to make, so don’t worry if you’re not confident in your cutting skills – the cardboard is pretty forgiving, so you won’t be able to notice any wonky shapes. Plus, it looks great when finished – an easy way to add a touch of personality and color to any shelf. Give this project a try today, and have fun making beautiful bookends! almostmakesperfect
19. DIY Decorative Wooden Bookends
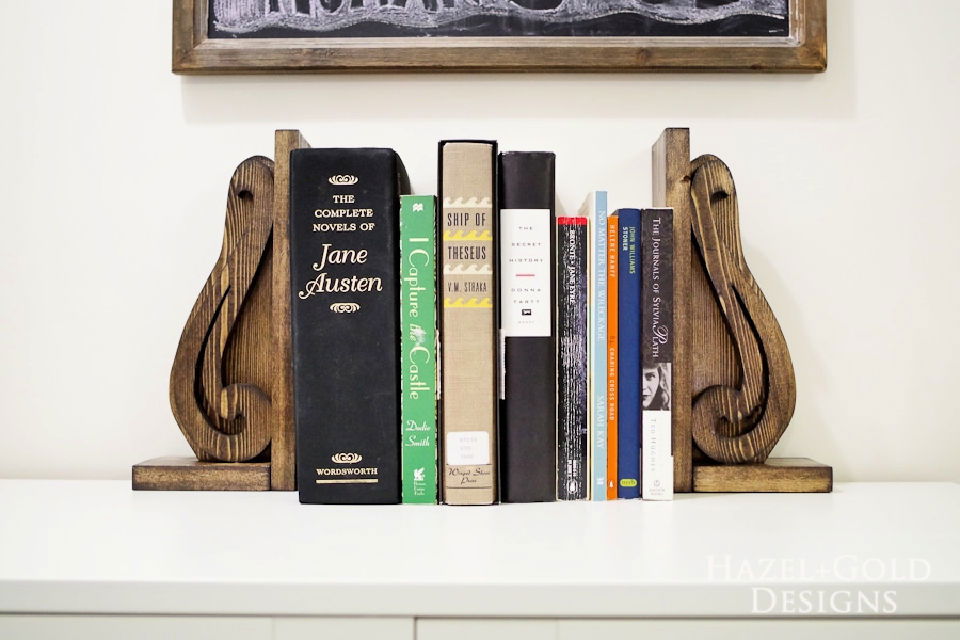
Turn your home into a unique and captivating space with these stylish DIY decorative wooden bookends. All you need is a 1×4 pine board, french curve stencil or design of your choice, wood stain to finish the bookends, a towel for wiping off excess stain, and polyurethane sealant to protect it. This simple yet stylish craft project is perfect for any home office or living space! Add some flare to your shelves in no time with these decorative wooden bookends – just follow the easy instructions! jenwoodhouse
20. Easy DIY Bookends from Wood Scraps
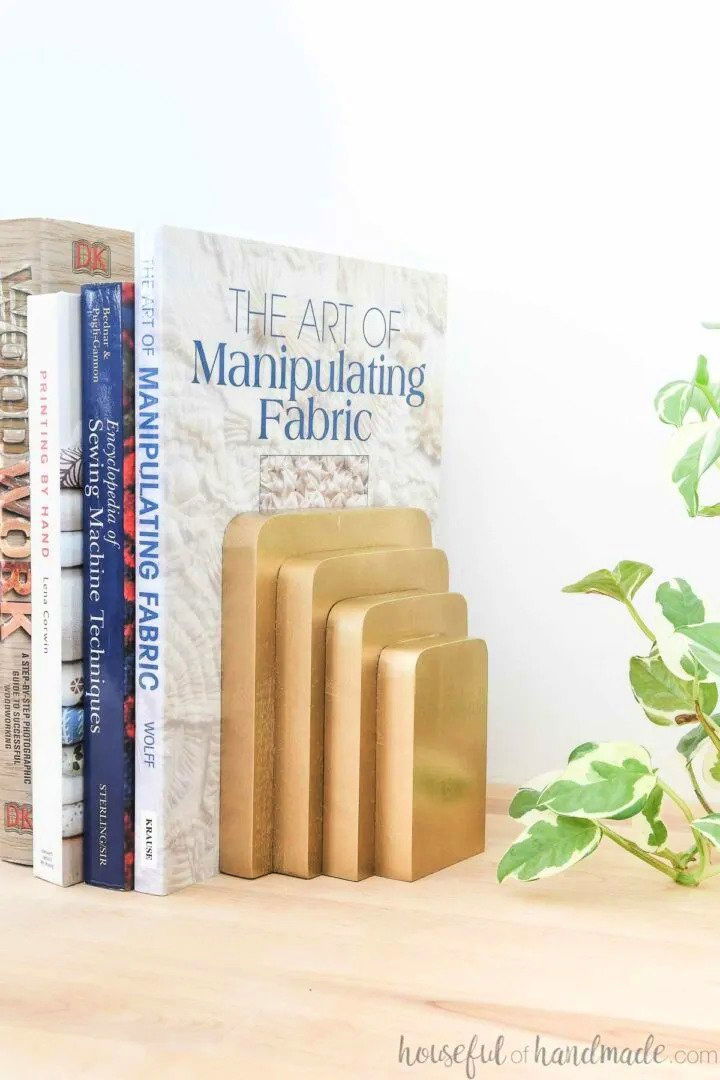
Organize your bookshelf with some fun new DIY bookends made from wood scraps! Making bookends is a great beginner-level DIY project and comes together quickly. They can be used in multiple places to help organize your books while adding style. All you need are some wood scraps, glue, and spray paint to get started on this budget-friendly project that will make your bookcase look amazing! housefulofhandmade
21. Stylish DIY Mountain Bookends
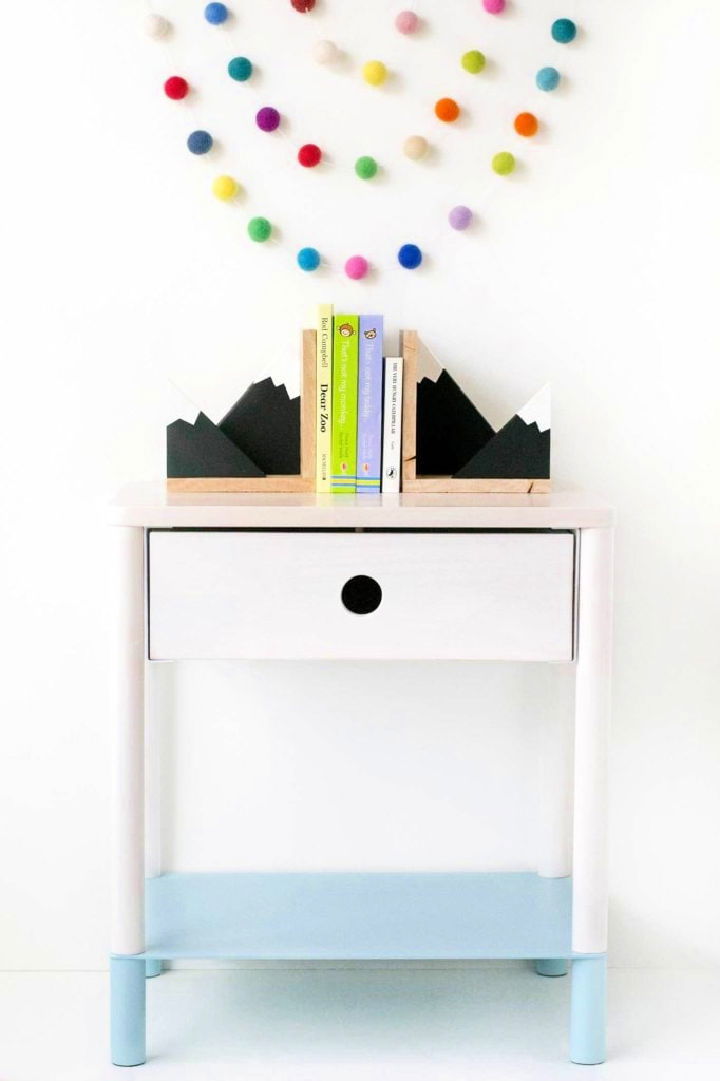
Climb to new heights of organization and style with these DIY mountain bookends! Crafted from wood and simple acrylic paints, they will fit any room. These are so easy to make – all you need is wood, white and black acrylic paint and a few other supplies. Take the time out of your day for this project for an impressive, lasting lifetime result! Keep your shelves tidy in style with these beautiful mountain bookends. curbly
22. DIY Wooden Bunny Bookends
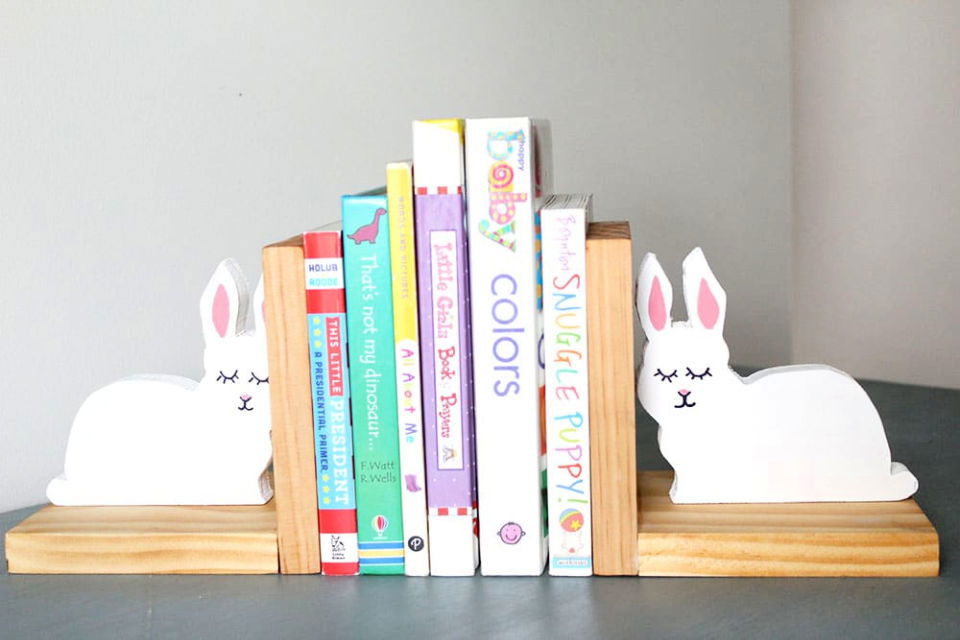
Put together your wooden bookends with this simple and easy-to-follow DIY tutorial. All you need are a few supplies, such as wood and screws, to make these adorable bunny bookends that will help keep kids’ books organized. Get creative with paint or go for the rustic look – it’s a zero-cost project! Explore different designs to get unique results each time and impress everyone with your craftsmanship. Today, follow this guide to learn how to make your own DIY wood bookends! justmeasuringup
23. Homemade Fabric Wrapped Bookends
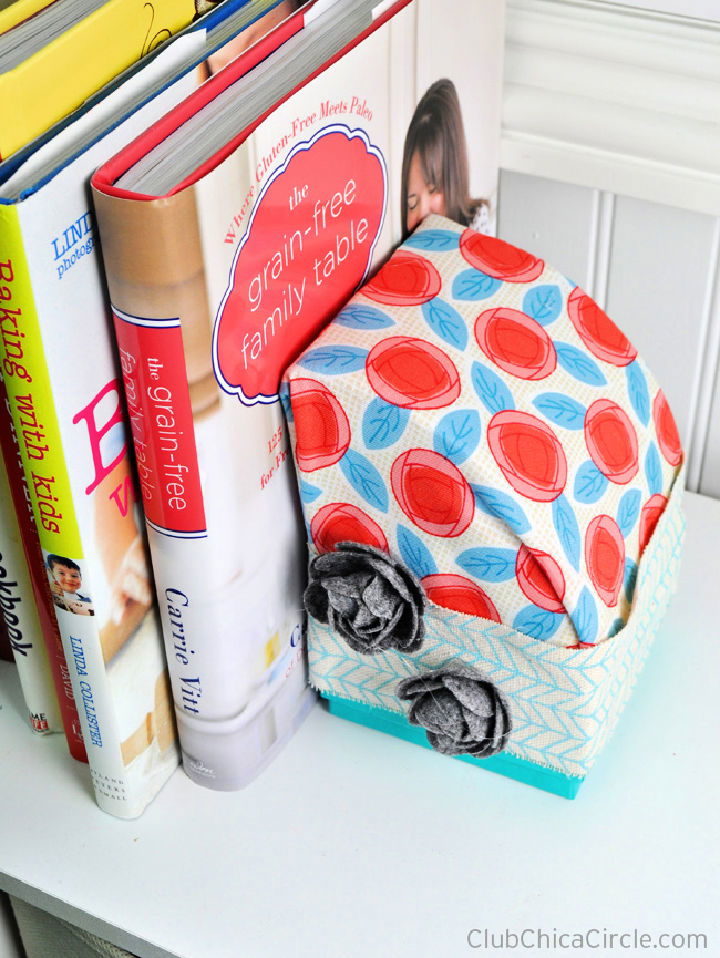
Keep your bookshelf organized with these beautiful homemade fabric-wrapped bookends. With just a few supplies, such as a cake form, small gift boxes, decorative fabric of choice, t-pins, ribbon, and felt flowers, your books will look great in no time! These charming bookends will add personalization to any room while helping you stay organized for years. Give the perfect finishing touch to your decor with this simple project that can be customized with fabrics of different colors and textures. chicacircle
24. How to Make Bookends With Cardboard
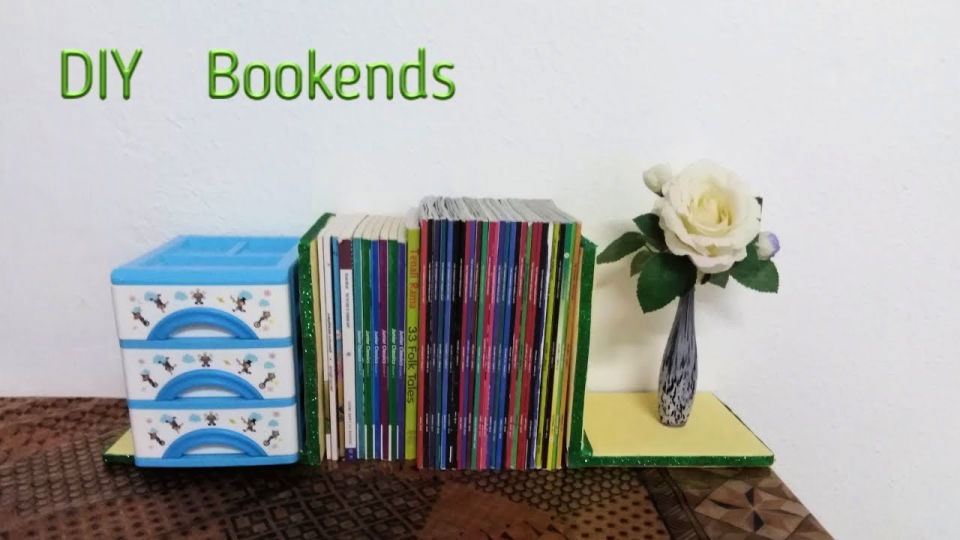
Make your table look beautiful and organized with this DIY how to make bookends with cardboard. With this easy-to-follow tutorial, you can make a stylish bookend from used cardboard in absolutely no time! From the cost perspective, it is free as all you need is some waste cardboard that otherwise would have ended up in the trash. The best part about making these bookends is that you can customize them according to your own style and needs. So why wait? Make your home look creative and amazing by trying this simple yet effective DIY project today! youtube.com
25. DIY Workshop Bookends From Scrap Plywood
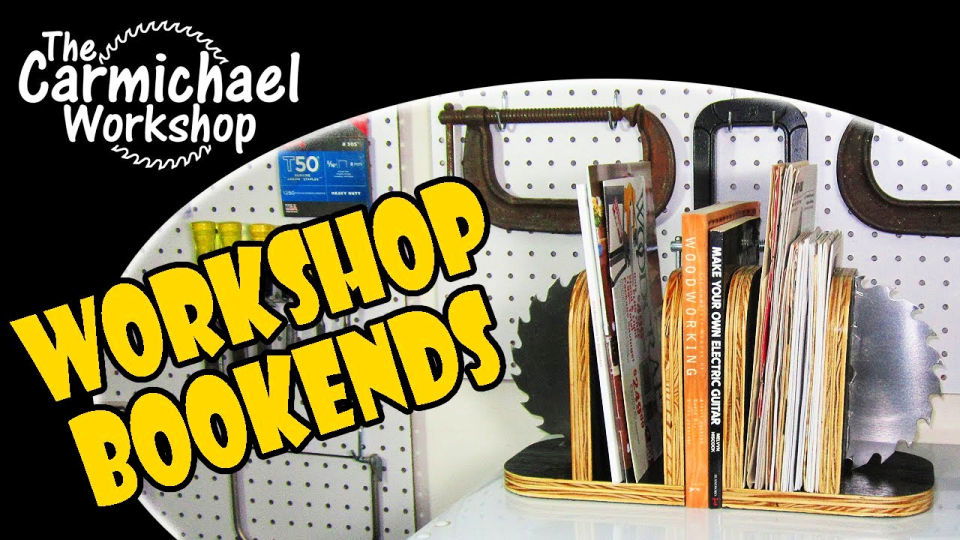
Unleash your inner artist and add industrial flair to your workspace with custom-made workshop bookends! This easy-to-follow DIY project is perfect for anyone looking to spruce up their home office or workshop. They feature storage space for magazines, manuals, and books between the two bookends. Unleash your creativity with this simple yet fun project – build your workshop sawblade bookends today! youtube
Conclusion:
As you can see, making your own DIY bookends is a rewarding and creative way to spruce up your bookshelf. You can use a variety of materials, techniques, and styles to make bookends that suit your personality and taste. Whether you want a modern, whimsical, or natural look, these 25 easy DIY bookend ideas will help you first best fit.
You can also customize your bookends with colors, patterns, or letters to make them more personal. DIY bookends are not only useful for keeping your books in place, but also for adding some charm and character to your home. So what are you waiting for? Grab your tools and materials, and start making your own DIY bookends today!

